
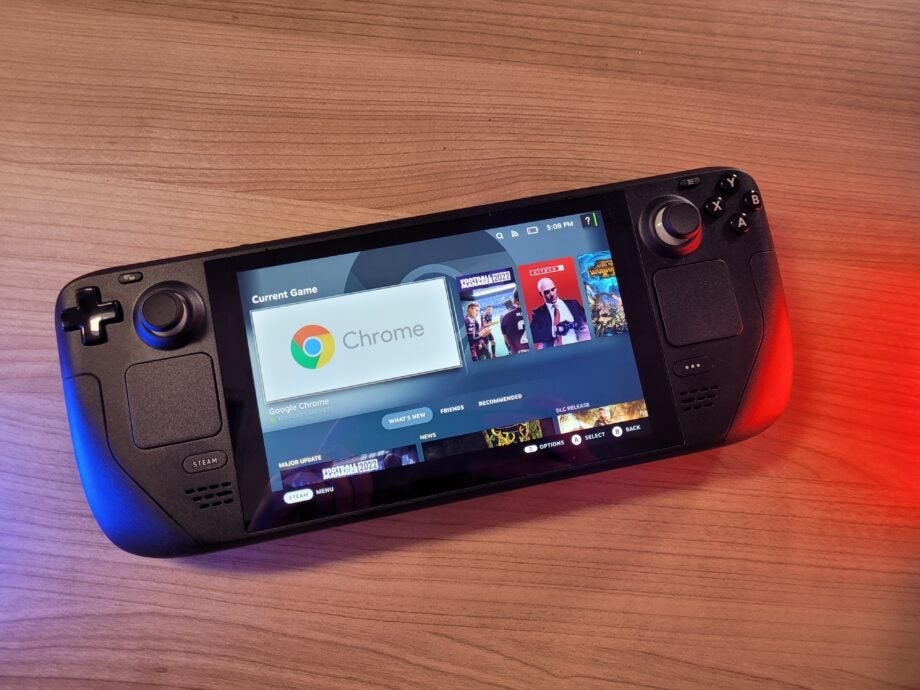
The Steam Deck doesn’t ship with a lot of onboard storage, especially if you purchased the base 64GB model. This makes a Micro SD card an excellent option, allowing you to considerably boost the storage space so you can install additional games.
But if you’ve used the SD card on a previous device, such as a Windows PC or Nintendo Switch, then it most likely won’t work until you format the card.
Fortunately, it’s very easy to format an SD card on the Steam Deck, and we’ve created this guide to help you through the process. So keep on reading to find out how you can format an SD card on Steam Deck.
What you’ll need:
- Steam Deck
- Micro SD Card
The Short Version
- Insert Micro SD card into the Steam Deck
- From homescreen, press the Settings button
- Click on System
- Scroll down to Format SD Card
- Select Format, and then Confirm
Pixel 8 with Unlimited Data
For just a pound more than the adjacent Pixel 8 deal, you can treat yourself to an unlimited data tariff, letting you make the most out of your new handset.
- Mobiles UK
- Just £9 upfront
- Only £29.99/month
Step
1Insert Micro SD card into the Steam Deck
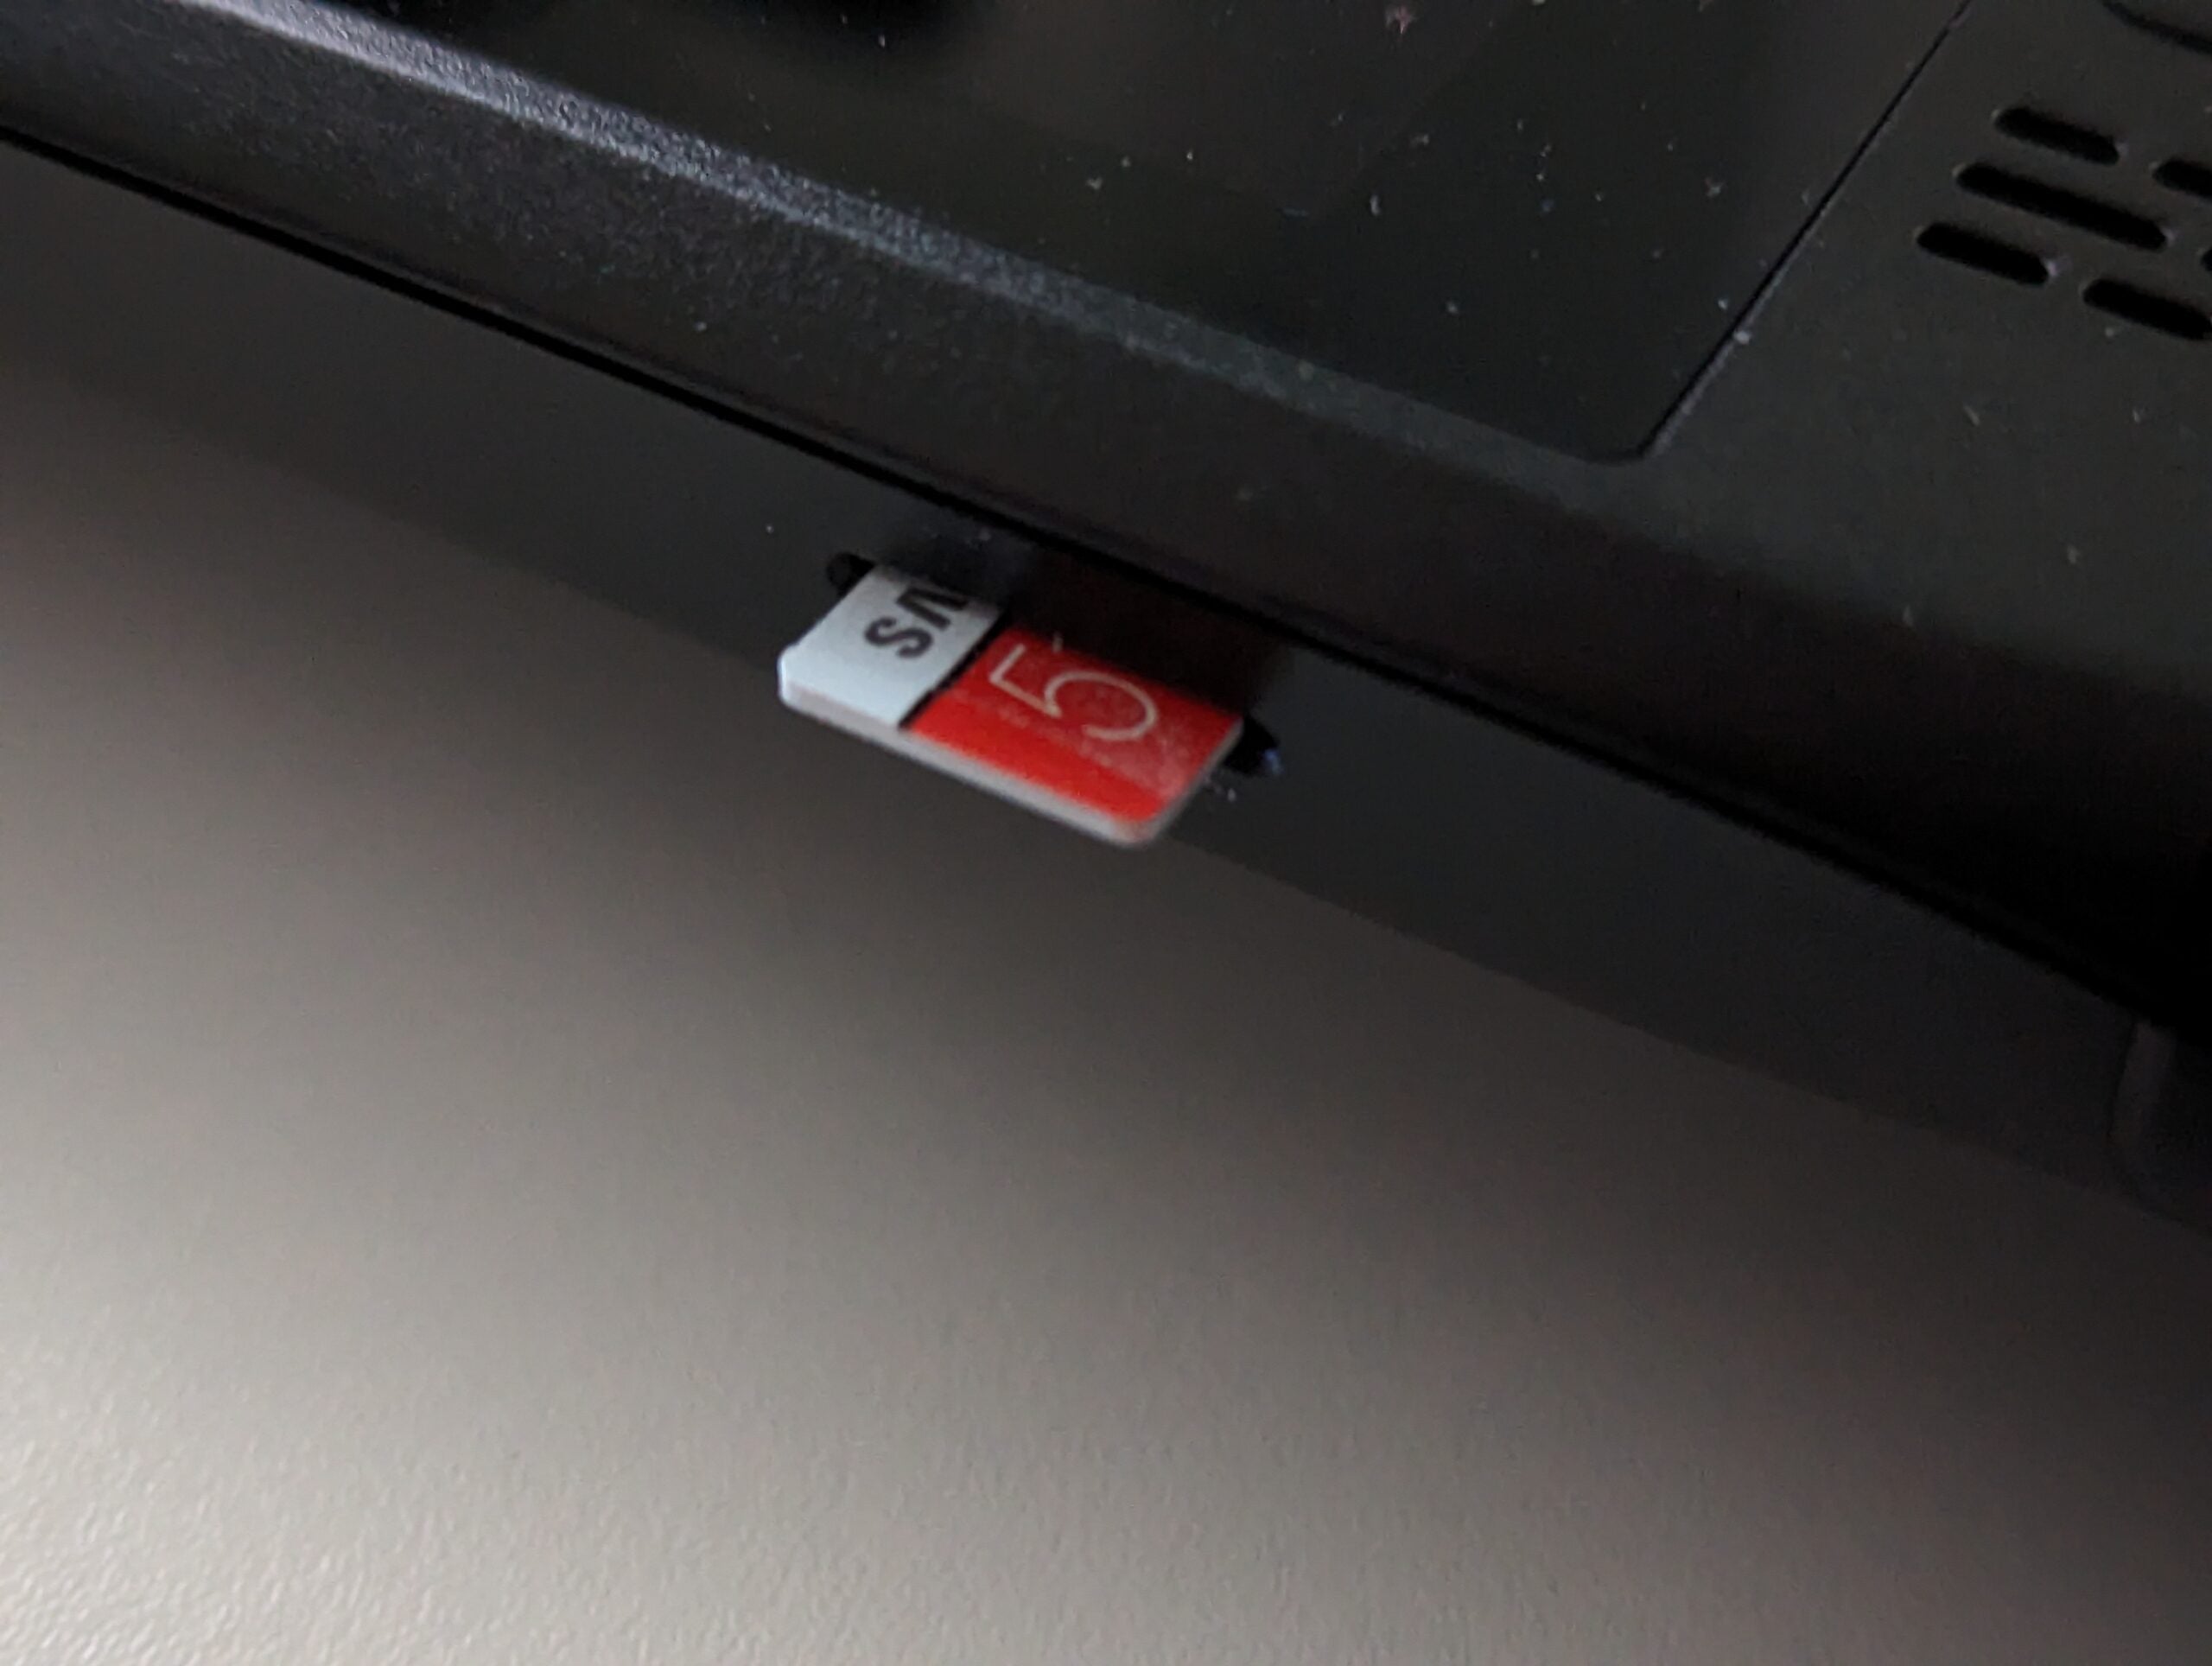
You’ll find the Micro SD card slot on the bottom-right of the Steam Deck. Gently press the card in until you hear a little click. It shouldn’t be hanging out of the device.
Step
2From homescreen, press the Settings button
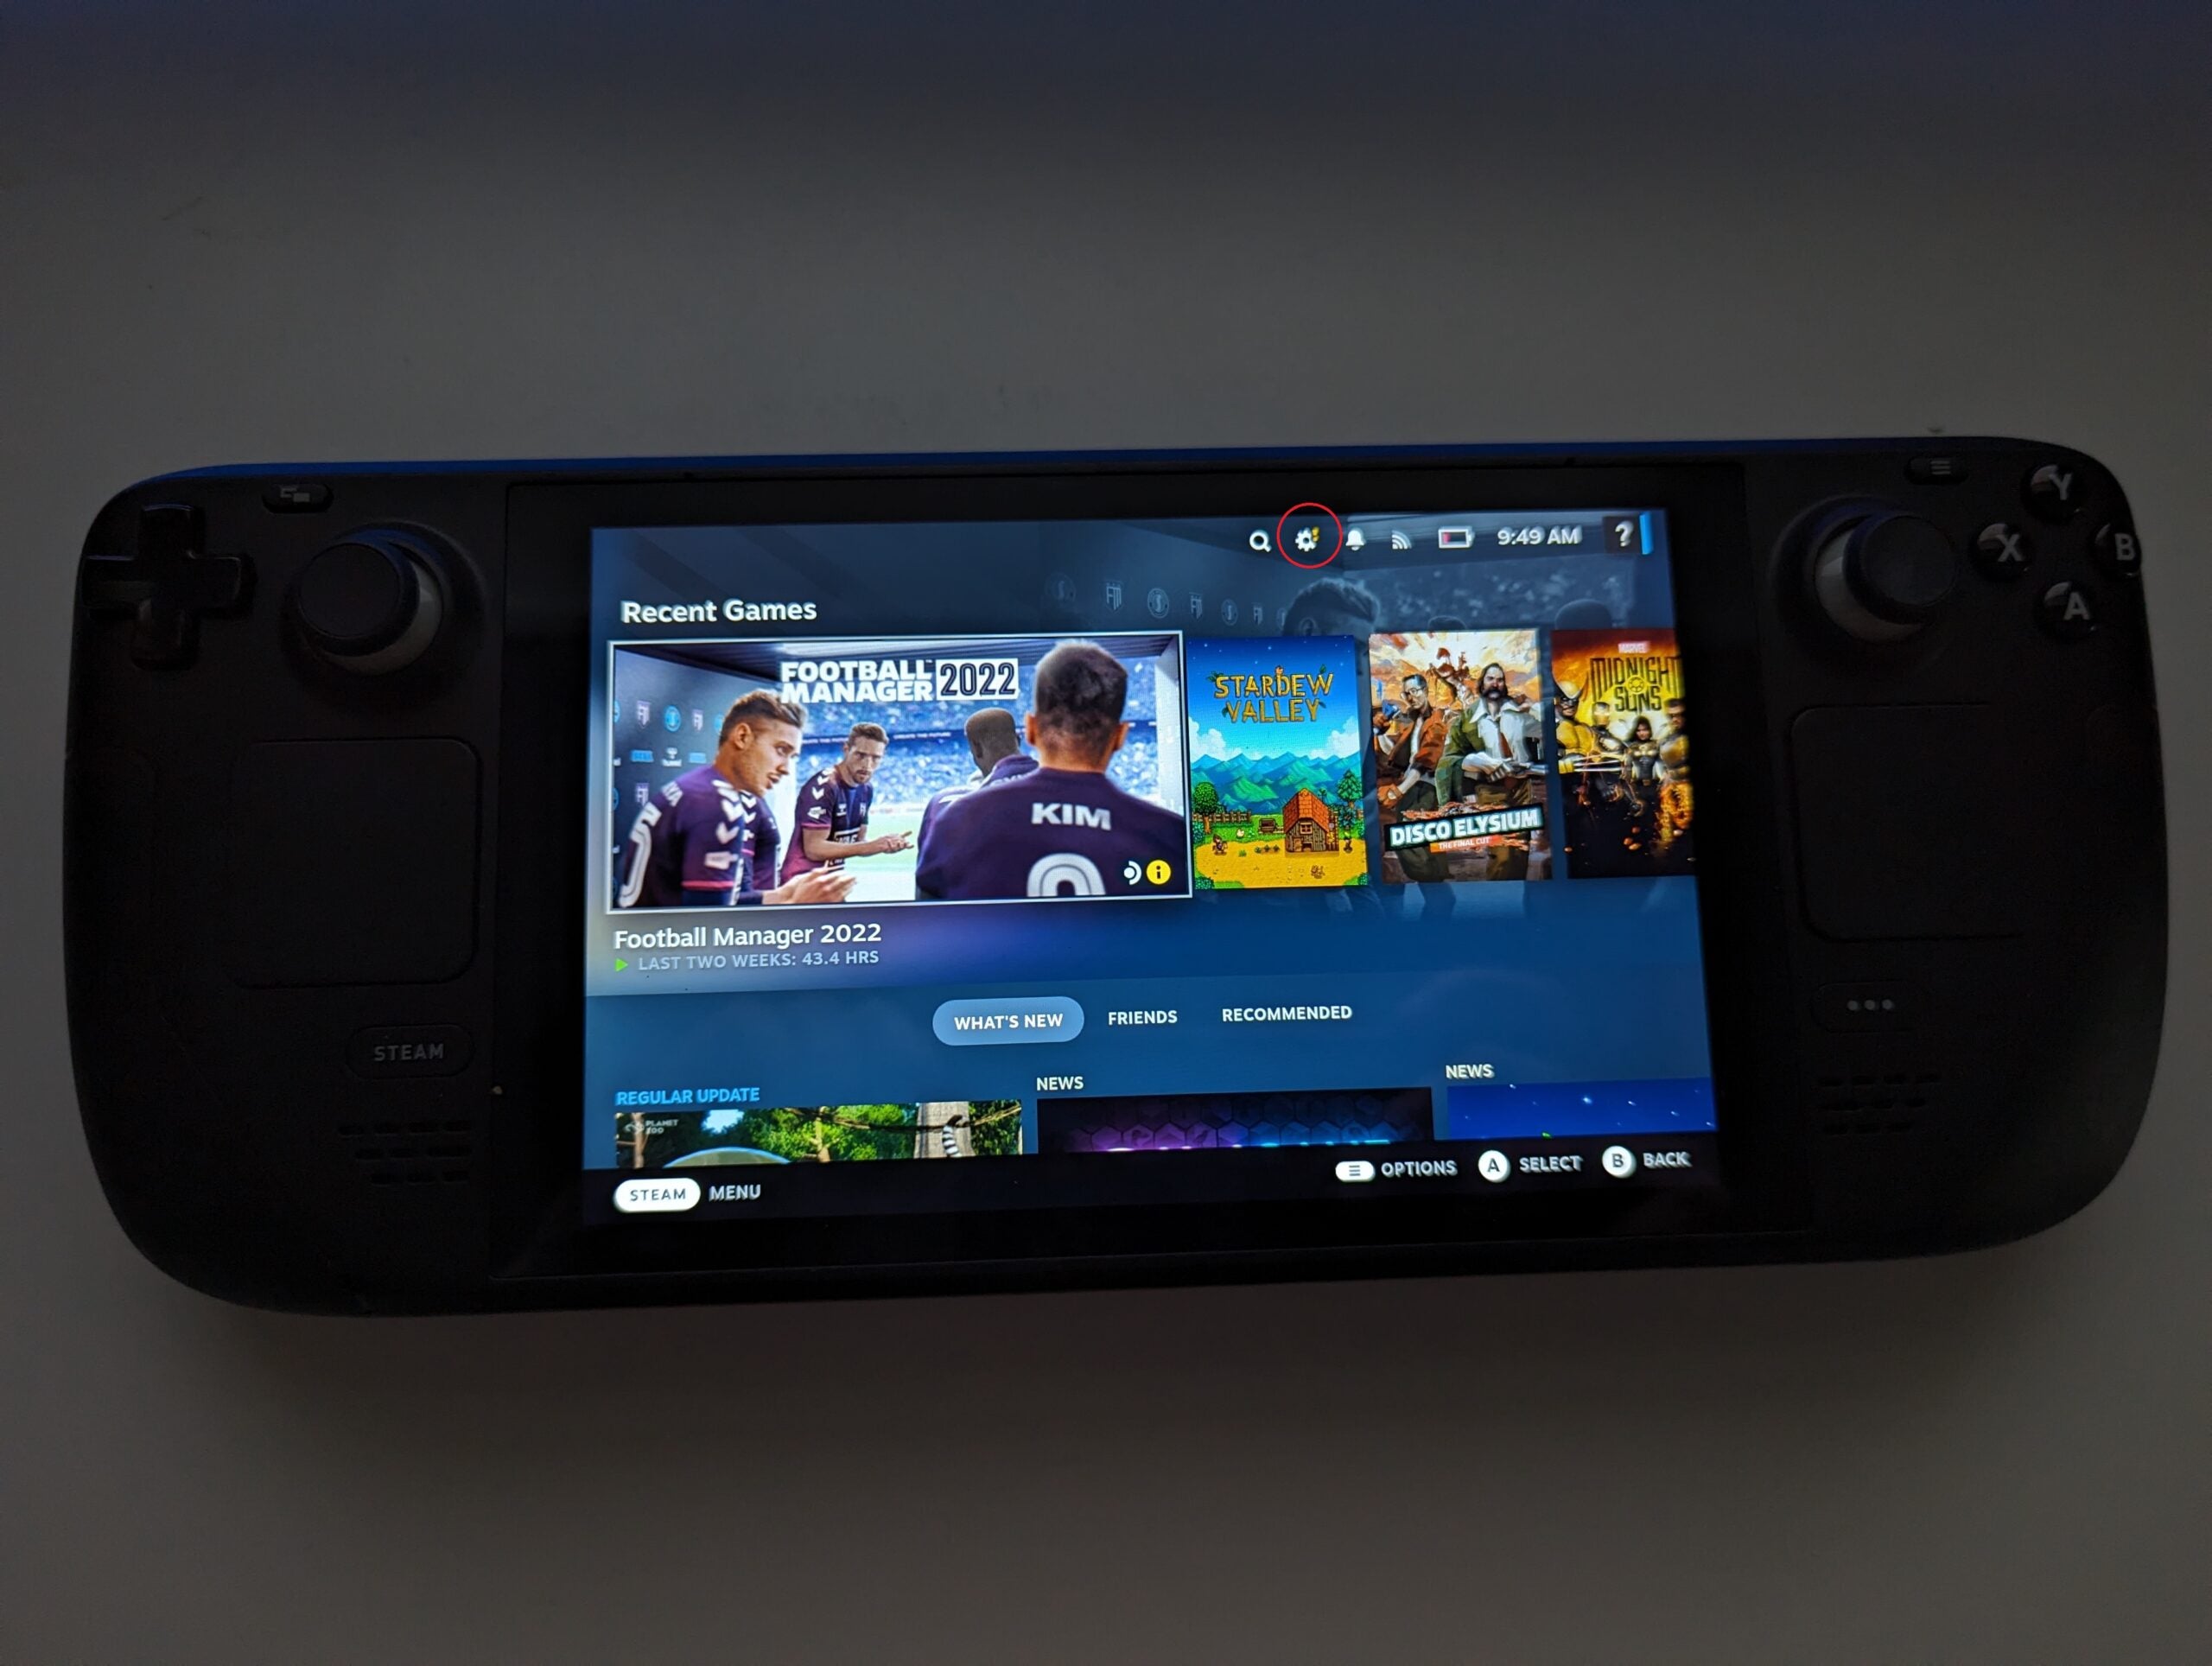
On the Steam Deck homescreen, you should be able to see a cog icon on the top row, which we’ve circled in red above. Click on this to enter the Settings menu.
Step
3Click on System

You should be hovering over System by default, so click on this to enter the System Menu.
Step
4Scroll down to Format SD Card
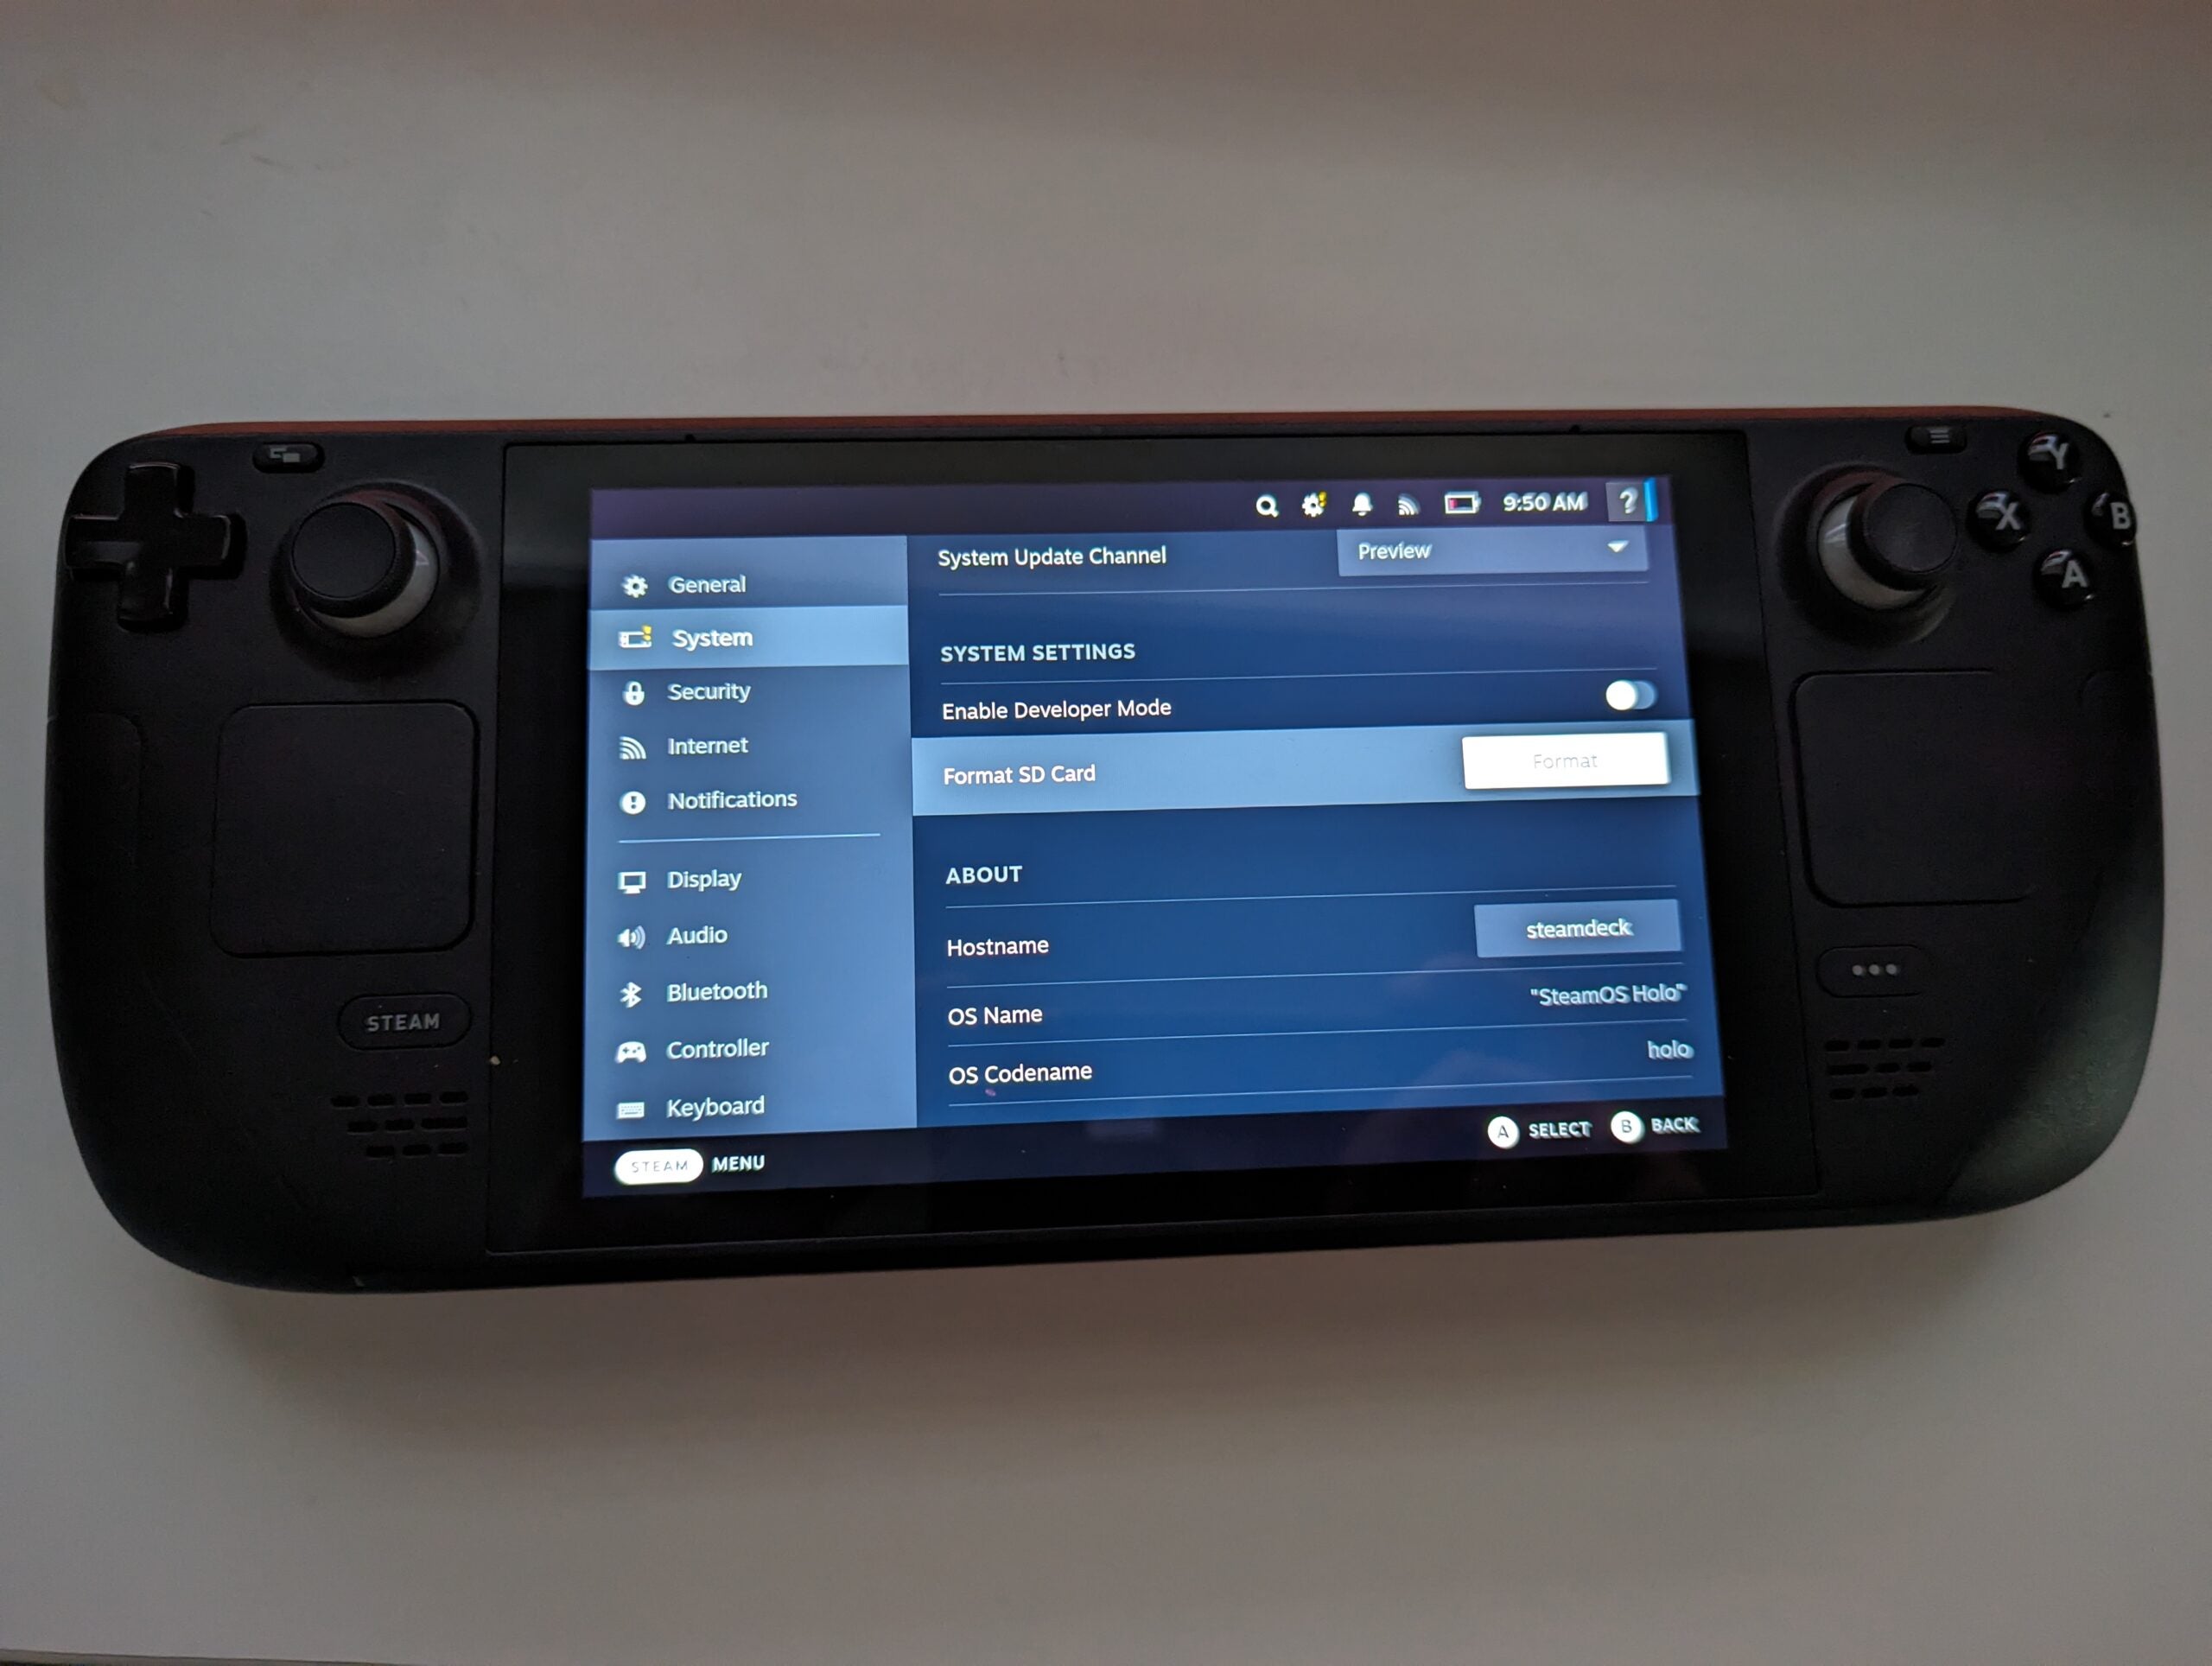
Scroll down until you find the System Settings header. A couple of rows down, you should be able to see the Format SD Card option.
Step
5Select Format, and then Confirm
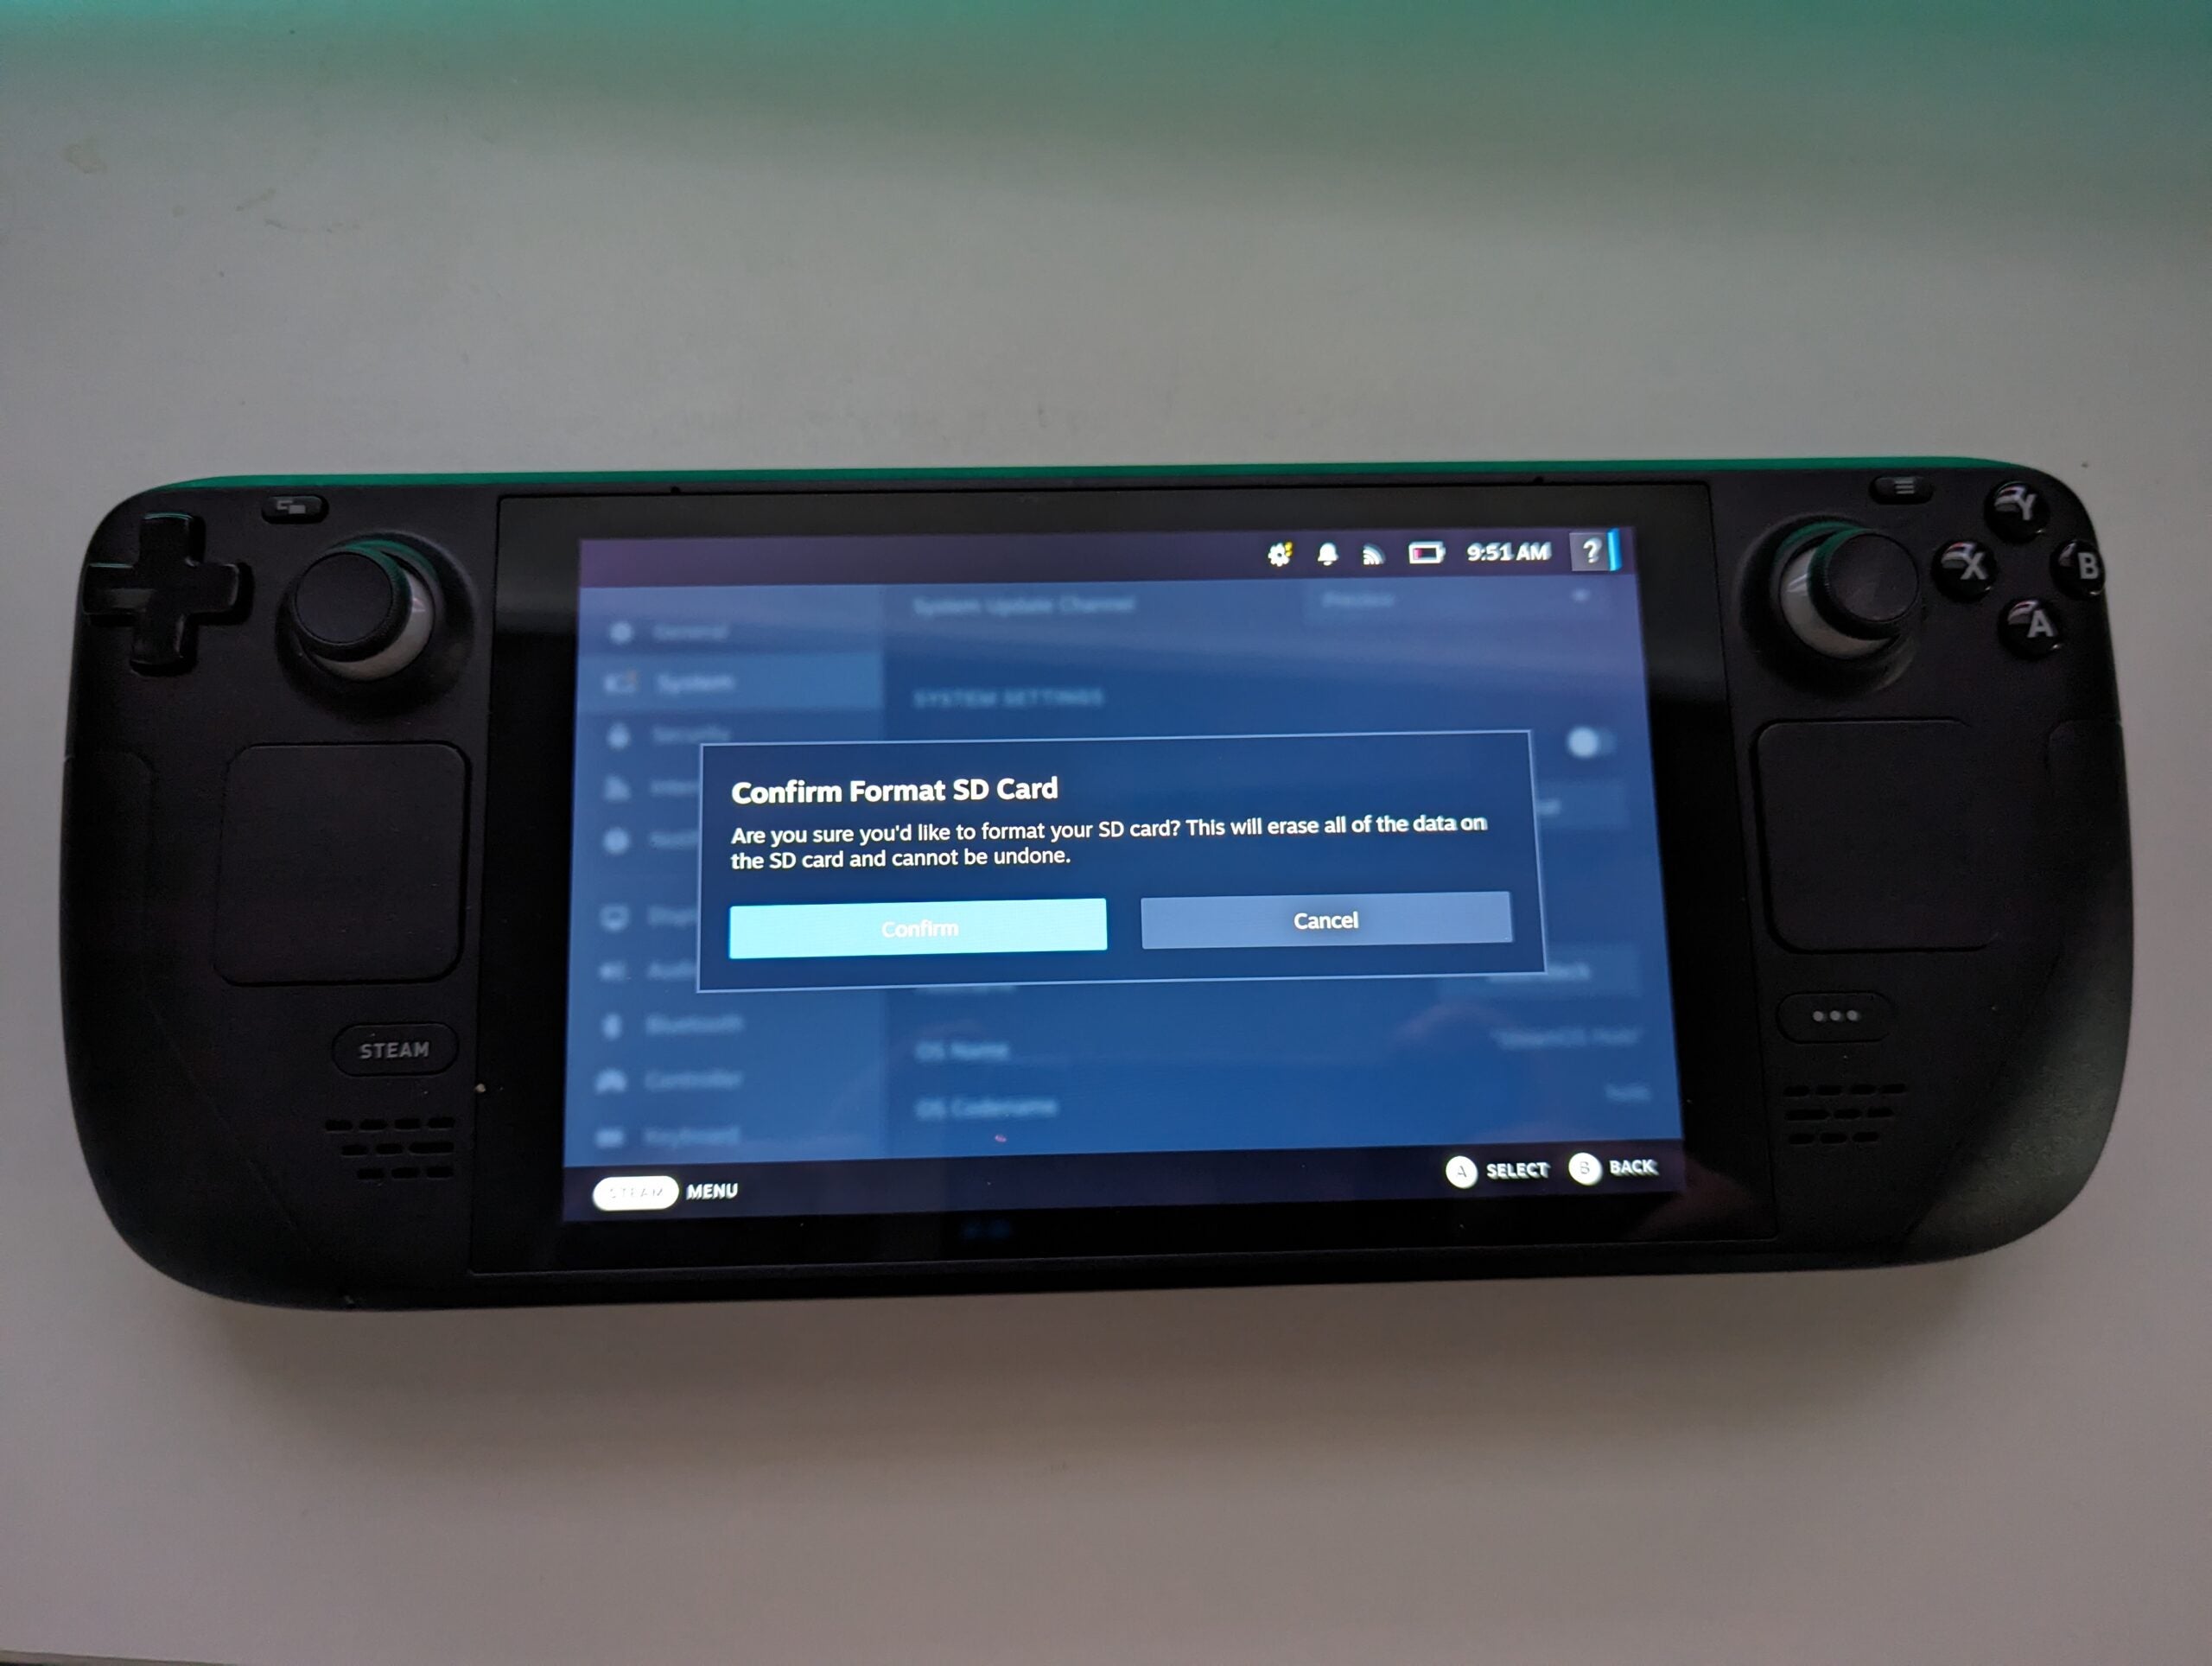
Now select Format. You’ll then get a pop-up window asking you to confirm. Press Confirm, and then your Steam Deck will begin the process. It may take a couple of minutes, but once complete, you’ll be able to start using the extra storage.
Troubleshooting
If the option to Format SD Card is greyed out, there could be several reasons as to why. Make sure that the SD Card is fully inserted in the correct way, and that your Steam Deck has enough power. Then try restarting the Steam Deck. If it’s still not working, it’s possible that the SD card is faulty or damaged.
We recommend turning the Steam Deck off before removing an SD card. That said, it is safe to remove while the Steam Deck is running, just as long as you don’t have any games running.
You might like…


Editorial independence
Editorial independence means being able to give an unbiased verdict about a product or company, with the avoidance of conflicts of interest. To ensure this is possible, every member of the editorial staff follows a clear code of conduct.
Professional conduct
We also expect our journalists to follow clear ethical standards in their work. Our staff members must strive for honesty and accuracy in everything they do. We follow the IPSO Editors’ code of practice to underpin these standards.