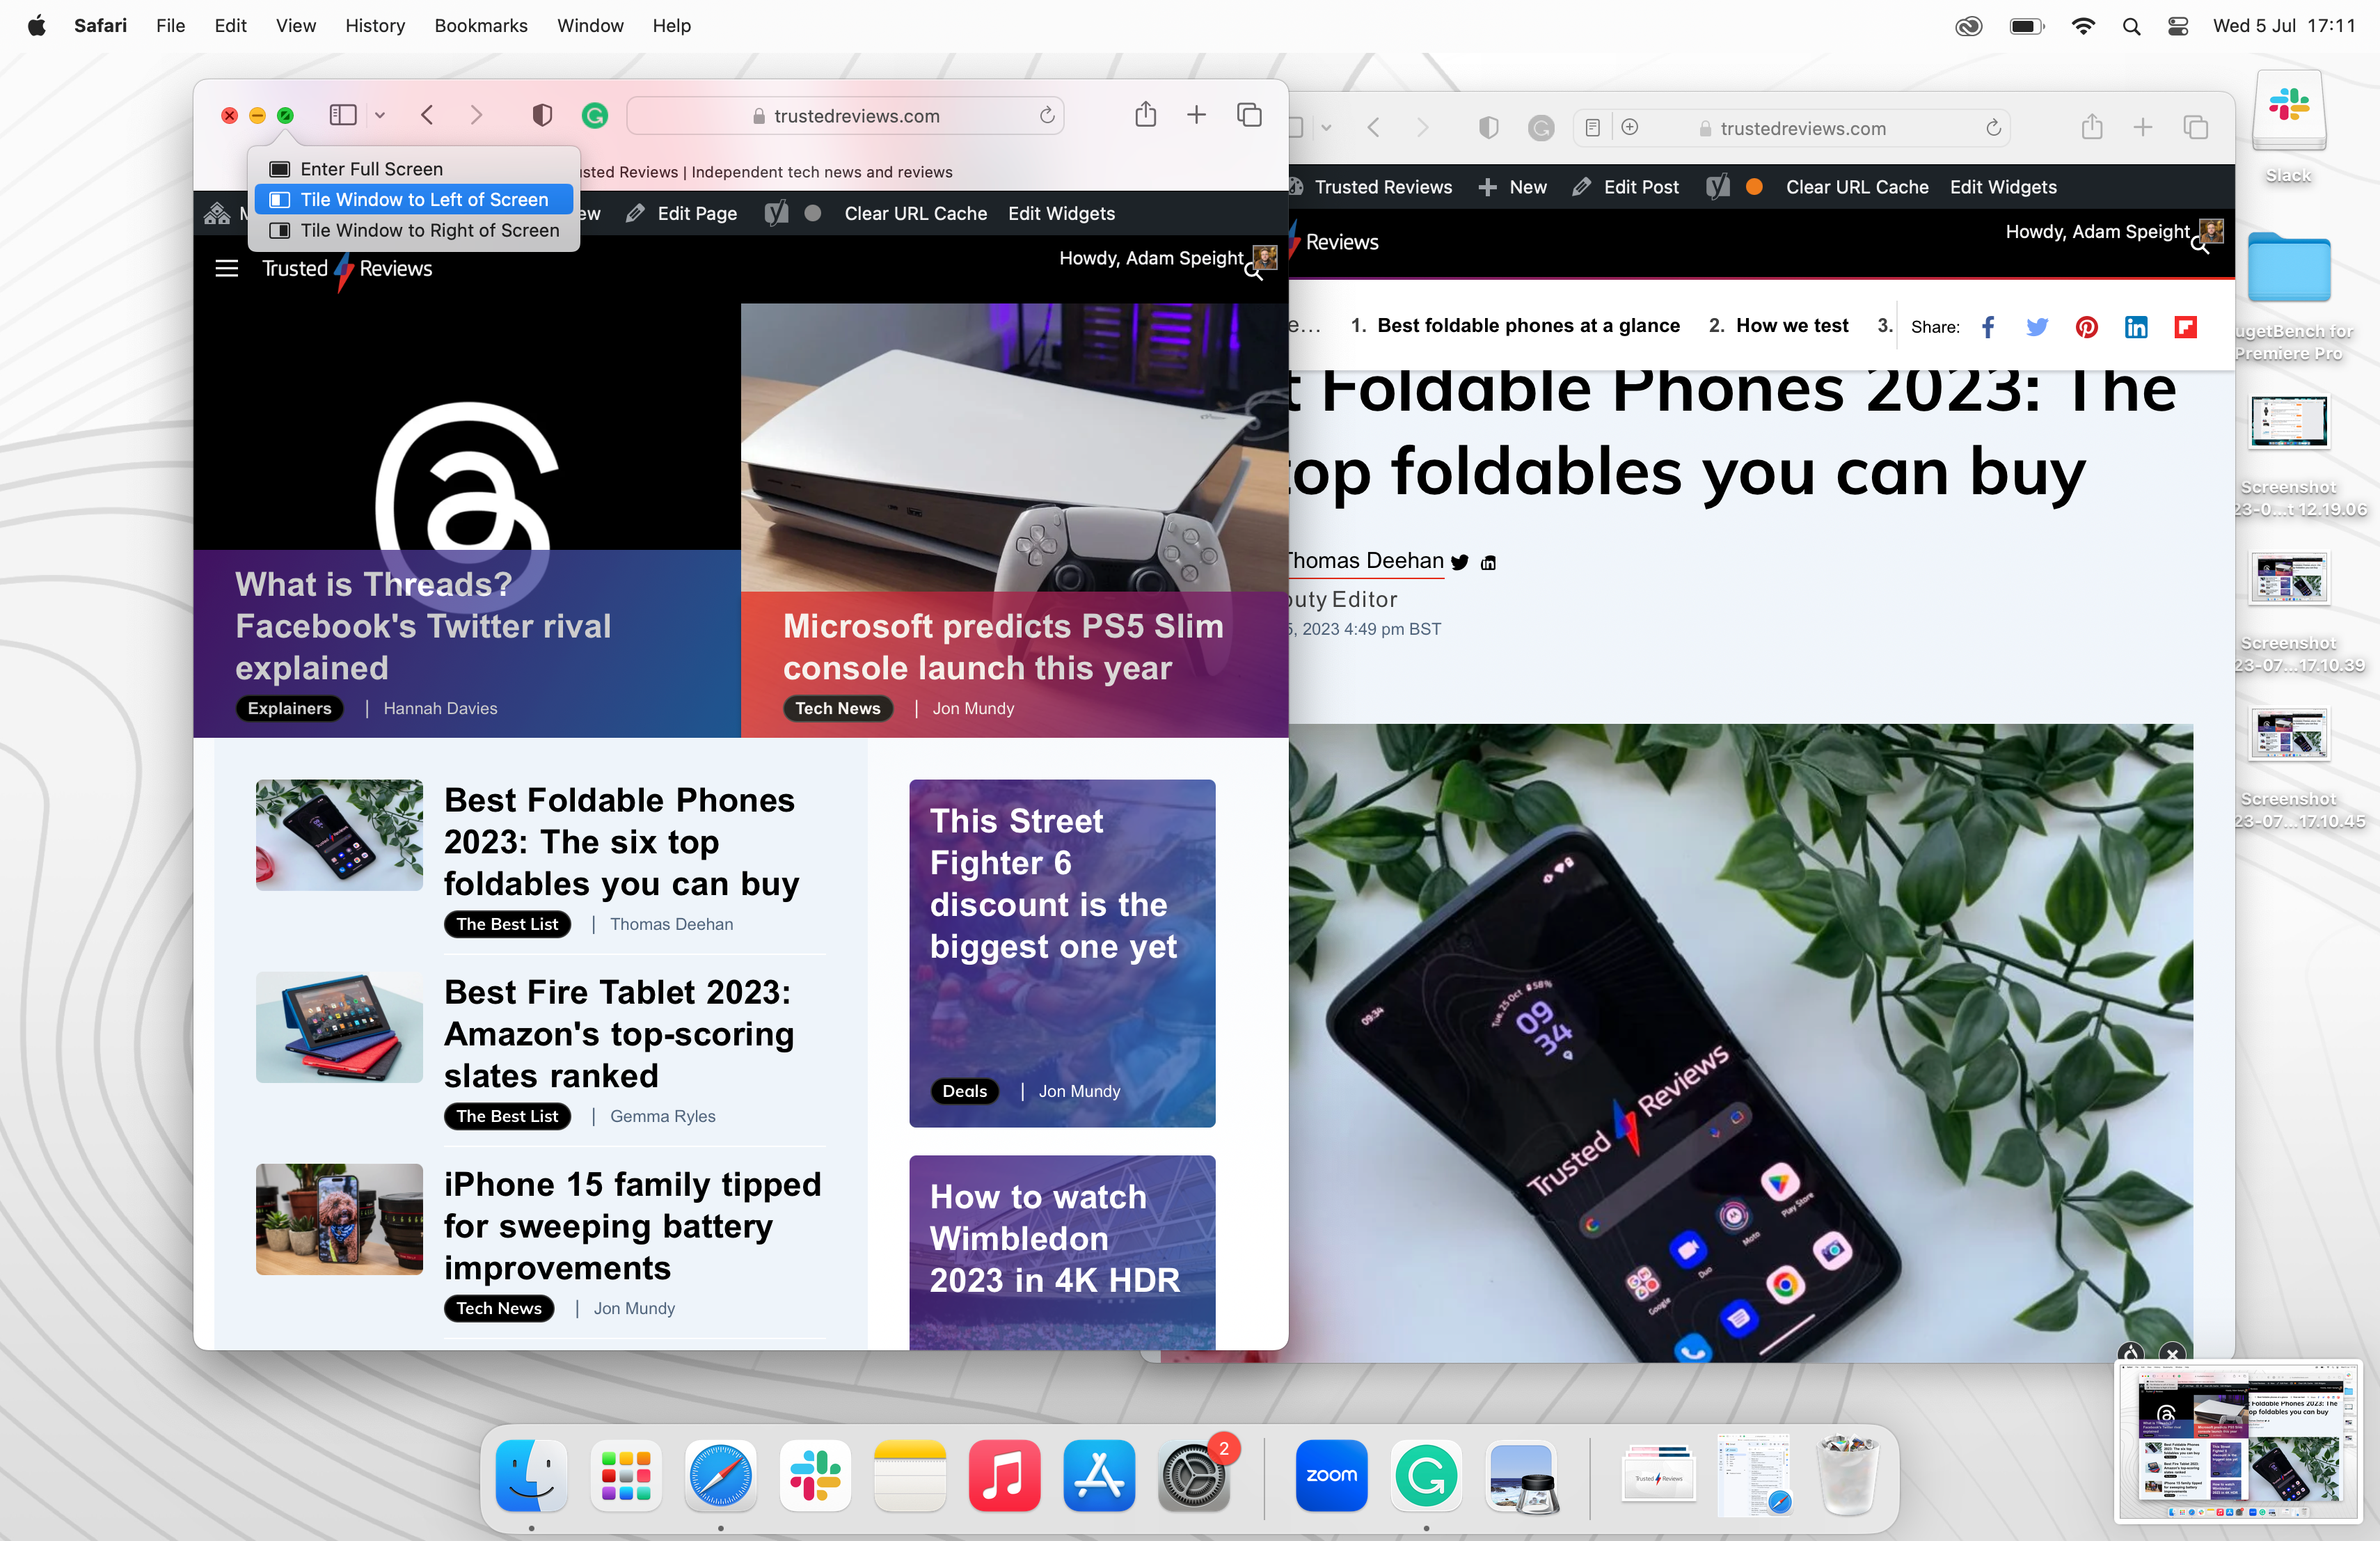
How to use split screen on a Mac

When it comes to organising different open apps, Windows has MacOS beat. But you may not known split screen is actually possible on a Mac. It’s called Split View. Here’s how to use split screen on a Mac.
You may not know about Windows excellent Snap Groups and Snap Layouts if you’re a dedicated Mac user but, if you do, you are probably pretty jealous. The Windows feature lets you easily organise up to four tabs in many layouts on your screen for easy multi-tasking.
MacOS does not have any kind of snap feature but it does offer Split View. Split View is a take on a split screen that lets you fit a window to each half of your display. This is how to use split screen on a Mac.
What you’ll need:
- A Mac
The Short Version
- Open two app windows
- Hover over the green button to the top left of a window
- Select “Tile Window to Left of Screen”
- Click the second window to attach to right of screen

Apple TV+
The Home of Apple Originals. Enjoy star-studded, award-winning series, films, and more. Grab your 7 day free trial now.
- Apple
- 7-day free trial
- £8.99 p/m
Step
1Open two app windows

Open the two app windows that you’d like to use in Split View.

Step
2Hover over the green button to the top left of a window

Go to the green traffic light button to the top left of the window you’d like to attach to the left half of the screen.

Step
3Select “Tile Window to Left of Screen”

A menu will appear. Select “Tile Window to Left of Screen” (you can also select “Tile Window to Right of Screen” if you prefer).

Step
4Click the second window to attach to right of screen

Hover over the second window and it will be outlined, then select it to attach to the right half of the screen (or the left if you select right for the other half).

Troubleshooting
Select Command+Tab to return to your previous window on a Mac. Hold Command and press the Tab key, then select Left or Right to cycle through all open windows on a Mac.


