
Those with an alternative firewall program or hardware firewall may wish to disable the one built into Windows 10. Below, we look closer into why you would turn off this Microsoft security feature, and provide a step-by-step guide through the process.
Microsoft’s built-in firewall for Windows is an internet security feature that protects your computer from unauthorized incoming and outgoing network traffic. Therefore, it is usually recommended to leave it enabled, and you will occasionally be prompted by the operating system to allow trusted apps to bypass it.
People who have installed alternative free or paid-for firewalls as part of an antivirus software suite, or have implemented a hardware firewall on their network, may want to disable the firewall built into Windows 10. Running two firewall apps simultaneously isn’t recommended, but please note that having a hardware firewall, or dedicated firewall device, on your network doesn’t mean you should necessarily disable the built-in Windows firewall.
Hardware Used
- Modern Windows 10 desktop PC
- Wireless broadband connection
The Short Version
- Click the Start button
- Click Settings
- Click Network & Internet
- Scroll down Status page until you see Windows Firewall text and click it
- Click the (active) network connection
- Click the Microsoft Defender Firewall toggle button and dismiss the warning
- Close the Settings panel
Step
1Click the Start button

Click the Start button and then Settings, which will appear just a short distance above, and is represented by a ‘cog’ icon.
Step
2Select Network & Internet to display the Network Status page
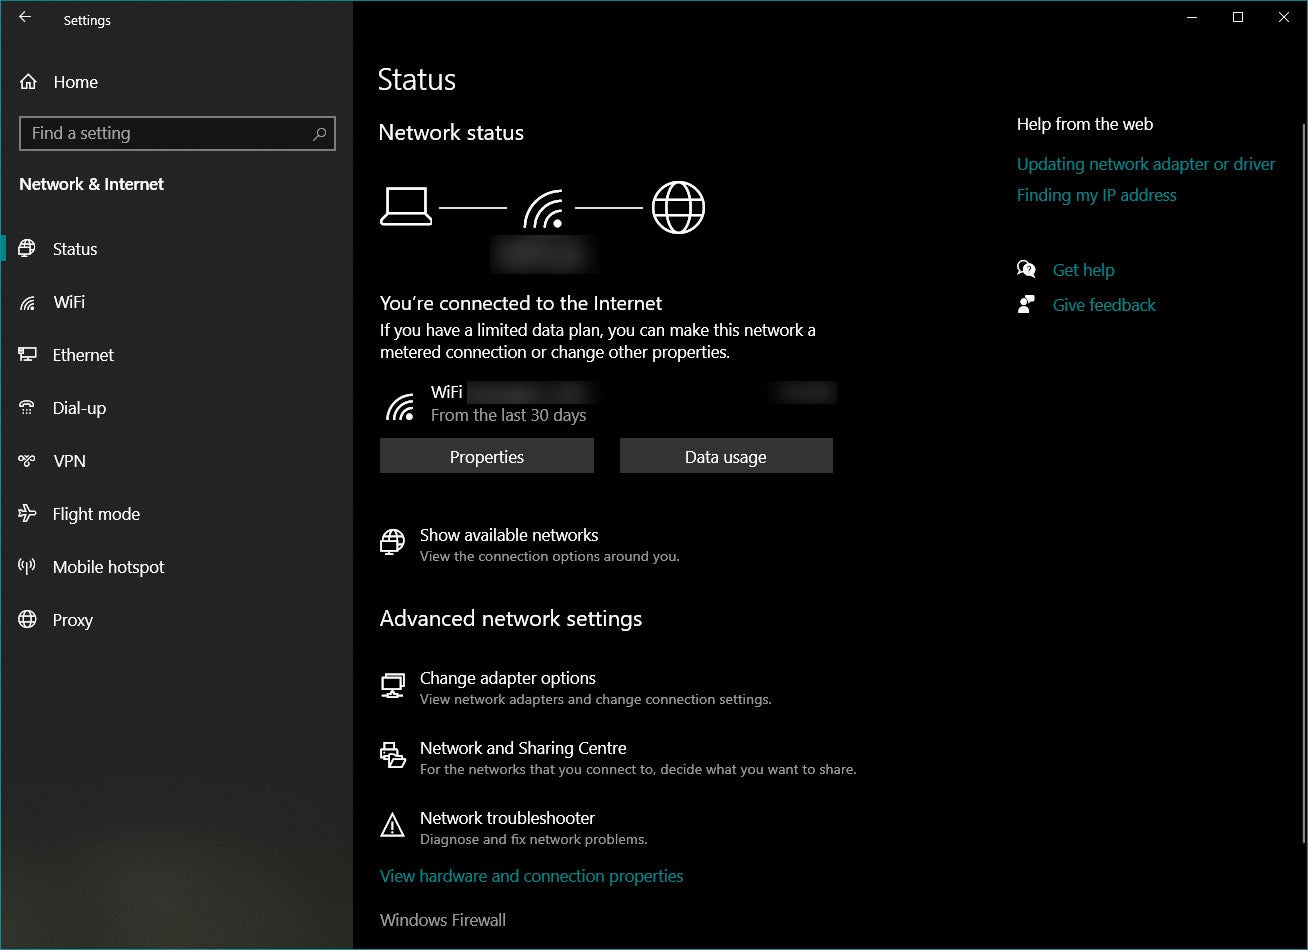
After clicking on the Network & Internet option in Settings, you will be brought to the status page for your active network. In my case, it was a Wi-Fi network. Scroll down this page to reveal some clickable text ‘Windows Firewall’. This can be seen at the bottom of the screenshot.
Step
3Select the currently active network

On the subsequent Firewall & network protection dialogue window you will see a domain, private and public network listed with a firewall status message below each one. Click the network which is active, indicated by the word ‘active’ in parentheses.
Step
4Hit the toggle button to turn off Microsoft’s firewall
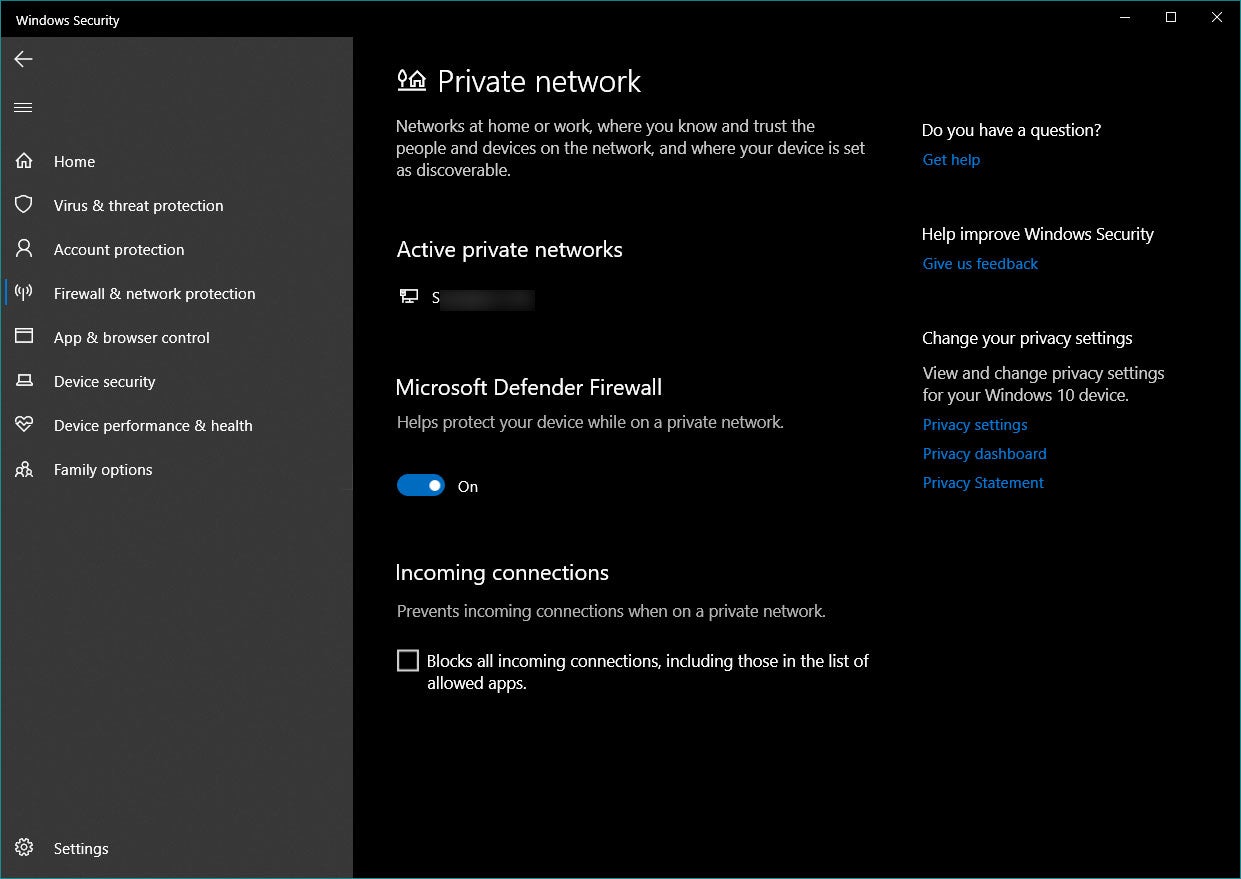
In the network propertied page that pops up, you will be presented with the option to toggle Microsoft Defender Firewall on and off. In our screenshot, you can see the radio button says it is currently on. Click this button and a Windows Security warning will pop up asking if you are sure you want to continue. As long as you have your alternative firewall ready to go, proceeding should be safe.
FAQs
To turn the built-in Windows 10 firewall back on, simply follow steps 1 to 3 above and then at step 4 hit the ‘Off’ toggle button to the ‘On’ position.
Yes, if you are familiar with typing commands, you can open the Windows Command Prompt as administrator (search for it in Windows and you will see the option show up in the right pane). After the command prompt pops up, type, or copy-paste “netsh advfirewall set currentprofile state off” without the quotes. To turn the firewall back on via this method type “netsh advfirewall set currentprofile state on”
You might like…


Editorial independence
Editorial independence means being able to give an unbiased verdict about a product or company, with the avoidance of conflicts of interest. To ensure this is possible, every member of the editorial staff follows a clear code of conduct.
Professional conduct
We also expect our journalists to follow clear ethical standards in their work. Our staff members must strive for honesty and accuracy in everything they do. We follow the IPSO Editors’ code of practice to underpin these standards.