
Knowing how to screenshot on Windows is a useful skill, especially when you want to take a quick snap of your screen, be it to save an image for yourself, to put it into a document, or to send it on to someone else.
Luckily, in Windows, there’s a handy few ways of doing it, and the process is remarkably simple, whether you’re using Windows 10 or 11, the dedicated Snipping Tool or the good-old Print Screen command. Soon enough, you’ll be screenshotting like a pro, and if you ever have any trouble, just come back to our handy guide, and we’ll be sure to help you out.
Hardware Used
- Lenovo Legion 5
- Windows 10 Home
The Short Version
- Use the Print Screen key
- Use the Snipping Tool
- Use Windows Game Bar
Step
1Method 1 Use the Print Screen key
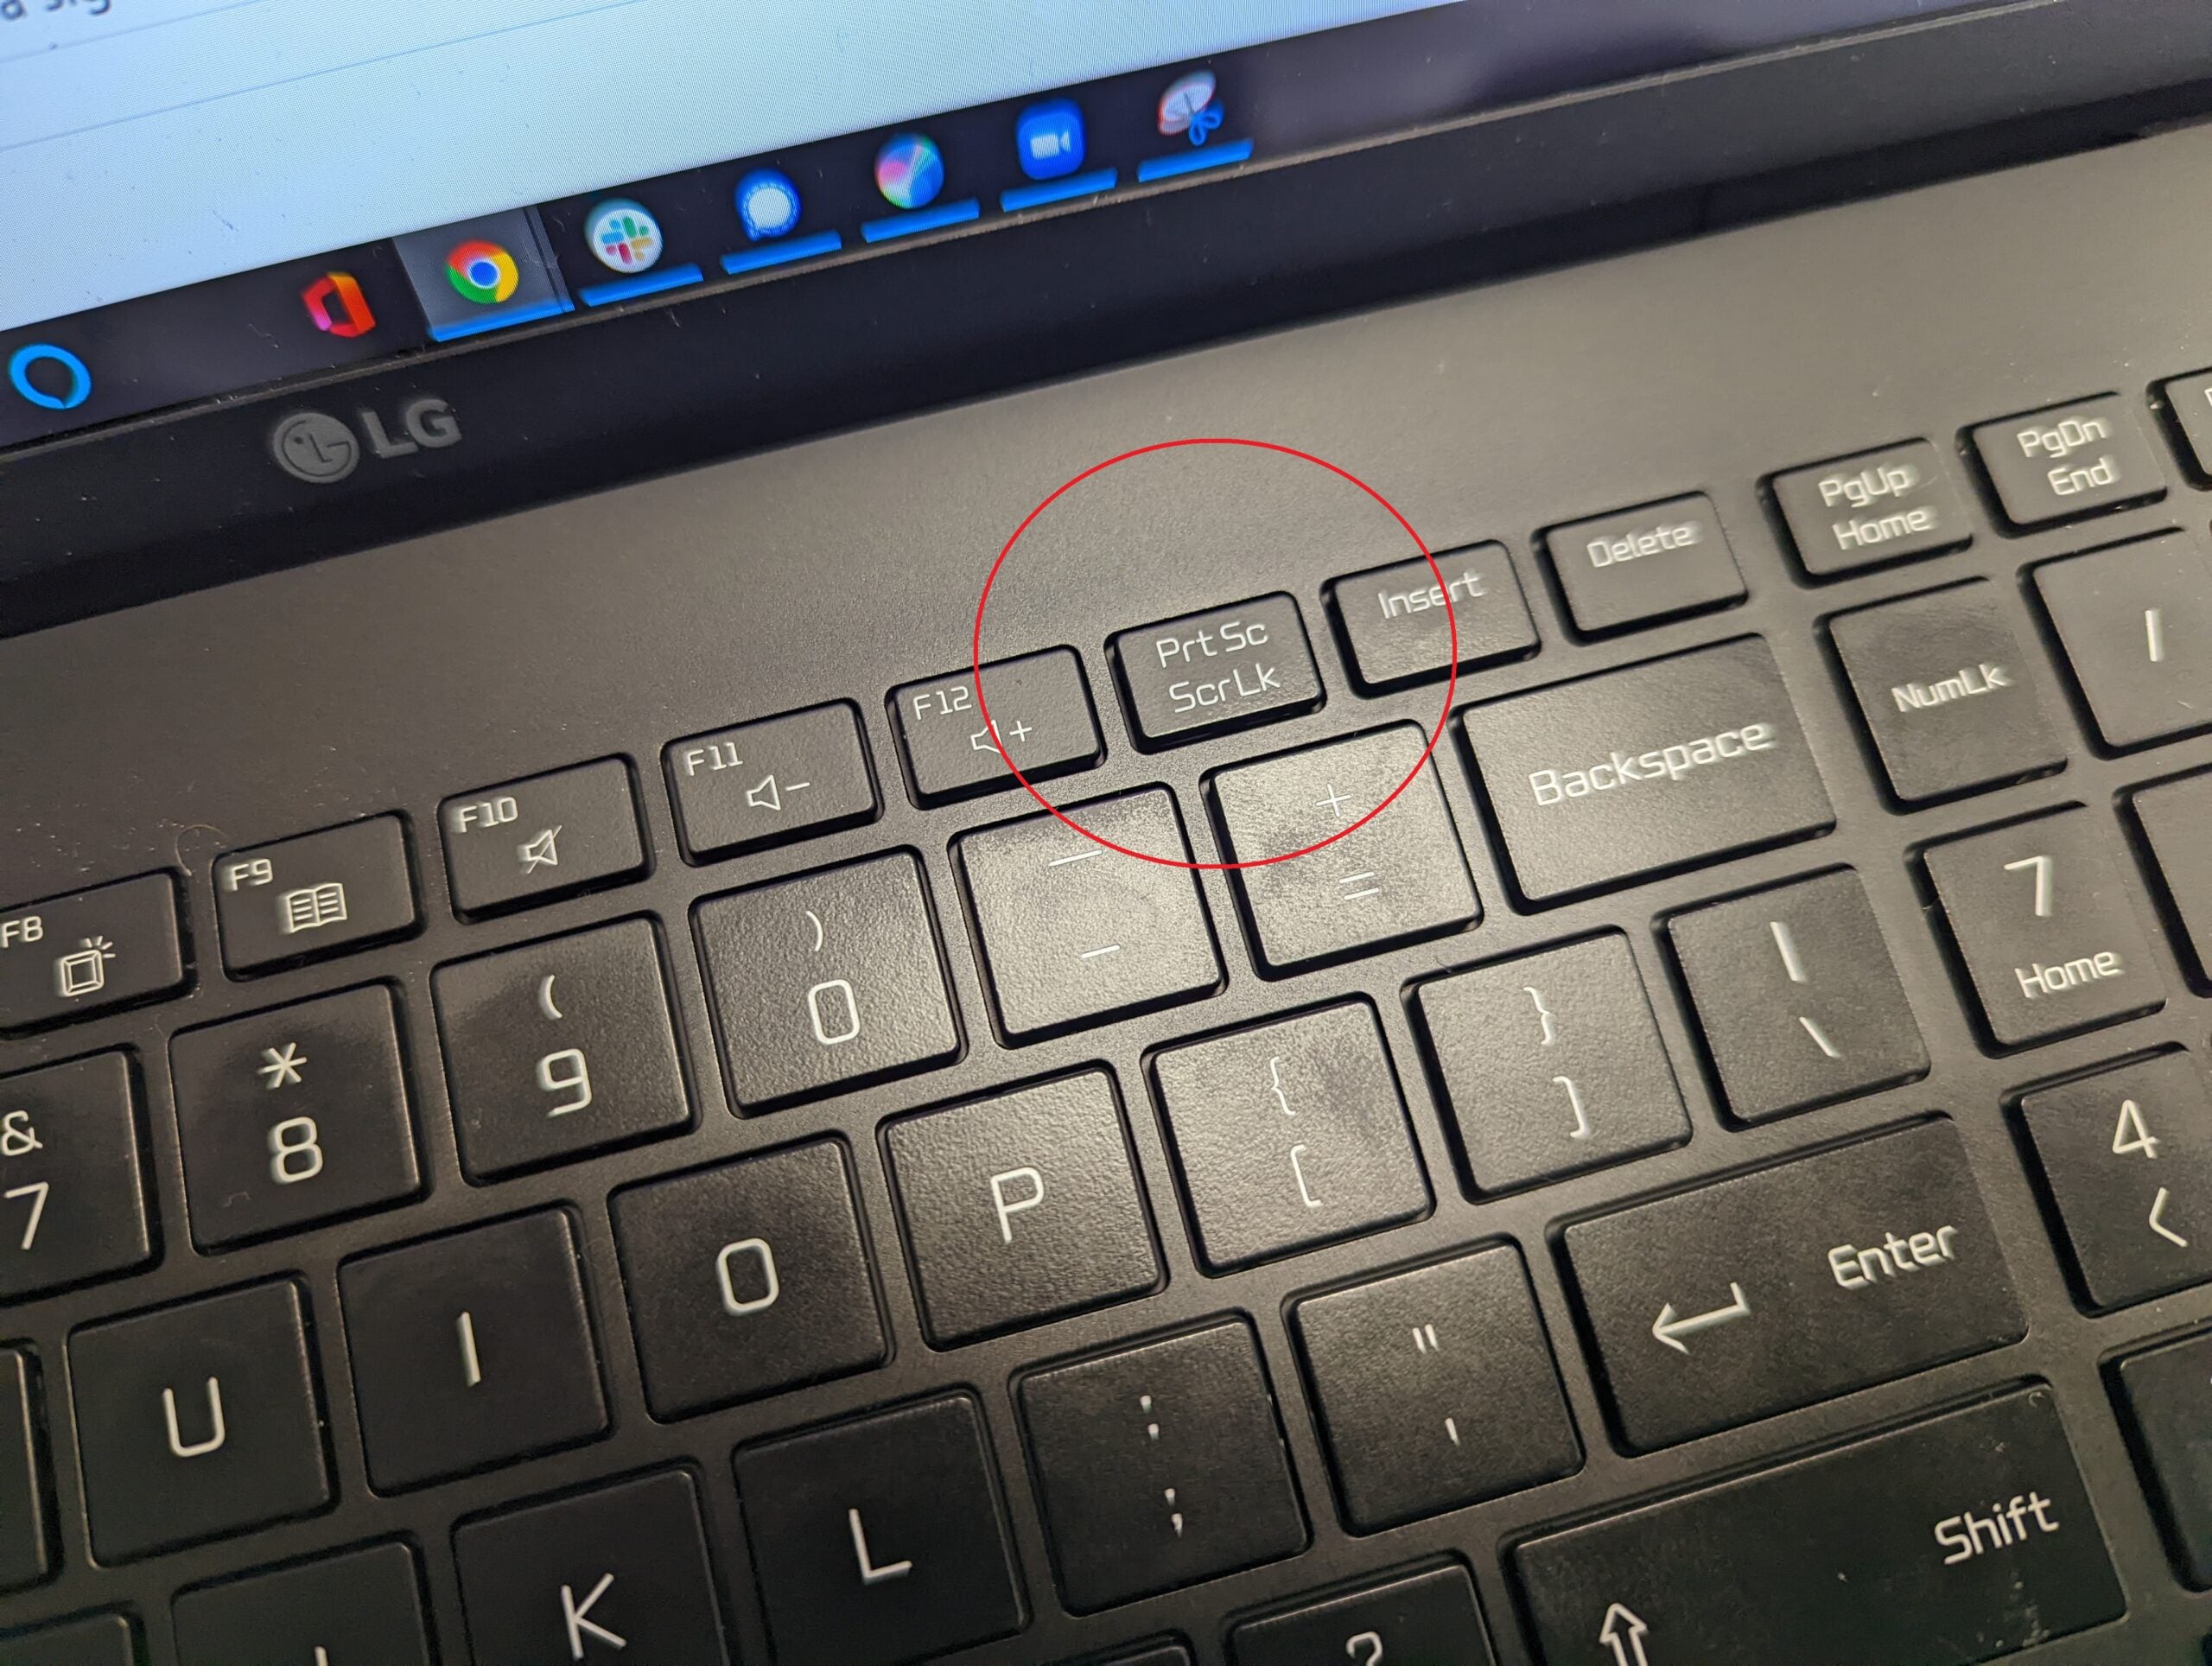
This is the easiest method of taking a screenshot in Windows. All you have to do is click the Print Screen, or PrtSc key. It’s been a Windows system function for years, and pressing it will take a screenshot of your entire desktop, and then save it to your clipboard, in Windows 10.
Step
2Find the screenshot
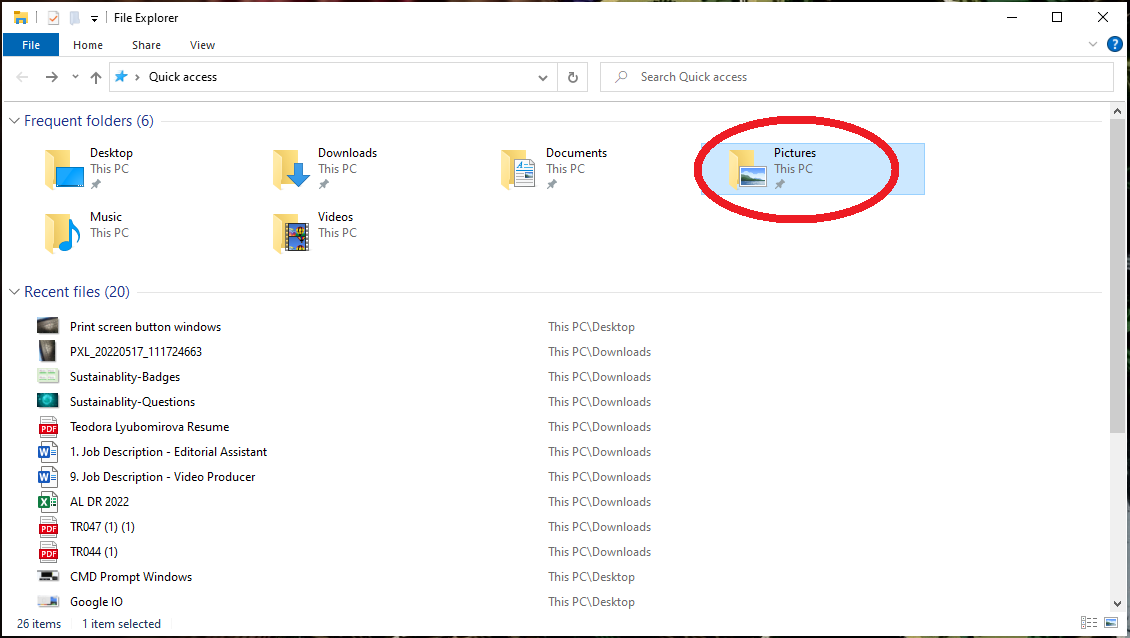
In Windows 11, taking a screenshot with PrtSc will save it directly into the Screenshots folder, which can be found inside the Pictures folder in your documents.
Step
3Alternative button controls
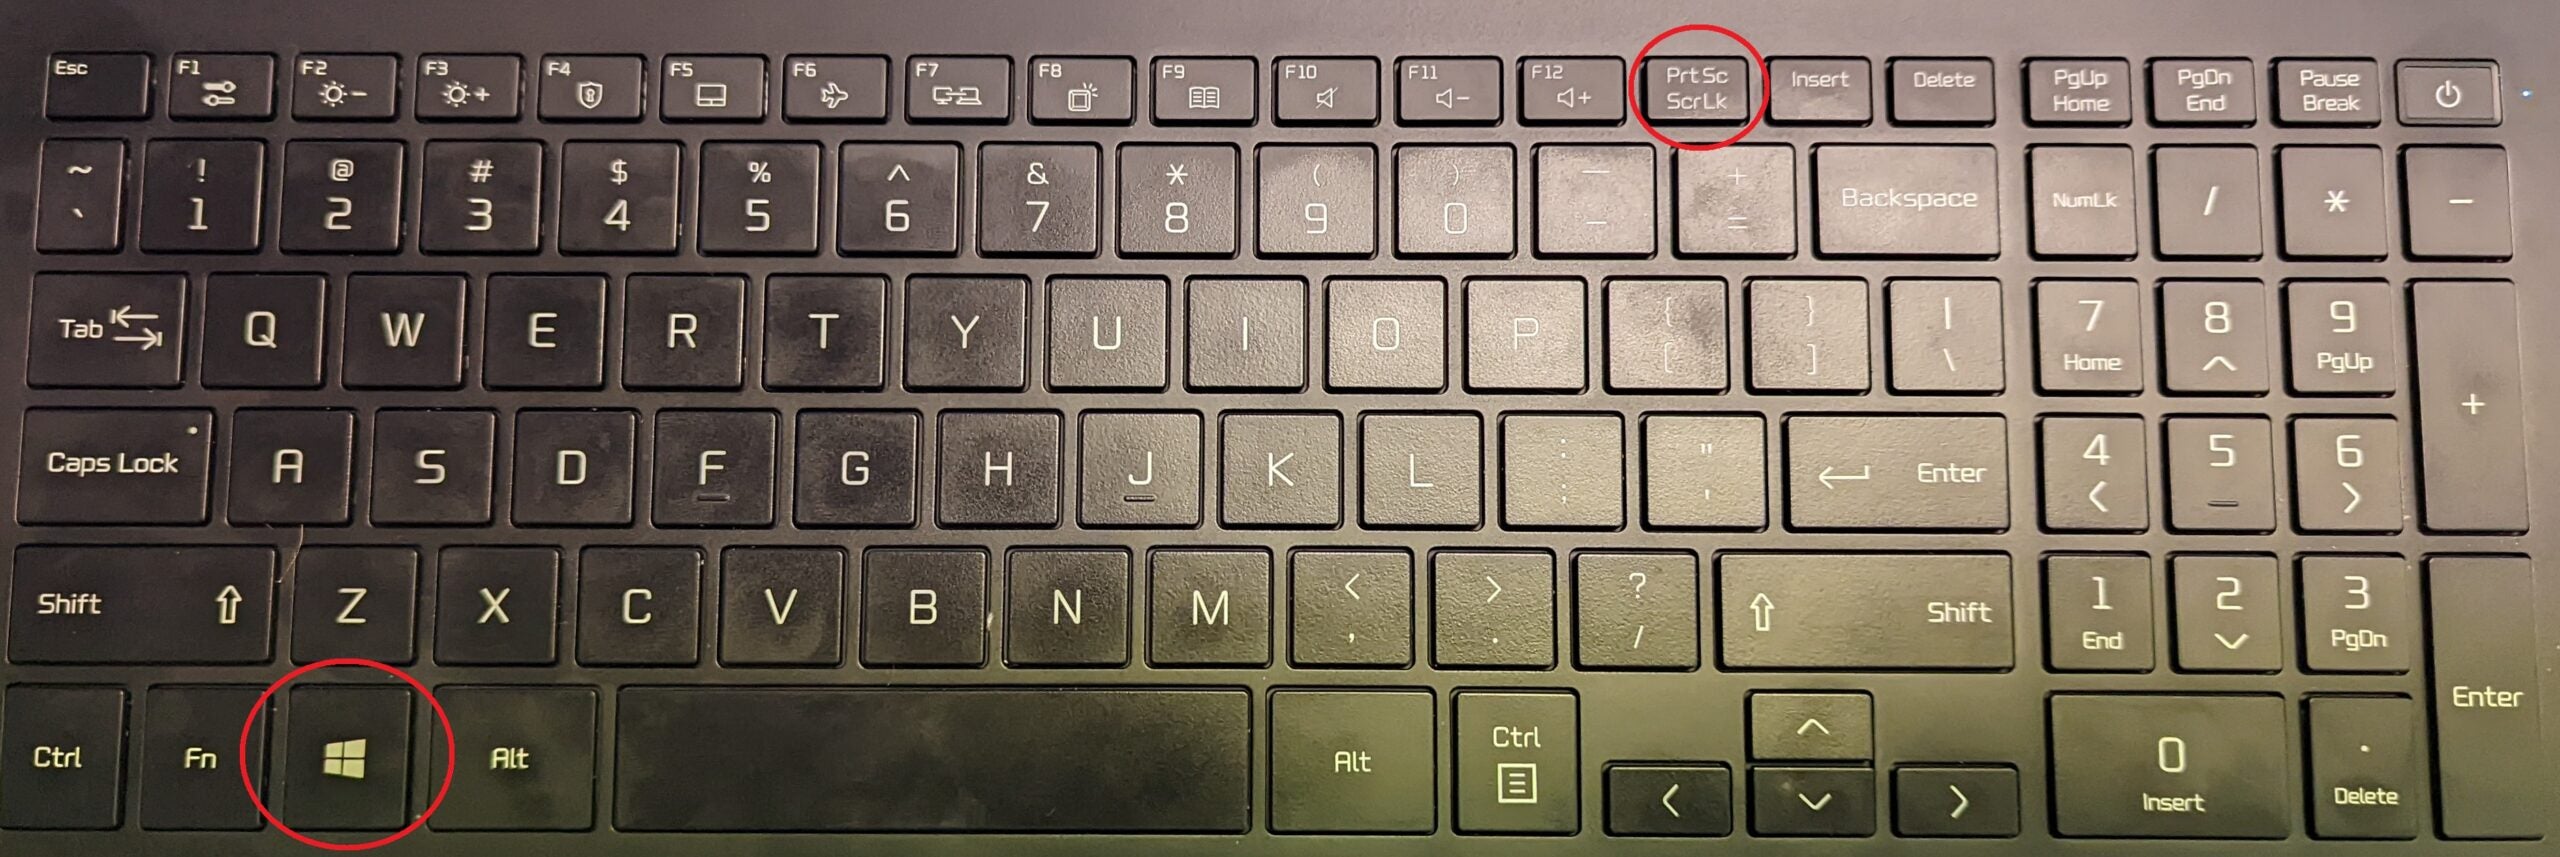
You can also, if you press the Windows key with PrtSc in Windows 10 to take and save a screenshot simultaneously. And, for capturing only the window you’re working in, then you can press Alt and PrtSc.
Step
4Method 2 Use the Snipping Tool
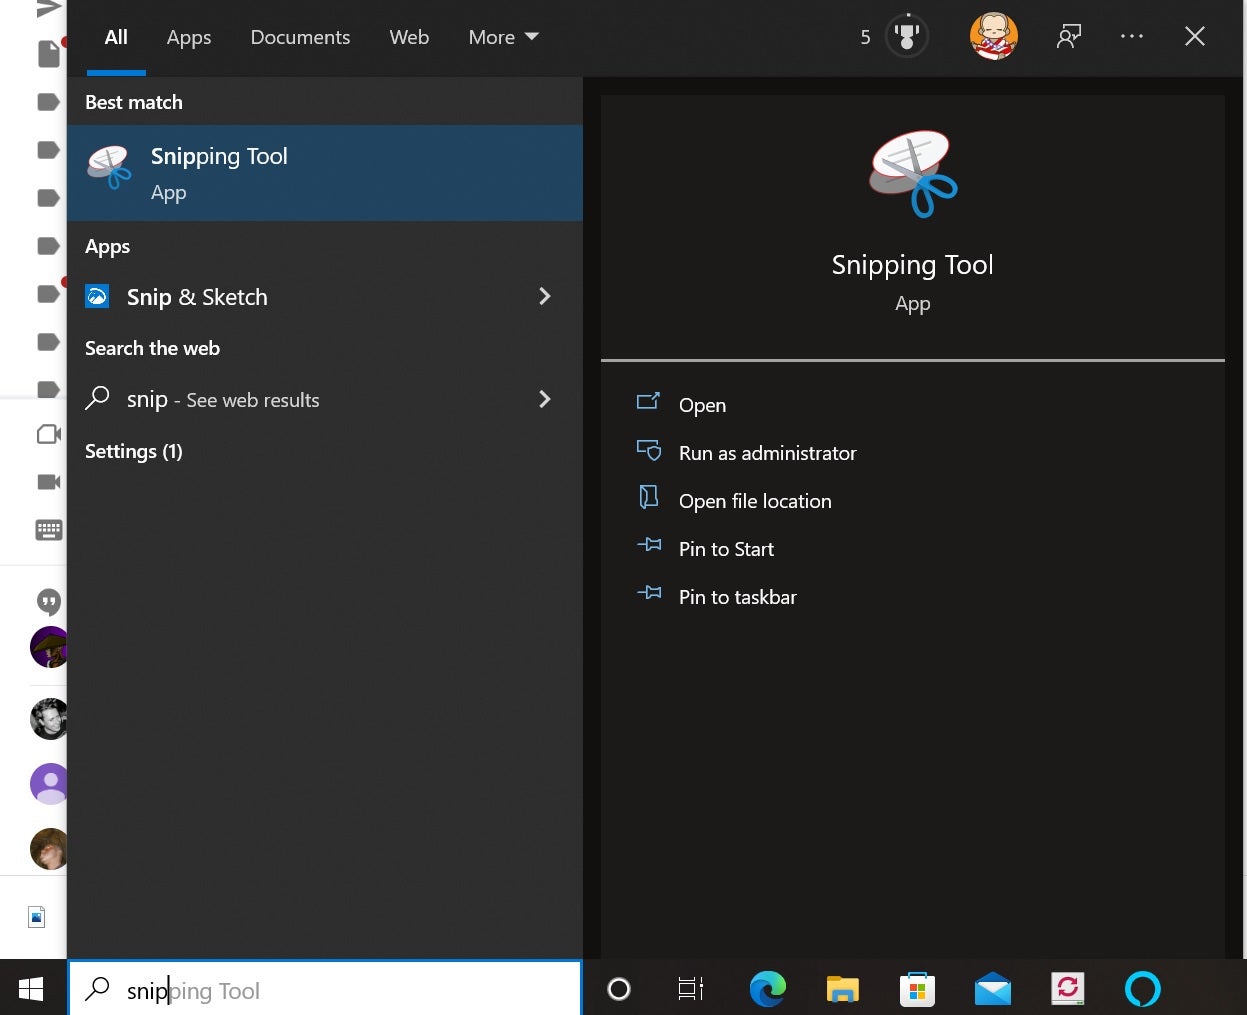
If you don’t want to use the print screen key then the Snipping Tool, or Snip and Sketch, is arguably the most versatile tool. To open it, you can press the Windows key + Shift + S combination, or simply head into the search bar and type ‘Snipping Tool’. You can see what the icon looks like in the below screen shot.
Step
5Tap new
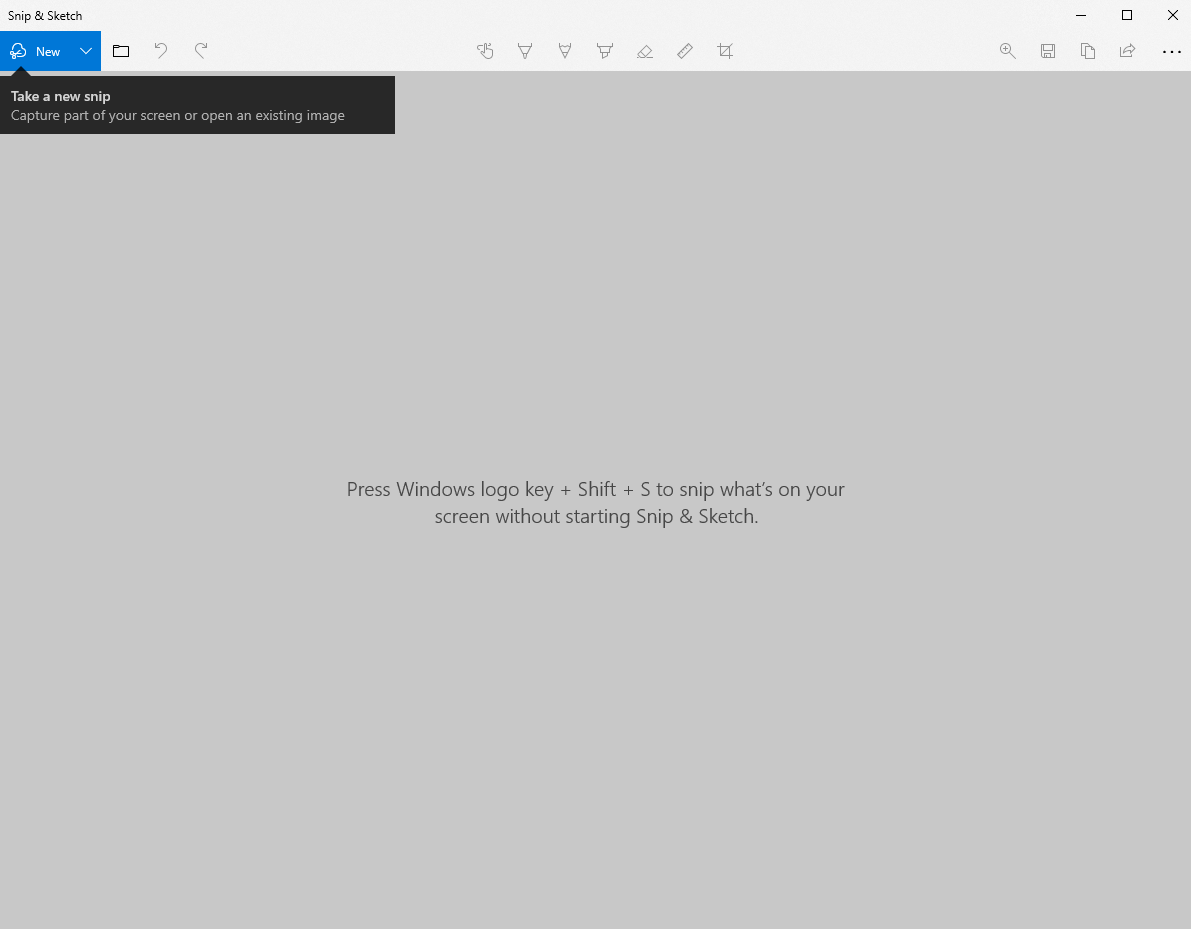
Once inside, you can drag your cursor around to select a designated area to screenshot as well as to screenshot a selected window, or your entire screen.Step
6Method 3 Use Windows Game Bar

If the Snipping Tool isn’t your jam, then Windows also allows you to use the Game Bar as a method of screenshotting. To open it, press Windows + G, and you’ll be greeted with an overlay menu. Inside, you’ll find a camera icon – hitting it will take a full screen screenshot. When you’re in this menu, you can also start screen recording, with or without audio, as well as alter volume levels for your recording.
Troubleshooting
Your screenshots, depending on the method you use, will get saved either in the screenshots folder (found within Pictures in your documents), or directly to the clipboard, where you can then paste them in a program to save, be it Microsoft Word or Paint.
You might like…


Editorial independence
Editorial independence means being able to give an unbiased verdict about a product or company, with the avoidance of conflicts of interest. To ensure this is possible, every member of the editorial staff follows a clear code of conduct.
Professional conduct
We also expect our journalists to follow clear ethical standards in their work. Our staff members must strive for honesty and accuracy in everything they do. We follow the IPSO Editors’ code of practice to underpin these standards.