
If you’re responsible for a under-thirteen-year-old who’s keen to try Roblox, here’s your guide to creating their account, adding safety and privacy settings, and imposing spending limits.
If you’re securing an existing over-13 account being used by a younger child, see my guide on How to enable parental controls on Roblox 13+ accounts instead. To get an overview of the risks and features of this wildly popular child-oriented gaming ecosystem, first read Understanding parental controls and risk on Roblox.

Save 81% on a VPN with SurfShark
Surfshark has dropped the price of its VPN to £1.94 a month. Head over to Surfshark now to pay a one time price of £46.44 for 24 months of Surfshark and save 81%.
- Surfshark
- 81% off
- £1.94 a month
The Short Version
- Go to the Roblox website
- Enter a date of birth
- Enter a user name
- Enter a password
- Click Sign up
- Click Verify
- Prove you’re a human
- Check out your new account
- Click the gear icon
- Click Settings
- Add a parent’s email
- Enter your email address
- Add it
- Click OK
- Verify the email address
- Close the new tab
- Log in again if required
- Select Privacy
- Check your Contact Settings
- Disable Contact
- Disable private server access
- Disable joining
- Disable inventory viewing
- Select Parental Controls
- Enable a Parent PIN
- Create a PIN
- Click Add
- Click OK
- Enable Monthly Spend Restrictions
- Enter your PIN
- Click Unlock
- Change the spending limit
- Enter a sum
- Click Save
- Optional: Enable Account Restrictions
Step
1Sign up on the Roblox website
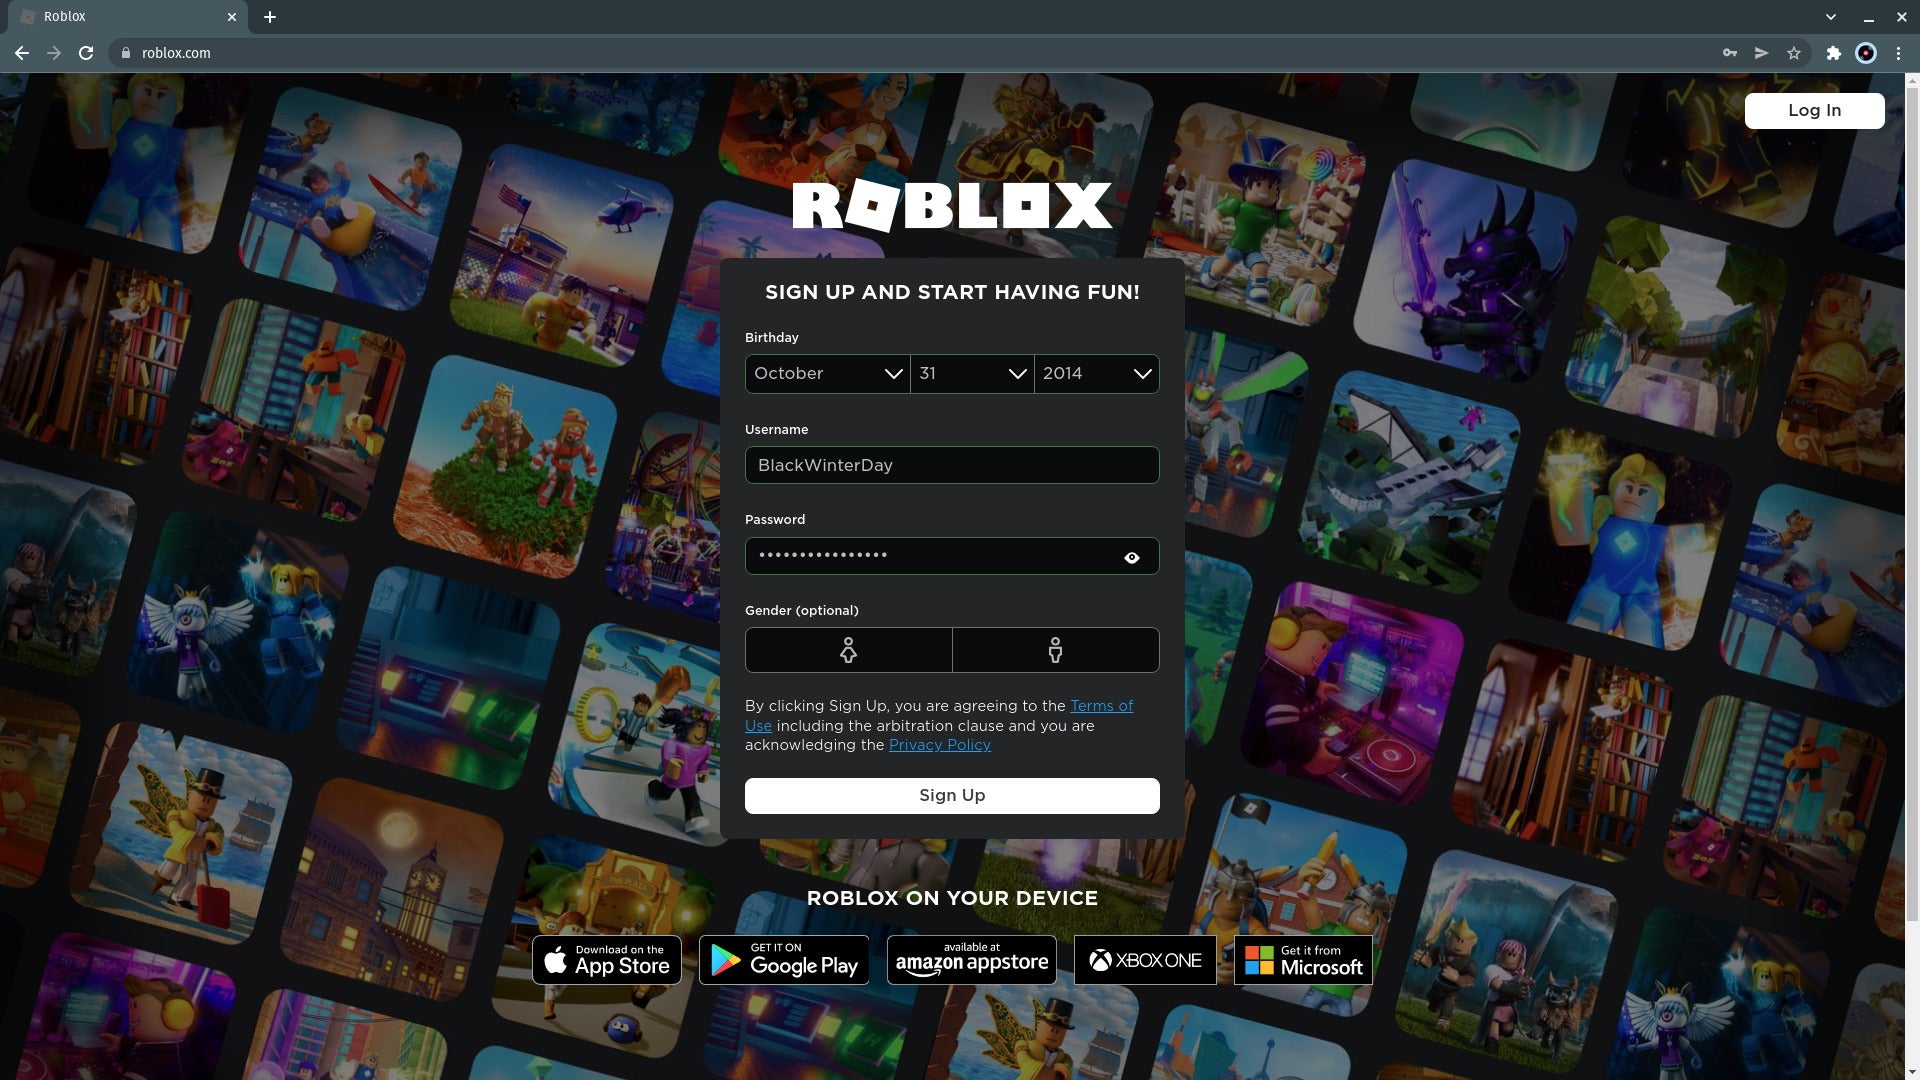
Go to https://www.roblox.com/ – you should immediately see a Sign-up screen. If you or another family member already have an account, you may have to log out of it first. Enter your child’s date of birth, their desired user name, and create a strong password using your password manager. You can safely ignore the gender field: it’s only there for data collection purposes.
Step
2Click Sign up
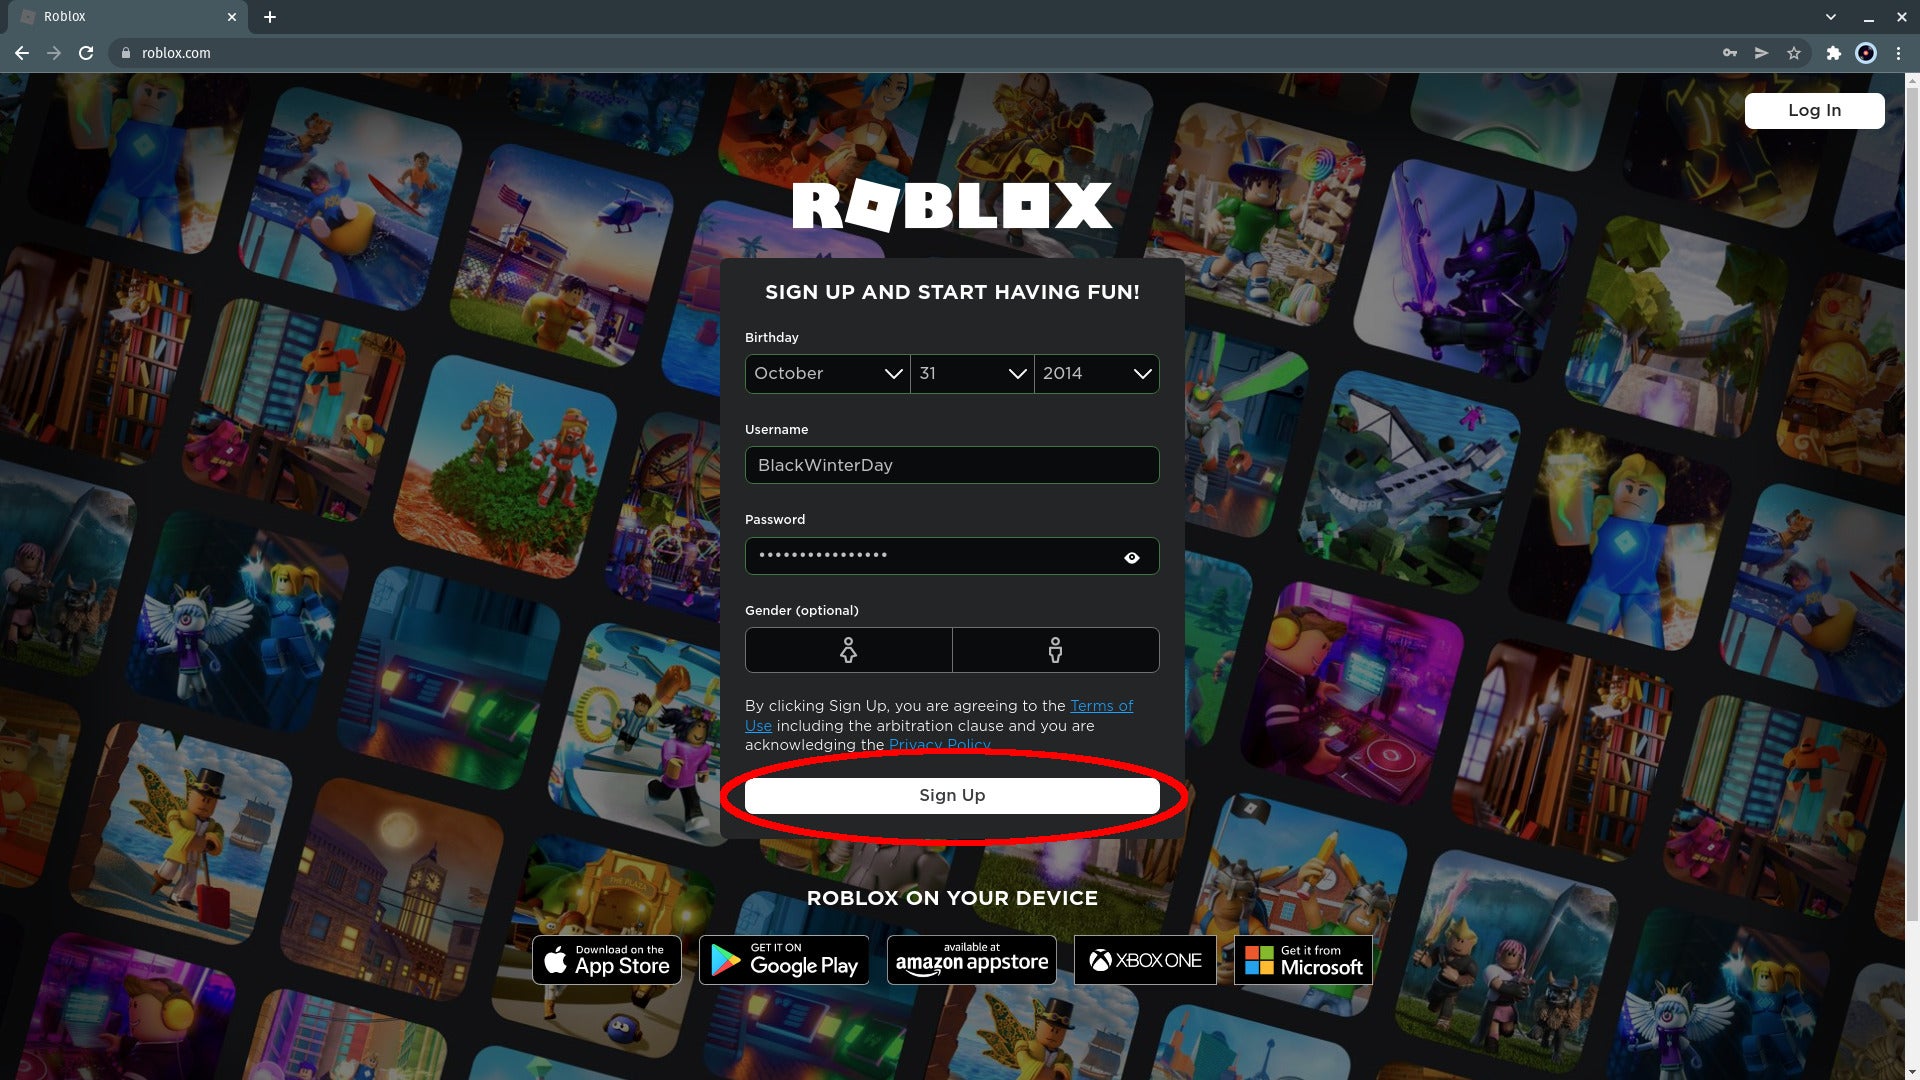
Check your data and click Sign Up.
Step
3Click Verify
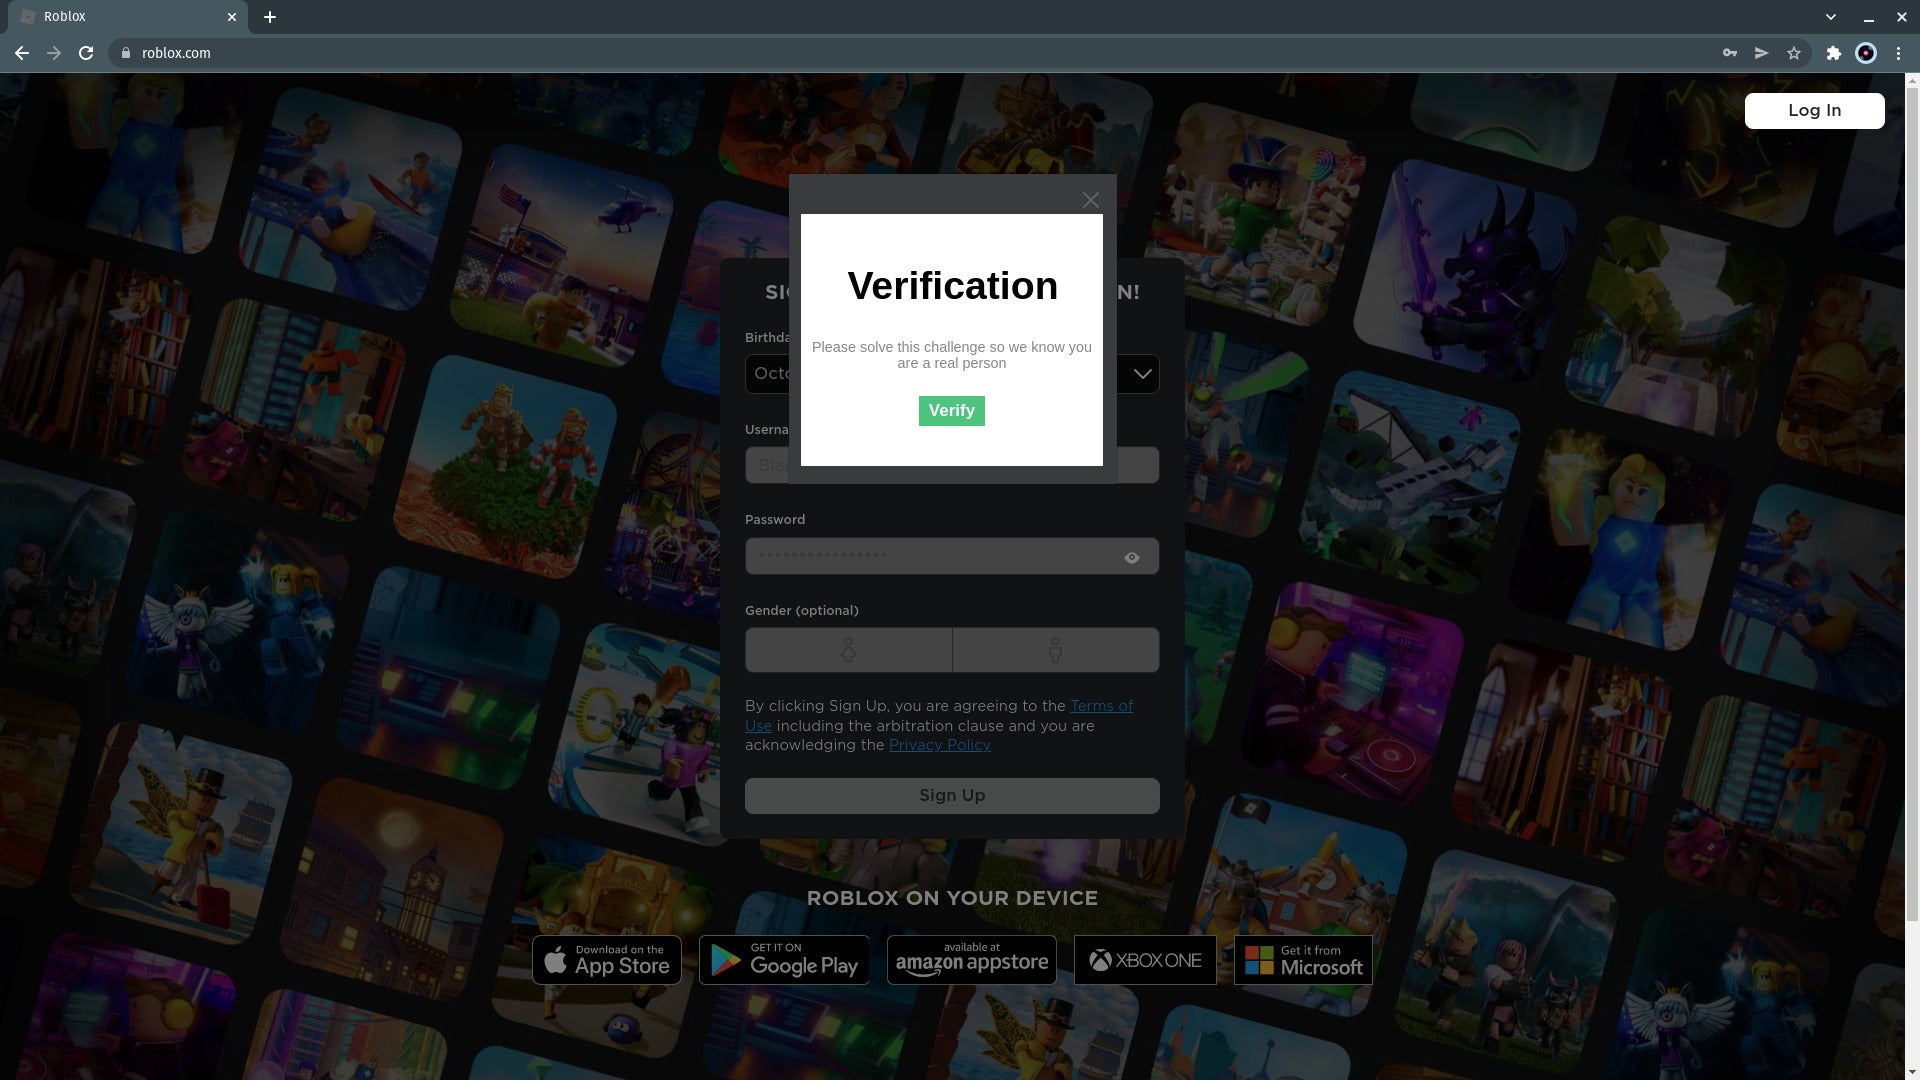
Click Verify on the challenge pop-up.
Step
4Prove you’re a human
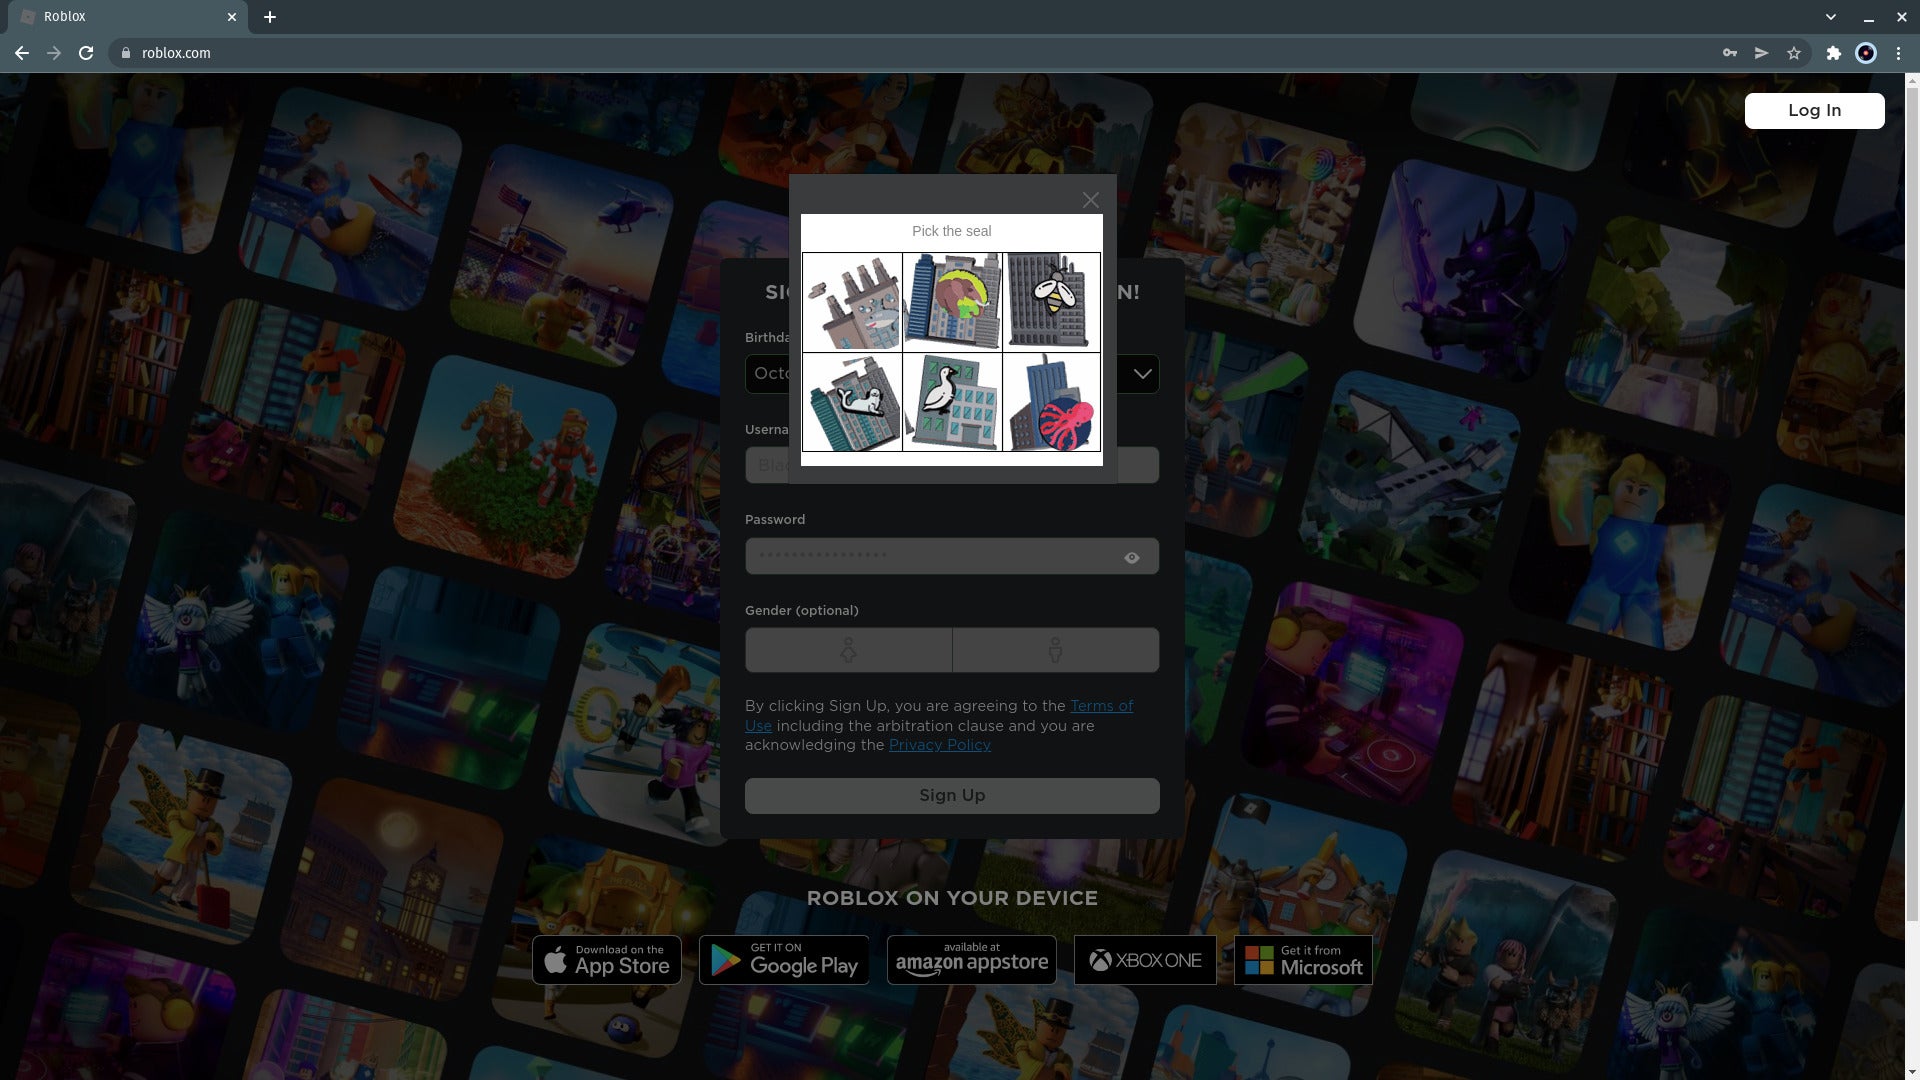
Pick the requested cute animal from a selection of six images in the child-friendly captcha alternative. You’ll have to complete this challenge anywhere between three and eight times.
Step
5Check out your new account
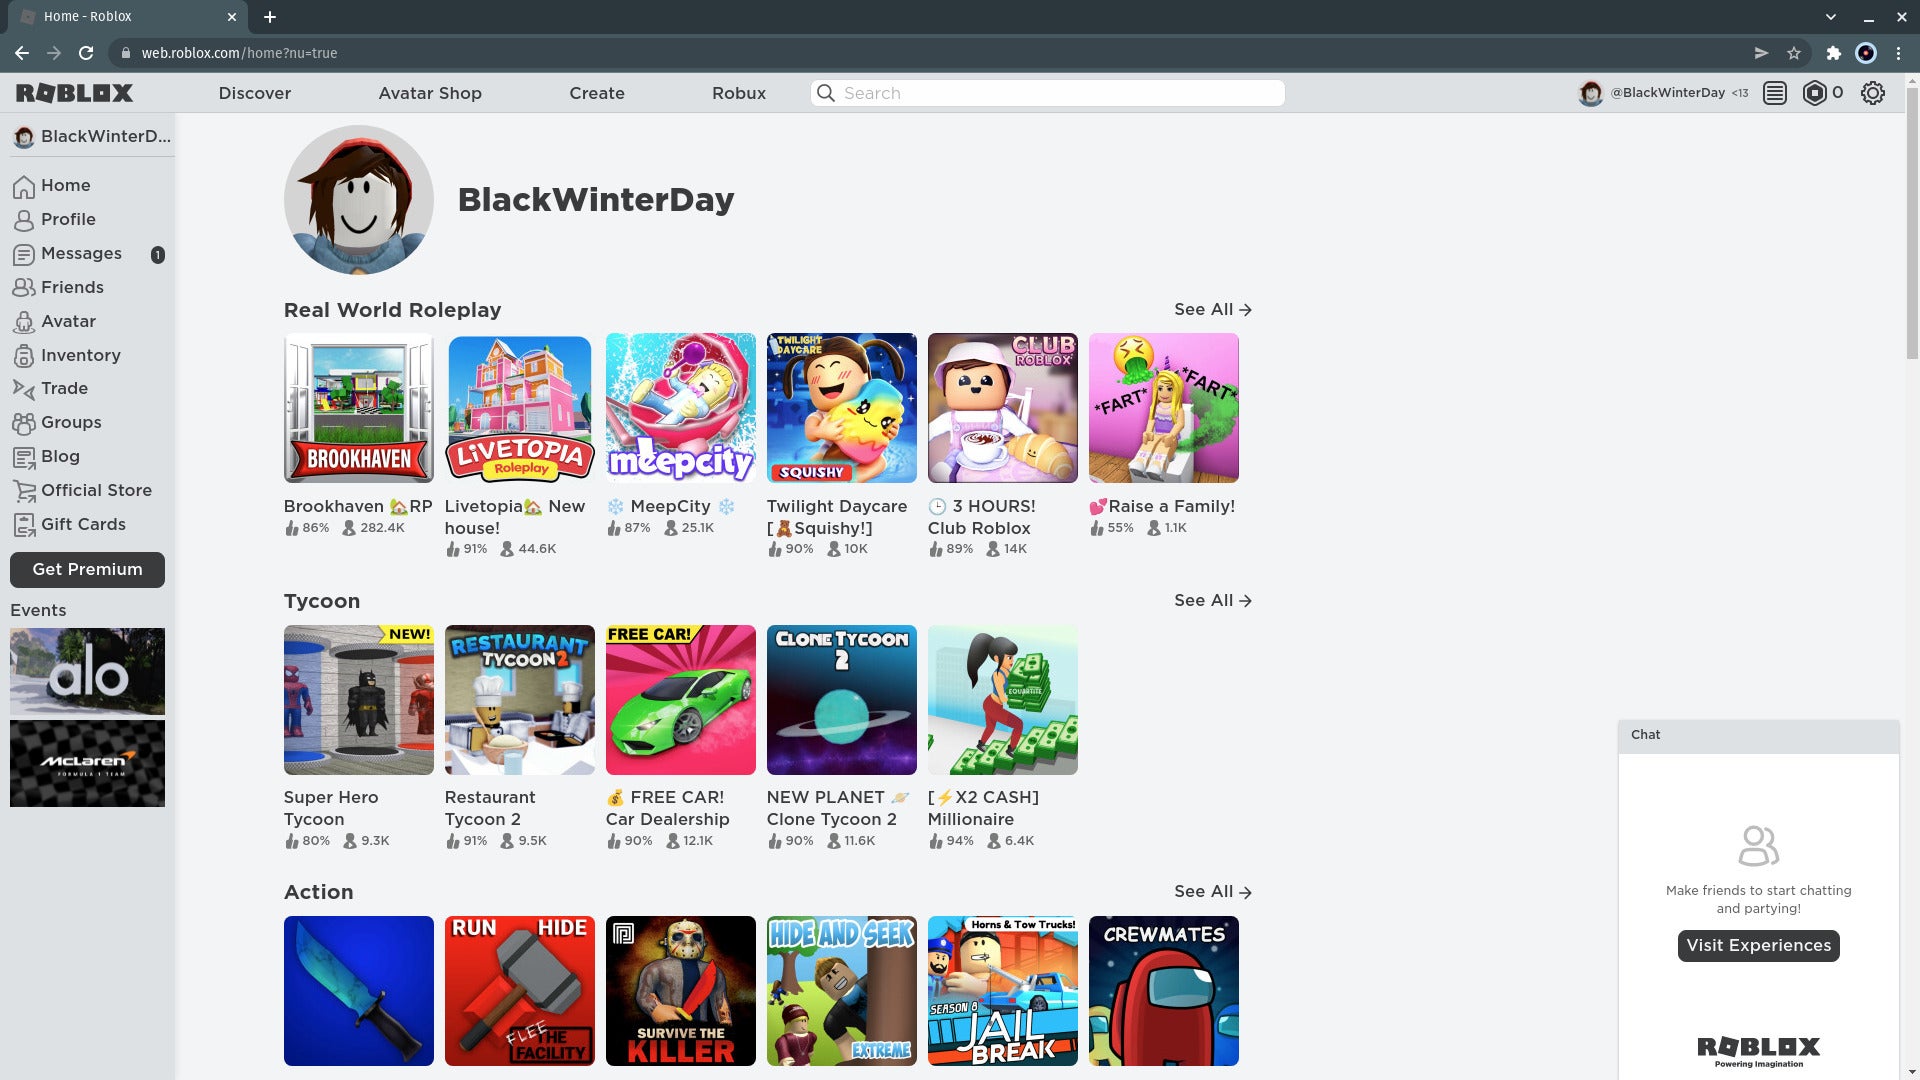
You’ll be logged into the new account. It you check the top right-hand corner, you’ll see <13 next to the account name. This means that the account is automatically subject to restrictions for users under the age of the 13, which won’t be lifted until the account holder ages up. If you want to add further restrictions, read on.
Step
6Click the gear icon

Click the gear icon at the top right of the screen.
Step
7Click Settings
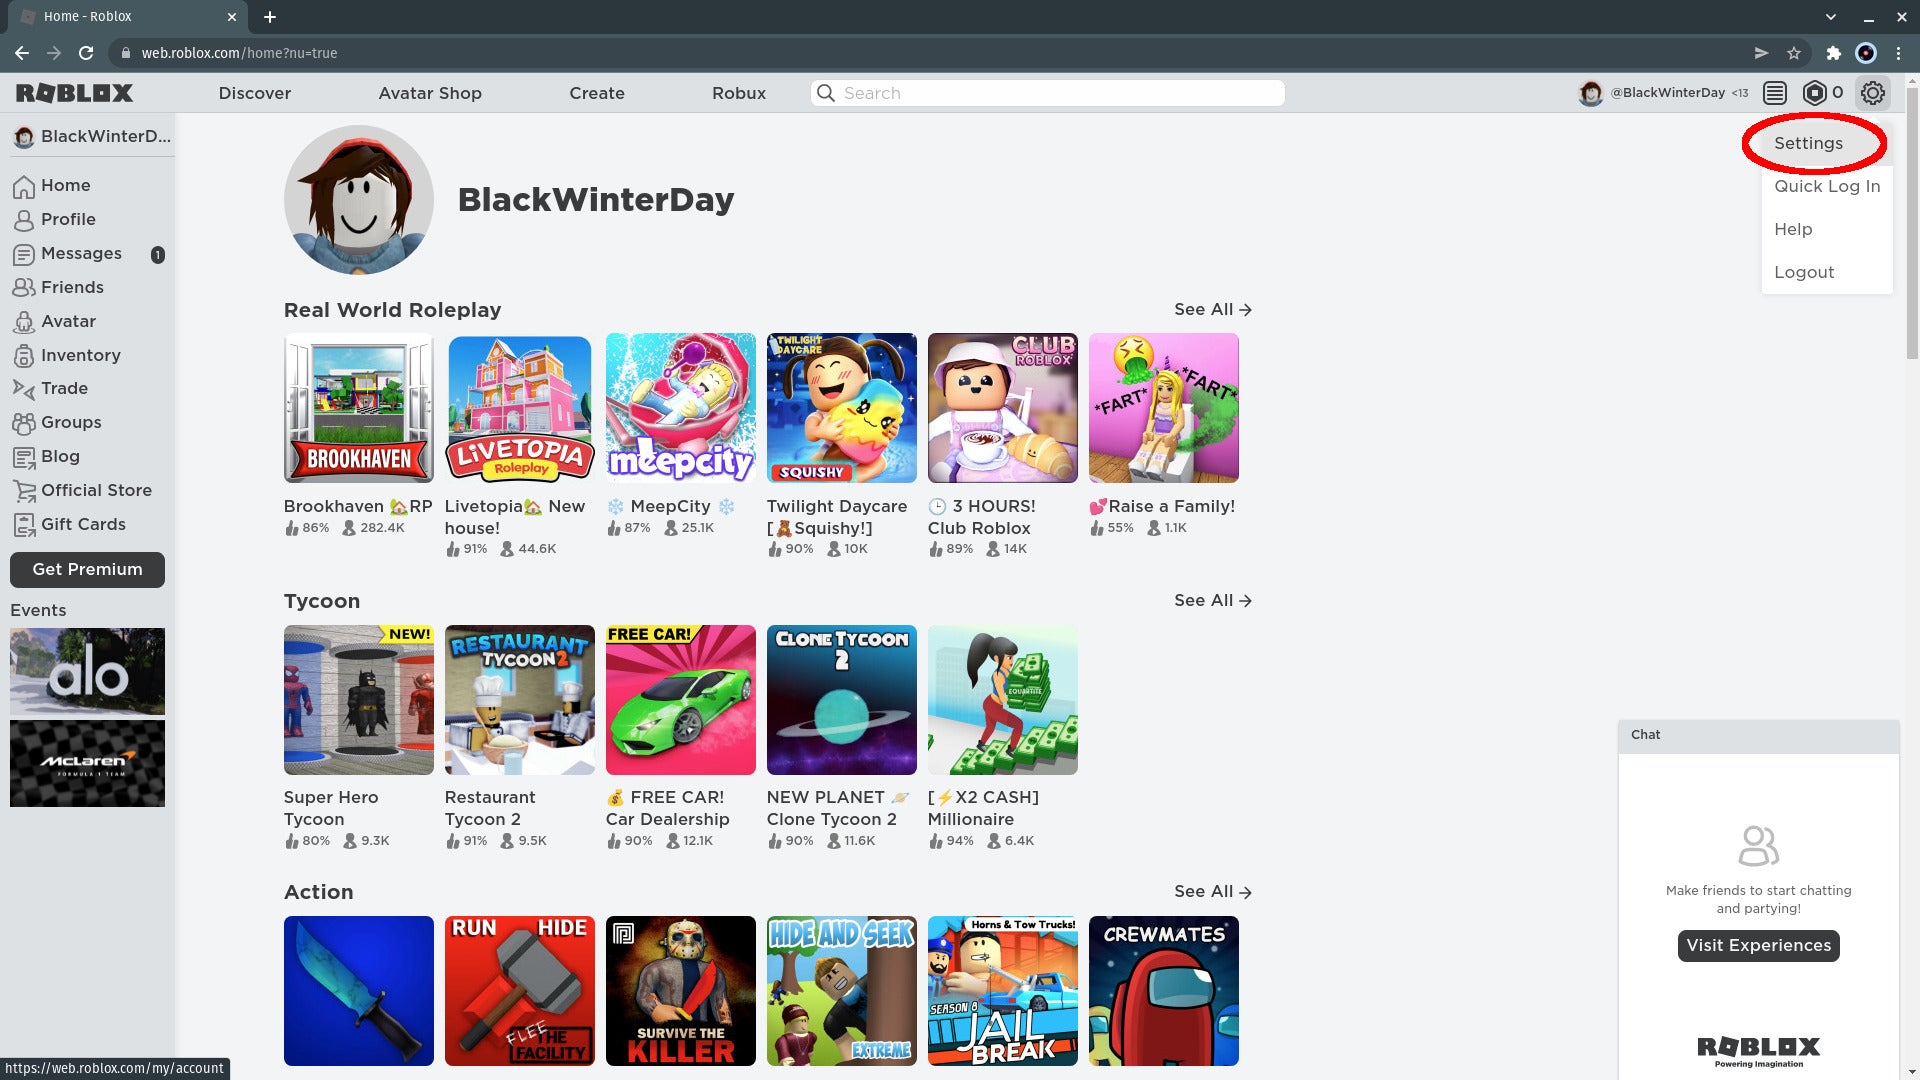
Click the Settings option in the menu that appears and the Account Info page will open. You can also go directly to Roblox’s Settings at https://www.roblox.com/my/account#!/info
Step
8Add a parent’s email
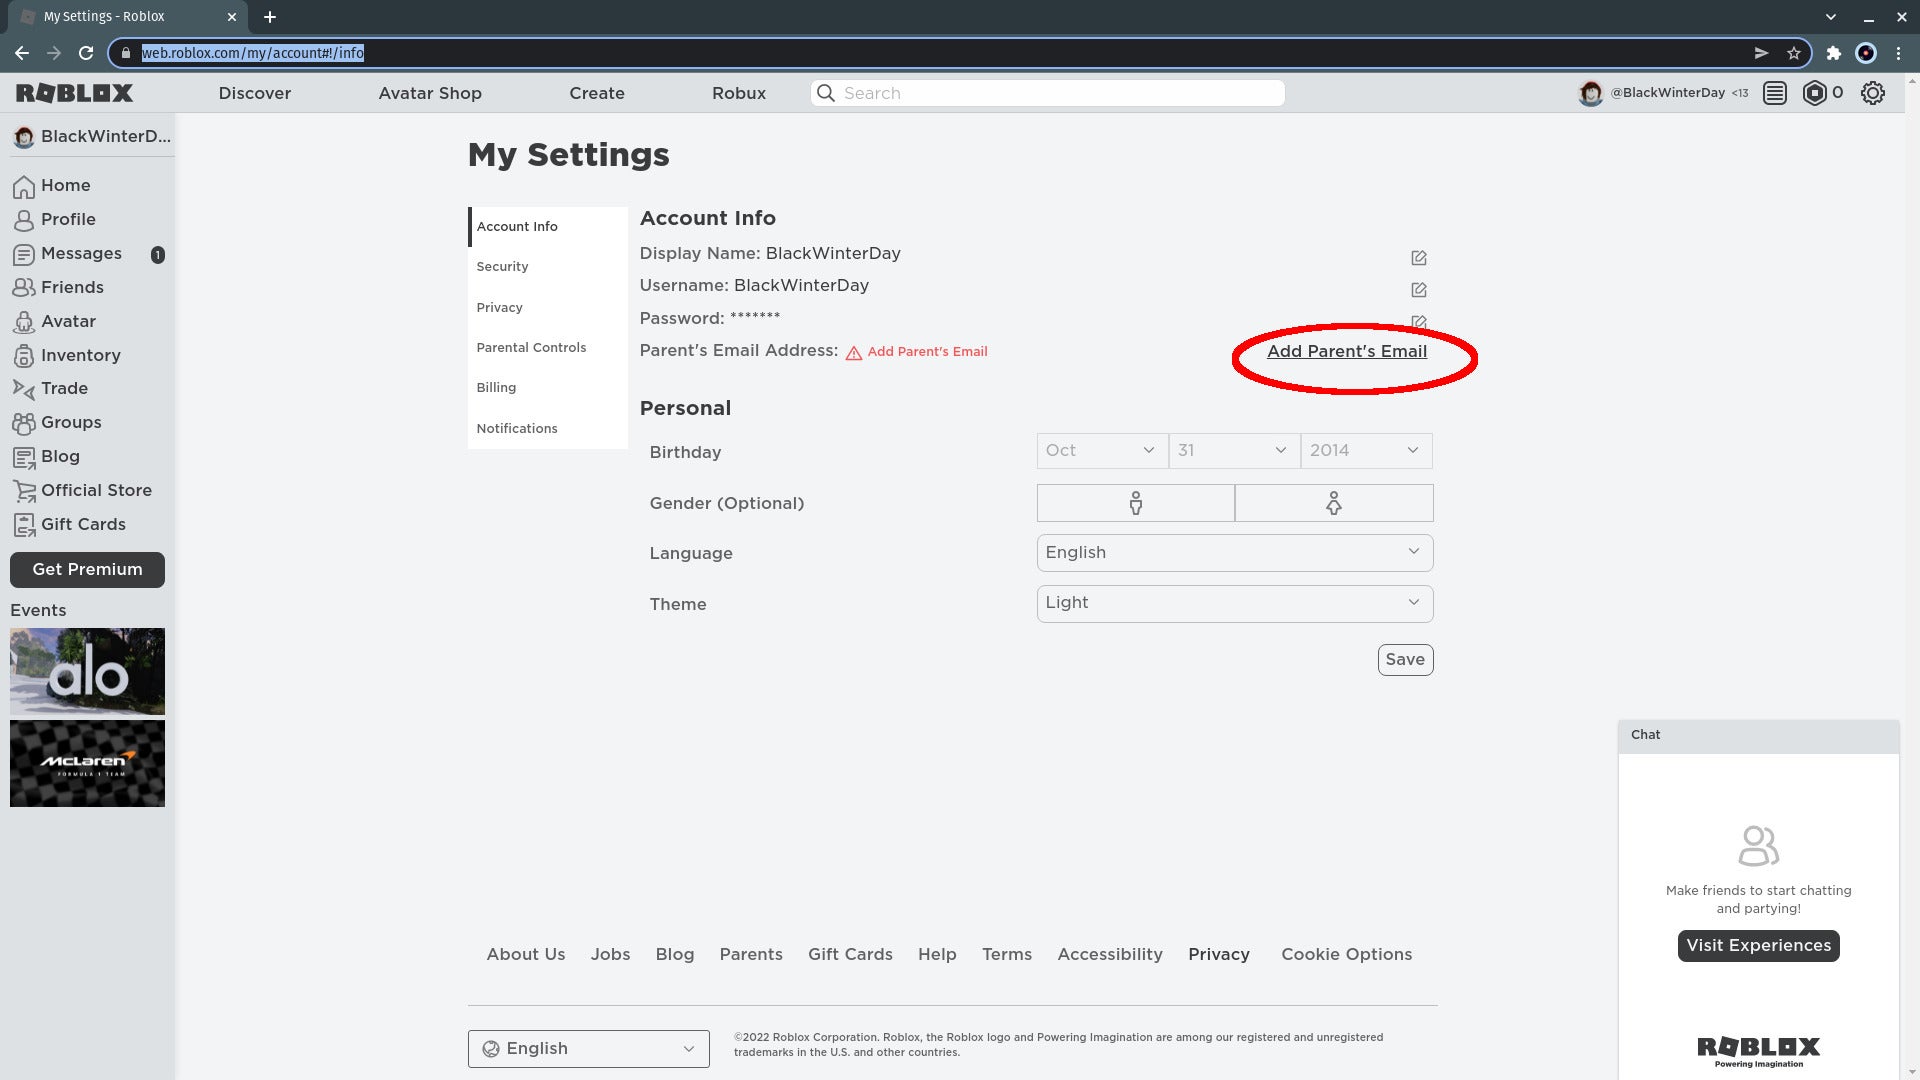
Click Add Parent’s Email. Doing so will help you manage and recover access to the account in case of emergencies.
Step
9Enter your email address

Type your own email address into the box.
Step
10Add it
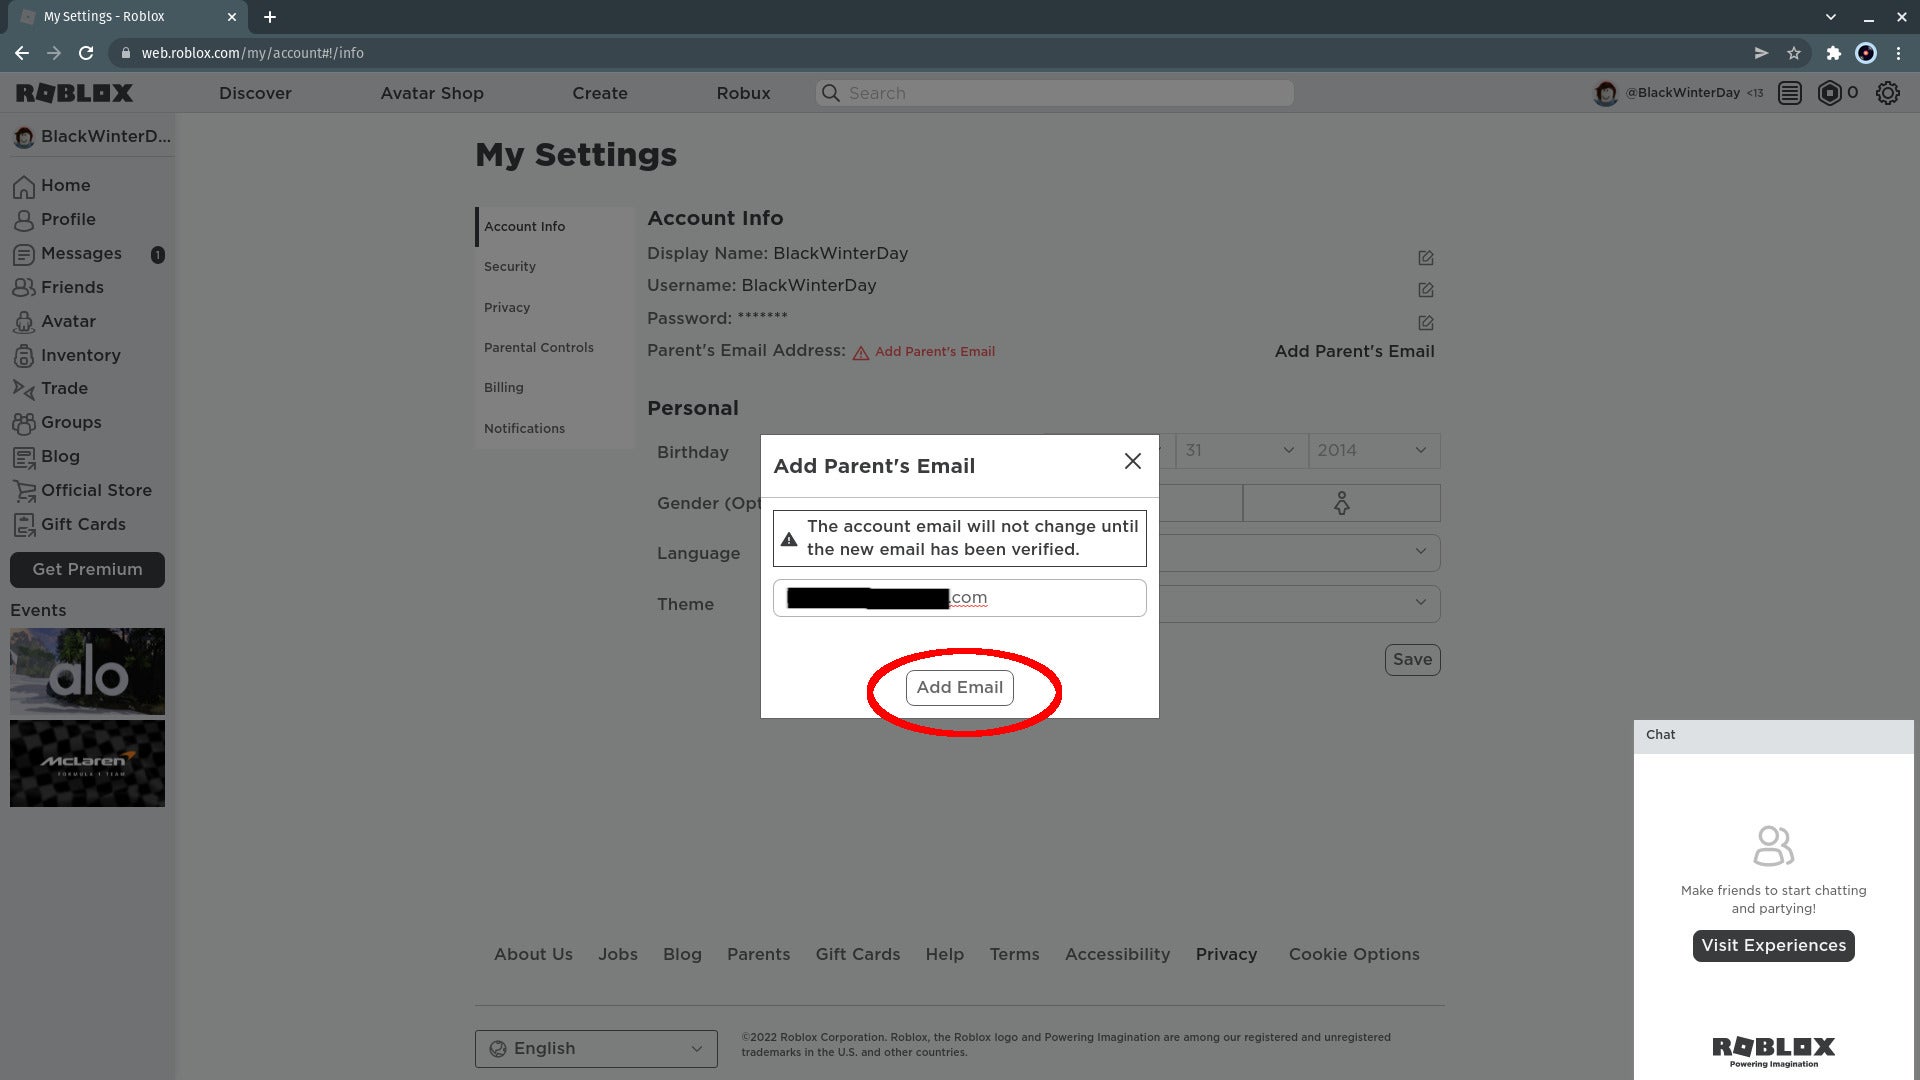
Click Add Email.
Step
11Click OK
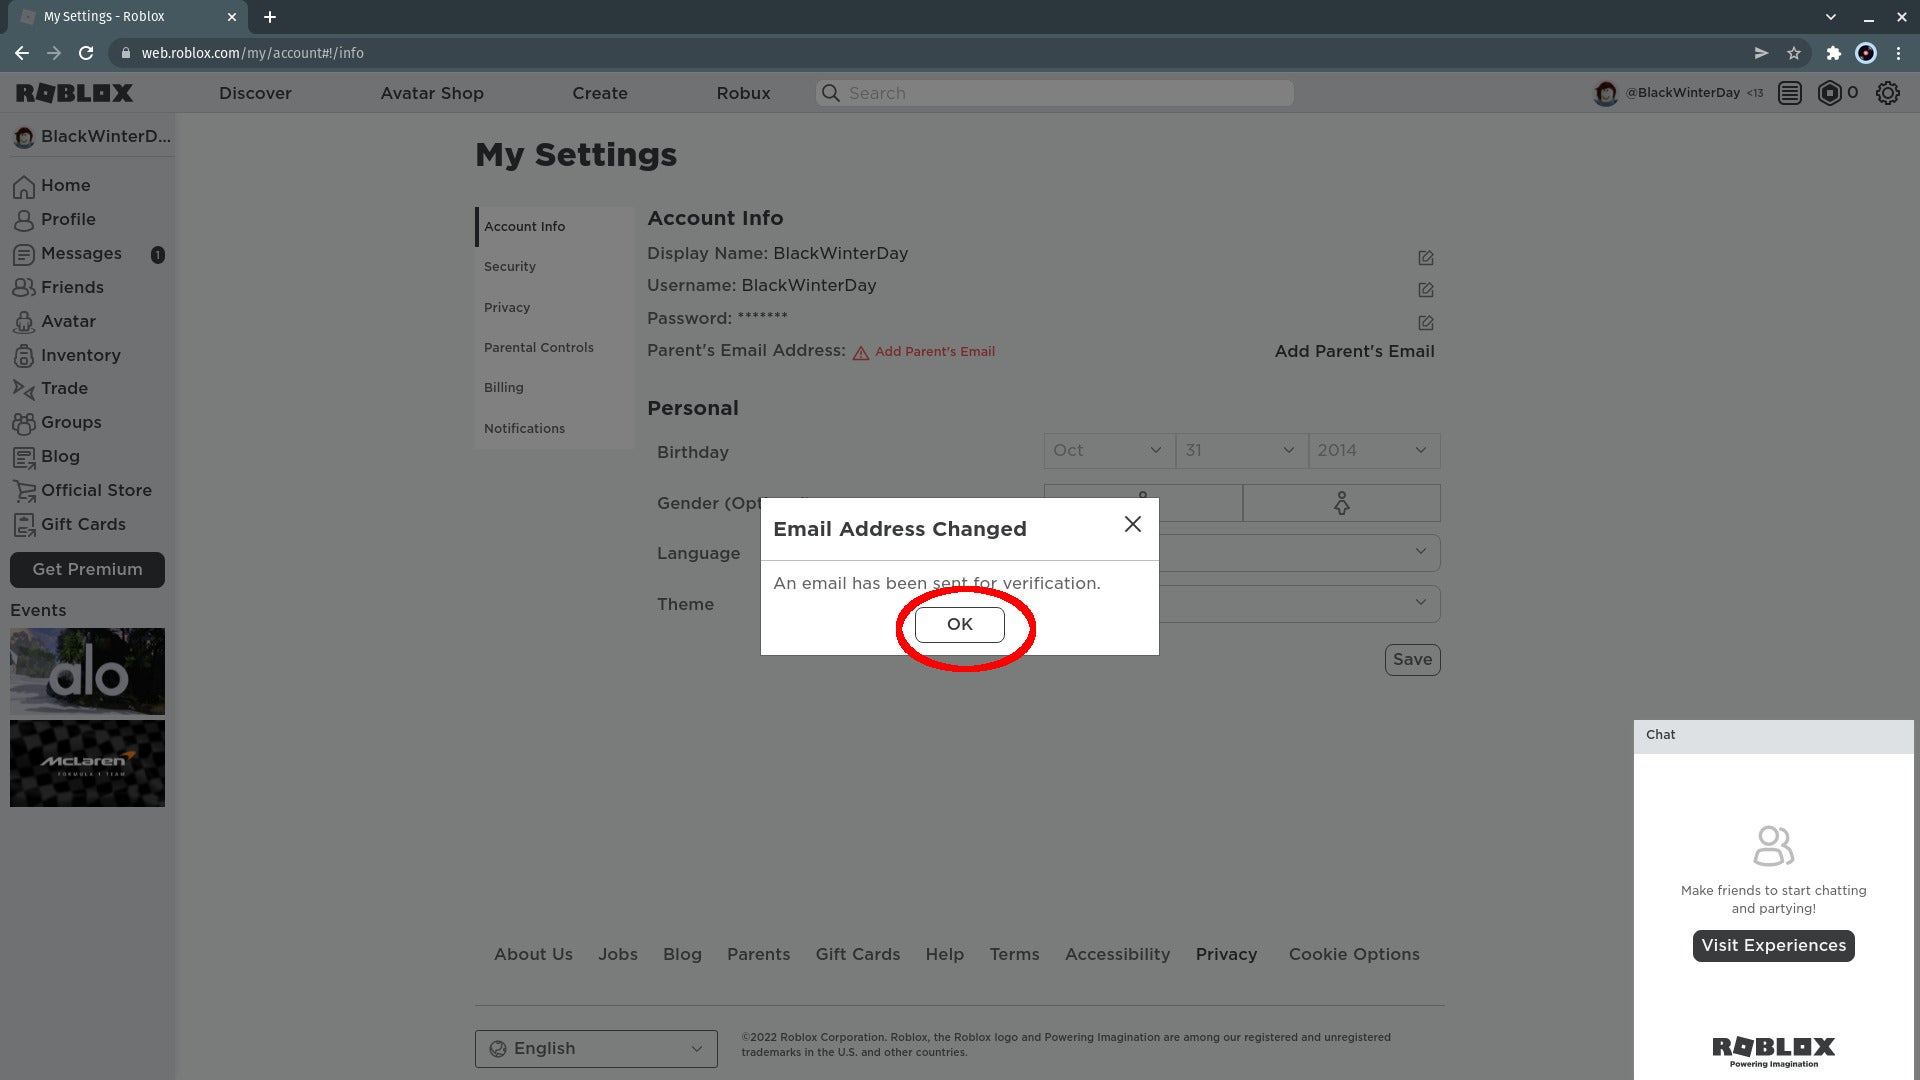
Click OK on the box informing you that a verification email has been sent.
Step
12Verify the email address
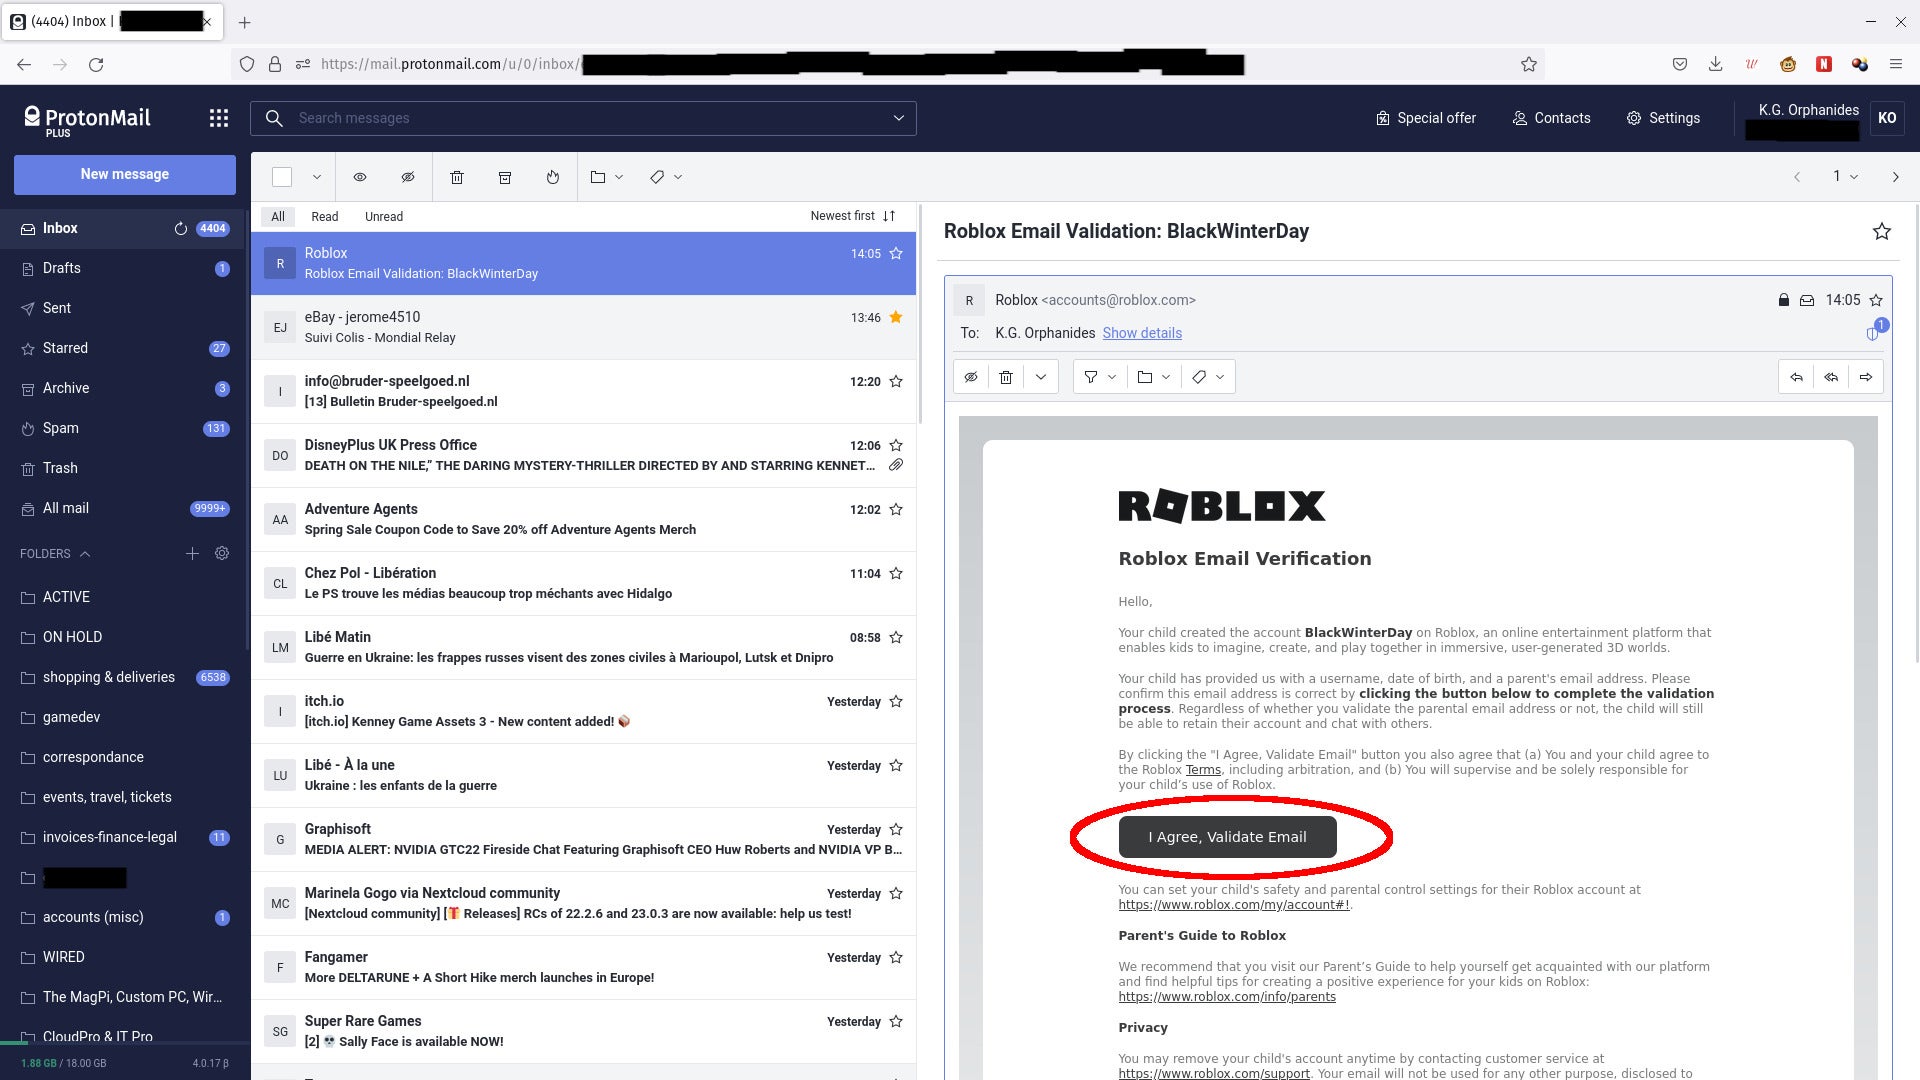
Open your email client and find the message with the subject that begins Roblox Verification Email. Read the information for parents, then click I Agree, Validate Email.
Step
13Close the new tab
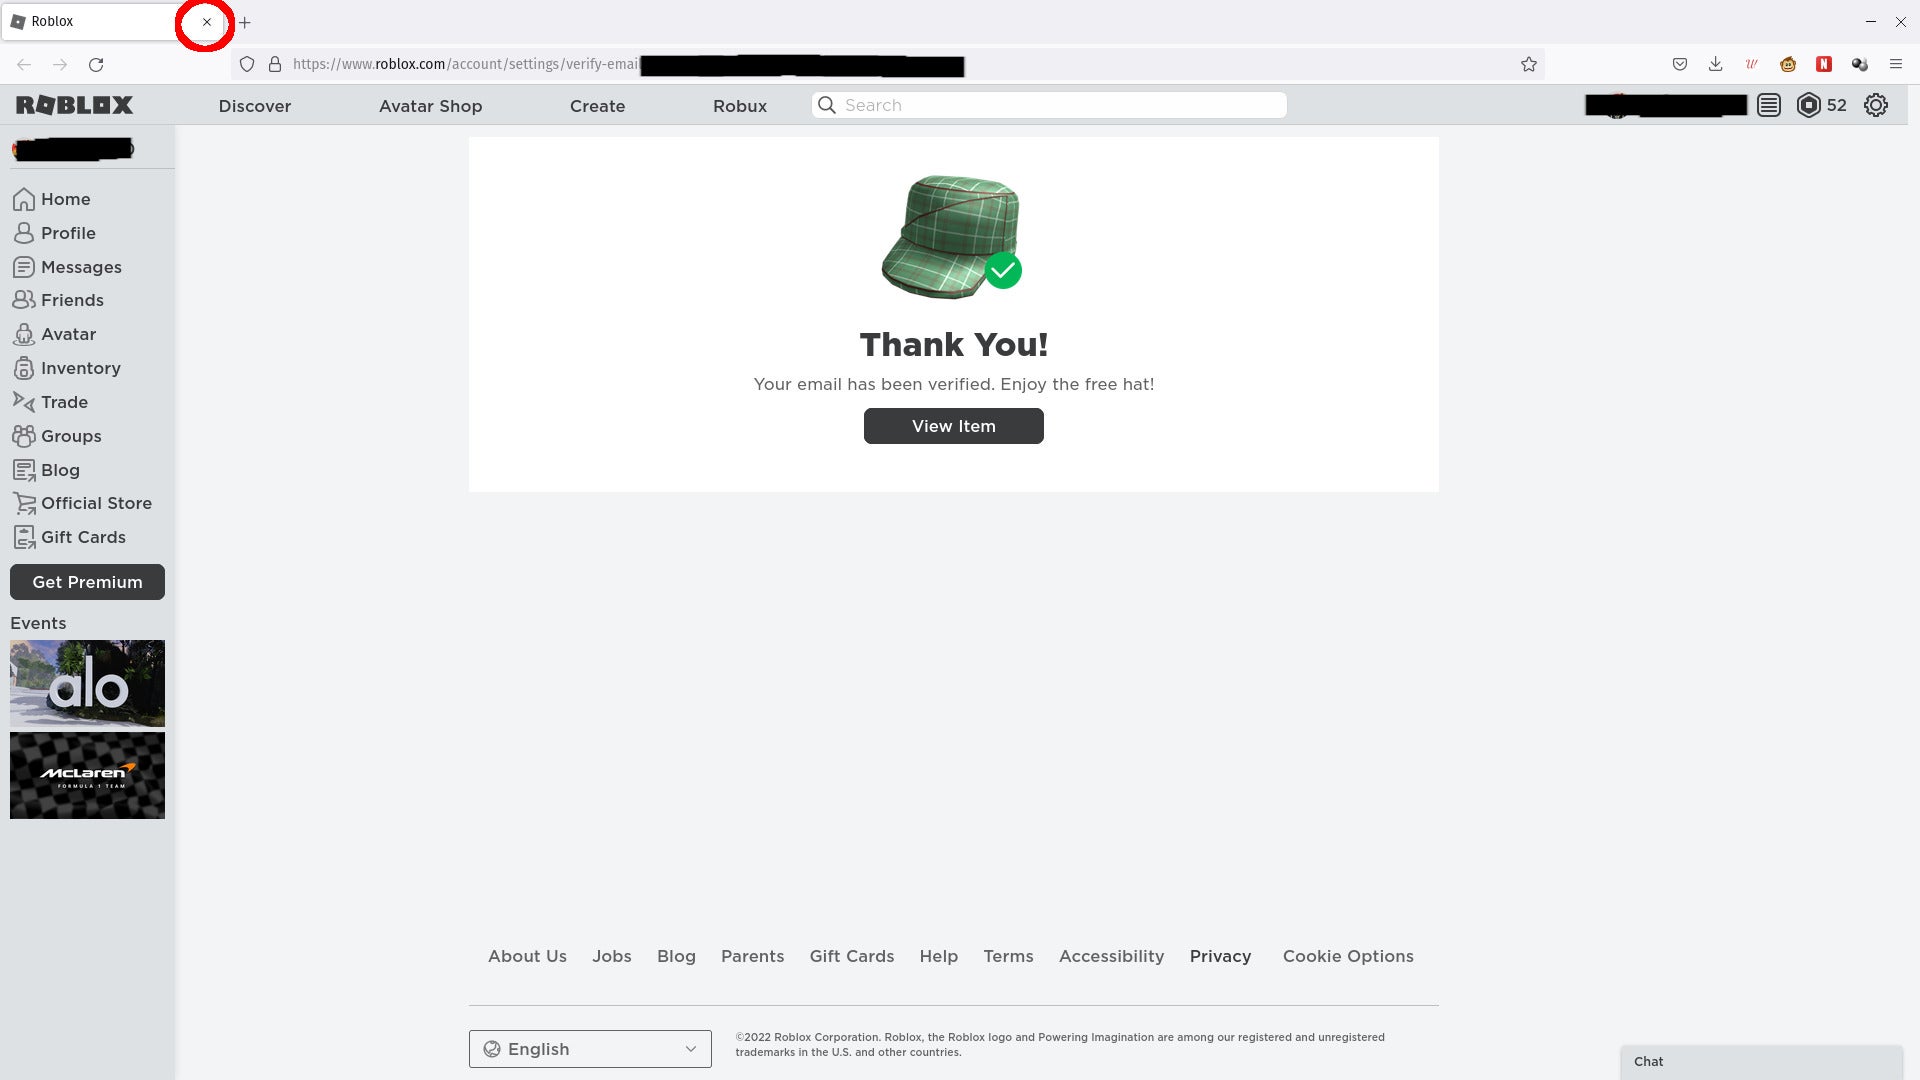
This will open a new browser tab or window to confirm your verification. Close this and return to the window where you’re setting up the new account (at https://web.roblox.com/my/account?nl=true#!/info).
Step
14Refresh and log in again if required

Press F5 to refresh the window. You may be logged out at this point. Log back in using the username and password we set up earlier. Verify that you’re a human, as above, if asked. You should be taken directly back to the Settings page.
Step
15Select Privacy
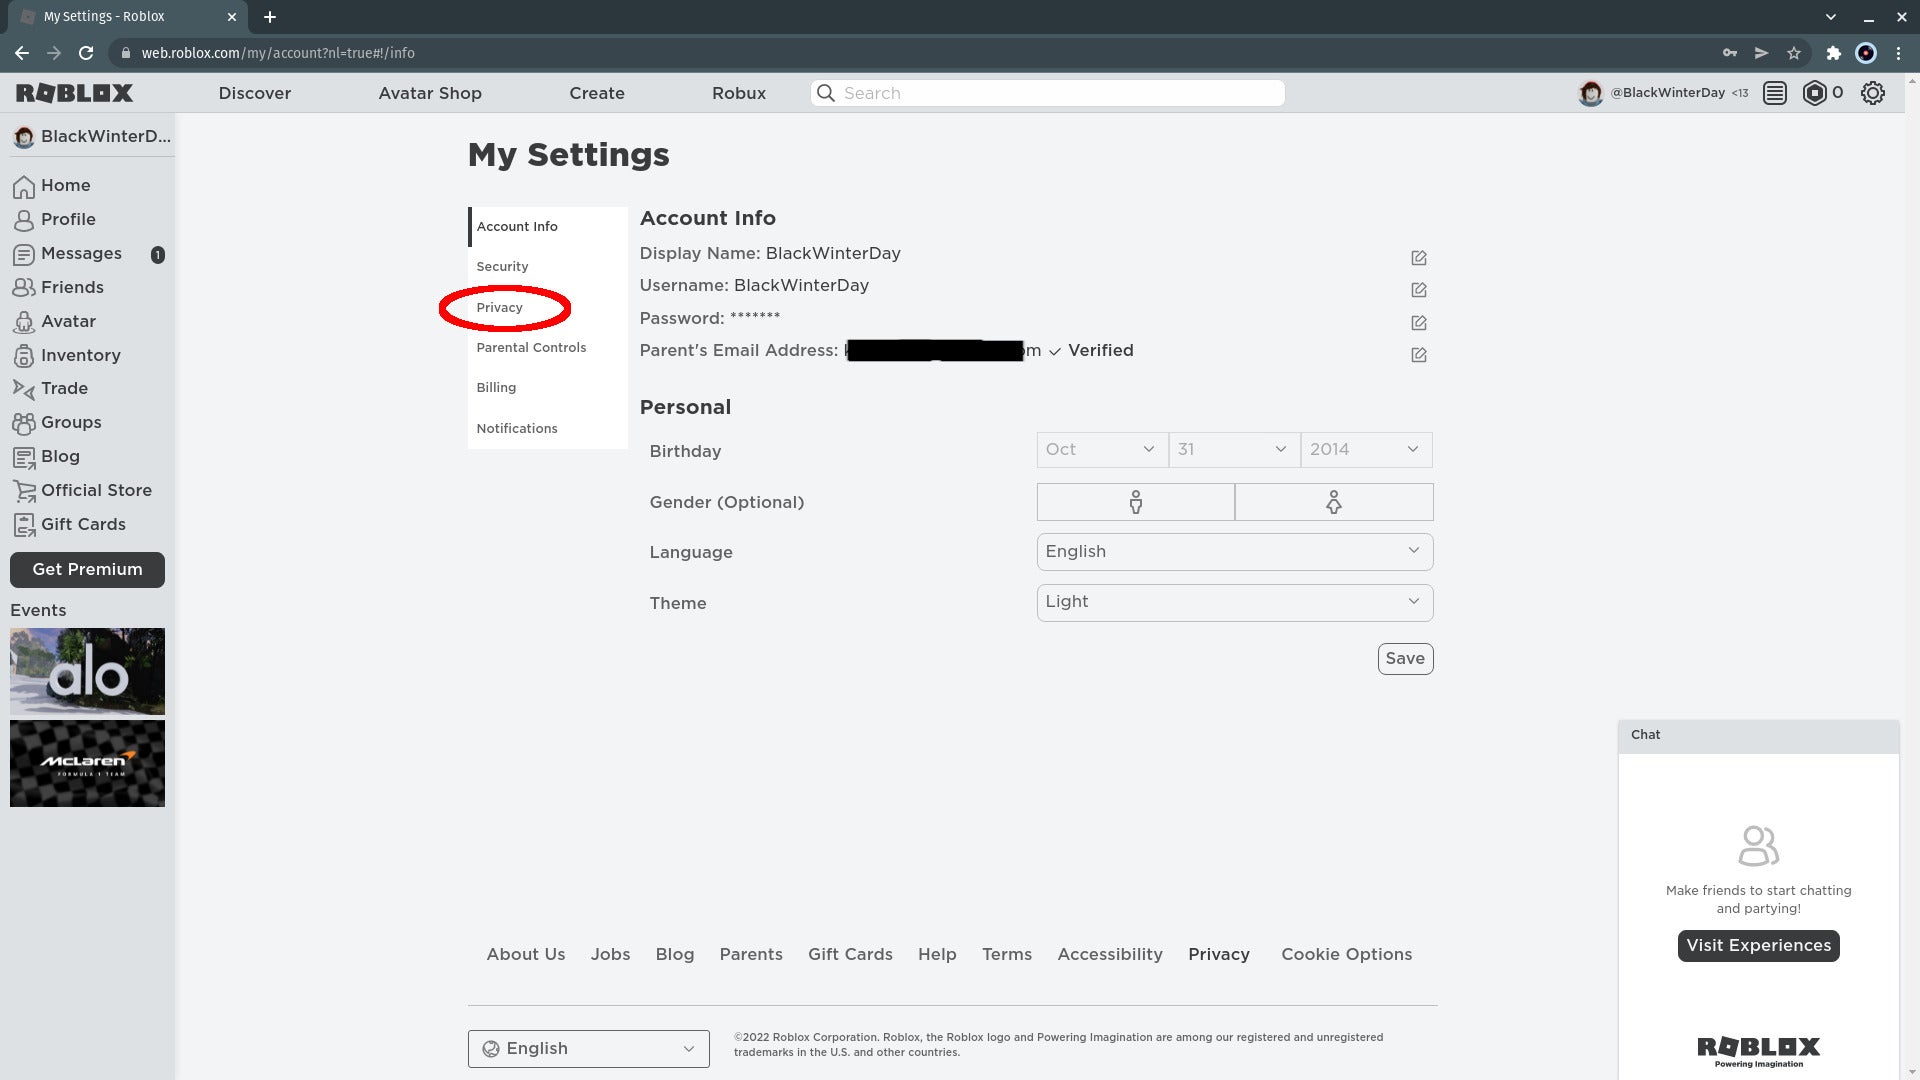
Scroll back up the page and select the Privacy tab at the left of the settings page, or go to https://www.roblox.com/my/account#!/privacy
Step
16Check your Contact Settings
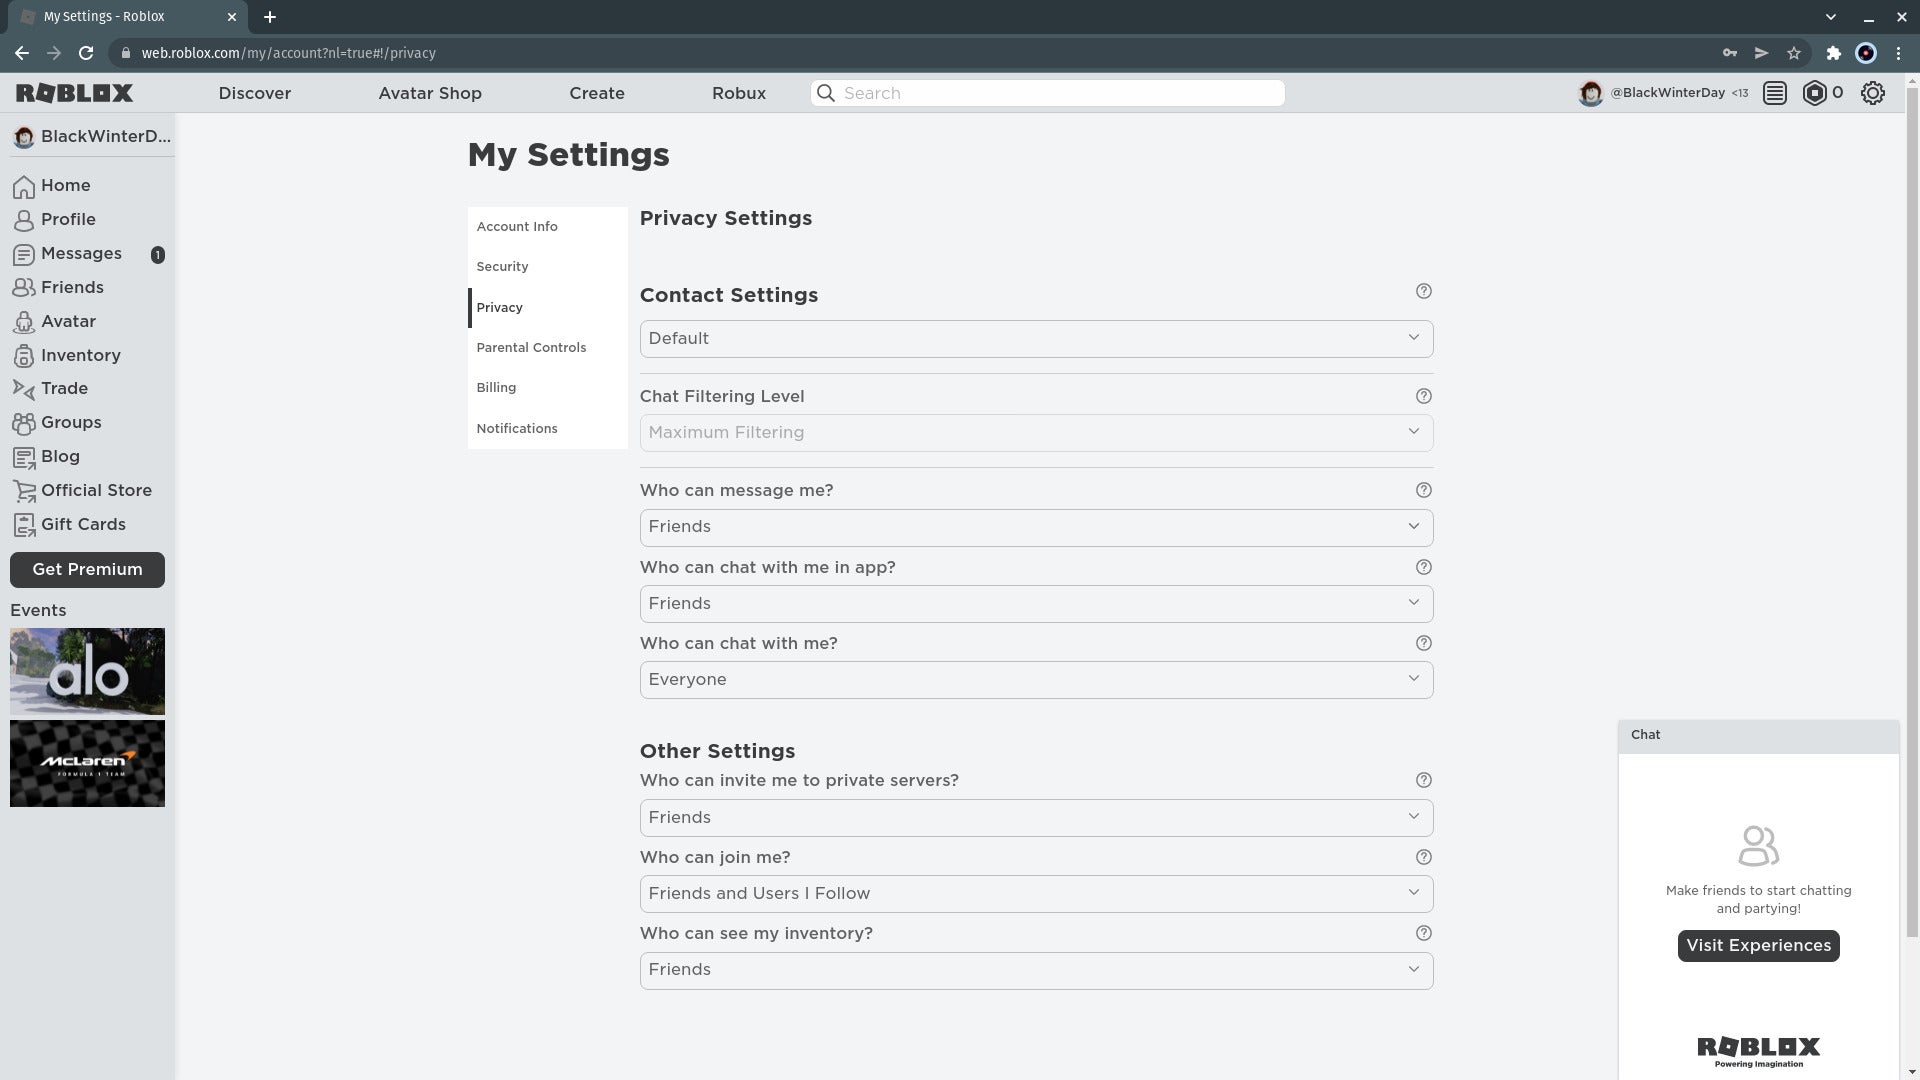
This is where you can see who is allowed to message and interact with your child’s account. Because this account it for an under-thirteen-year-old, content filtering is set to Maximum Filtering. If you want your child to make and talk to friends on Roblox, or play together with friends and family members, leave everything as it is and jump to step 21 in this How-To. If you want to lock everything down, read on.
Step
17Disable Contact
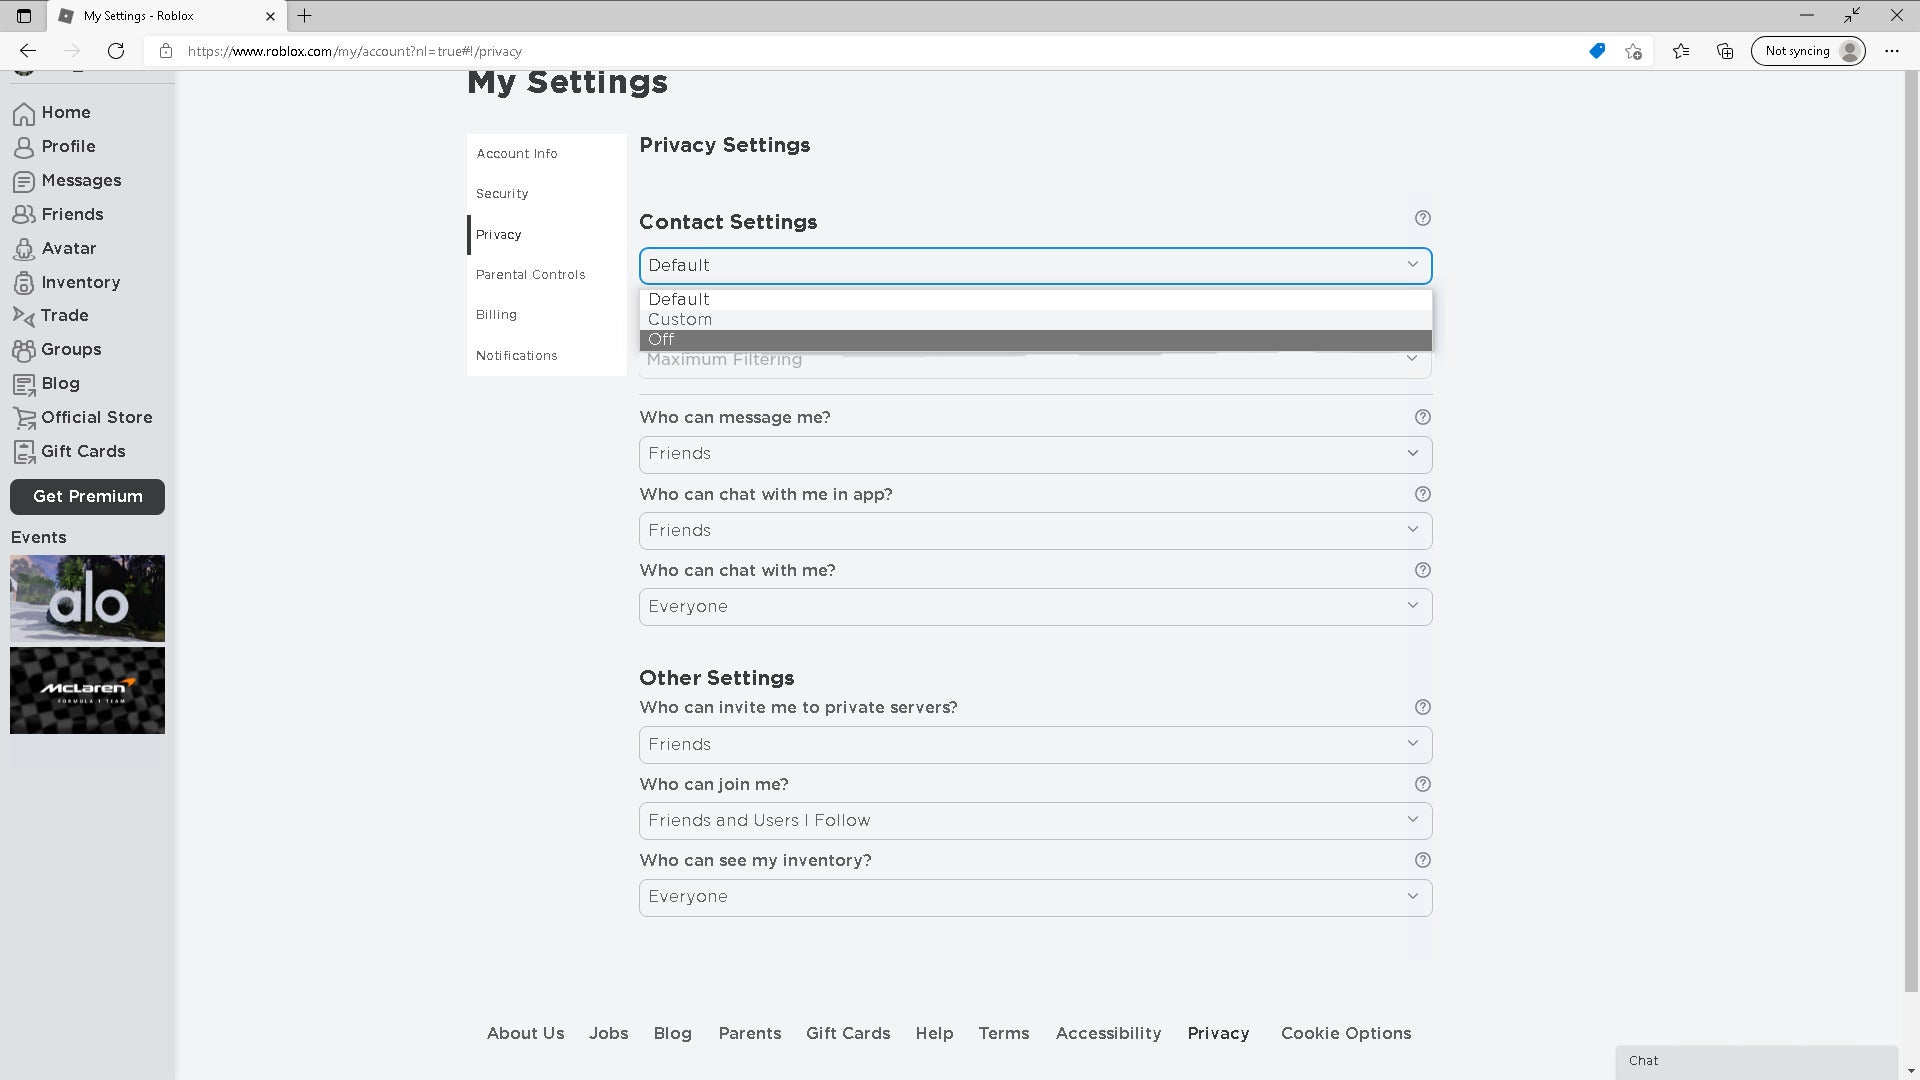
Click the pull-down menu beneath Contact Settings and select “Off”. This will be auto-saved, with a green “Saved Successfully” bar appearing at the top of the page to inform you of this.
Step
18Disable private server access
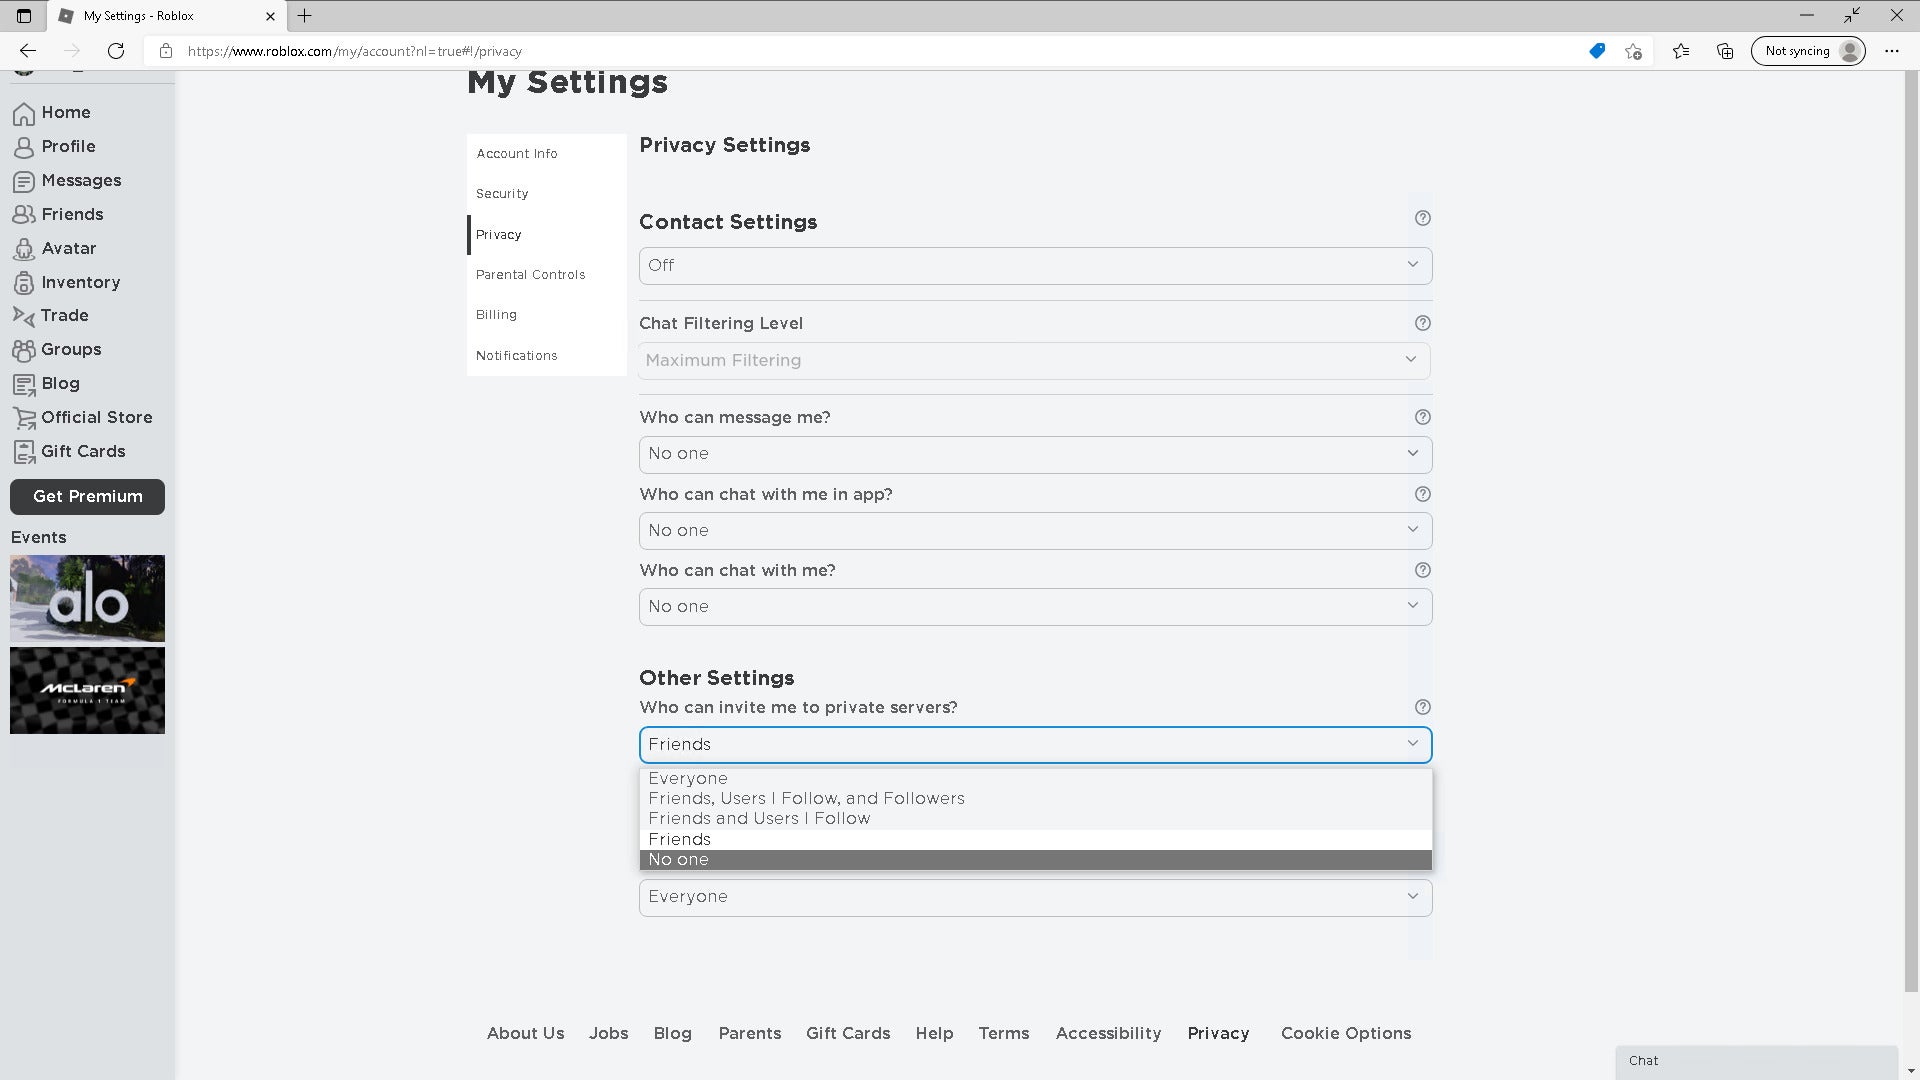
Further down the page, under “Who can invite me to private servers?”, open the pull-down and select “No one”. If you play together as a family, you may wish to set this to “Friends”, instead.
Step
19Disable joining
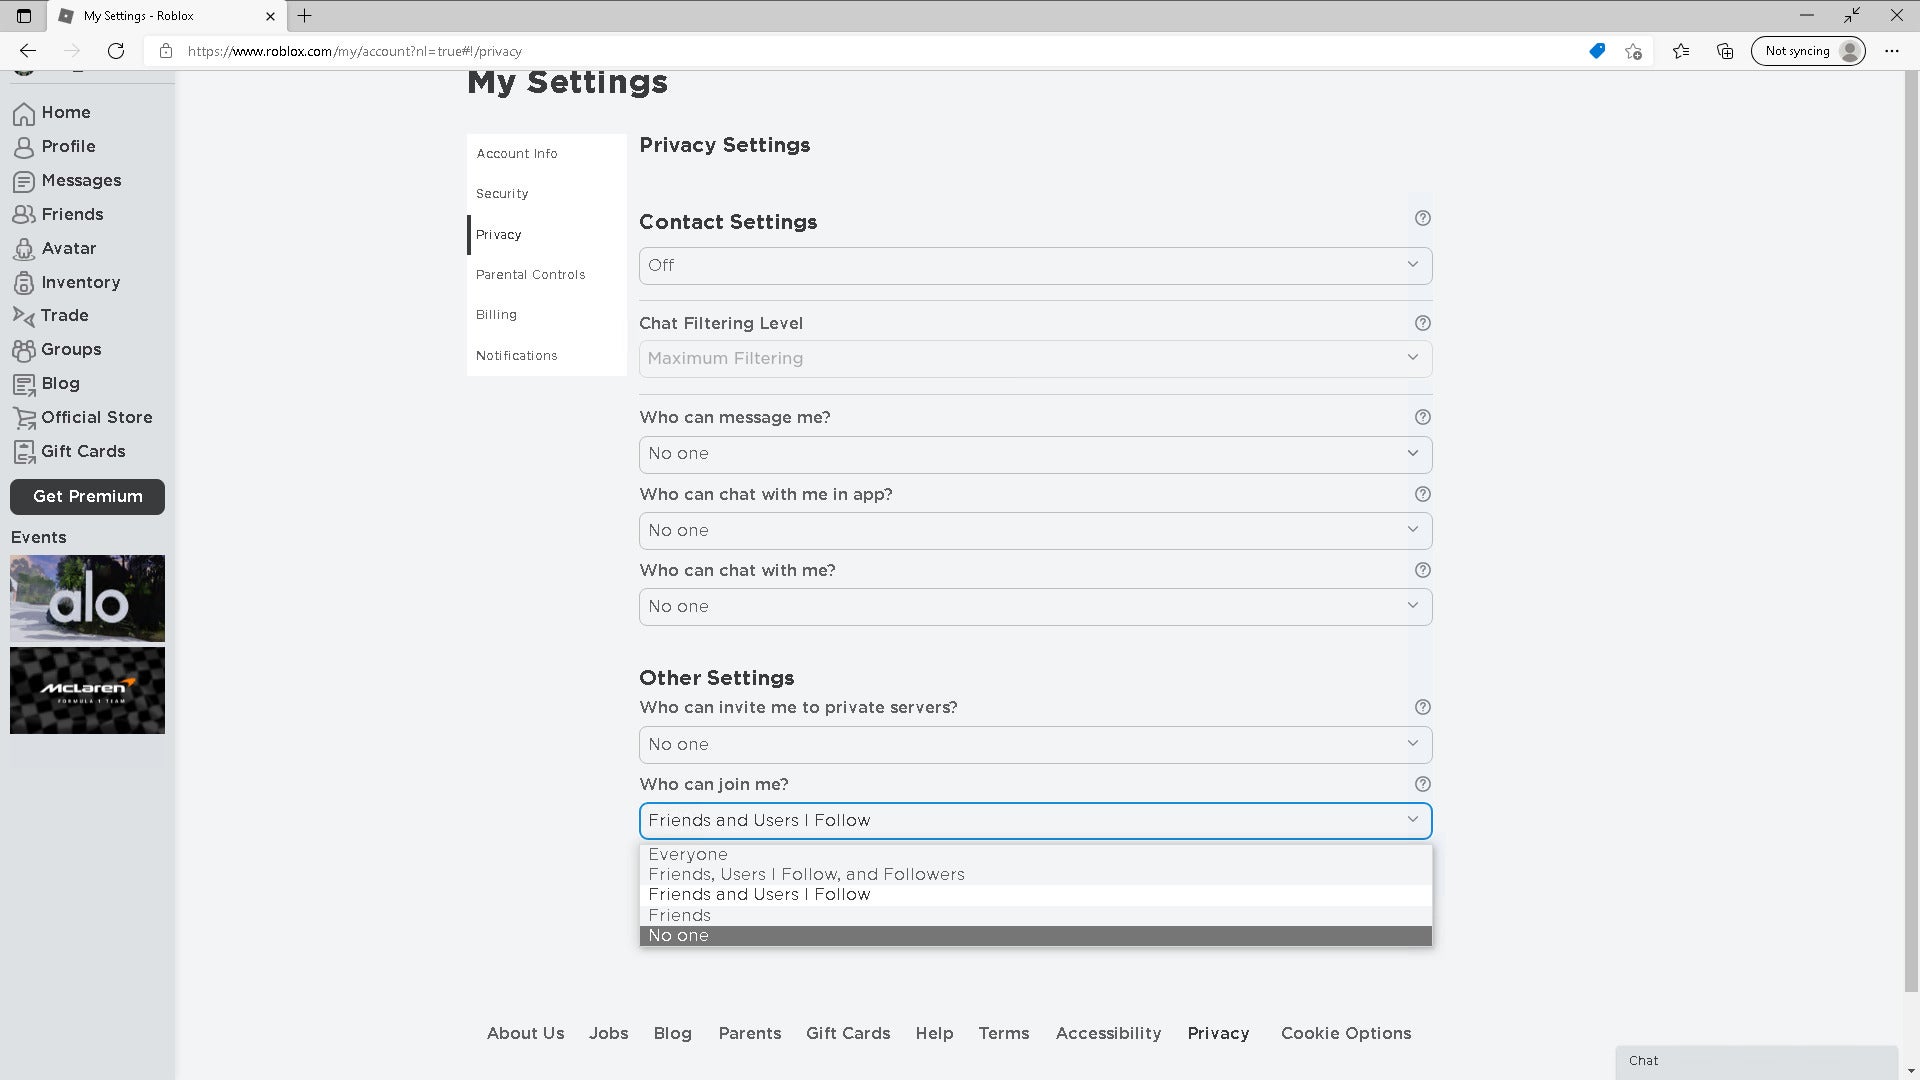
Under “Who can join me?”, open the pull-down and select “No one”. If you play together as a family, you may wish to set this to “Friends”, instead.
Step
20Disable inventory viewing
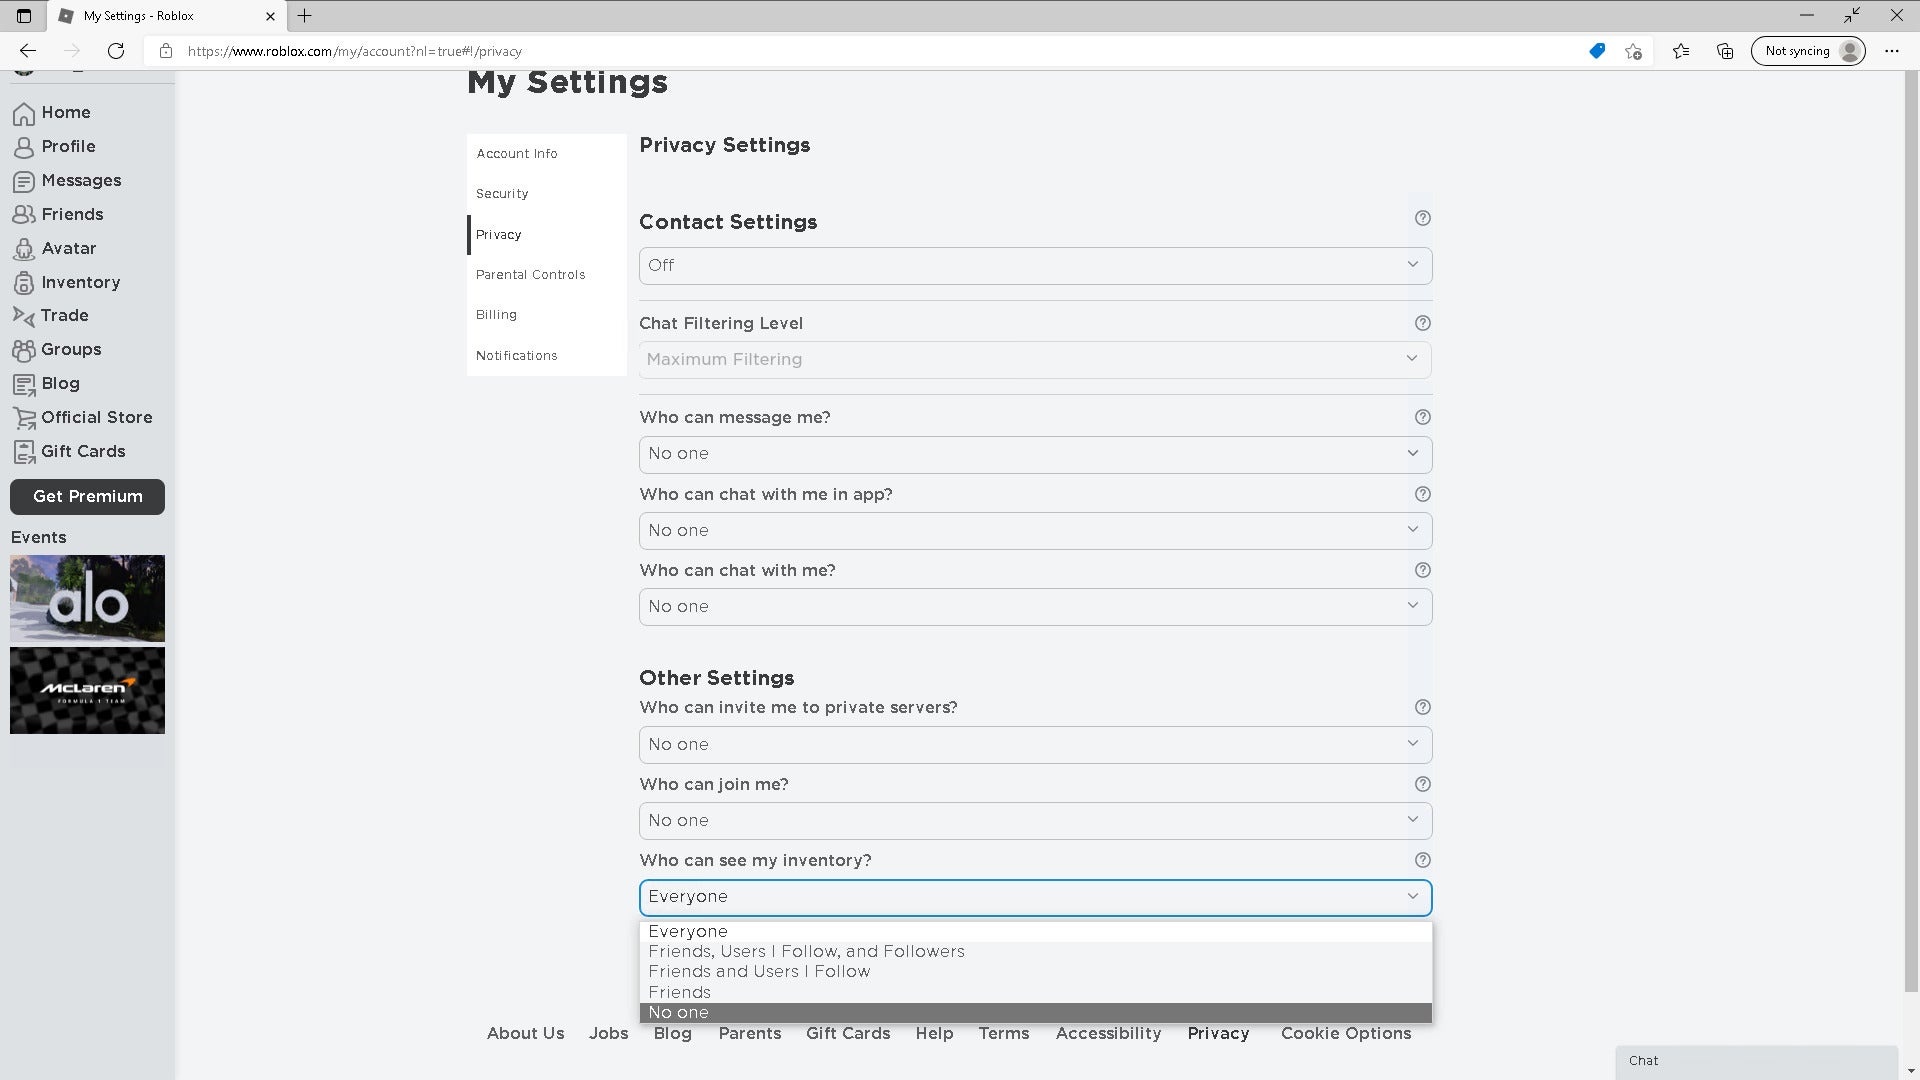
Under “Who can see my inventory?”, open the pull-down and select “No one”.
Step
21Select Parental Controls
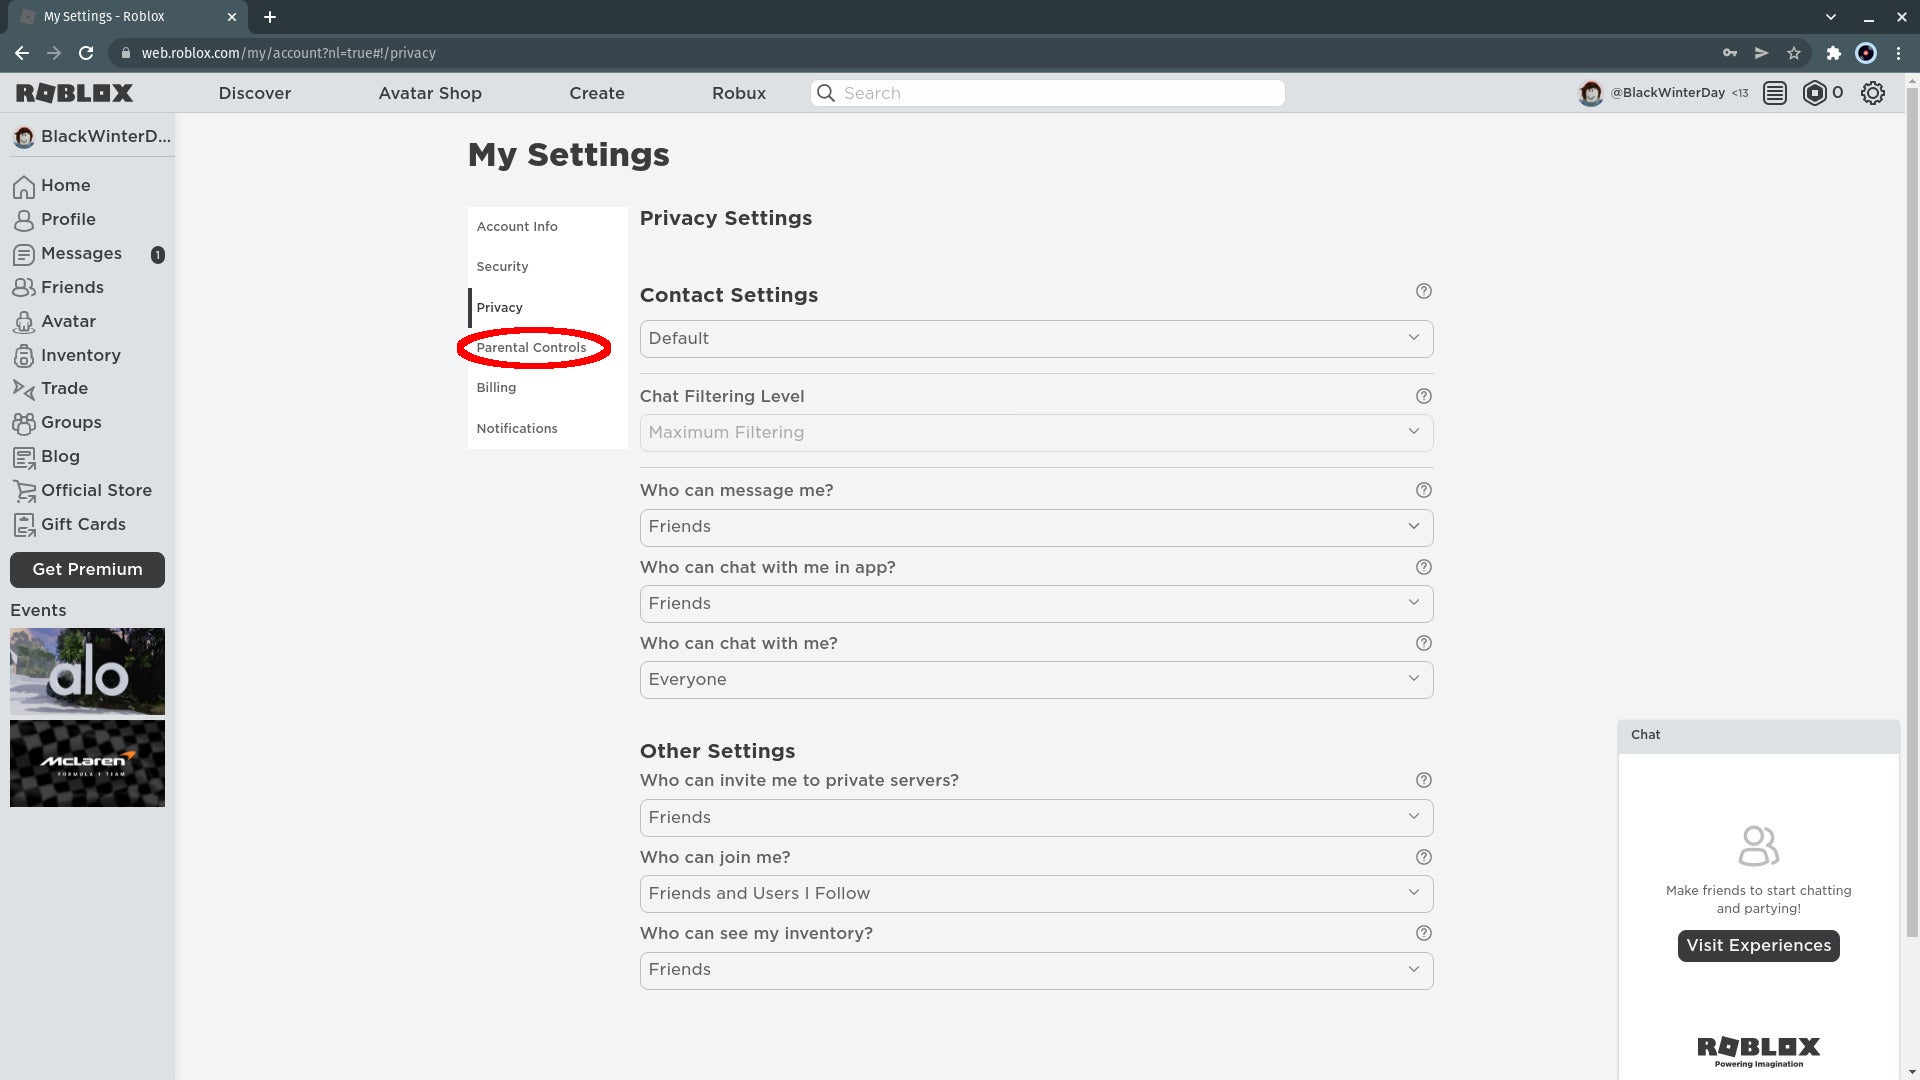
In the tab bar to the left of this settings page, select Parental Controls.
Step
22Enable a Parent PIN
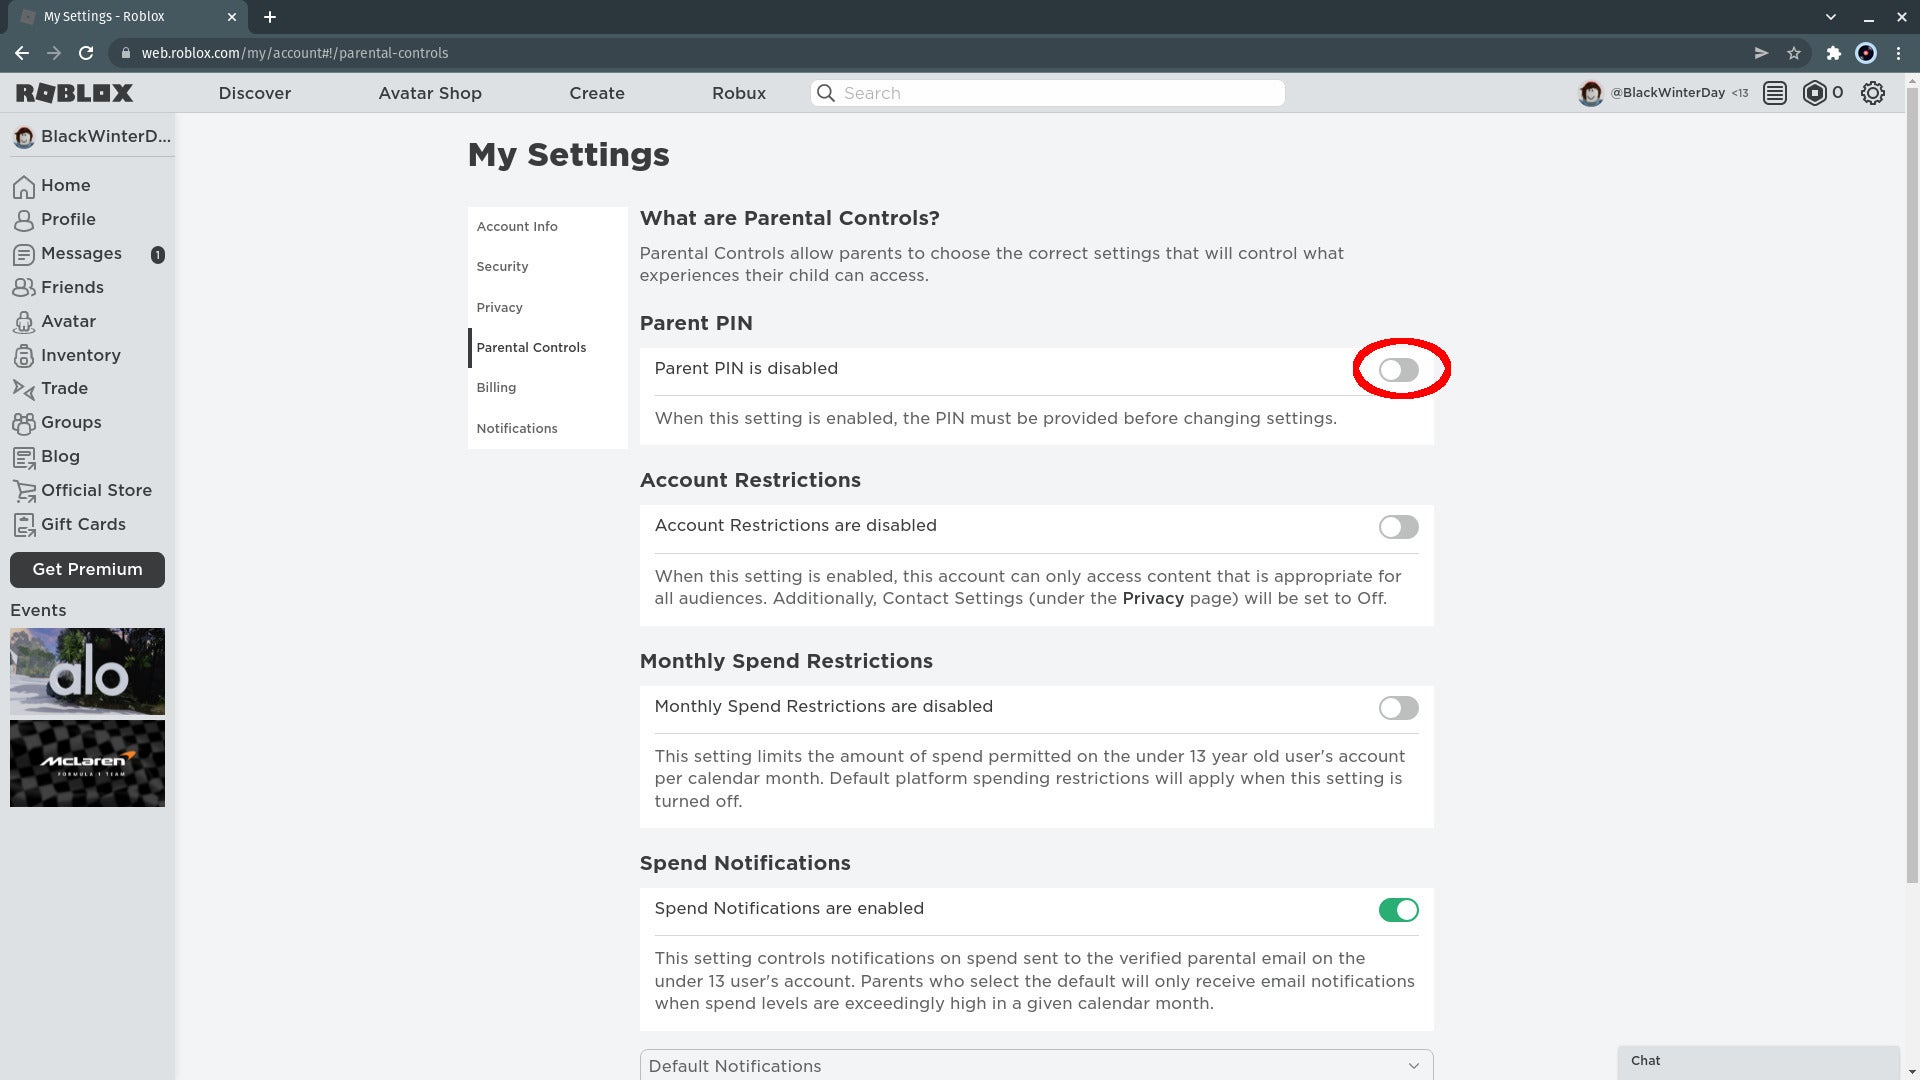
Click the slider button next to where it says “Parent PIN is disabled”.
Step
23Create a PIN
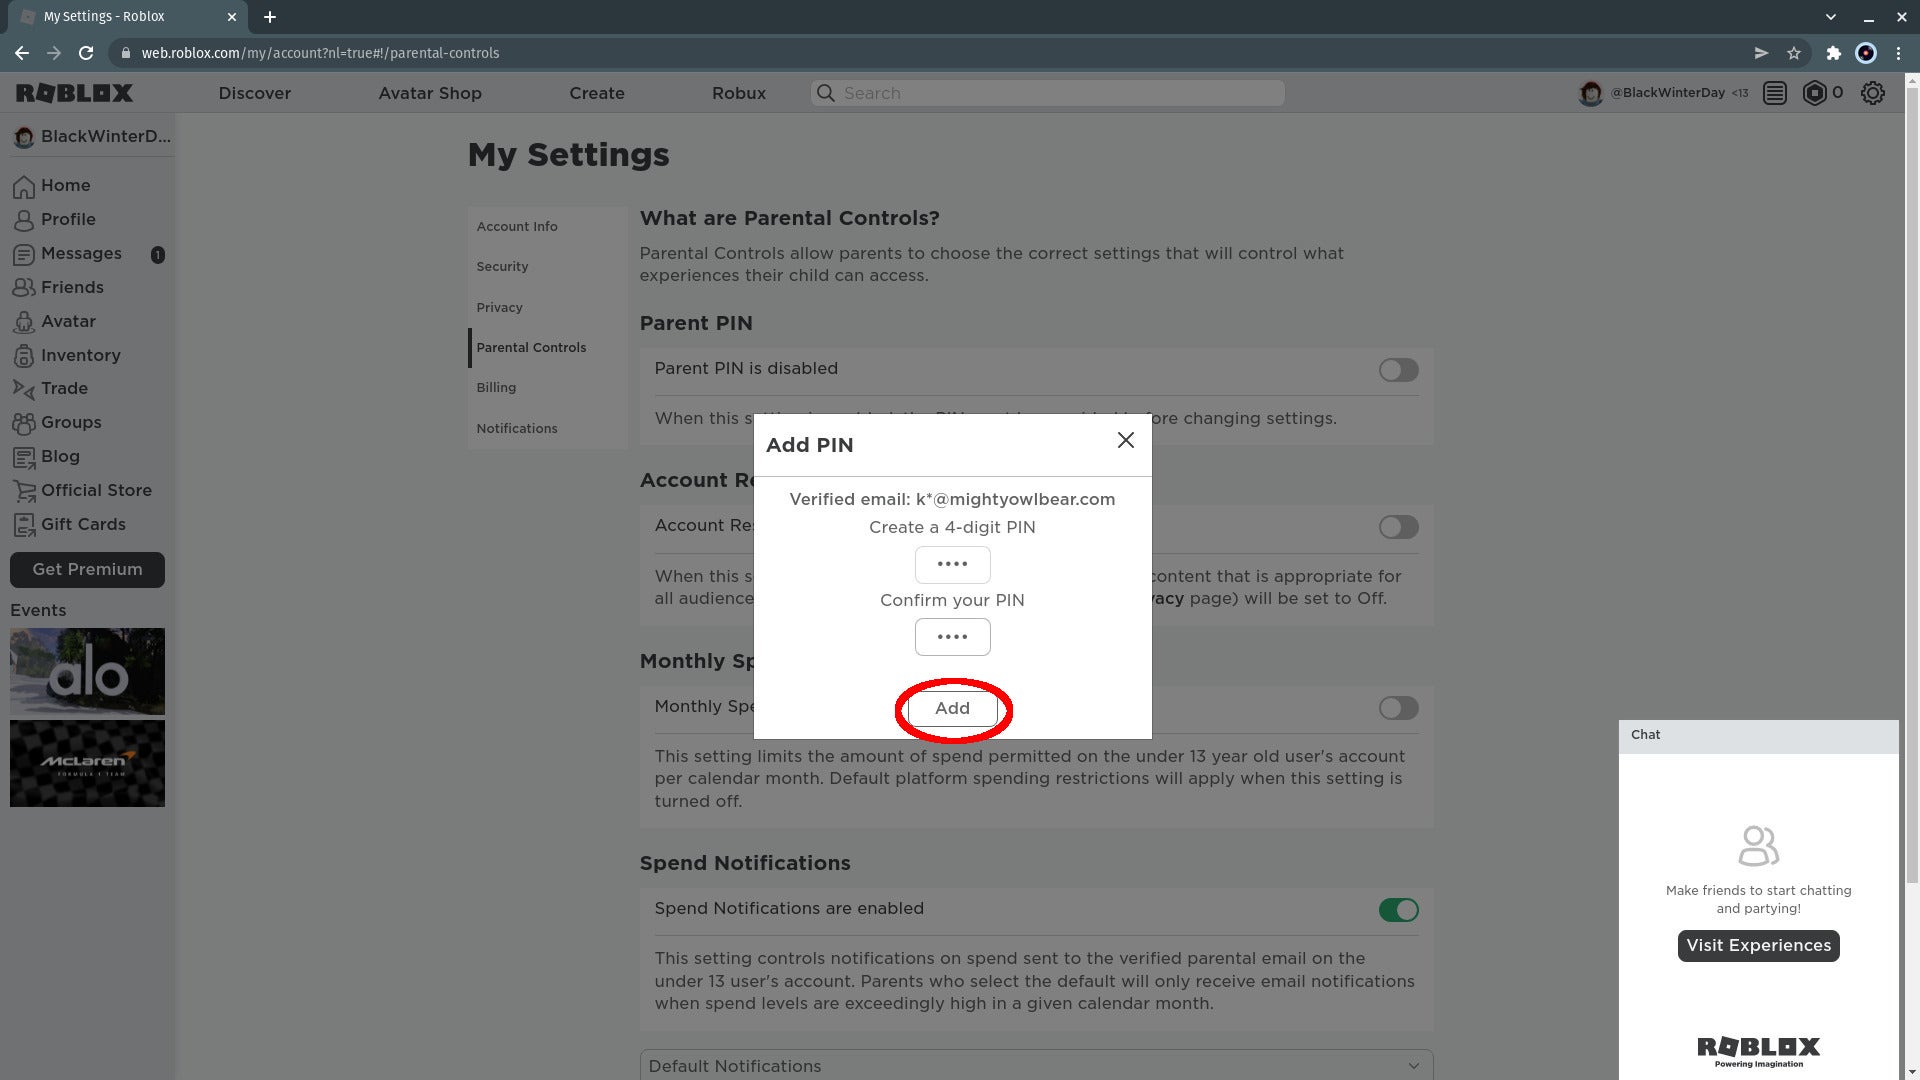
Set a four-digit number as your PIN and confirm it in the box below.
Step
24Click Add
Click the Add button. With a PIN set, no one who doesn’t have the code number will be able to change the settings on this Roblox account. Save the PIN in a password manager so you don’t forget it.
Step
25Click OK

A box will inform you of this. Click the OK button to clear it.
Step
26Enable Monthly Spend Restrictions
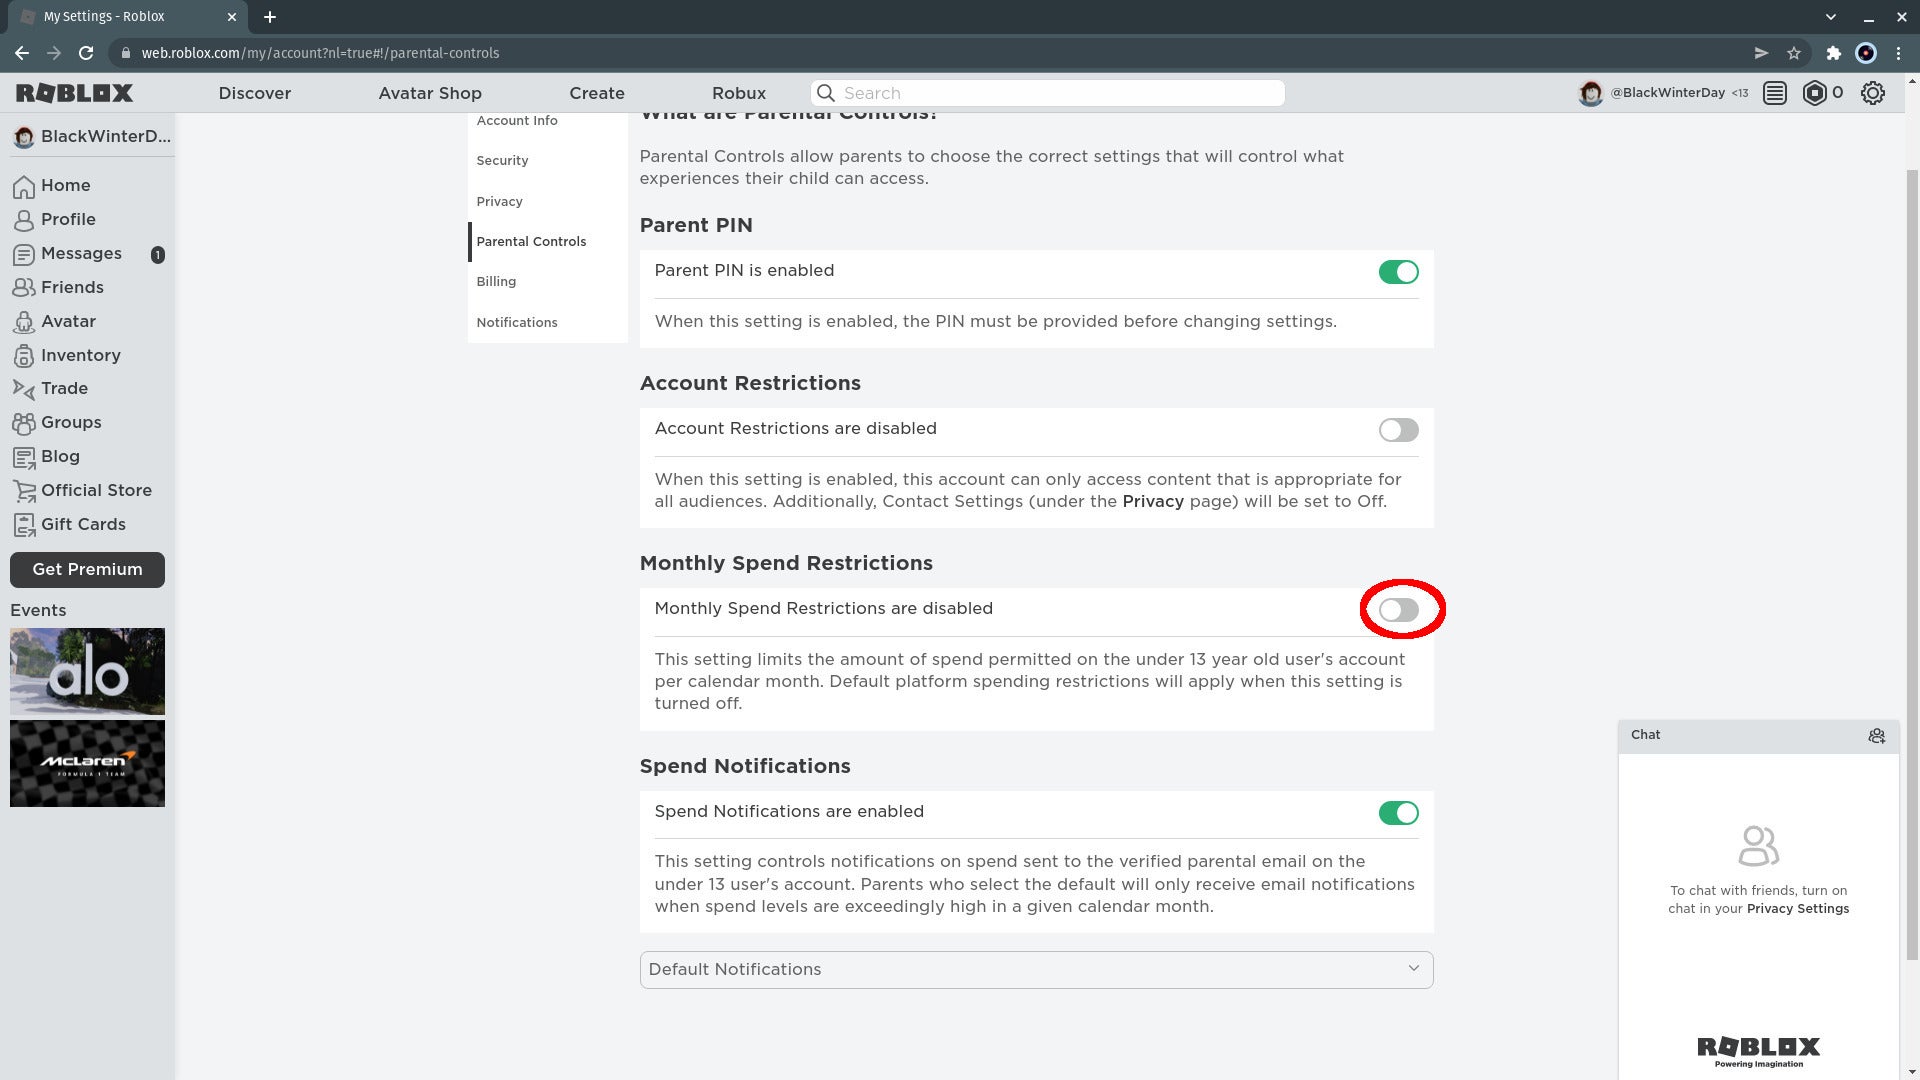
Unlike a over-13 account, you can configure spending restrictions for under-13s. Click on the slider marked “Monthly Spend Restrictions are disabled”.
Step
27Enter your PIN
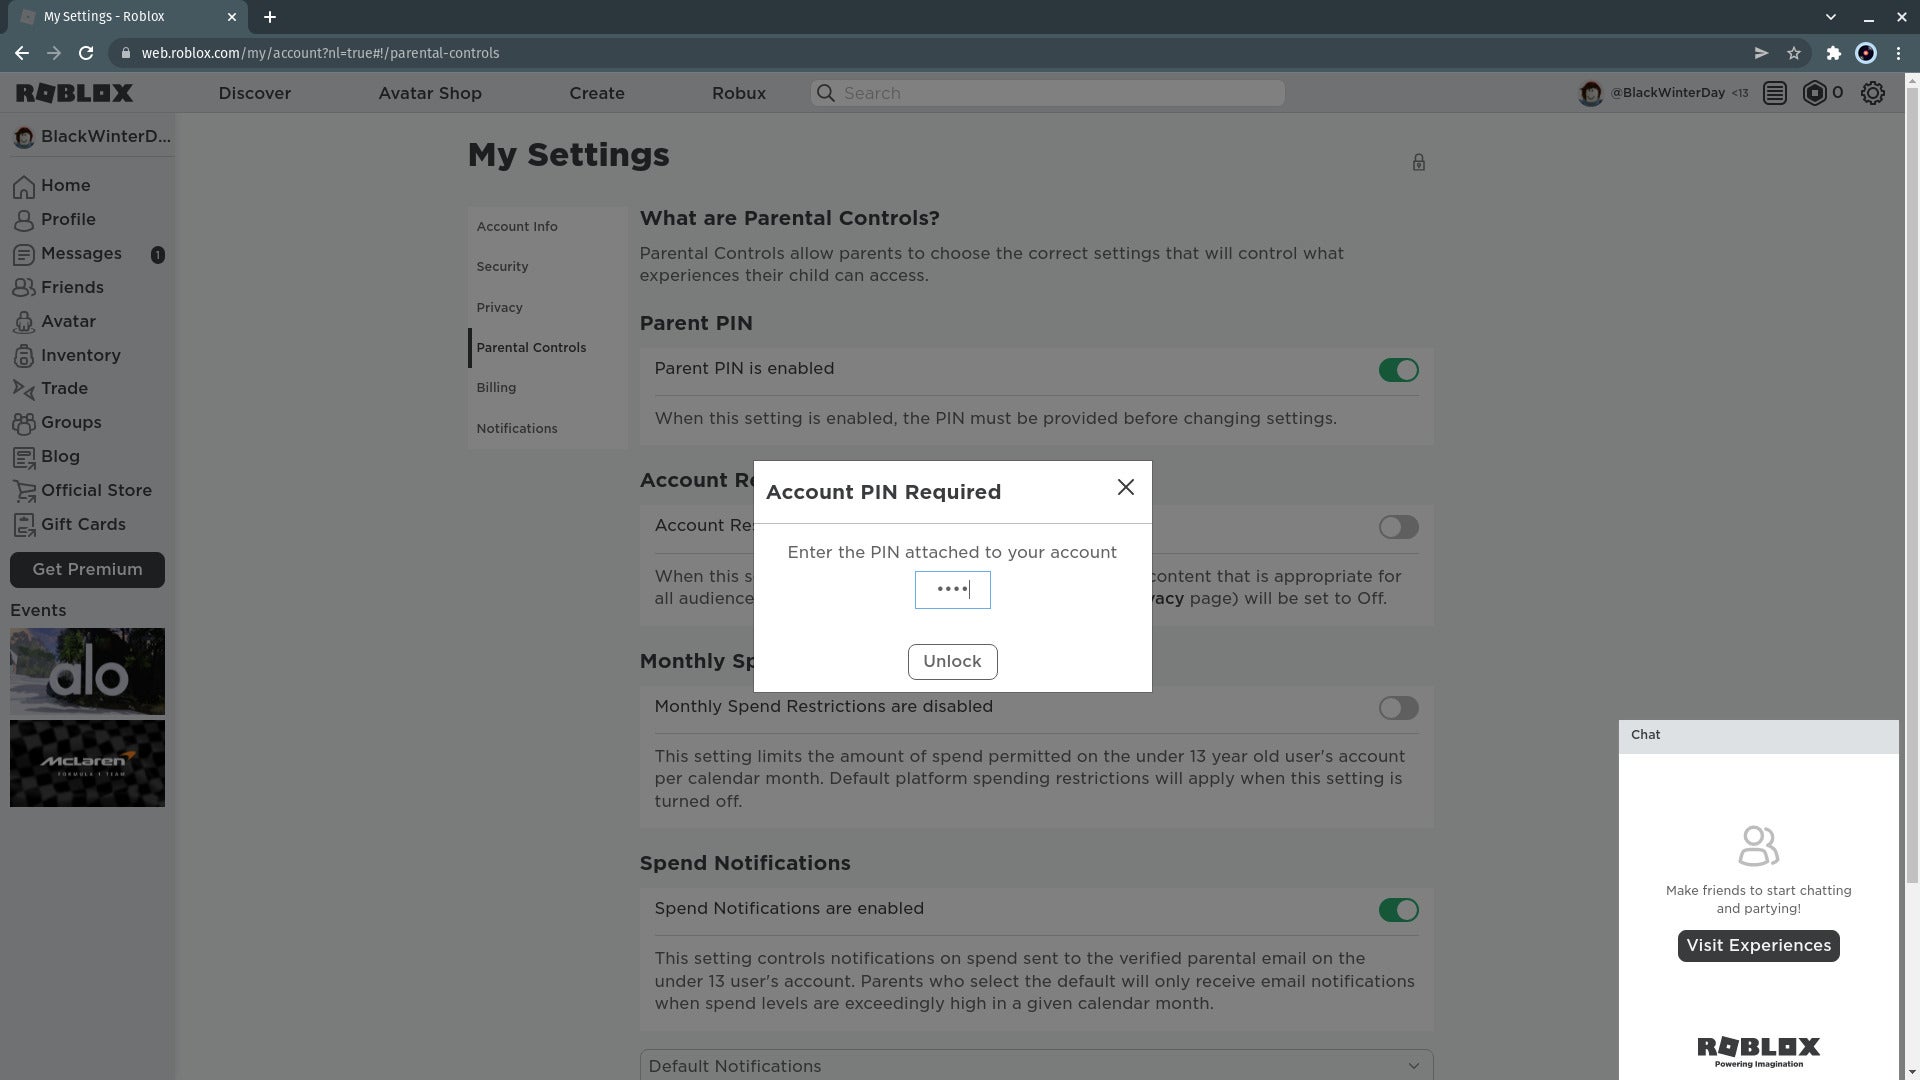
Because this is a settings change, you’ll be prompted to enter the PIN you just set.
Step
28Click Unlock
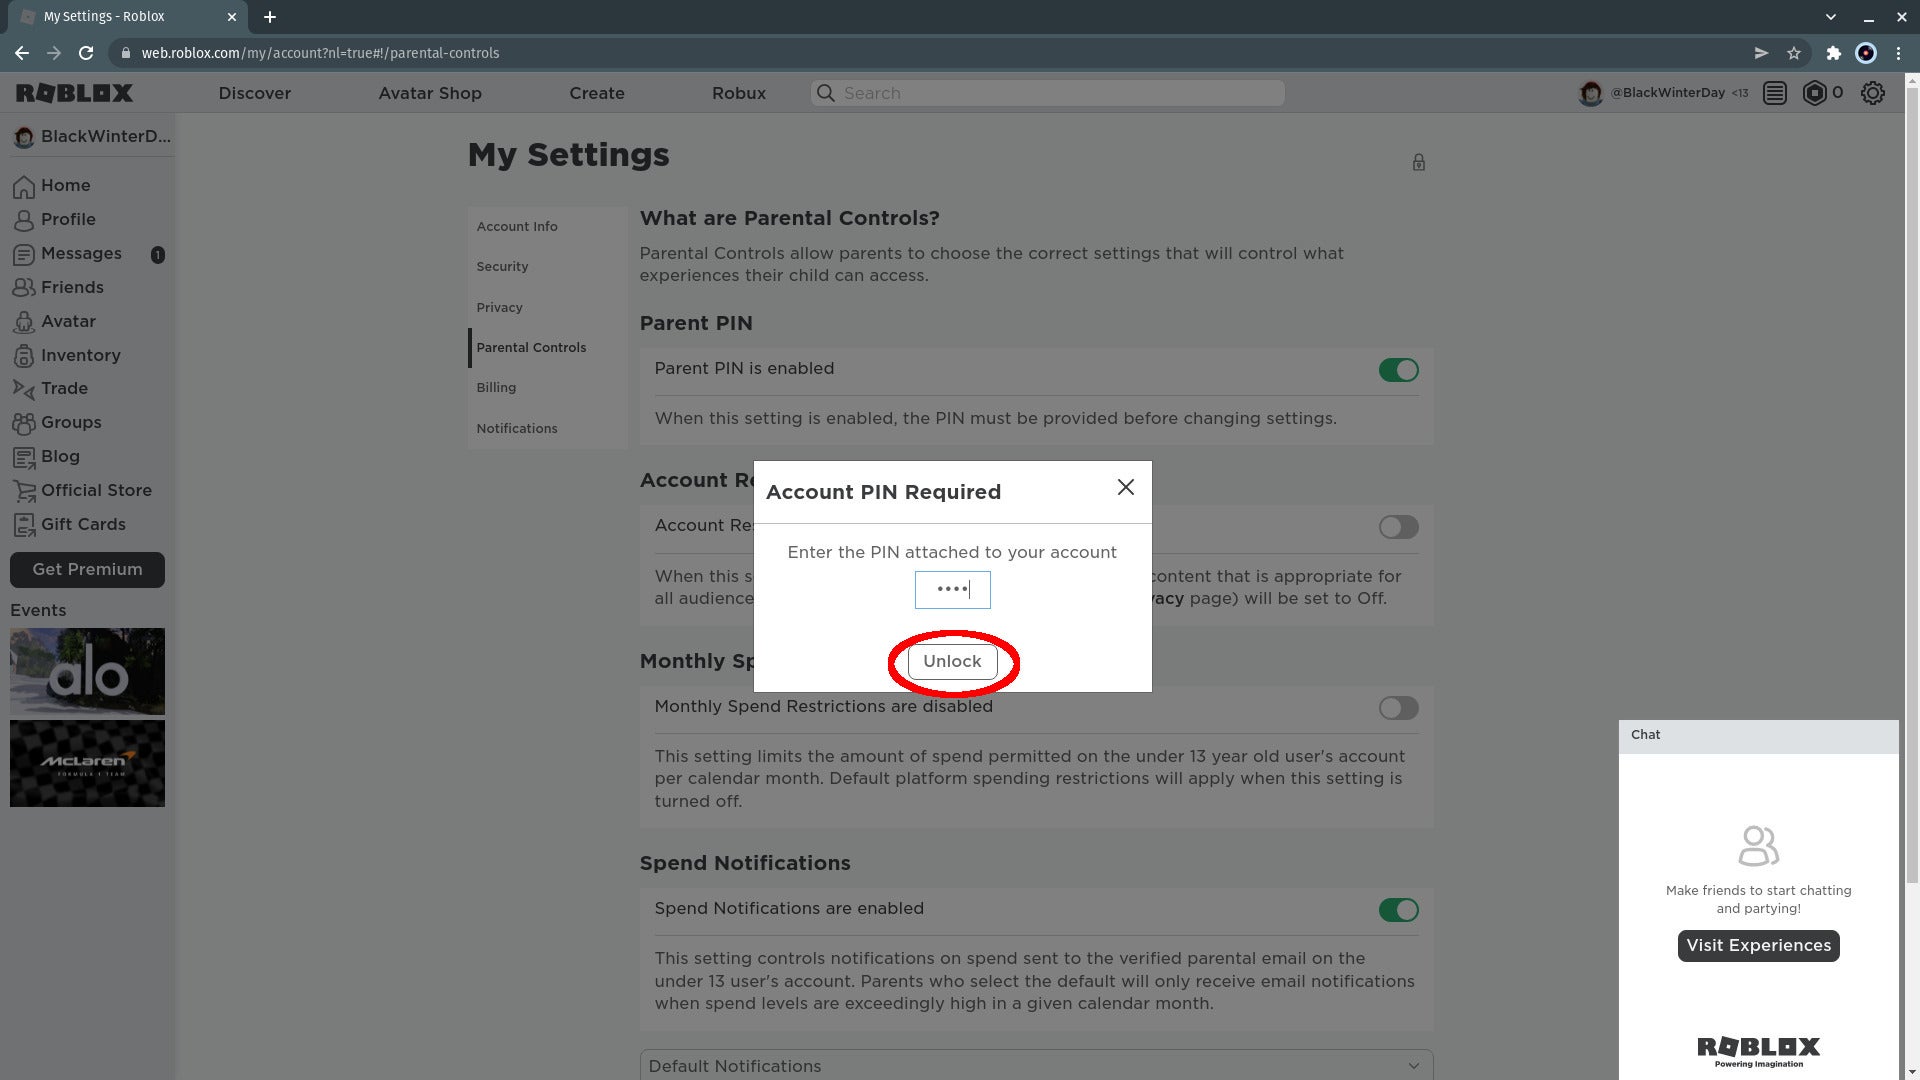
Click the Unlock button to change your settings.
Step
29Change the spending limit
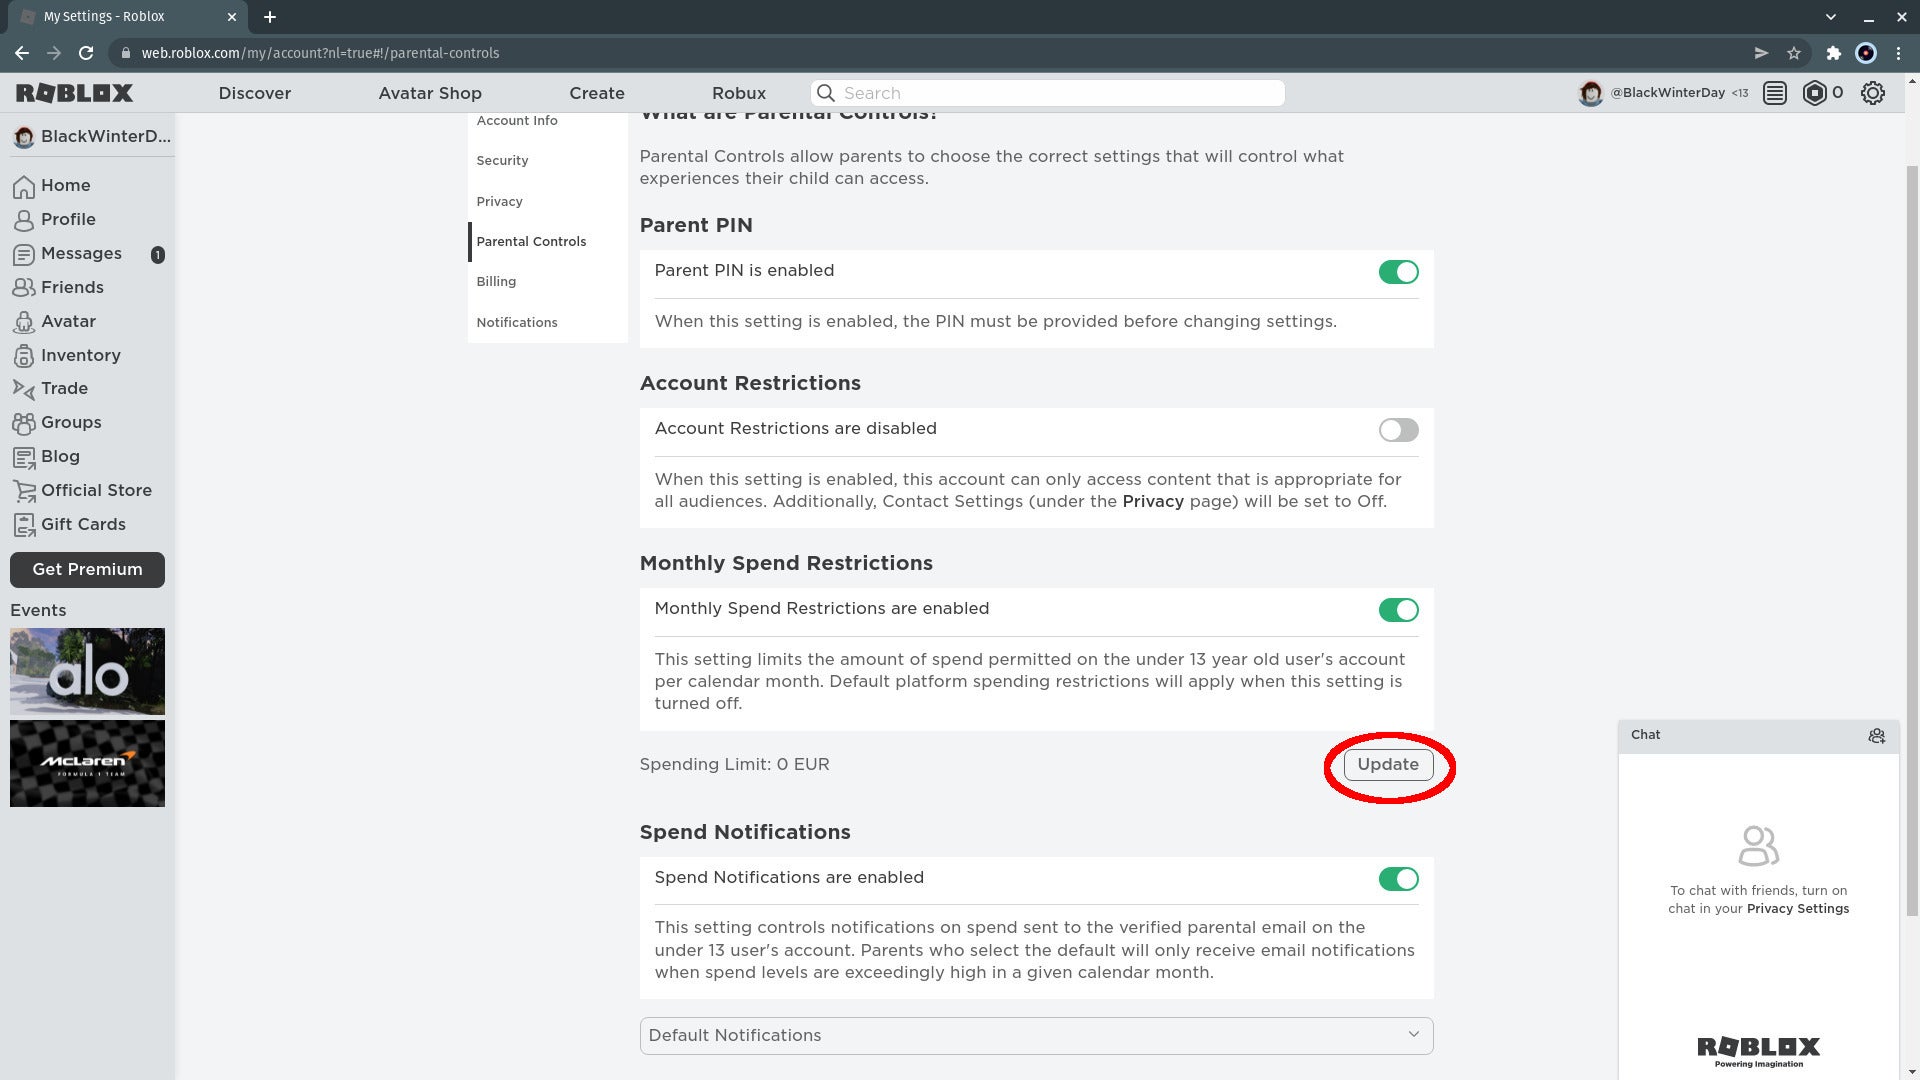
The default spending limit is £0. If you want to change that, click the Update button.
Step
30Enter a sum
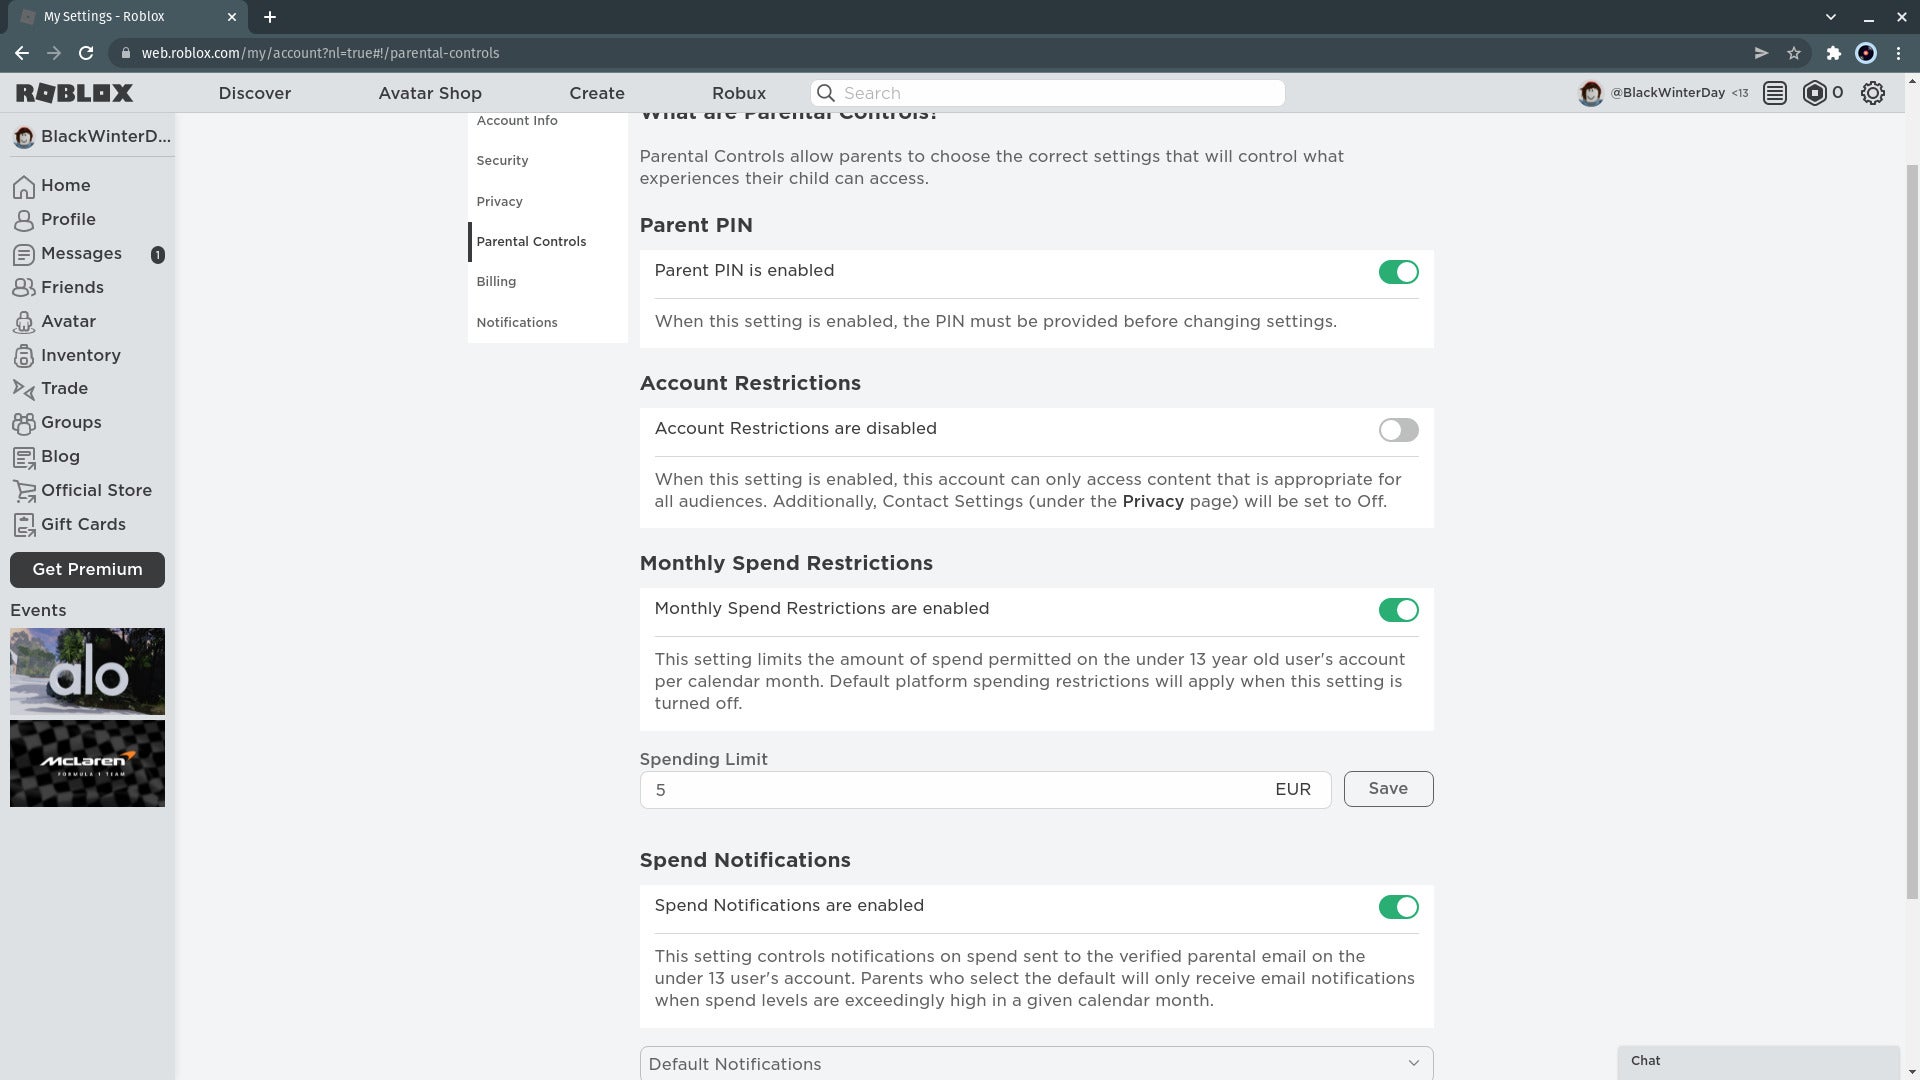
Decide how much you want to let you child spend every month and enter it in the box.
Step
31Click Save
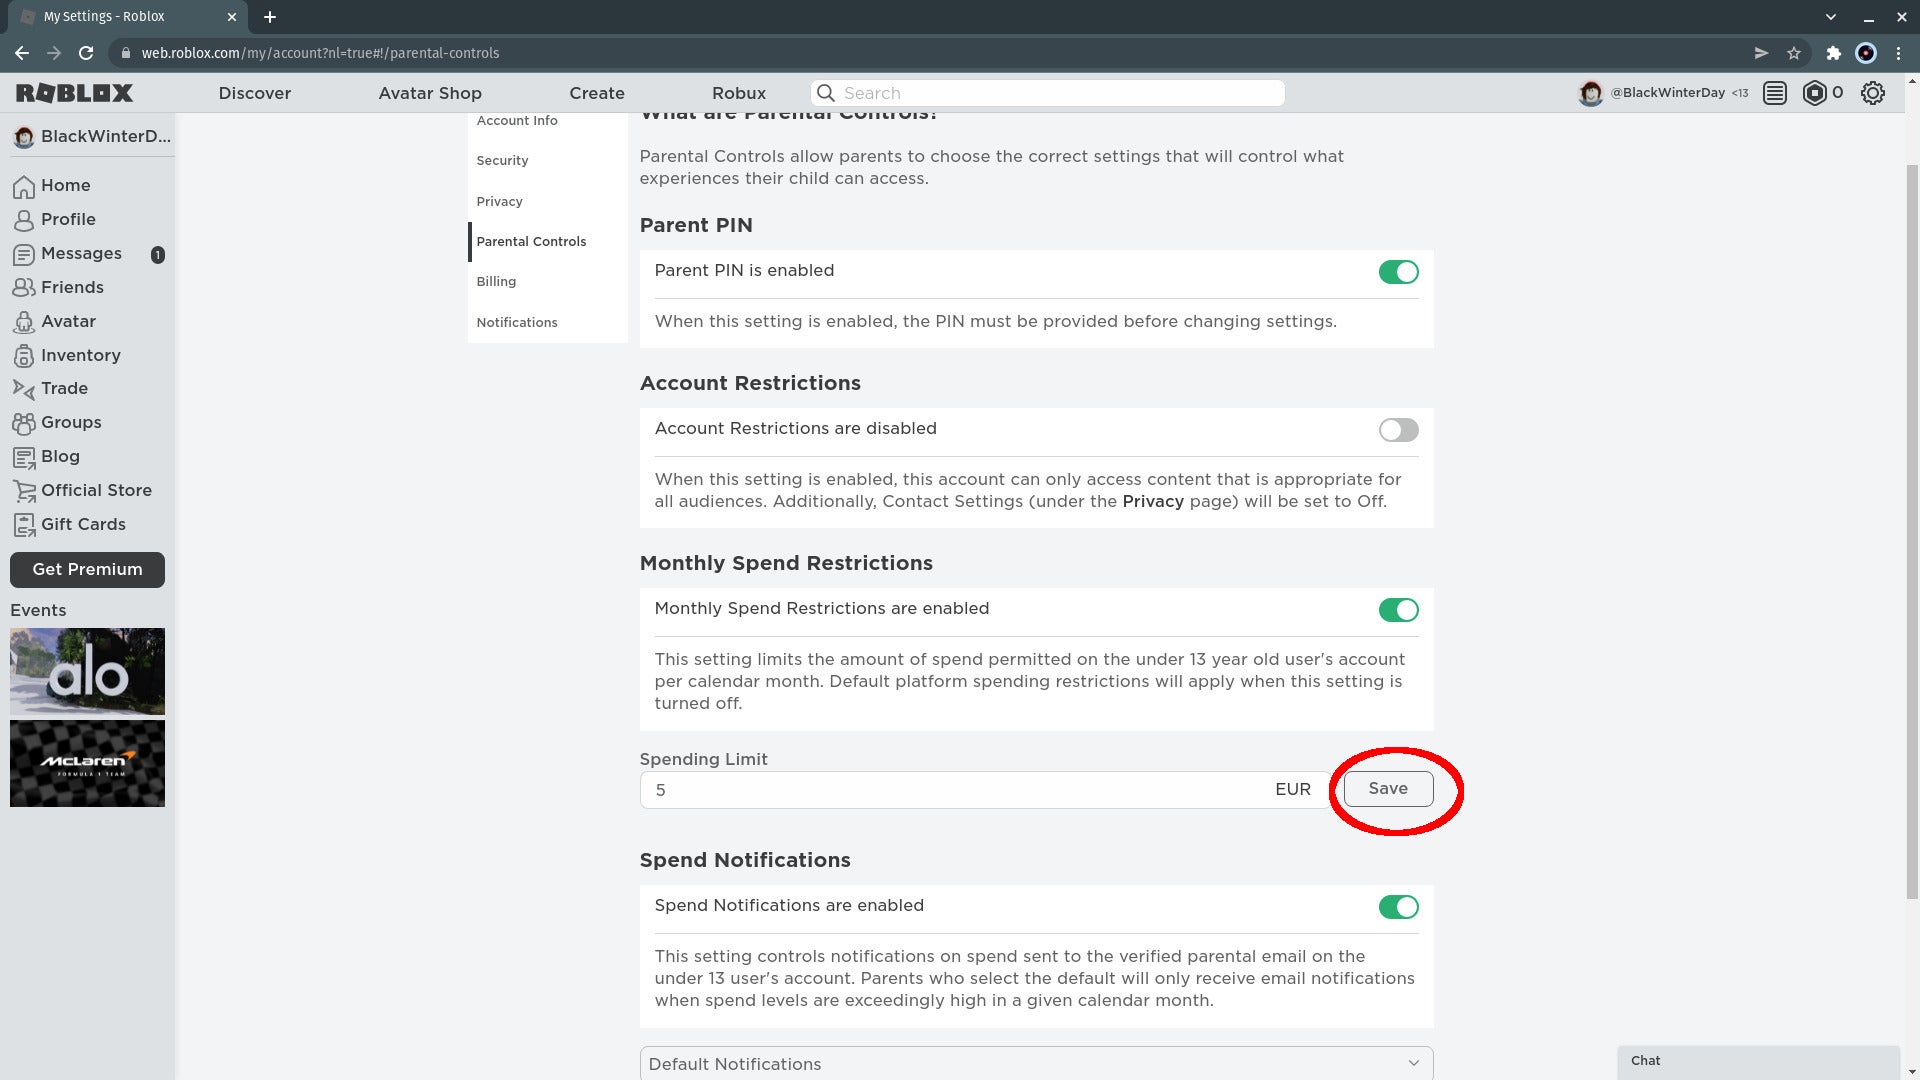
Click the Save button. A green bar will briefly appear at the top of the screen to tell you that your changes are saved.
Step
32Optional: Enable Account Restrictions
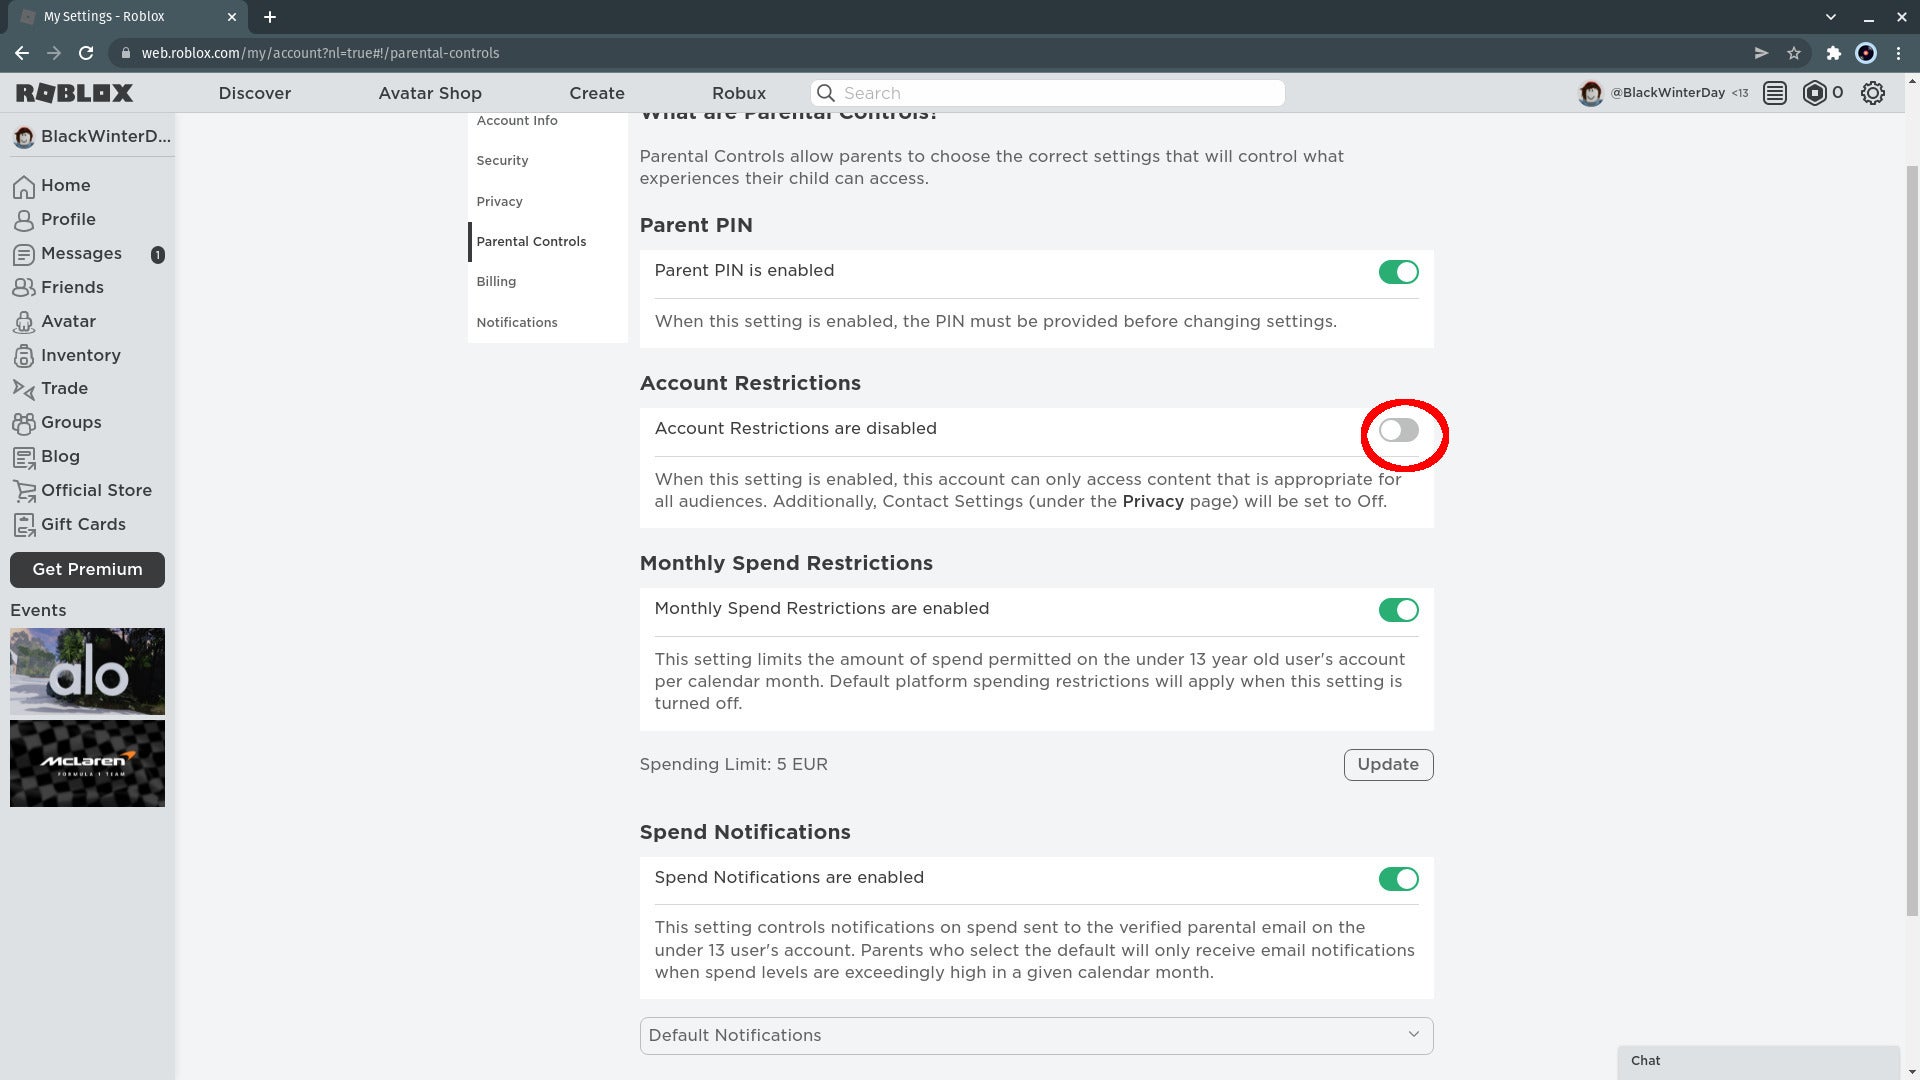
You can lock Roblox down to all-audiences content by clicking the slider next to Account Restrictions. This will disable direct messaging, which we already disabled in our Privacy settings, and also block a significant chunk of games in the system. It’s a good choice for the youngest and most easily distressed of children, but I generally recommend setting looser restrictions and playing together instead.
Kaspersky Home Security
Keep your online activity safe and private across multiple devices – without compromising speed.
Check out Kaspersky’s new security plans from just £10.99 per year
- Kaspersky
- money back guarantee
- from £10.99
Troubleshooting
It’s impossible to block individual Roblox experiences that you think are inappropriate for your child. However, to ensure that they only see the most locked-down content on the platform, enable account restrictions (see Step 32), which will block most examples of militarism, combat and creepy/horror content.
Setting a new username on Roblox can take a while, as there are millions of extant Roblox accounts, and anything that sounds rude, like a real name, or like a place name gets nixxed by Roblox’s privacy protection filter. Your punctuation options are also limited to an underscore. Try adding numbers to the beginning or end if the name you want is taken.
If you accidentally entered an the wrong year, creating an over-13 account for an under-13, you can edit the user’s birthday on the Roblox account settings page. If the wrong age has been set for an under-13, you’re not allowed to change it until they age up to thirteen, due to Roblox’s legal obligations.
You might like…


Editorial independence
Editorial independence means being able to give an unbiased verdict about a product or company, with the avoidance of conflicts of interest. To ensure this is possible, every member of the editorial staff follows a clear code of conduct.
Professional conduct
We also expect our journalists to follow clear ethical standards in their work. Our staff members must strive for honesty and accuracy in everything they do. We follow the IPSO Editors’ code of practice to underpin these standards.