How to delete your search history on Facebook

You might clear your Google search history on a regular basis, but do you ever think about clearing your Facebook searches? Whether you’ve been checking up on an ex or researching a birthday gift for a nosy friend, here’s how to hide your search history on Facebook.
Deleting your Facebook search history is a relatively quick and straightforward process. This guide will cover how to clear your history fully, but if you’re looking to delete only your most embarrassing searches scroll to the bottom of this page to learn how to hide specific ones.
One benefit to having items in your search history is that it makes finding people, pages and things you’ve looked for in the past a lot faster the second time around, so just be aware you’ll be losing that.
If this isn’t a problem for you, keep reading to learn how to clear your search history on Facebook…
What you’ll need:
- A Facebook account
- Previous searches
The Short Version
- Open Facebook
- Click the search bar
- Click ‘Edit’
- Hit ‘Clear Searches’
How to delete your search history on Facebook
Step
1Open Facebook

We’ll be clearing our search history in the desktop browser version of Facebook.

Step
2Click on the search bar

This can be found in the top left corner.

Step
3Click Edit

You can also hit the X next to recent searches to delete individual searches at this stage.

Step
4Hit Clear Searches
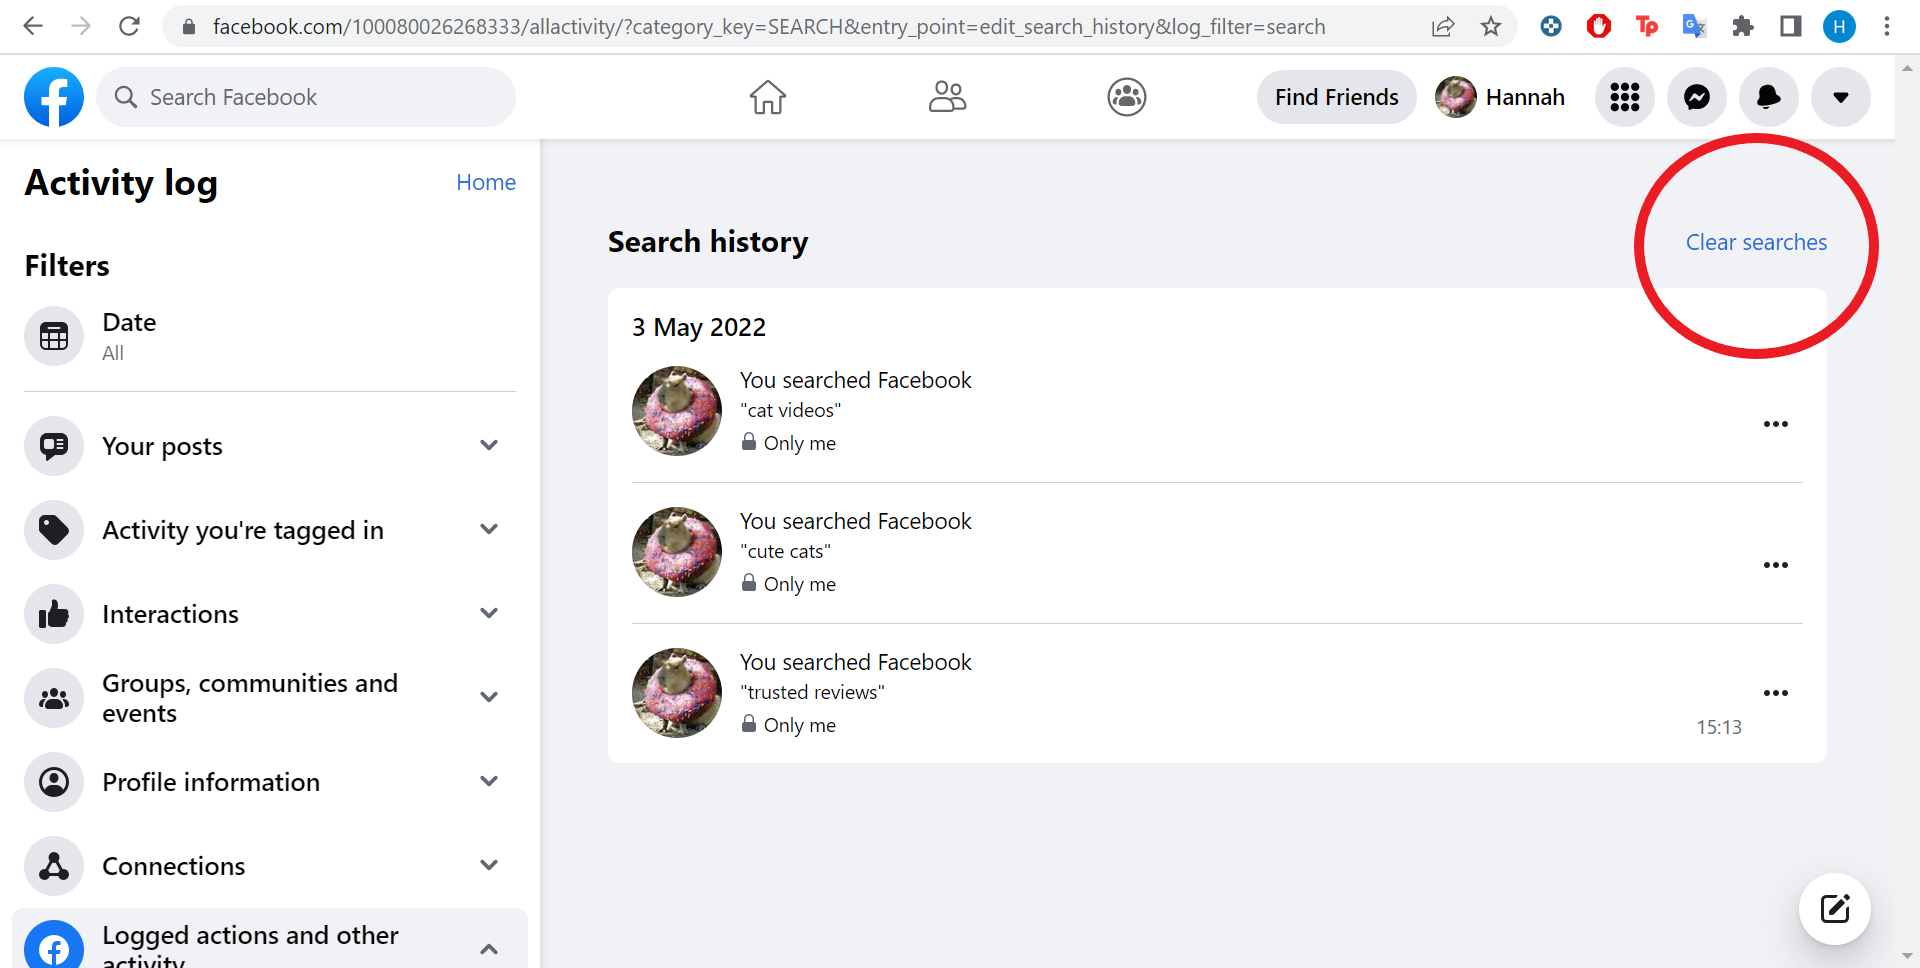
This will delete your entire Facebook search history. You can also filter your searches by date and delete individual items using the three dot icon beside each item.

Troubleshooting
Yes, you can. To delete individual items, simply follow the first three steps in this guide but instead of clicking ‘Clear Searches’, click on the three dot icon next to anything you’ve searched. Then just click ‘Delete’ to get rid of it.
Your search history is private, meaning only you can see it. However, if someone has access to your device or account, they may also be able to see what you’ve been searching.


