
Although most washing machine vendors will offer a cheap installation service, with the removal of your old machine, there are times when you may have to do the job yourself. Whether you’re moving house, have inherited a new machine from a friend or just want to save a bit of cash, here’s how to install a washing machine.
If you have an old washing machine to remove, then follow my guide on how to disconnect a washing machine. Keep a spare towel to hand to mop up any drips of water.
Tools we used
Aside from your hands, the help of another person and some elbow grease, you may need a few tools to complete this job. We used:
- An adjustable spanner
- Flat head screwdrive
- Washing machine water hose
Short version
- Remove the transit bolts
- Attach the water hose to the washing machine
- Attach the water hose to the tap
- Test the water connection
- Plug in the washing machine
- Connect the waste pipe
- Level the washing machine
Step
1Remove the transit bolts
Once you’ve removed the washing machine from its packaging, including taking it off its polystyrene base, you’re ready to get started. Make sure that your washing machine is close to where it has to go, but don’t push it into place yet.
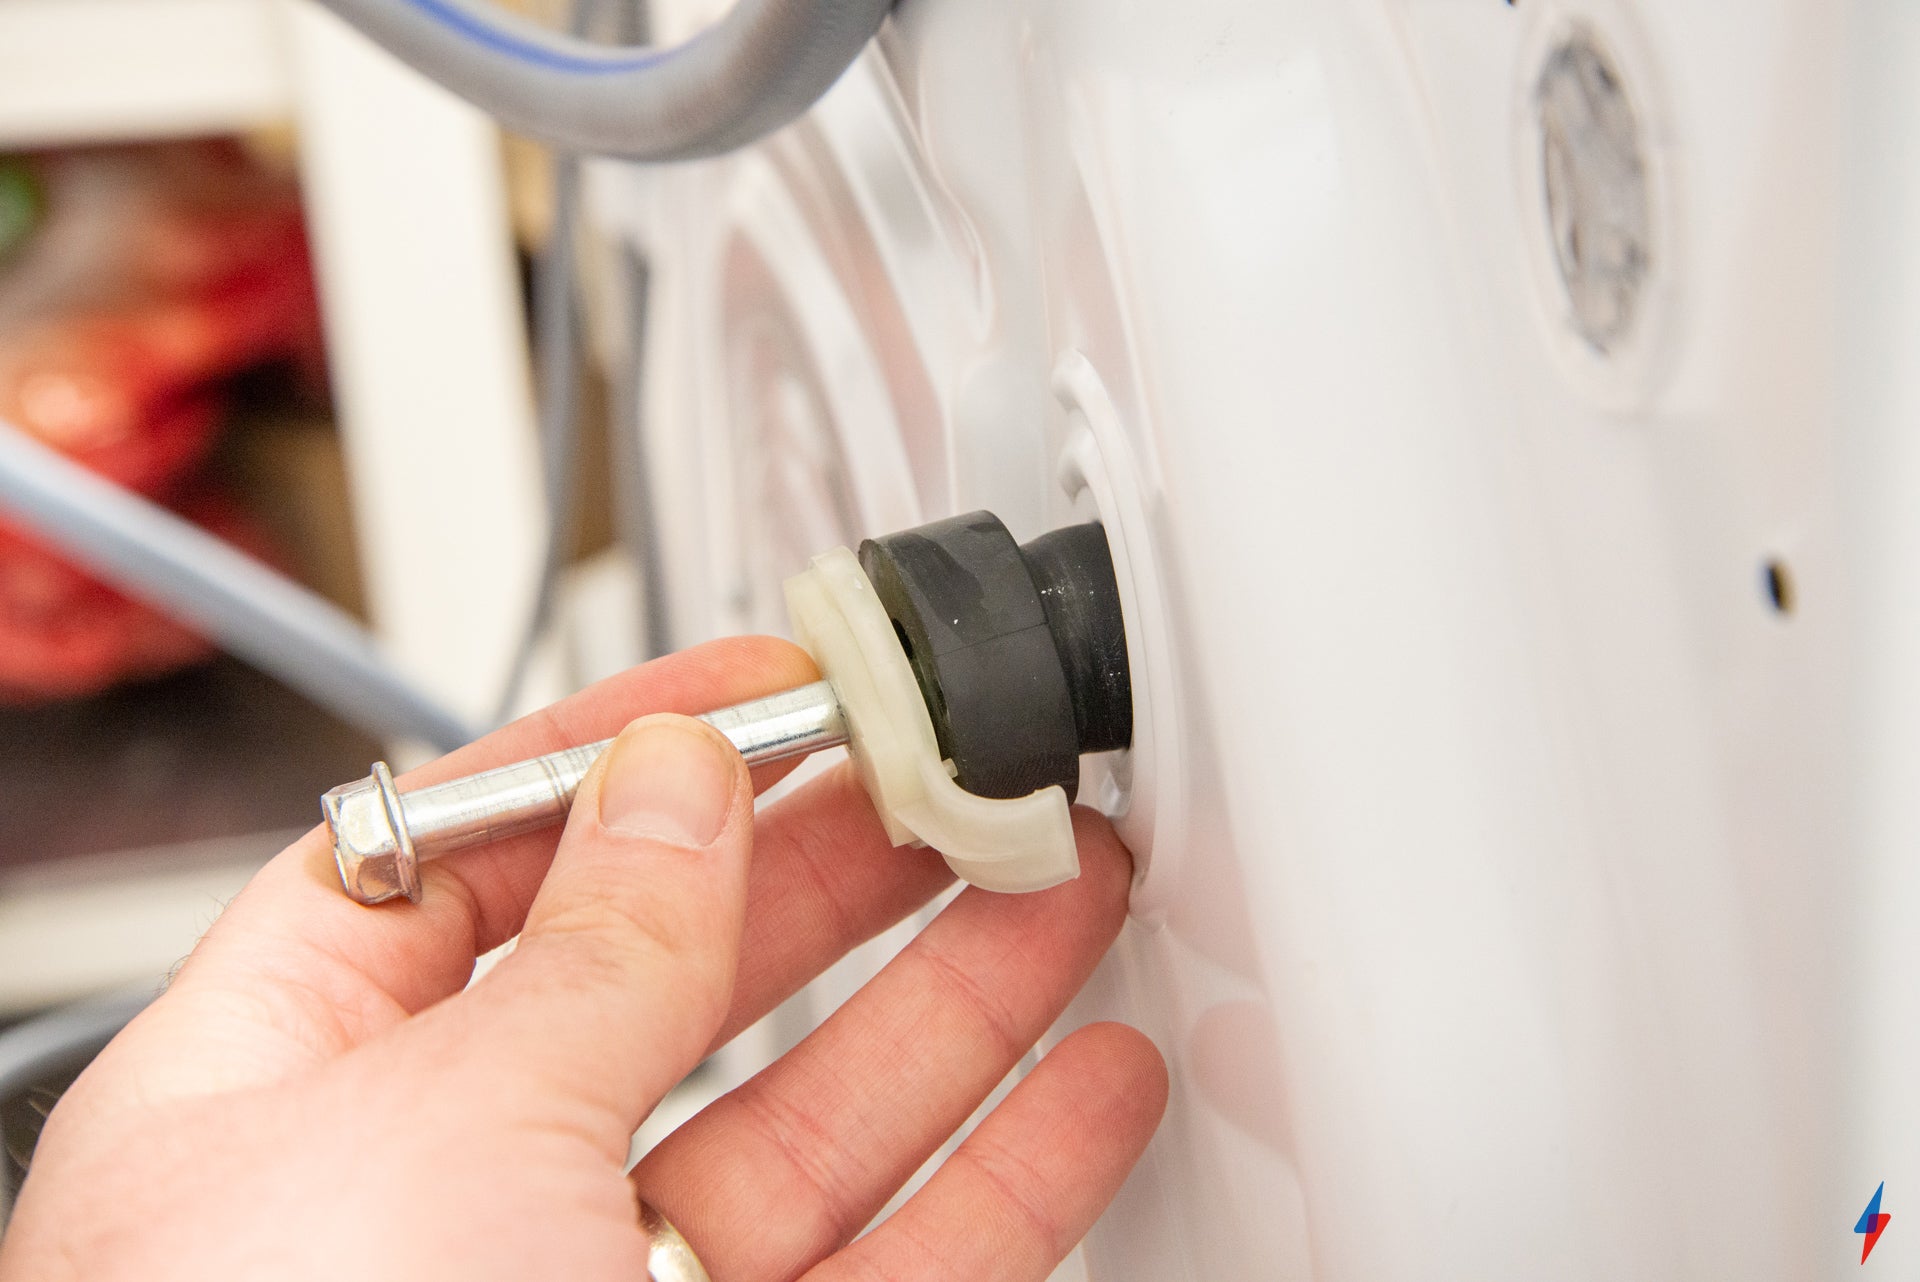
At the back of your new washing machine, you’ll see up to five transit bolts. These secure the drum in place when the machine is transported and must be removed before you can use your new machine.
Some vendors provide a tool (this will be located inside the machine) for removing bolts, but others don’t, so you’ll need either an adjustable spanner or spanner set to hand. Using the tool or your spanner, undo the bolts at the rear.
You’ll need quite a lot of force to get started, and you’ll have to keep turning them until the bolts become loose. You can then pull out the large plastic plug and cylinder. These can be tough to remove, but a flat-head screwdriver can be used for leverage to get them out.
Manufacturers suggest that you keep the transport bolts in case you want to move your washing machine again, but they can be hard to get back in.
Some washing machines come with stick-on pads that go underneath the washing machine, and help keep it quiet. If yours ships with these, you’ll need to check the manual to find out where they attach and how.Step
2Attach the water hose to the washing machine
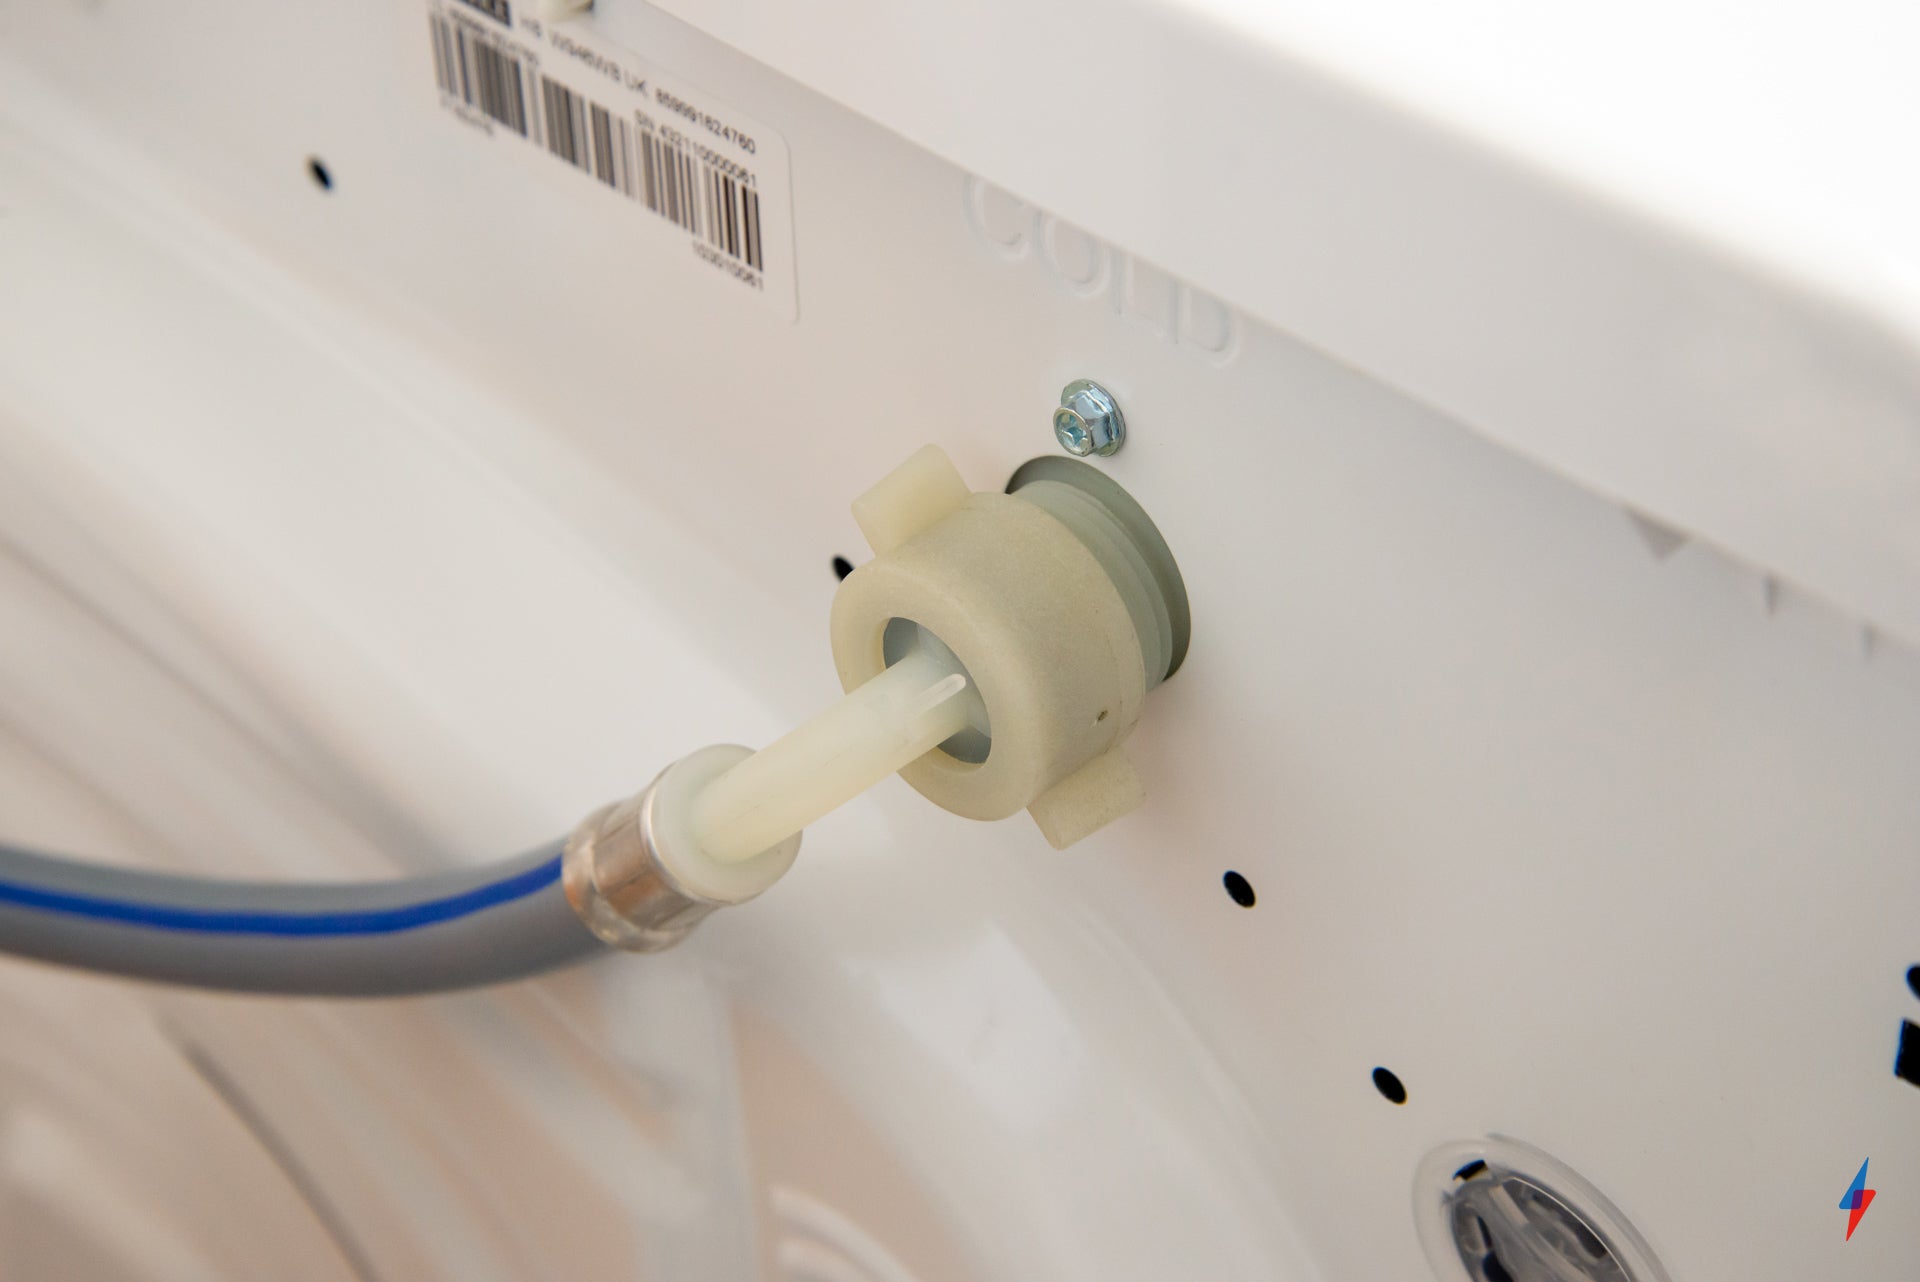
You can reuse an old water hose if you have a washing machine already. If not, then it’s likely that your new machine will have shipped with one, otherwise, you can pick up a new hose from a DIY shop.
All hoses are the same with screw connectors at either end. The angled connector is the one that should be screwed into the back of your washing machine; this lets you push the machine back to the wall without damaging the hose. The hose should be tightened by hand.Step
3Attach the water hose to the tap
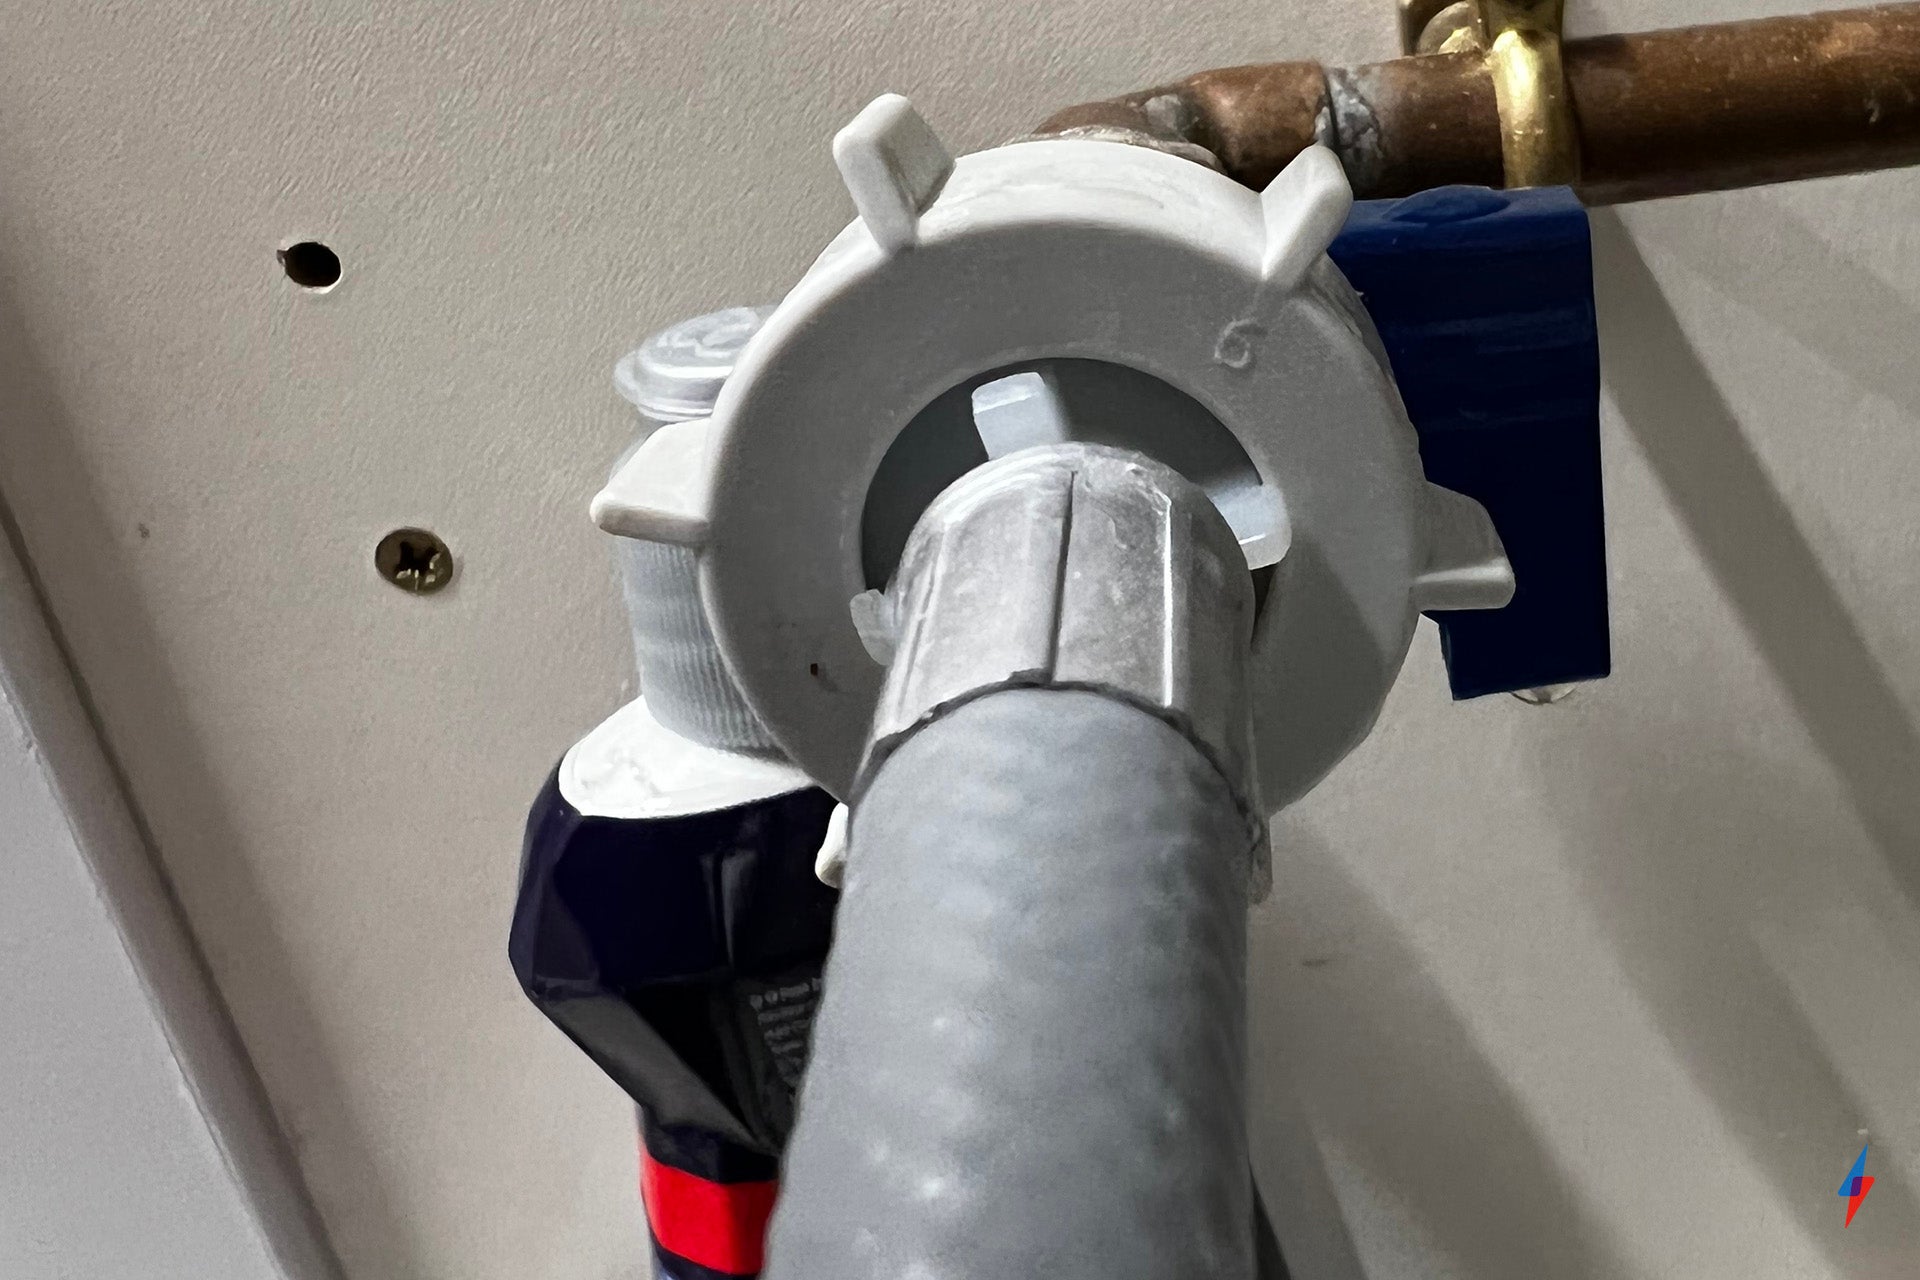
You’ll most likely need to feed the other end of the hose through a hole in your kitchen cupboards in order to reach the cold water tap. Screw the straight end of the hose into this tap, again tightening by hand until it’s secure.
Step
4Test the water connection
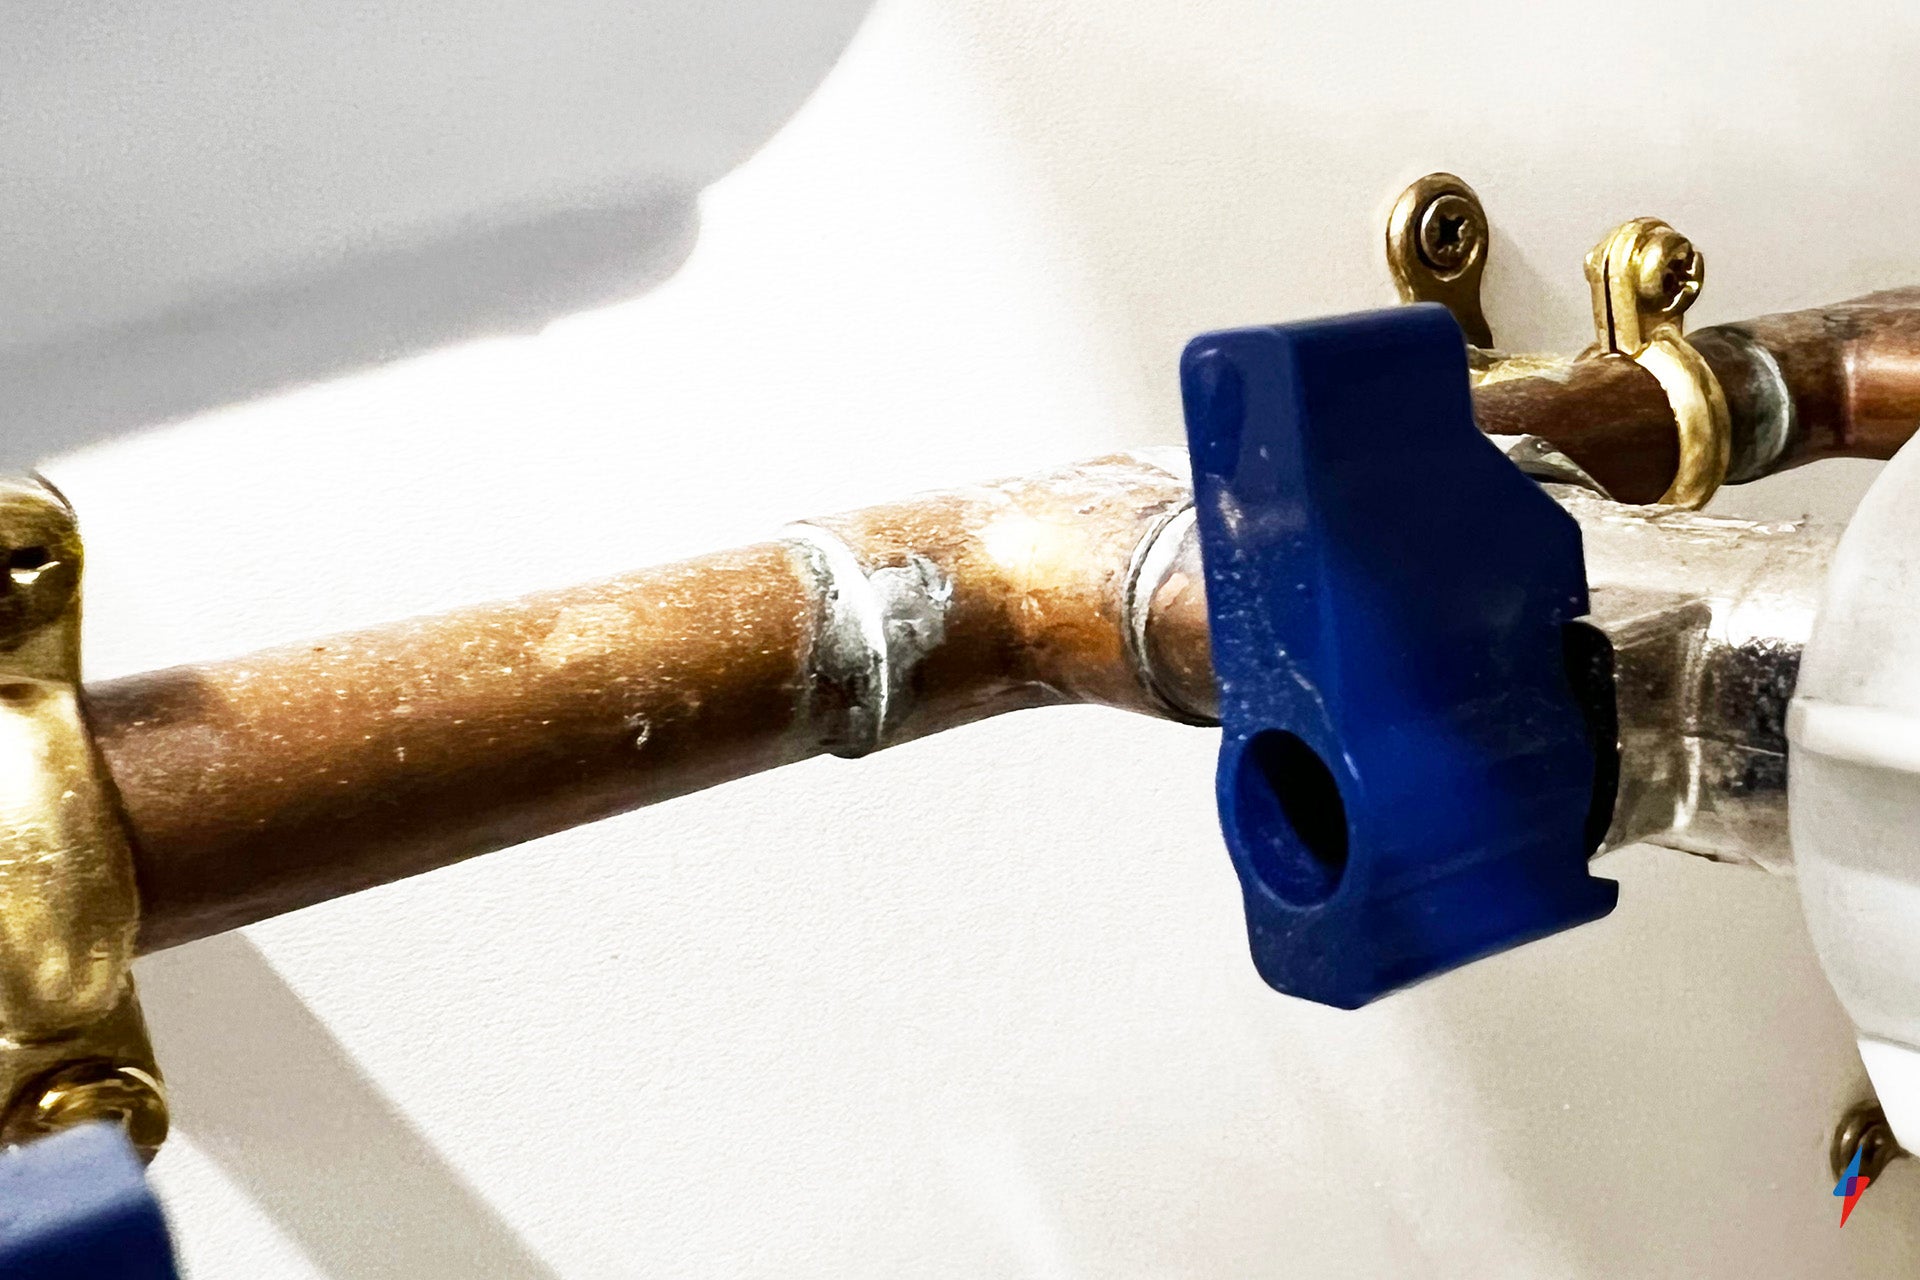
You can now test the tap and your hose connection by turning the water on. Most taps are blue (for cold water). When they’re vertically aligned, they’re off; when they’re in line with the water pipe, they’re on.
Use gentle pressure to turn the tap on. You should hear a small whoosh of water, as the hose is filled up. Check carefully that there are no leaks at either end of the hose. If there are, turn off the water, tighten the connections, then test again. You can leave the tap on.Step
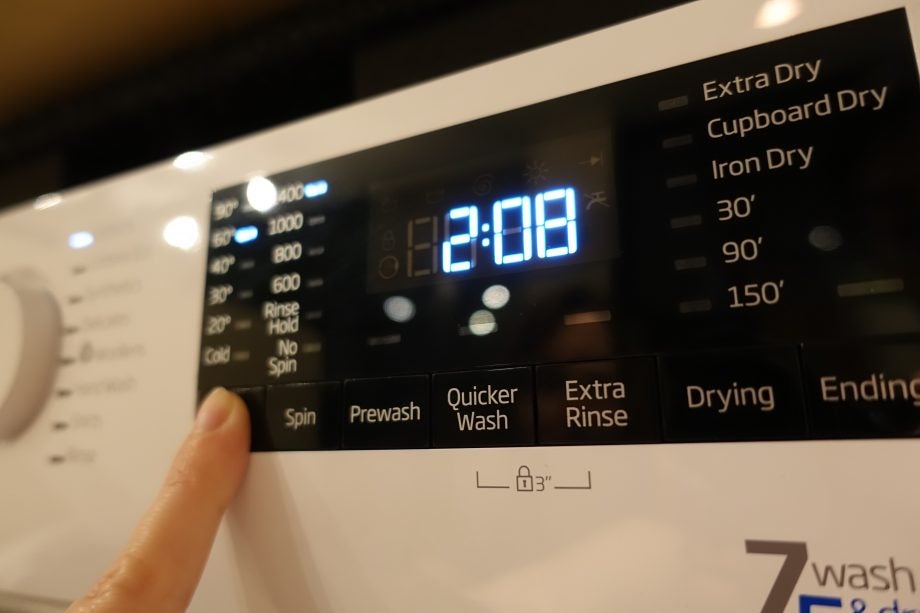
5Plug in the washing machine
Now, you need to feed the power cable to where it needs to go. Again, this often through a hole in a kitchen cupboard. Plug the cable in, and then turn on the power. You can press the power button on your washing machine to turn it on, making sure that it’s working. You can turn the washing machine off with its power button, but leave the main power socket on.
Step
6Connect the waste pipe
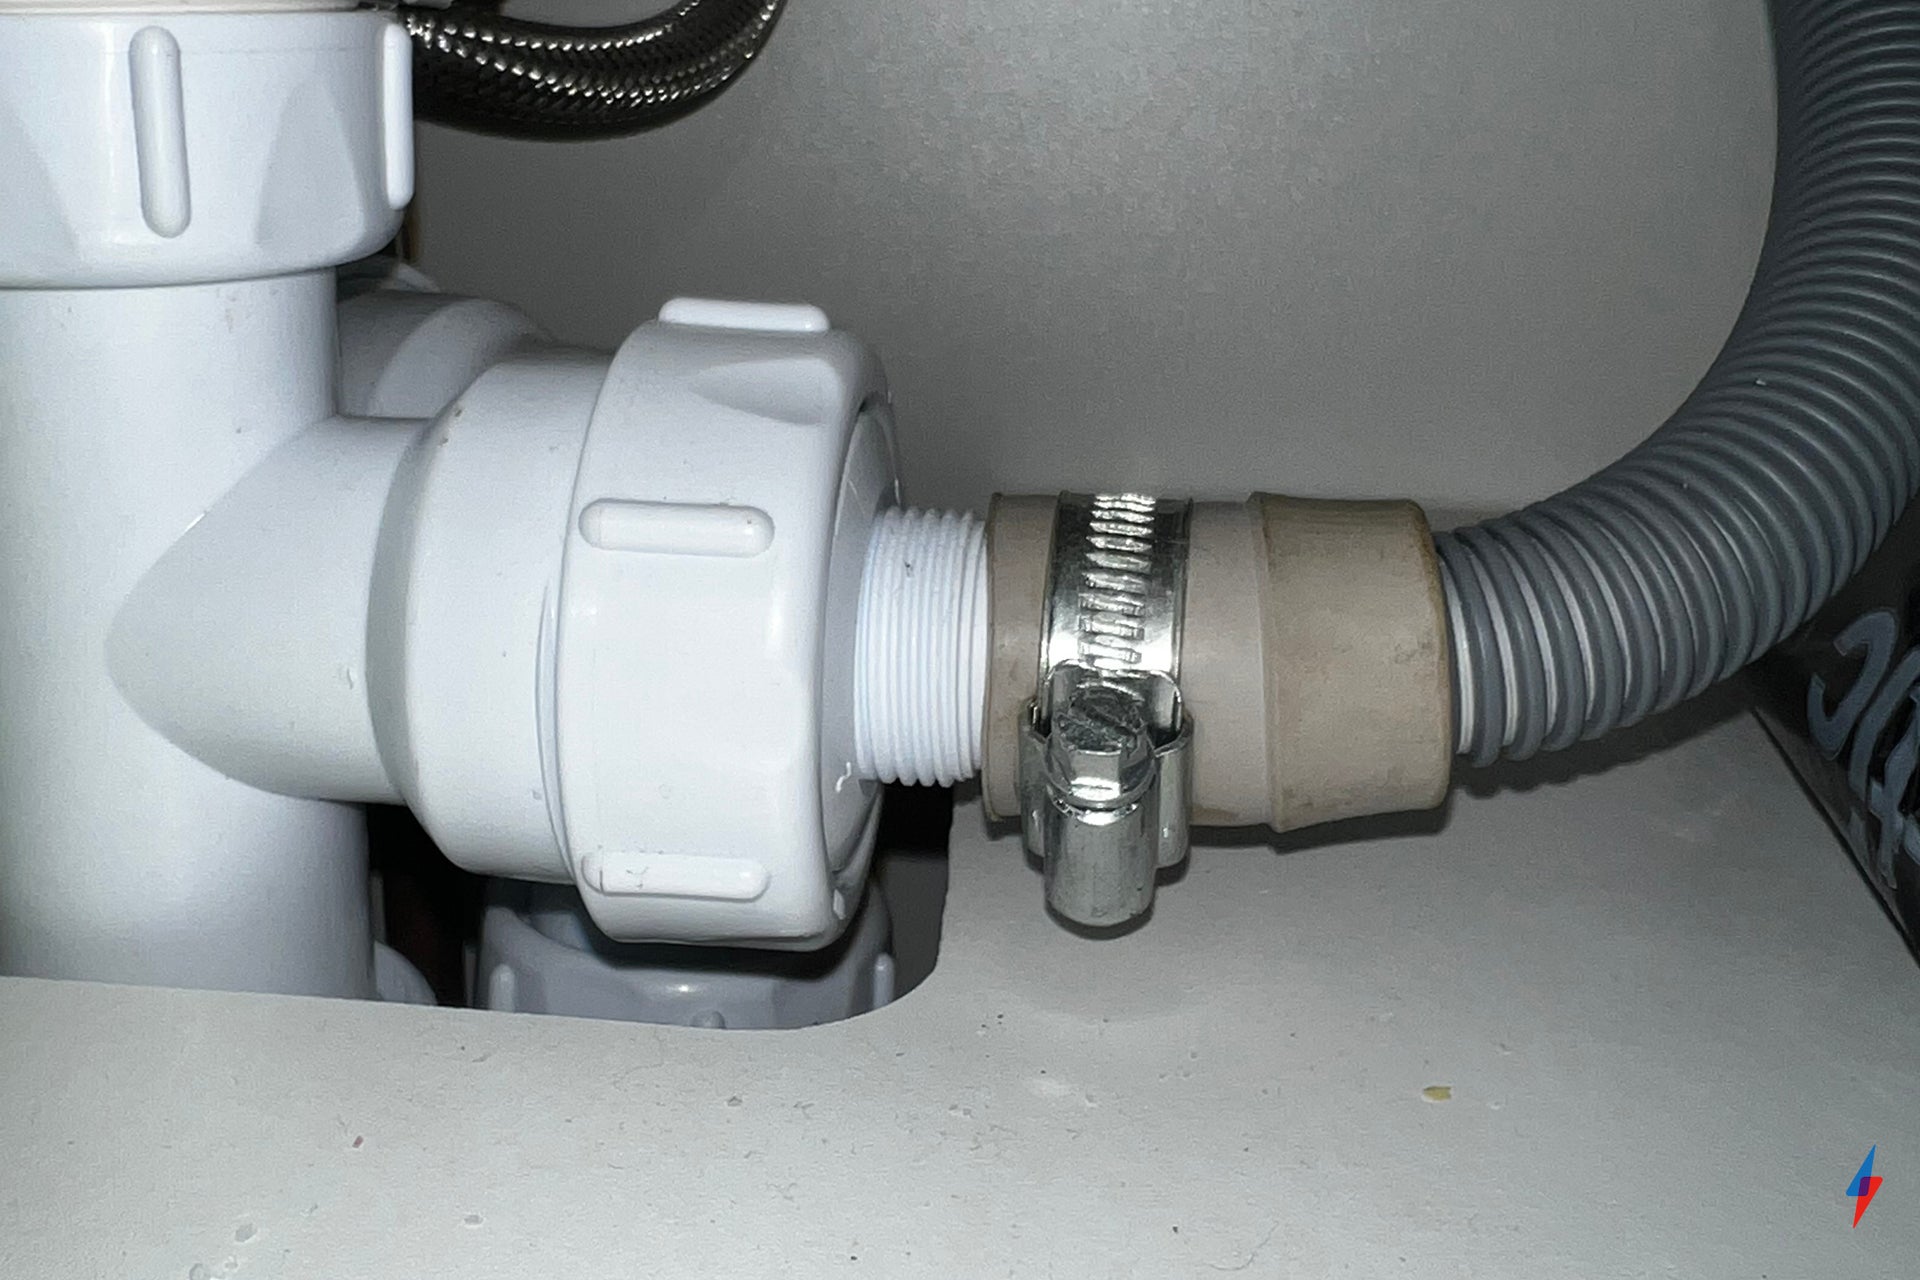
The waste pipe is permanently connected to the washing machine, and is usually clipped in at the back. Unclip the hose and then feed it to where the drain is.
If your washing machine has a hard plastic u-bend, you can clip this around the hose, and even attach it to the wall. This helps prevent blockages in the pipe, but it’s not essential; in fact, in many cases, if you use the u-bend, you might have trouble getting the hose to reach where it needs to go.
The best advice that we can give is to make sure that the waste pipe stays straight as you push the washing machine into place, avoiding any kinks in it.
A lot of washing machines ship with a metal collar that you put around the end of the waste pipe first; cheaper machines often don’t have these.
In both cases, push the end of the waste pipe over the hose connector near your sink. Push the waste hose firmly over this connector until it feels secure; a gentle tug is all you need to check. If you have a retaining collar, slide this around the top of the hose, then use a flat head screwdriver to tighten it.Step
7Level the washing machine
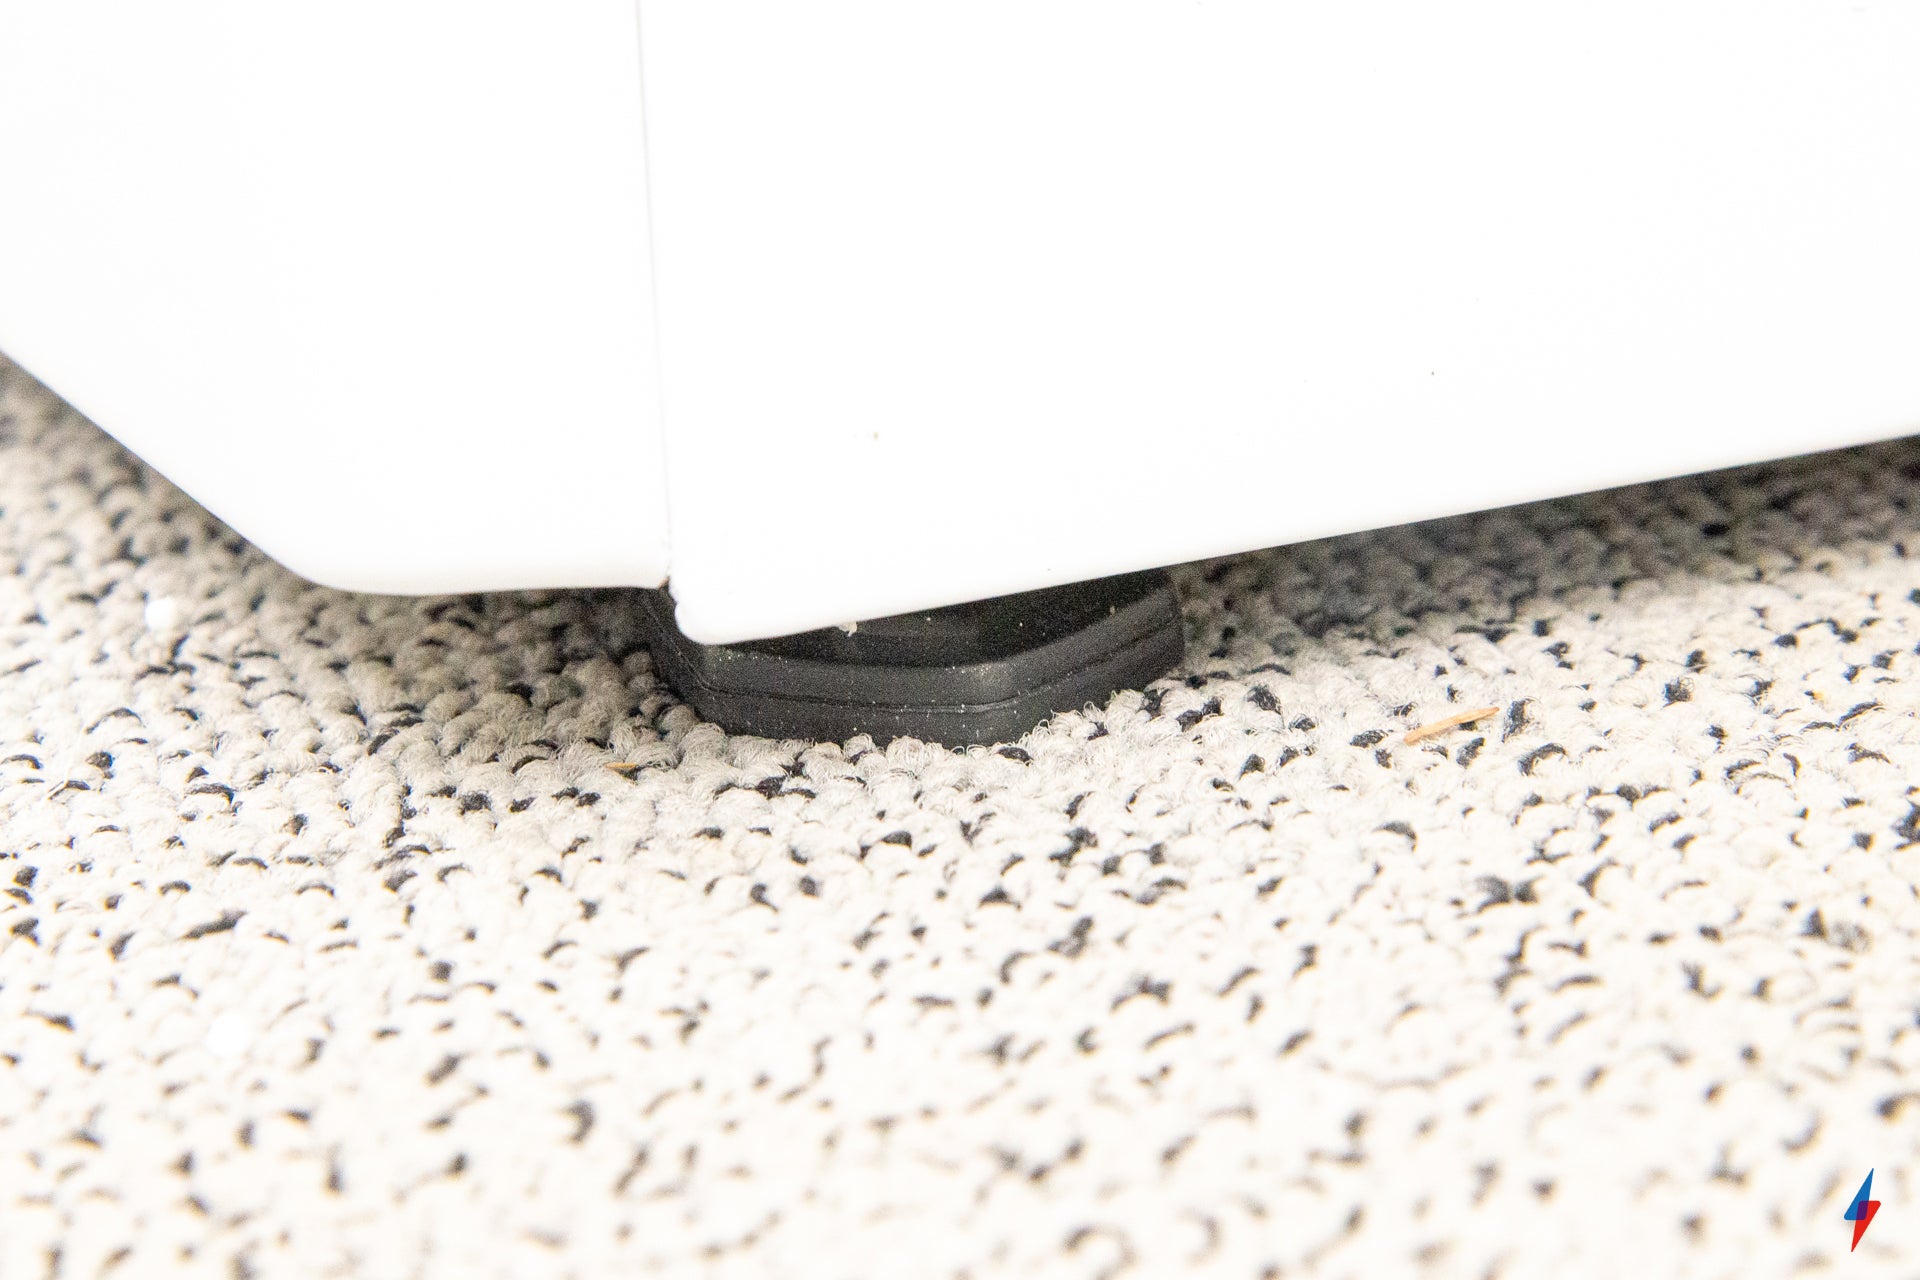
Push the washing machine back into its place, but leave it sticking out enough that you can put a spirit level on the side and top (facing front to back). It’s usually easier to get two people to move a washing machine, pushing from the bottom of the machine. As you push it back, make sure that neither of the hoses nor the power cable gets trapped. You may need to pull these items gently from under your sink to guide them through any holes cut in your cupboards.
With the washing machine in place, you should put a spirit level on both the top (facing front to back) and side. If the machine is not level, it can vibrate and jump on the spin cycle, potentially causing damage. To fix a washing machine that’s not level, you’ll need to adjust its front feet. These can be screwed in or out to adjust the washing machine; you may need to tilt the machine back to make an adjustment.
When the washing machine is level, push it back into place, now you can start to use it.
FAQs
An unbalanced machine will start to shake when it’s spinning clothes, which can lead to it jumping forward, potentially causing damage.
PTFE tape is designed to stop leaks in pipe connectors. As the hose has a rubber washer, you don’t need PTFE tape for this and can simply tighten by hand.
You might like…
Editorial independence
Editorial independence means being able to give an unbiased verdict about a product or company, with the avoidance of conflicts of interest. To ensure this is possible, every member of the editorial staff follows a clear code of conduct.
Professional conduct
We also expect our journalists to follow clear ethical standards in their work. Our staff members must strive for honesty and accuracy in everything they do. We follow the IPSO Editors’ code of practice to underpin these standards.