
How to enable Advanced Data Protection in iCloud: You can add end-to-end encryption to many of the apps backed up through iCloud. Here’s a step-by-step guide to enabling the new security feature.
In late 2022 Apple announced Advanced Data Protection for some of the most important apps users back-up to the iCloud storage locker. Now, with the launch of iOS 16.3, the feature is available for iPhone users in the UK to access.
The new feature adds end-to-end encryption to the data backed up via Messages, Photos, Notes, Safari, Reminders, Voice Memos and more. Once enabled, the feature protects that data with the company’s “highest level of cloud data security.”
Apple will not have access to any of the data, nor a key, and only the user will be able to decrypt the information via their trusted devices. The idea is to make the user’s most precious iCloud data impervious to would-be snoops.
Here is a step by step guide to enabling Advanced Datas Protection for iCloud on an iPhone.
What you’ll need
- An Apple iPhone compatible with iOS 16 (iPhone 8 and up)
- At least iOS 16.3 installed on the phone (Settings > General > Software Update)
The Short Version
- Open the Settings app on the iPhone (the silver cog icon)
- Tap [Your Name] at the top of the display
- Select iCloud
- Scroll down and select Advanced Data Protection
- Turn on Advanced Data Protection
- From the pop up, hit Set Up Account Recovery
- Select Add Recovery Contact or Recovery Key as a safeguard if you lose access to your account.
Step
1Open the Settings app on iPhone

Tap the silver cog icon to access the main Settings page
Step
2Tap [Your Name] at the top of the page
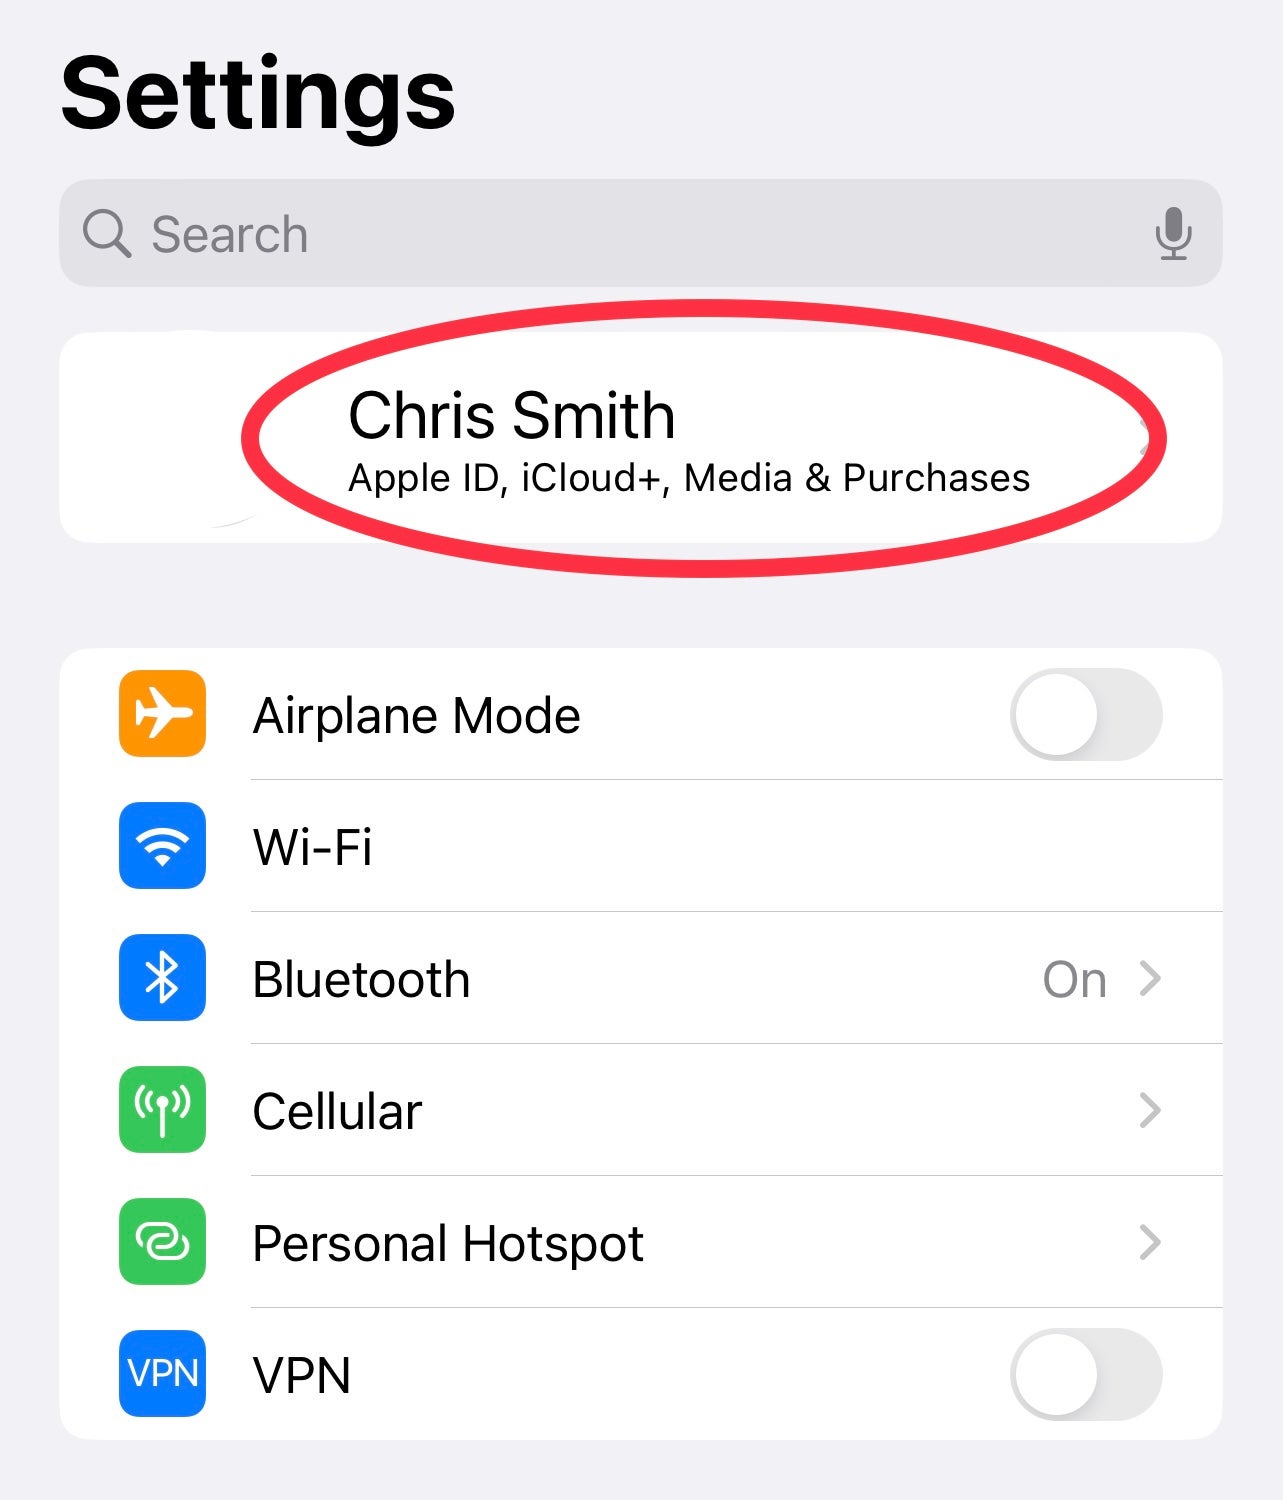
This takes you to your personal account settings, including for your Apple ID, iCloud and more
Step
3Select iCloud from the list

This page offers options for managing your iCloud settings
Step
4Scroll down until you see Advanced Data Protection
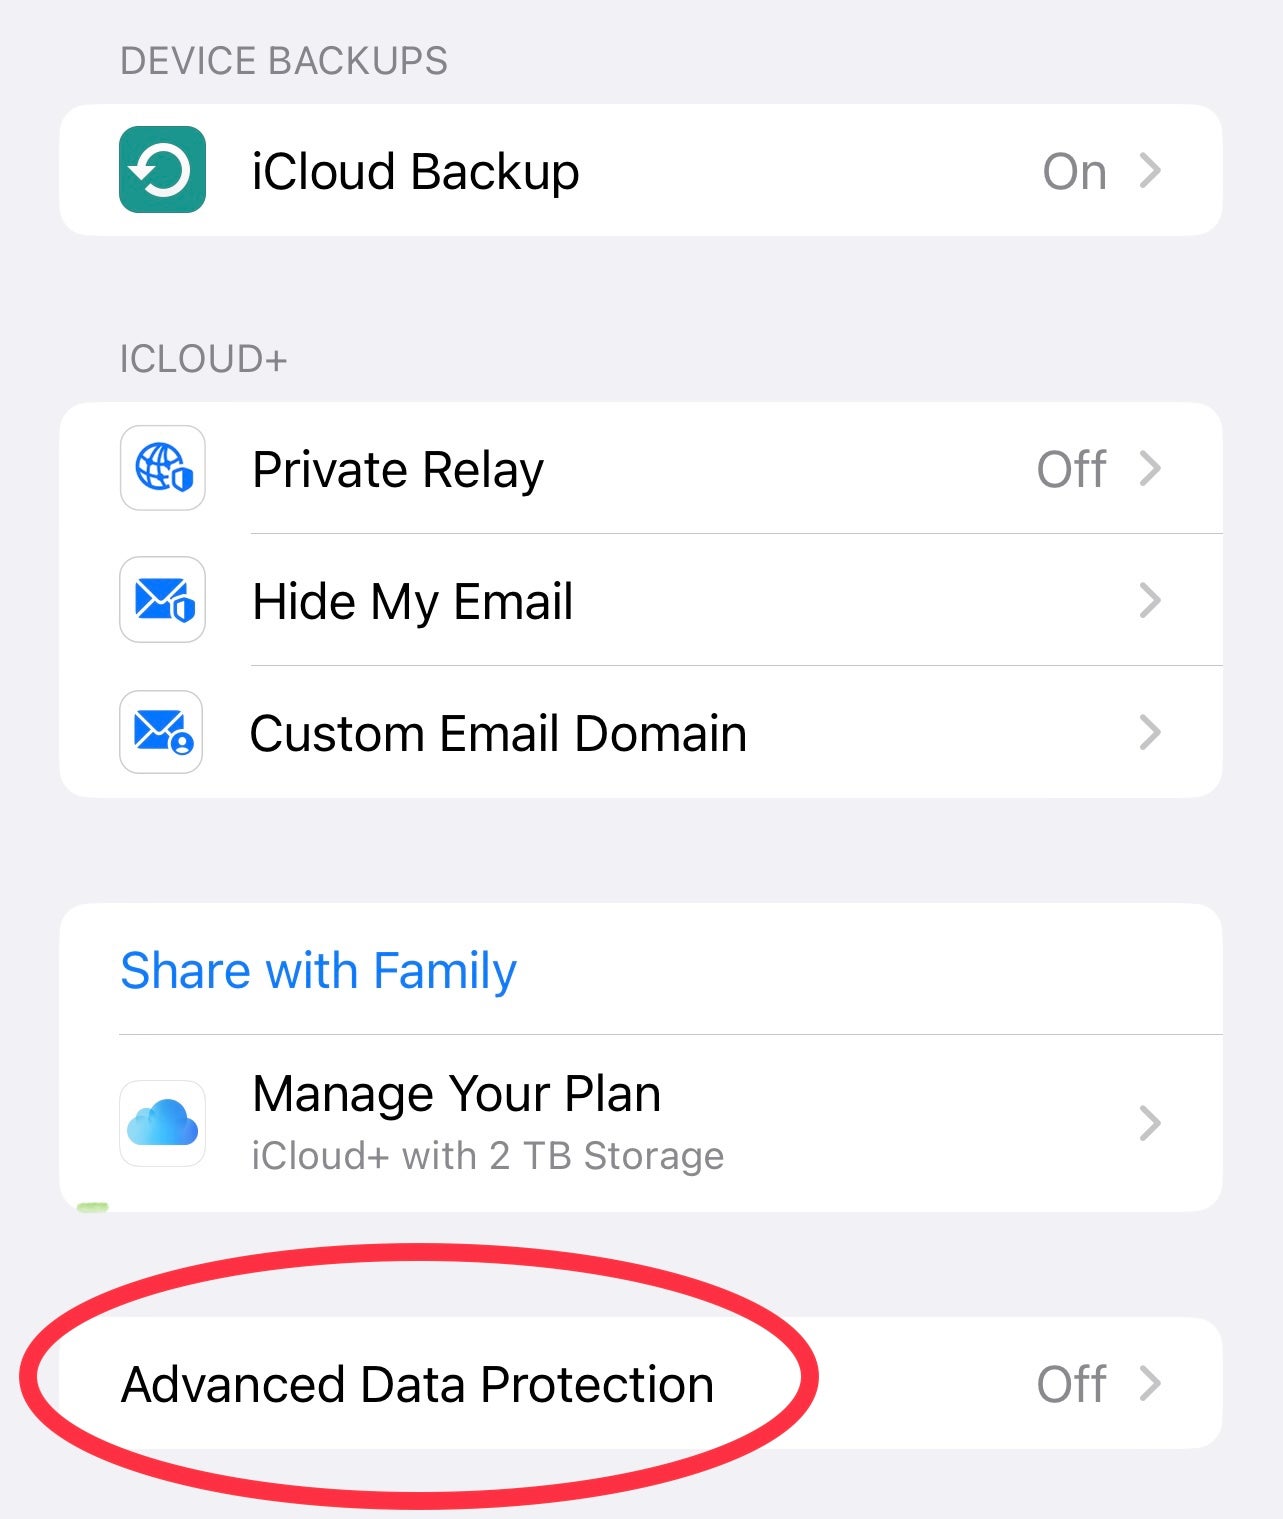
This new option is quite far down on the list, towards the bottom of the display.
Step
5Turn on Advanced Data Protection
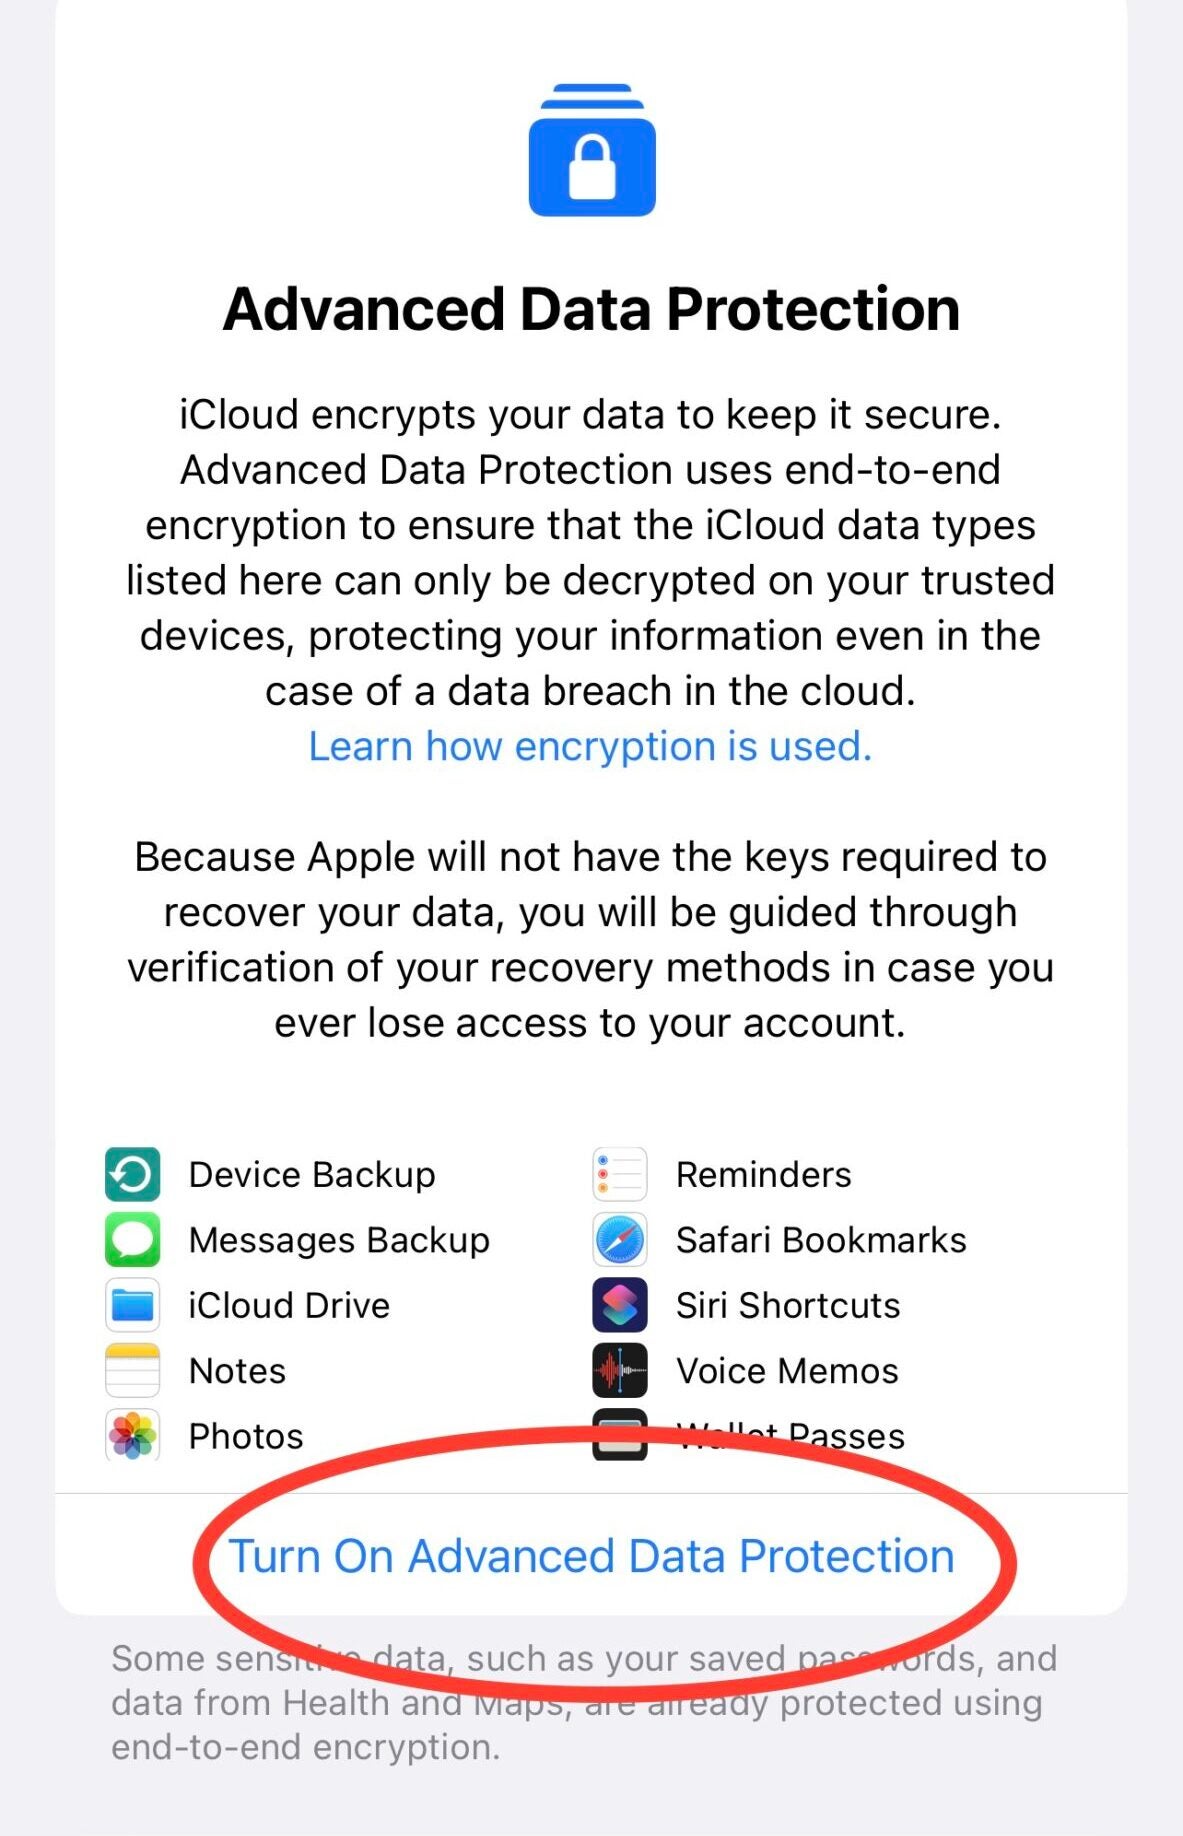
Here you’ll see the full lowdown on what this feature will protect
Step
6Set up Account Recovery

You’ll see a pop up advising that you set up an alternate method for accessing your data.
Step
7Choose an Account Recovery Method
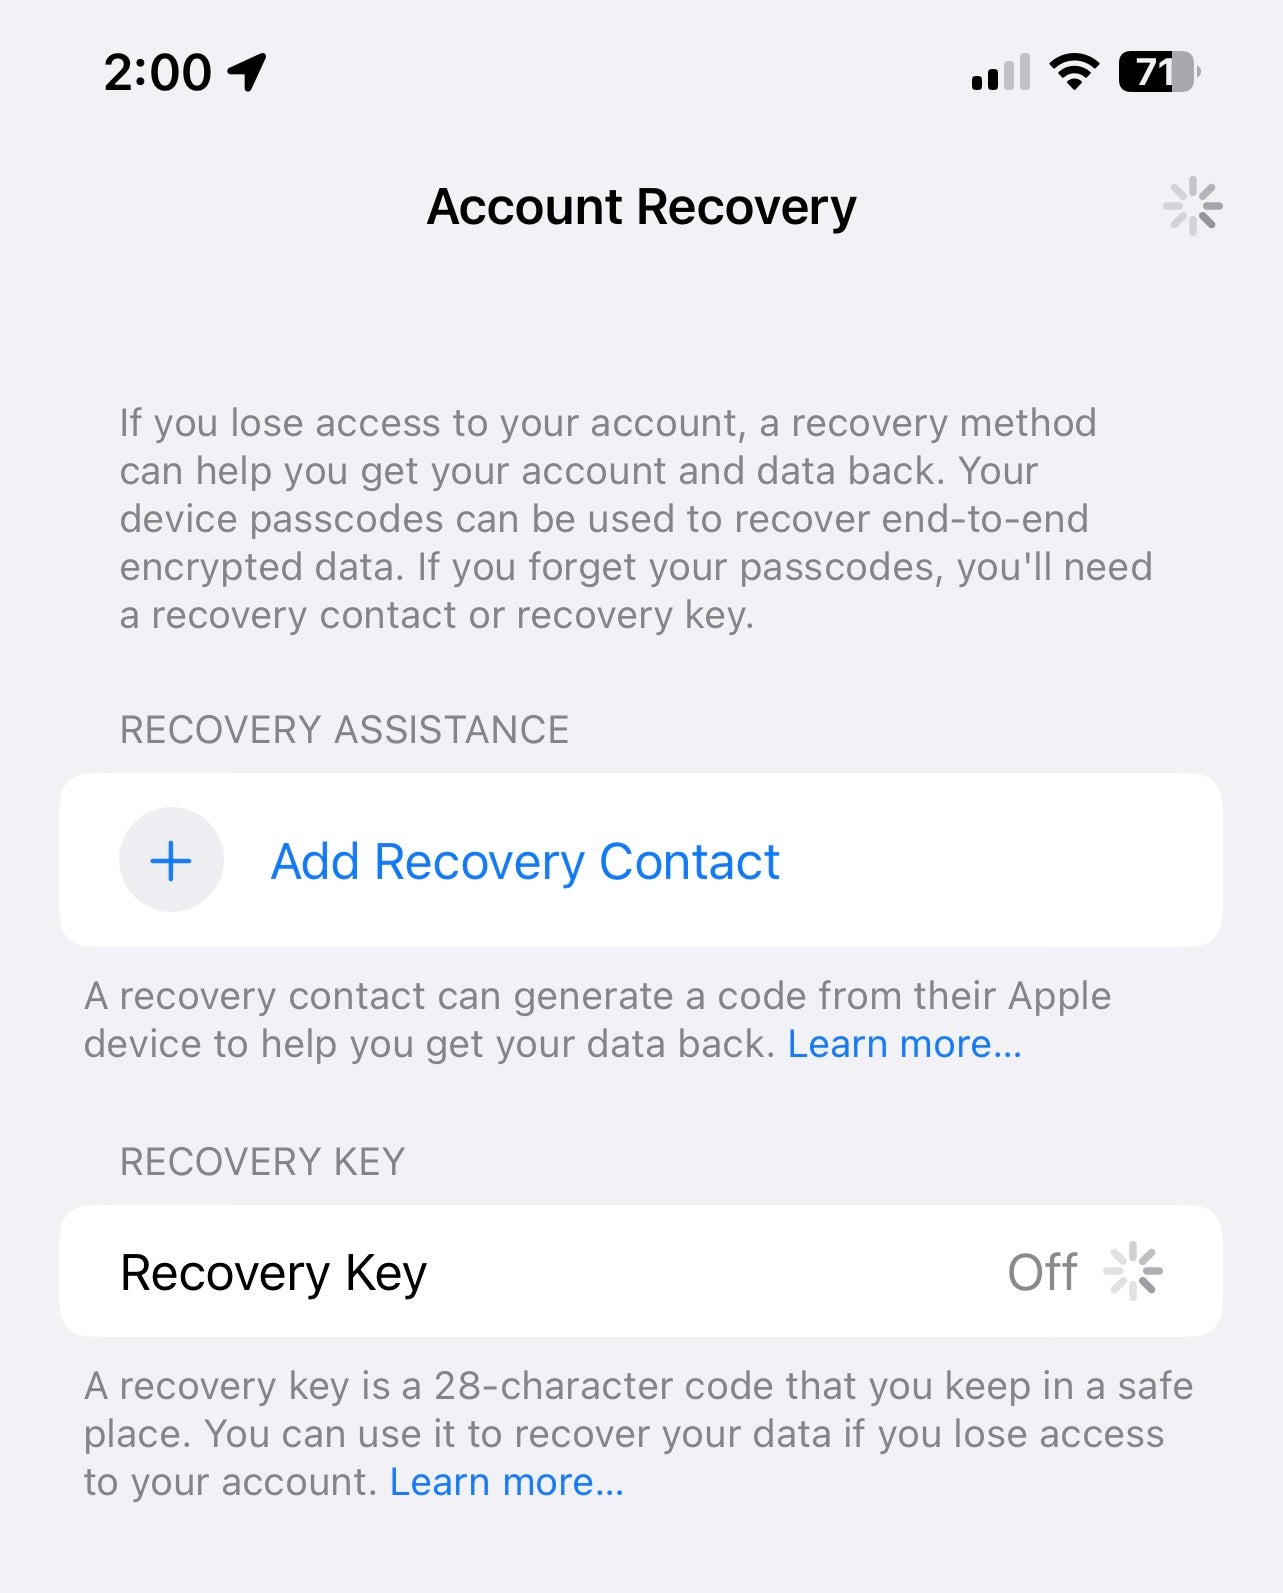
Here, you can choose to add a contact or turn and a 28-character recovery key you’ll need to keep safe. This completes the process. It may take a while for the new backup to be completed.
From here you will see that Advanced Data Protection is enabled on your iPhone, giving you a little added piece of mind when it comes to your most private data iPhone data.
You might like…


Editorial independence
Editorial independence means being able to give an unbiased verdict about a product or company, with the avoidance of conflicts of interest. To ensure this is possible, every member of the editorial staff follows a clear code of conduct.
Professional conduct
We also expect our journalists to follow clear ethical standards in their work. Our staff members must strive for honesty and accuracy in everything they do. We follow the IPSO Editors’ code of practice to underpin these standards.