Ducky ProjectD Tinker 65 Barebones Review
An affordable and simple way to build your first mechanical keyboard


Verdict
The Ducky ProjectD Tinker 65 Barebones edition makes it easy to build your first mechanical keyboard. If you’re an enthusiast itching to try out the next level of customisation, this is an affordable and approachable entry point.
Pros
- Excellent typing sound and feel
- Easy tool-free build process
- Compact layout with few compromises
Cons
- The lightweight design makes it feel a little cheap
- No dedicated software
- Non-standard Right Shift limits keycap options
Key Features
- Beginner-friendly build processIf the idea of building a keyboard fills you with fear, it shouldn’t. Using a kit like this, it’s as easy as snapping together a Lego set.
- Satisfying sound and feelThe gasket-mounted top plate and pre-lubed stabilisers result in an excellent typing feel and a very satisfying sound.
- Software-free RGB lightingThese days, we all have too many proprietary applications clogging up our PCs, but with the Tinker 65, you don’t need any software to take control of the impressive lighting effects.
Introduction
If you’ve ever considered building your own keyboard, Ducky’s latest barebones kit, the ProjectD Tinker 65, might just be the one for you.
Customisation in the world of mechanical keyboards run deep and, compared to those who whip out the soldering iron and crack apart their switches to apply lubricant, the Ducky ProjectD Tinker 65 Barebones only scratches the surface but makes for an intriguing place to start.
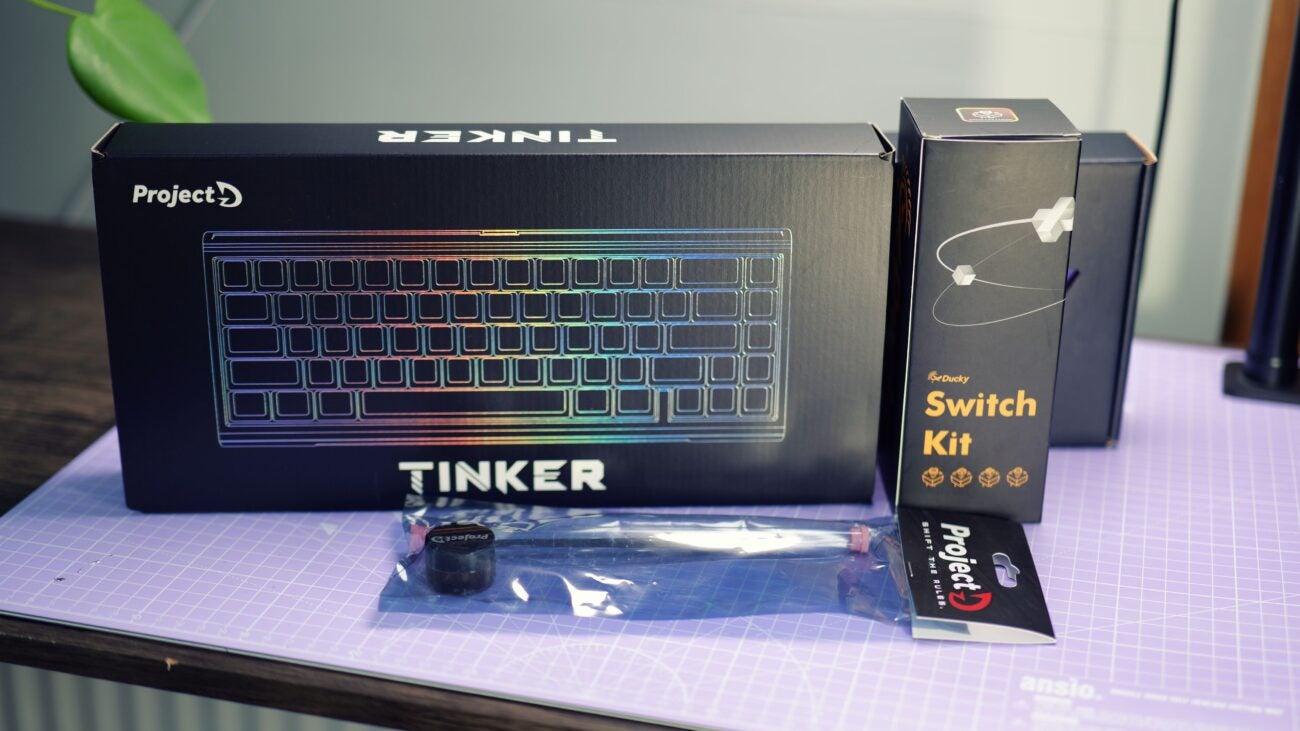
All the hard parts are taken care of in the factory, and you’re left to choose your switches and keycaps and snap it all together like an expensive Lego set. If you’re not as keen on building, though, the Tinker65 is also available pre-built, so you can enjoy the finished result without all the assembly.
The barebones kit will cost you £84.98/$89.99, while the pre-built model goes for £119.99/$109.99. When you factor in the cost of some quality switches and keycaps, you’ll likely end up spending more going the custom route, but then you’ll have a keyboard that’s perfectly tailored to your tastes.
I built the keyboard a few weeks ago and have been tapping away on it ever since. Here’s my full review.
Design
- Available pre-built or barebones
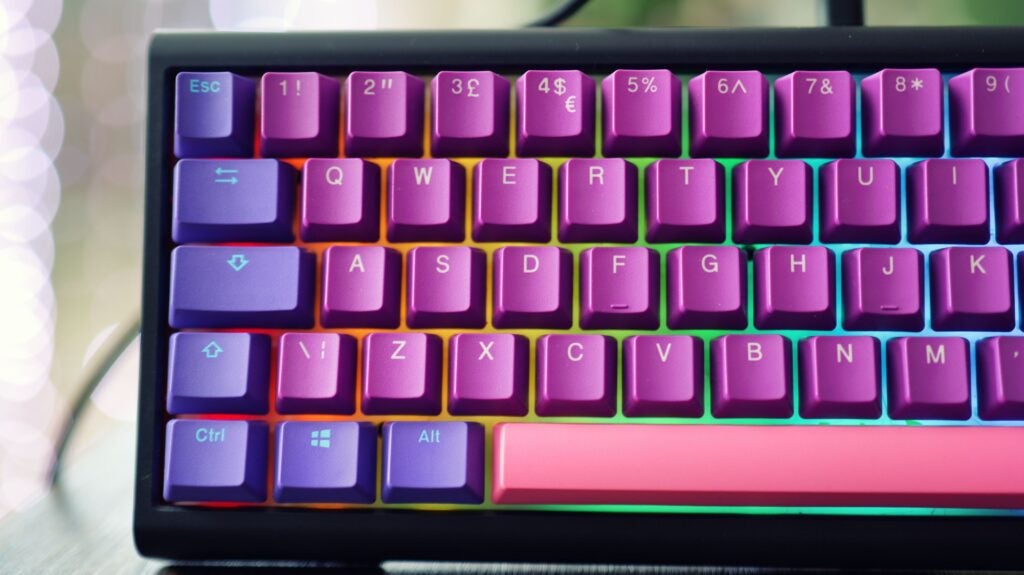
- 65% layout, plastic housing
- Hot-swappable switches
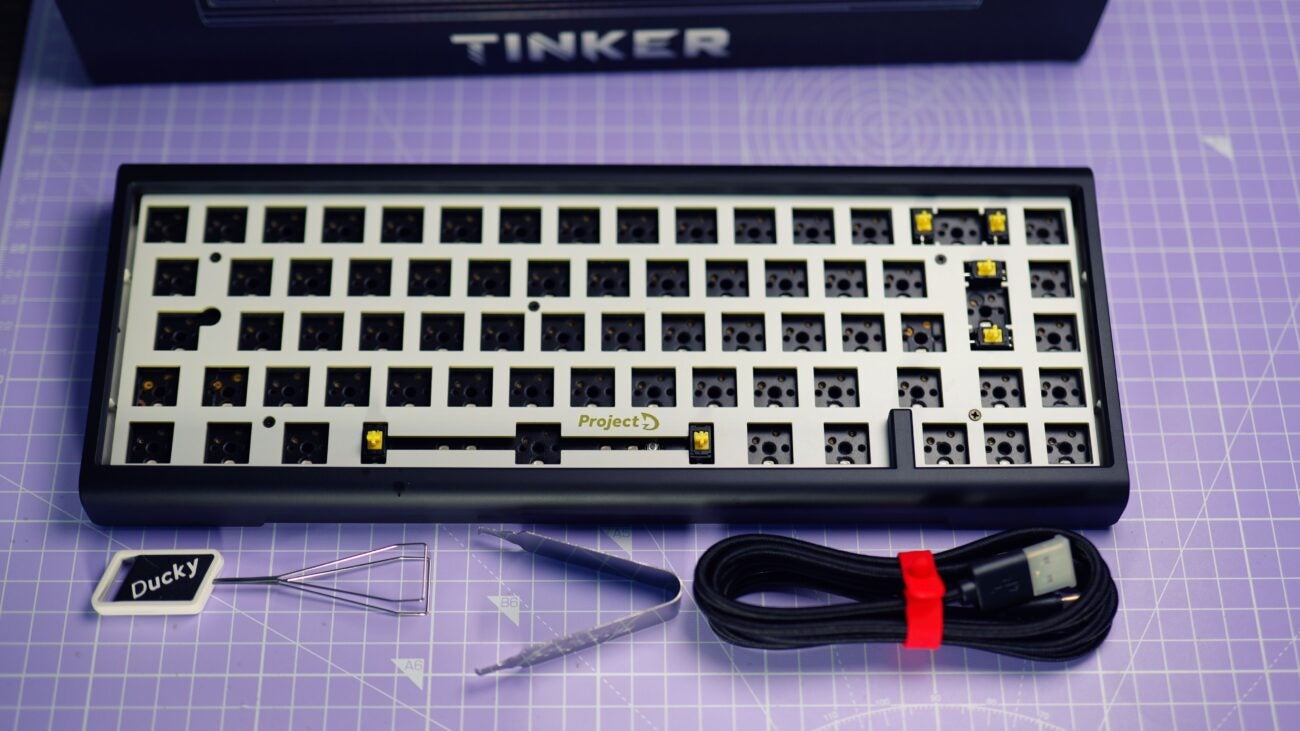
The Ducky ProjectD Tinker 65 Barebones kit comes mostly assembled, the user will only need to install the switches and the keycaps, which are sold separately. It’s a hot-swap design, which means that the switches simply snap into place and don’t need soldering to the PCB. It’s very convenient for the build process, but it’s equally beneficial if you have a faulty switch in the future, or if you simply want to try out a new set of switches.

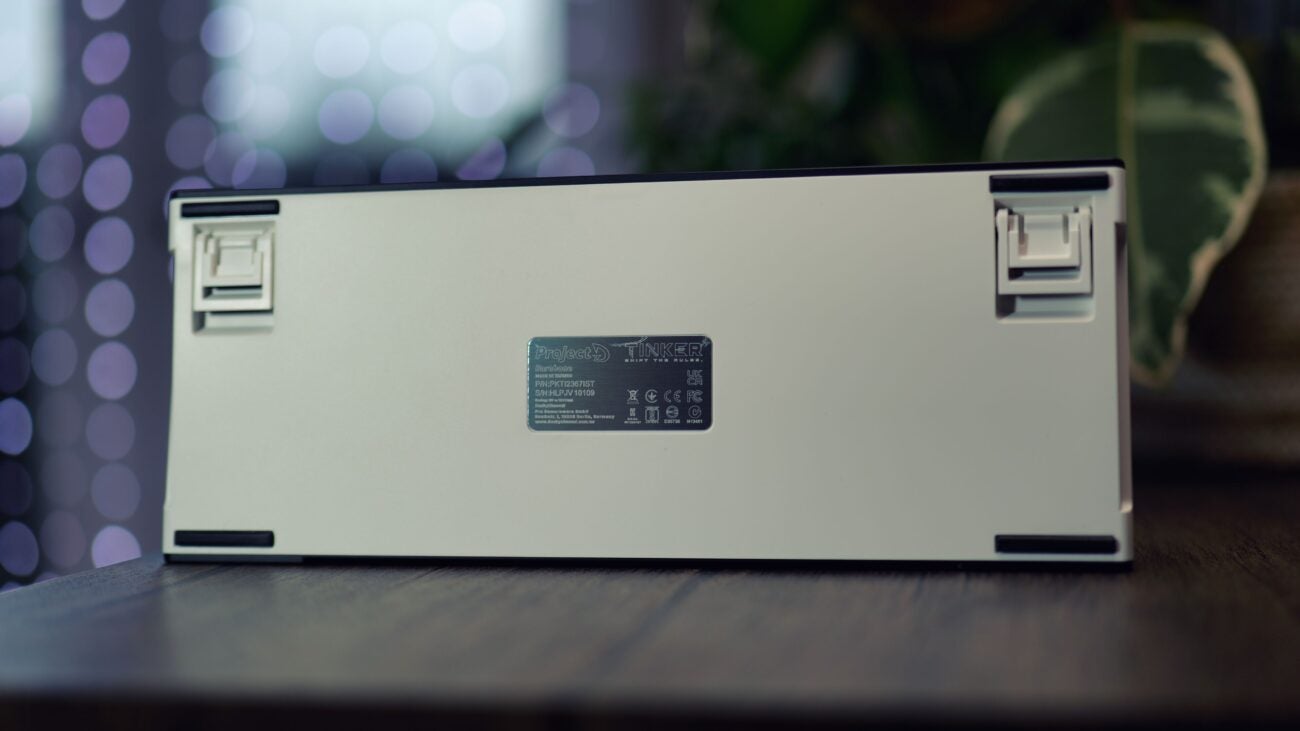
The keyboard is particularly light, being almost entirely constructed from plastic. It feels cheaper than most premium mechanical keyboards but the low weight and 65% layout make it extremely portable.
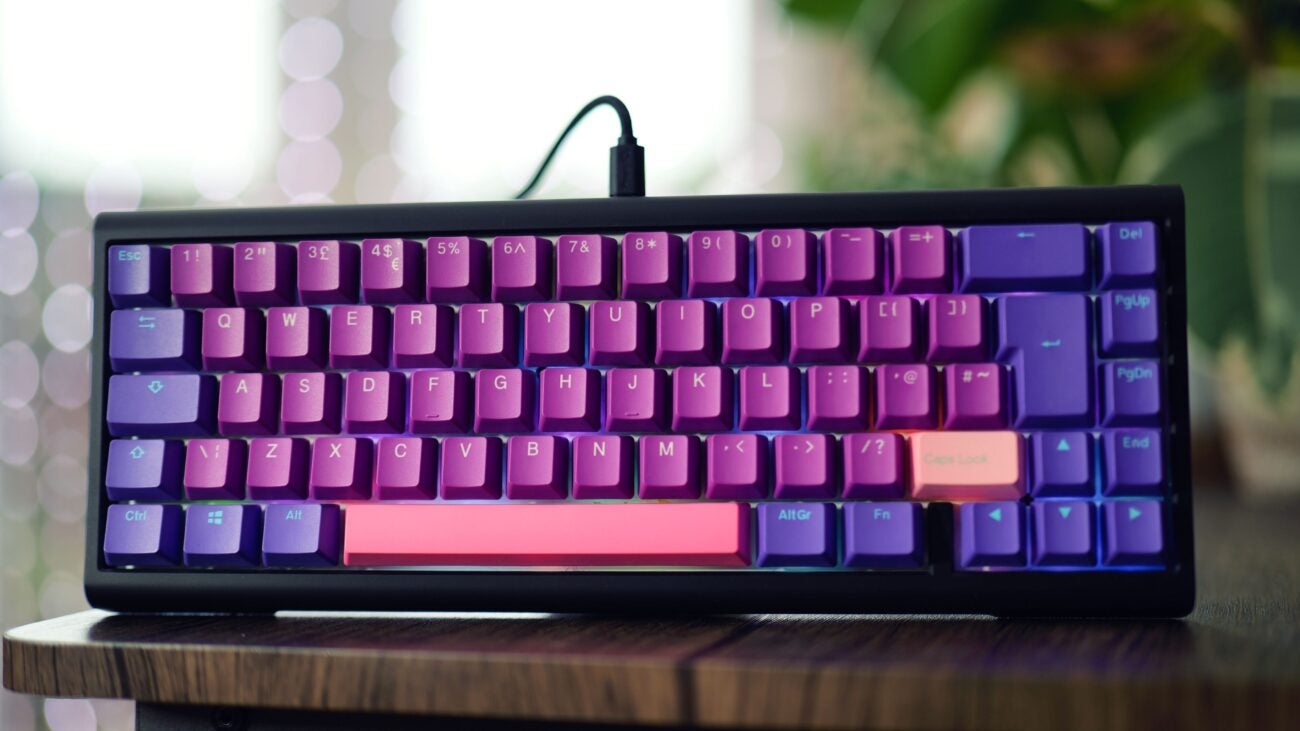
The underside is white and the lower shell wraps around the sides of the keyboard. The upper bezel, which also curves around the front and back, is black. It’s an inoffensive look, and reminds me a bit of a killer whale. The monotone colour scheme will pair nicely with just about any keycaps, no matter how outlandish the colour palette.
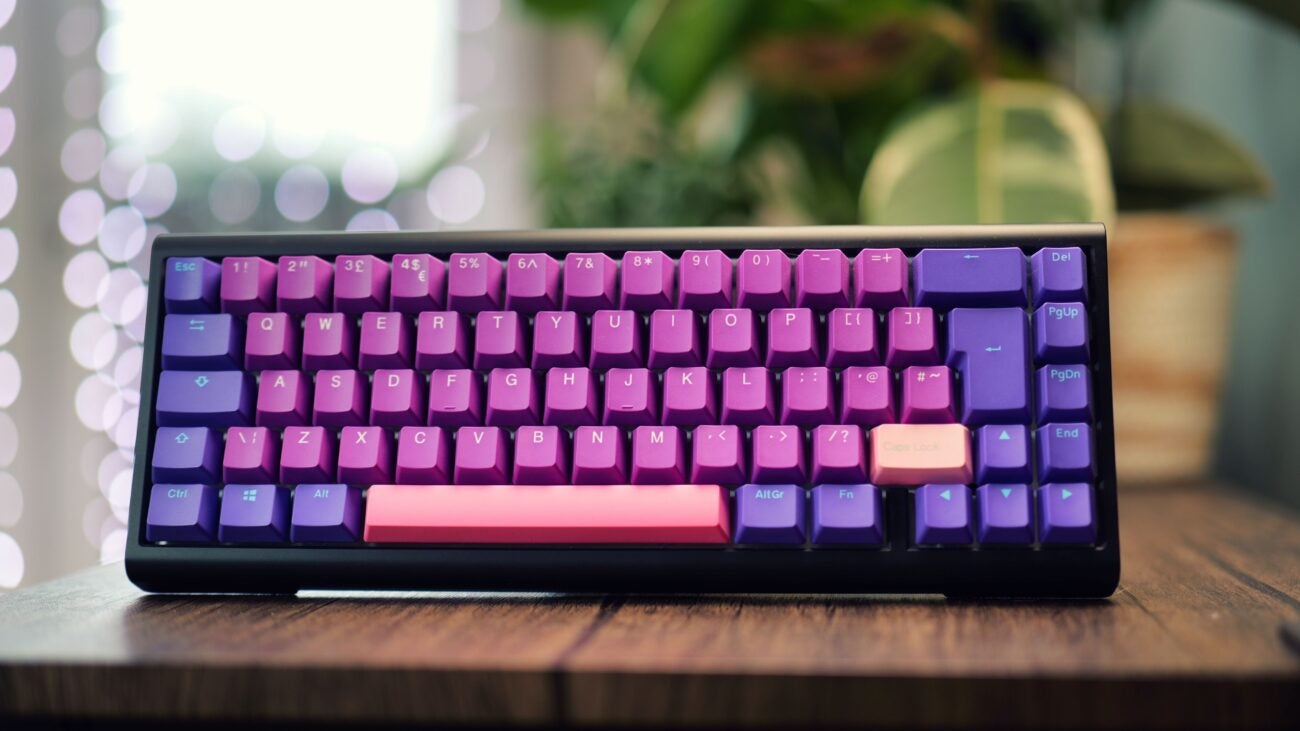
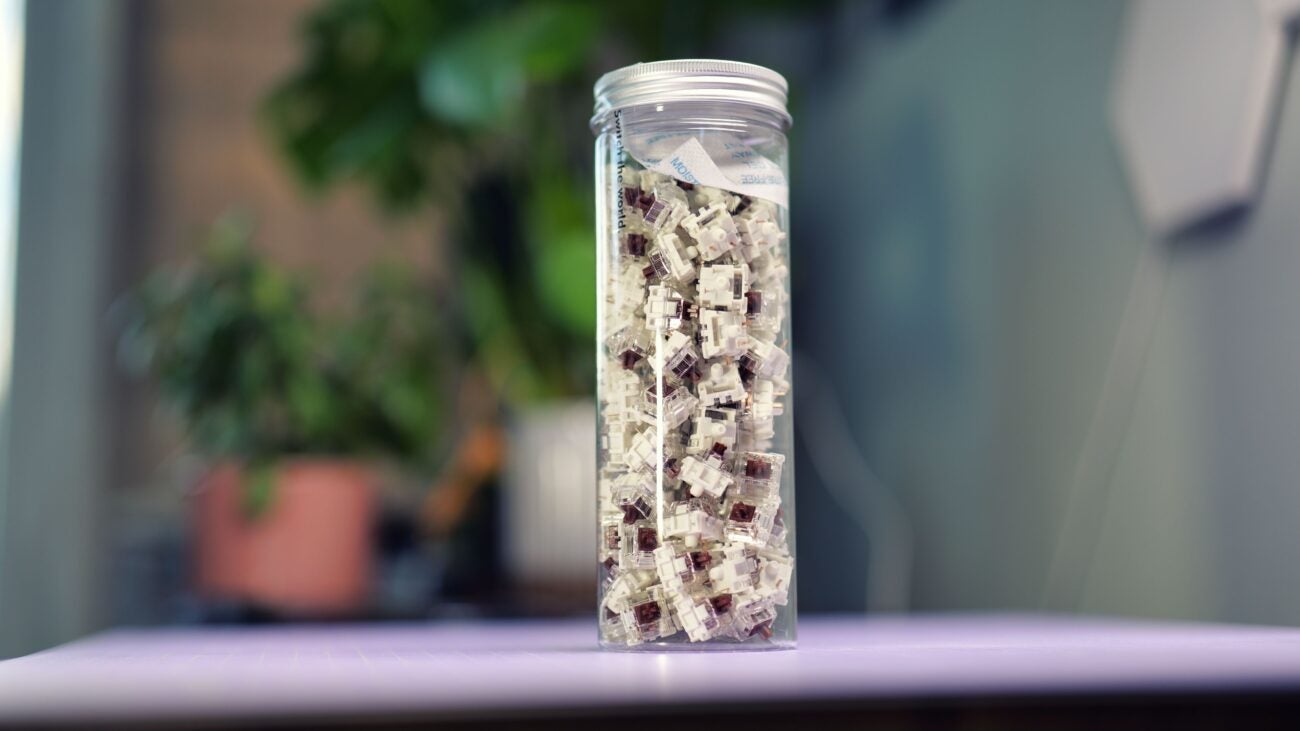
I chose to pair my barebones kit with Ducky’s own Ultra-Violet PBT keycaps, which add a healthy splash of colour to the design. I also used Ducky’s Gateron G Pro 2.0 Brown switch kit. These switches have a nice tactile feedback to them and come pre-lubed.
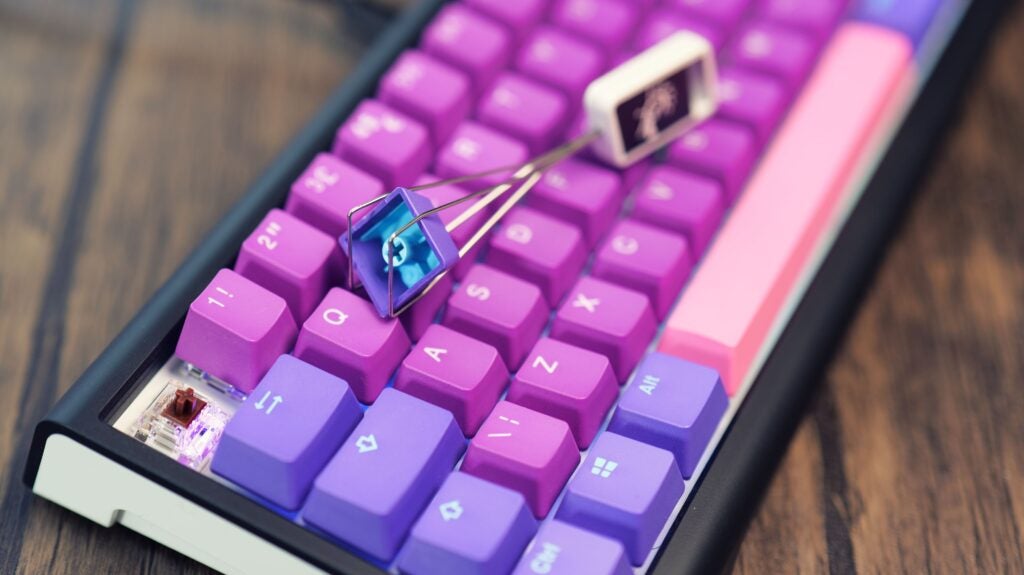
The build process was as simple as could be, the hot swap design meant that I just had to click my switches into place one by one until it was fully populated. It does take a while, there are 68 switches in total, but it’s very simple.
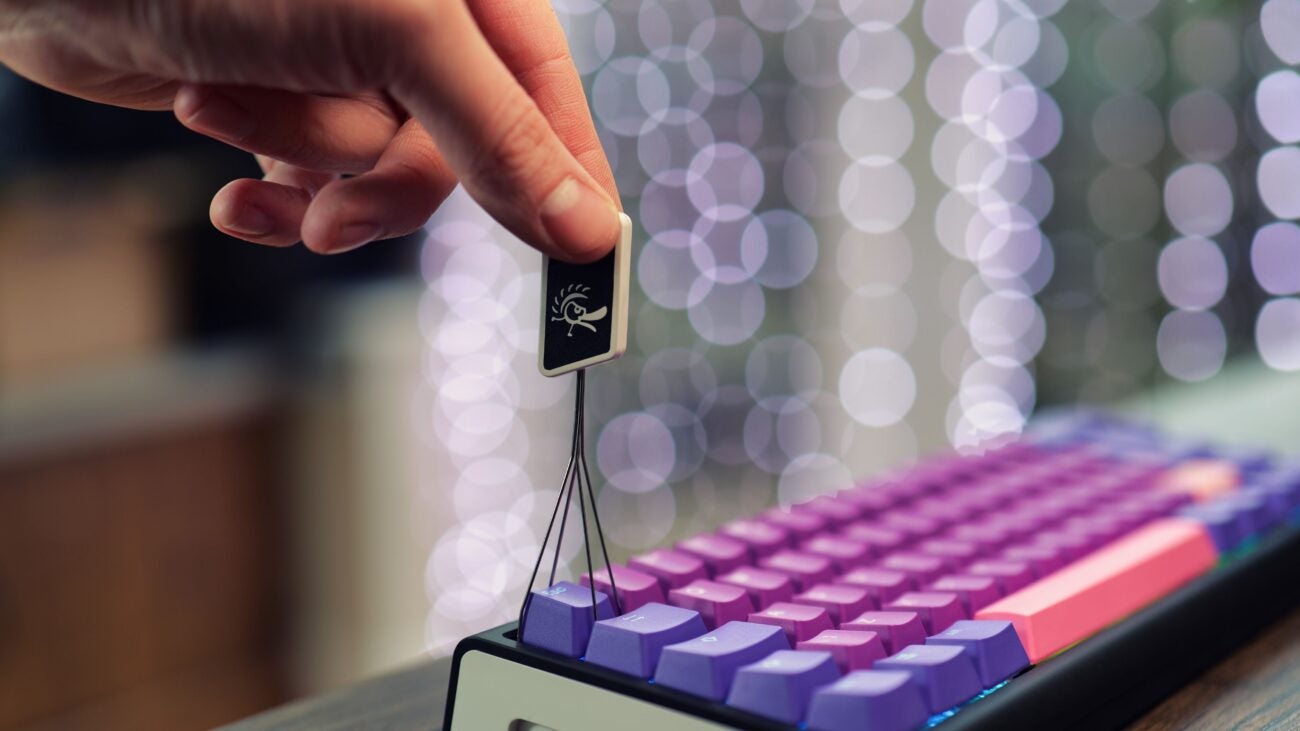
The same can be said for installing the keycaps, which just pop onto the switch stems like any other keyboard. It was here that I ran into a slight issue, though. I didn’t realise until this moment that the Tinker 65 has a non-standard right-shift key (1.75U), and my keycap set only came with a normal-sized one (2.75U).
This error meant that I would either have to use a smaller keycap in its place or find a keycap that fit from another set. Obviously, in the long term, a fully compatible keycap set is the way to go. I borrowed the caps lock key from my Tai Hao Miami keycap set and have been using that for now. Just remember, if you buy the barebones kit, you’ll need to find a keycap set that includes a 1.75U right-shift key.
Performance
- Gasket-mounted FR4 plate
- Pre-lubed stabilisers
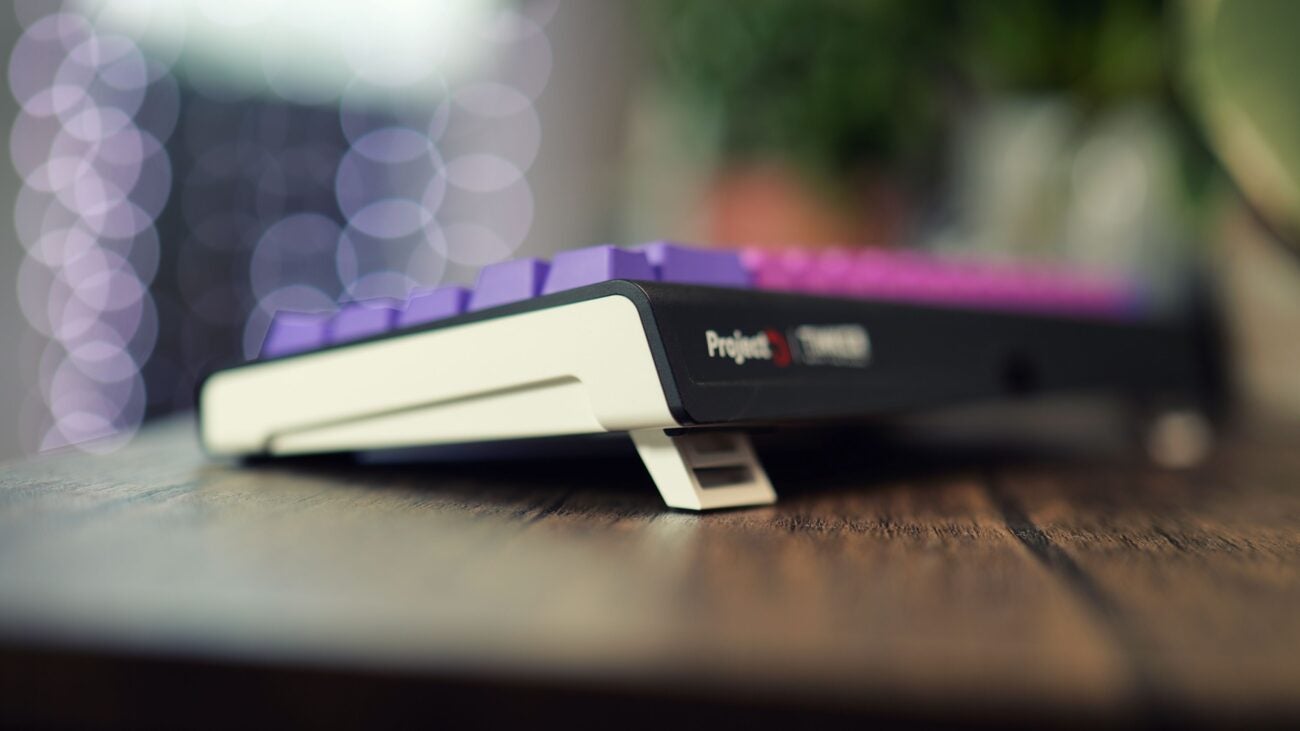
- Two-stage flip-out feet
Once assembled, all you need to do is connect to your computer with the included braided USB-A to USB-C cable, and you’re good to go. The software is completely optional and only required if you want to adjust the layout.
A 65% board is an excellent compromise. It’s almost as compact as a 60% but you retain your arrow keys, and coming from a TKL board, the only thing that took some adjustment was the loss of the F-keys. After a few days, though, hitting function to access this row became second nature.
The Gateron Brown switches and Ducky’s double-shot PBT keycaps are very good in their own right so my setup was set up to succeed. The gasket-mounted top plate adds a bit of “thockyness” to the sound, and the pre-lubed stabilisers ensure that the spacebar and enter key are equally satisfying.
I was initially concerned that the lightweight chassis might make the keyboard feel less planted on my desk, or that it might produce a hollow sound, but both of these assumptions were wrong. The rubbery feet keep the keyboard glued in place and that gasket works wonders for the acoustics.

I mostly used the Tinker 65 for work, typing up numerous reviews, but I also played some CS:GO to see how it fares for gaming. Gateron Browns probably wouldn’t be my top choice for gaming, but that’s an issue that’s easily solved during the build process. Despite the switch choice, the keyboard performed excellently and I never felt it lacked in speed or responsiveness.
Software and Lighting
- South-facing PCB with RGB LED lighting
- Customisable layout with QMK or VIA
- No software is required for lighting customisation
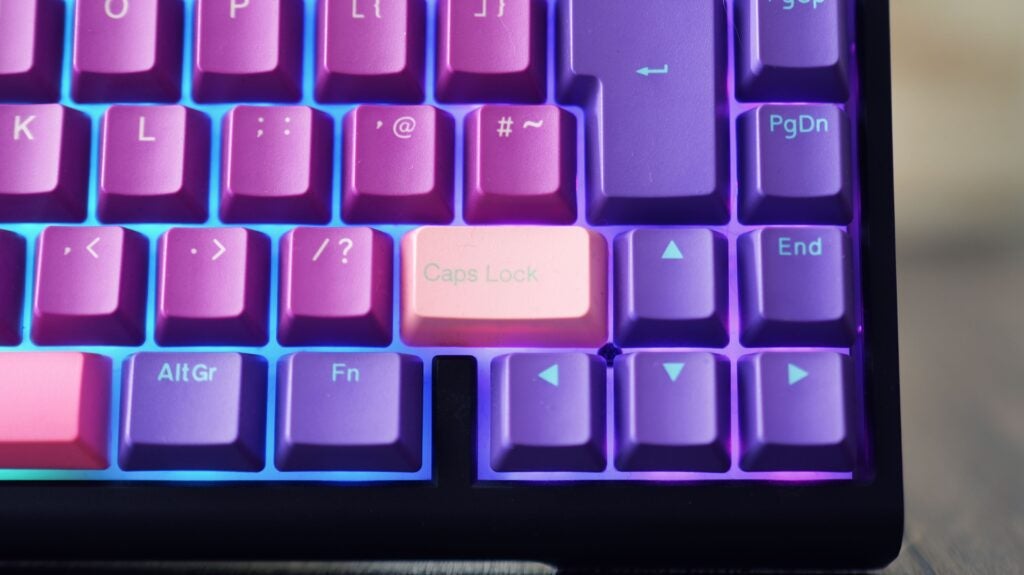
There’s no dedicated software for the Ducky ProjectD Tinker 65 Barebones, instead, you can use either VIA or QMK to customise the layout, if necessary. Meanwhile, all the controls for the RGB lighting are handled with keyboard shortcuts, with no software required. This approach is helpful as no one wants their computer loaded with too much proprietary software already.
There are downsides to this, too. You can’t sync your lighting with other peripherals like you can with Razer Chroma or Corsair iCue. Plus, remembering those keyboard shortcuts isn’t the easiest thing in the world, unless you’re the type of person who switches up their lighting every day.
The lighting itself is impressive, although it’d be more impactful with shine-through keycaps. Both my build and the pre-built model use solid PBT double shot caps, so the RGB effects are constrained to the space in between the keys.
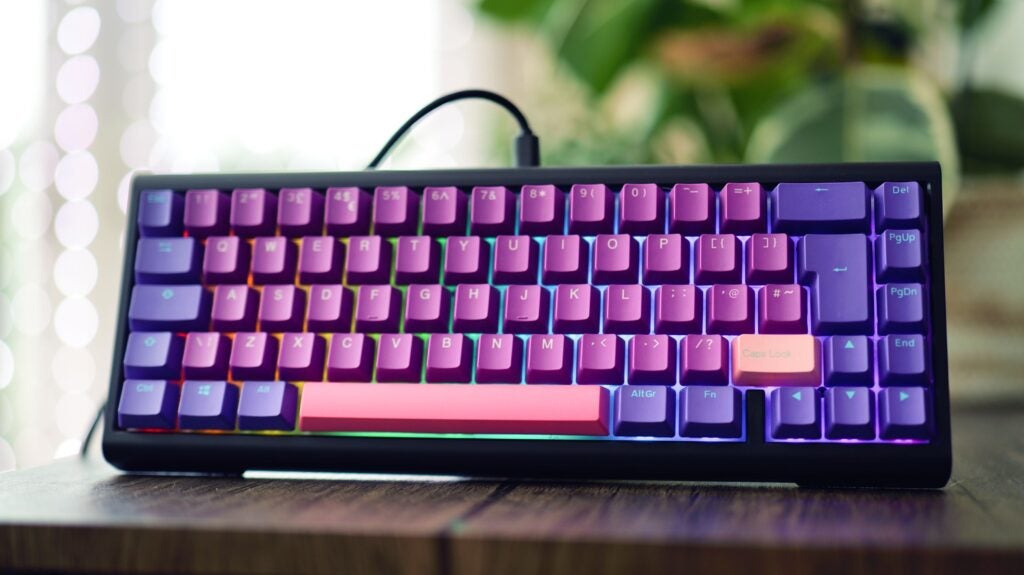
The use of a white top plate means that the illumination diffuses nicely and it’s bright enough that the effect looks impressive, even in a fairly well-lit room. There are tonnes of modes to choose between, including the usual gradient rainbow wave, spinning rainbow, solid colours and keypress reactive effects. You can easily adjust the brightness and speed of these pre-set effects, too.
Latest deals
Should you buy it?
You’re looking for a beginner-friendly build to start with
The Ducky Tinker 65 is very easy to put together, so you can enjoy the experience of building your first keyboard without worrying about messing anything up.
You want to synchronise the lighting with other accessories
Most gaming keyboards allow you to sync the RGB lighting with other products through software, but since the Tinker 65 has no software, no such feature is available.
Final Thoughts
The Ducky ProjectD Tinker 65 Barebones is a solid kit at a reasonable price. If you’re looking to build your first keyboard, this kit makes it simple, easy and fun – so long as you remember to get a keycap set with a 1.75U right-shift key.
Once it’s built, the typing experience is top notch and it’s great for gaming, too, particularly if you opt for linear switches. The 65% layout is a great middle-ground for those who want something compact but without sacrificing too much usability and, after a couple of weeks of testing, this is absolutely a feasible swap for a TKL option.
Many may prefer a heavier keyboard with a more solid-feeling construction, but there’s something to be said for the lightweight design of the Tinker 65. If you want to carry your keyboard between your home and the office, it could be just the ticket. If this set of keys isn’t to your fancy, there’s an excellent range of simple to more complex enthusiast options in our best mechanical keyboards guide.
If you’re not so keen on building, the pre-built board offers even better value, though it does look plain with black keycaps, and you’ll be limited to just a few Cherry MX switch options.
How we test
We use every keyboard we test for at least a week. During that time, we’ll check it for ease of use and put it through its paces by playing a variety of different genres, including FPS, strategy and MOBAs.
We also check each keyboard’s software to see how easy it is to customise and set up.
Spent over a week testing
Tested performance across a variety of games and software
Compared build and features with similarly priced keyboards
You might like…


FAQs
It will depend on your choice of switches and keycaps, but the pre-built weighs in at 590g, and most builds will be very similar.
The Ducky Tinker 65 offers a 1000Hz polling rate over its wired USB-C connection.
Full specs

Editorial independence
Editorial independence means being able to give an unbiased verdict about a product or company, with the avoidance of conflicts of interest. To ensure this is possible, every member of the editorial staff follows a clear code of conduct.
Professional conduct
We also expect our journalists to follow clear ethical standards in their work. Our staff members must strive for honesty and accuracy in everything they do. We follow the IPSO Editors’ code of practice to underpin these standards.