How to make devices compatible with HomeKit using Homebridge

Apple HomeKit is one of the best home automation systems, giving you a single place to control all of your devices. Yet, its main issue is one of support. While Apple has removed the most restrictive rules to get the system working, hardware support still lags behind Alexa and SmartThings.
Fortunately, the free Homebridge server is here to help. Via a series of plugins, this tool can let you add additional devices to your system, giving support to the likes of Ring, Honeywell Evohome and more.
1. Installing Homebridge
Homebridge.io contains links to download the server software. It will run on a Mac, Windows PC or even a Synology NAS. Once installed on either, the configuration instructions are the same from Step 3.
Here, I’ll show you how to get Homebridge running on a Raspberry Pi, which is a cheap way to leave the server running all of the time.
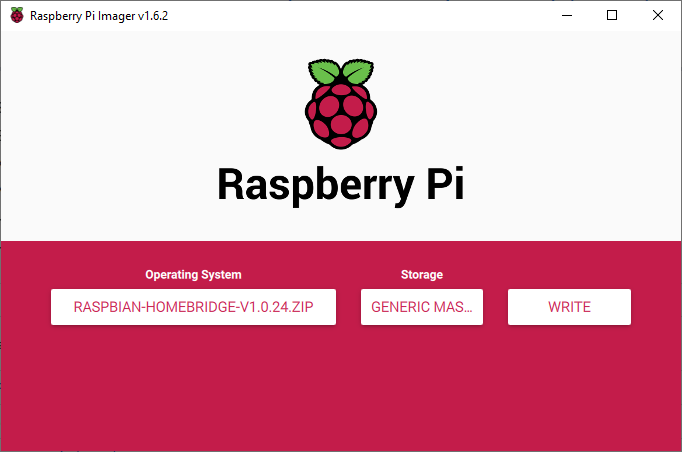
All you need is the mini-computer, such as the Raspberry Pi 4, and a microSD card (4GB or bigger). On a Windows or Mac, download the latest Homebridge Raspbian image. Then, download the Raspberry Pi Imager.
On your main computer, insert the card into the card reader and then run the Raspberry Pi Imager. When it starts, select Choose OS and scroll to the bottom of the list and pick Use customer, then browse to the Raspbian Image that you downloaded. Select your SD card under storage and click Write.
It will take a while for the card to be written, so sit tight.
2. Boot from your SD card
Once the process has finished, put the SD card into your Pi. If you want to use Ethernet, plug in the cable now, then turn on the Pi; for Wi-Fi, turn on the Pi without an Ethernet cable. Your Pi will boot up.
If you’re using Wi-Fi, get your phone out and connect to the temporary hotspot the Pi has created, and then configure your main wireless network. For Ethernet, skip this stage.
3. Connect to the web interface
For any server type, the instructions are now the same. Now, you can connect to the web interface. From any computer, open a web browser and enter http://homebridge.local. This should work. If it doesn’t, you’ll need the IP address of your device. You can usually find this in your router’s setting page, by looking at the IP reservation section of the interface.
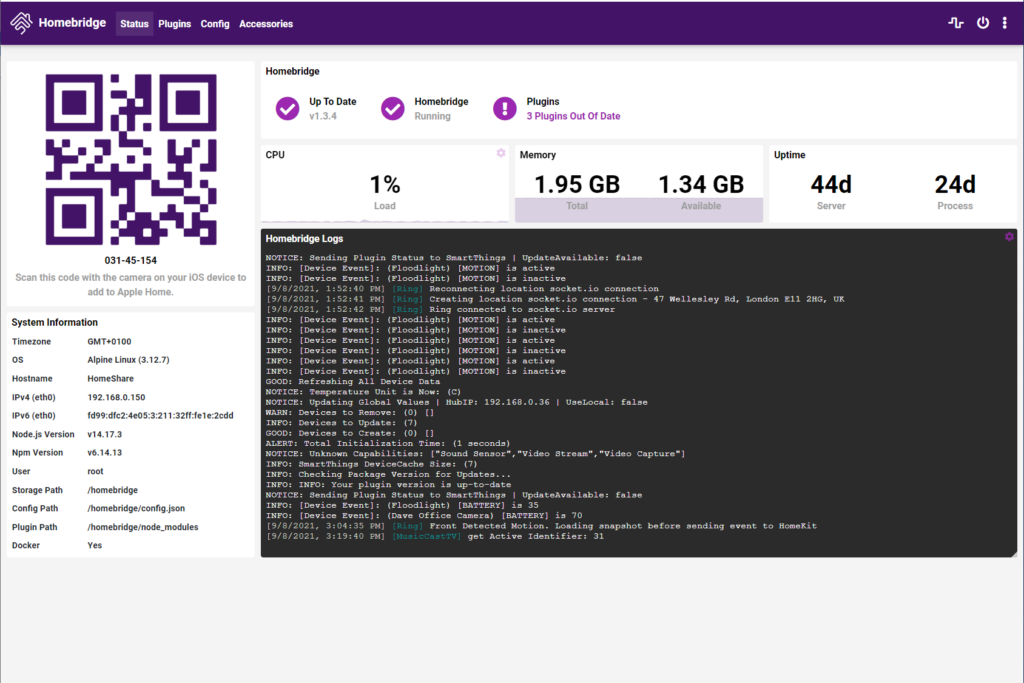
With the web interface, the address you need is http://<ip address of server>:8581. For me, this was http://192.168.0.150:8581. When prompted, enter the username as ‘admin’ and password as ‘admin’. You can change this under User accounts from the Homebridge menu: three dots after you’ve logged in.
4. Add plugins
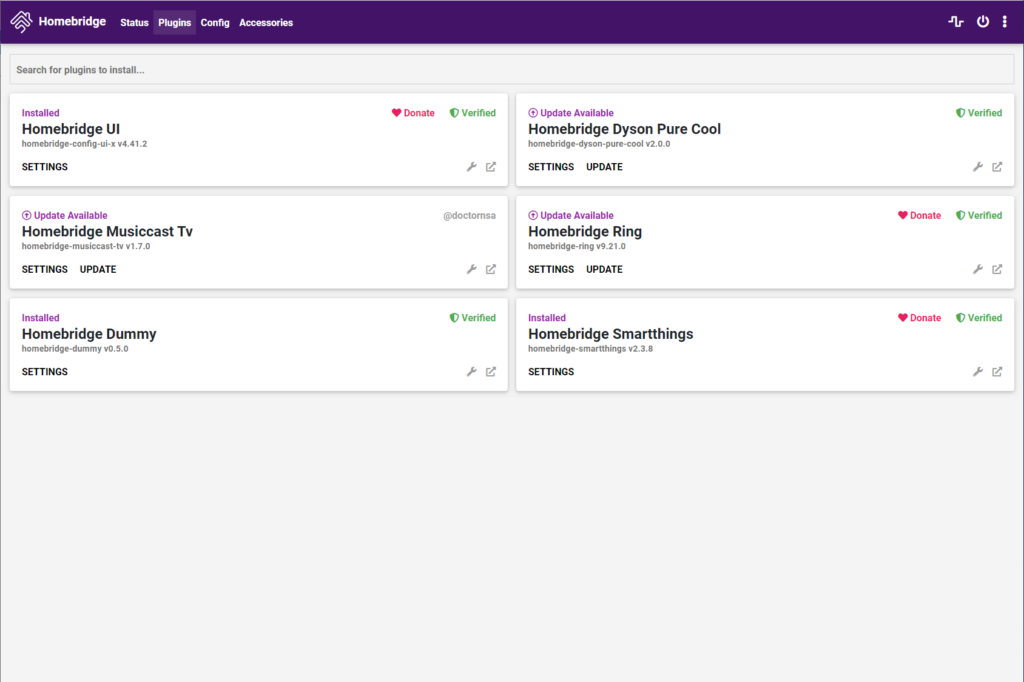
You can now add devices to your server. Click the Plugins link and then you can search for the plugins that you want to install, such as Ring or Arlo. Your plugin will be automatically installed and then you’re usually prompted to add the login details of your connection to the service and devices will be discovered automatically.
However, read the instructions for each plugin carefully, as some have additional setup steps. With SmartThings, for example, you need to install an app on your SmartThings app and copy and paste some details; with Dyson, you have to enter the IP address and Serial number for each fan you have.
You may also want to create separate accounts for Homebridge to use. For example, Arlo only allows you to have one device logged in at a time. Creating a separate account for Homebridge, then sharing all of your devices with it, means that Homebridge will work.
5. Add to HomeKit
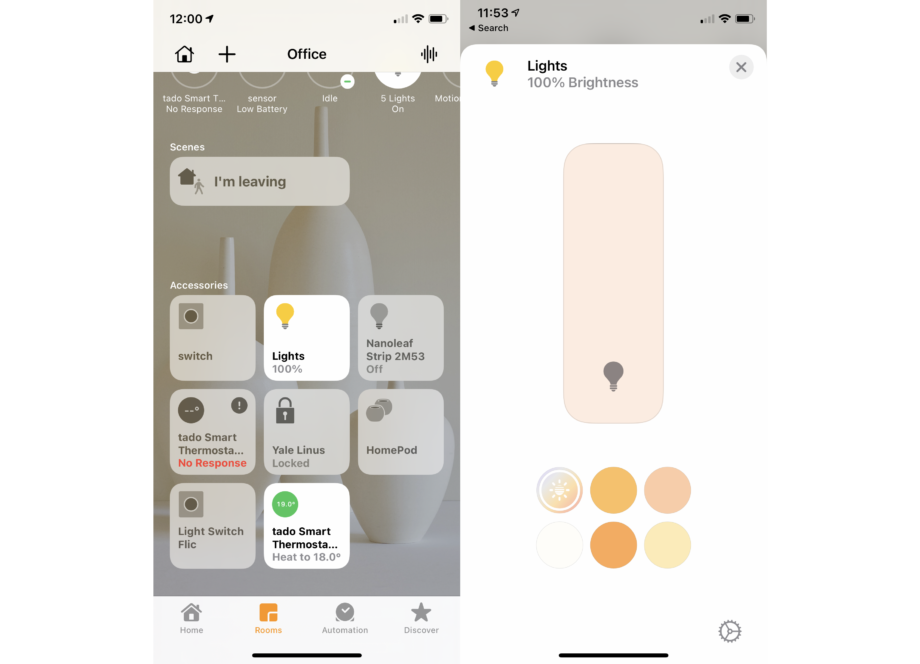
Go back to the main page of the Homebridge server, and you’ll see a large QR code. Go to your phone and open the Home app, then tap the plus button. Scan the QR code and Homebridge will be added, along with all of the devices you added.
Every Homebridge device will work and operate just like regular HomeKit devices, so you can control them or create automations.
You can manage plugin updates, and add new plugins from your Homebridge web interface. If you get any problems, a quick reboot usually does this: click the power button icon in the Homebridge interface to do this.
Editorial independence
Editorial independence means being able to give an unbiased verdict about a product or company, with the avoidance of conflicts of interest. To ensure this is possible, every member of the editorial staff follows a clear code of conduct.
Professional conduct
We also expect our journalists to follow clear ethical standards in their work. Our staff members must strive for honesty and accuracy in everything they do. We follow the IPSO Editors’ code of practice to underpin these standards.