Verdict
Key Specifications
- Review Price: £209.99
So finally, after months of public beta testing the new version of Lightroom is here. As good as the original was, Adobe has found a way to add more features and integrate it with features from Photoshop CS3 and presumably the forthcoming Photoshop CS4.
We first looked at the package in the beta review, which still had some bugs and didn’t have full integration with existing libraries from version 1.0, amongst other tools.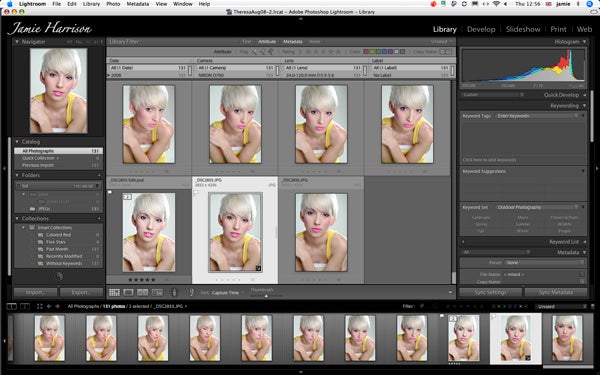
The final release isn’t too far removed from that of the beta, but it seems stable and now offers backwards compatibility with images and libraries from the previous release. This doesn’t just mean that it will open older libraries and offer the full benefit of the new features, it also transfers any presets you may have saved or downloaded, including web galleries, image effects and so on.
The library module of version 2.0 has been updated to provide better searching tools, including searching by keywords, filters and camera and image metadata. This is ideal for photographic journalists, but also useful for photographers wishing to compare bracketed shots, for example, or other parameters.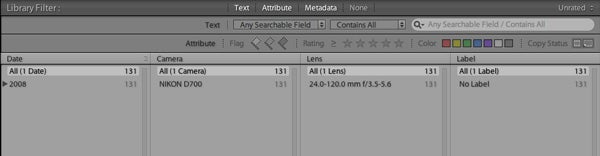
There’s now options to make Smart Collections, similar to Smart Playlists in iTunes. For example, all images that you have selected with five stars, or all images with the keyword ‘Christmas’ could be found in a Smart Collection with those criteria set. Keywording has also been enhanced, with Lightroom offering suggestions based on existing labels of similar images taken at around the same time.
Lightroom now offers dual monitor support and clicking on the screen icons at the bottom left of the first column brings up a second window that can be placed on the second monitor, if you’re lucky/rich enough to have such a set up.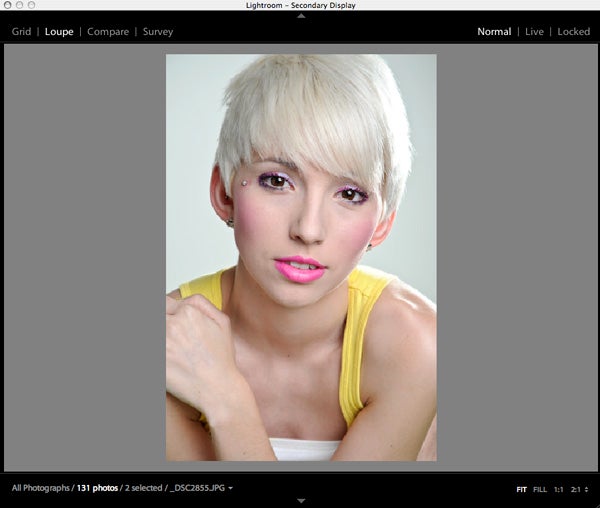
Once you have chosen or found your image or multiple images you can then open then in the Develop module as before, or you can open them in Photoshop or another external application. You can do this at any stage of the process.
Unlike Lightroom v1, the export dialogue doesn’t give you an option to open as a PSD or TIFF file or set the bit rate of 8 or 16 bits. I was annoyed about this at first, but never fear, the options are now in the Preference panel. In fact this is better, as most people have a set pattern of workflow – I always use 16-bit PSD, so once set in the preferences I can now forget about it. Furthermore, instead of generating a PSD file in Lightroom then opening in Photoshop, which is time consuming if you open multiple images, the files open in Photoshop and are saved back into Lightroom as PSD copies once they are closed in Photoshop. This speeds up workflow considerably. 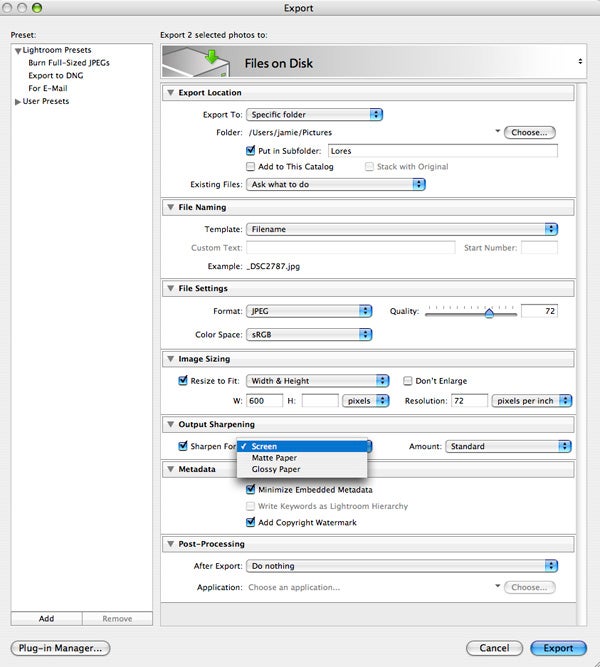
Further integration with Photoshop includes the option to open the files as Smart Objects, with support for High Dynamic Range and panoramic stitching from multiple files directly from the ‘edit-in’ dialogue box, again speeding up the workflow for fans of those processes.
On a similar note, the Export option has been given a slight makeover. If you want to export your images from Lightroom from Raw, DNG, PSD or JPEG to another format then the options are available in the Export box. Now included are better sizing and compression options as well as sharpening options for print and screen images. As sharpening is one of those misunderstood and mistreated processes this is particularly useful.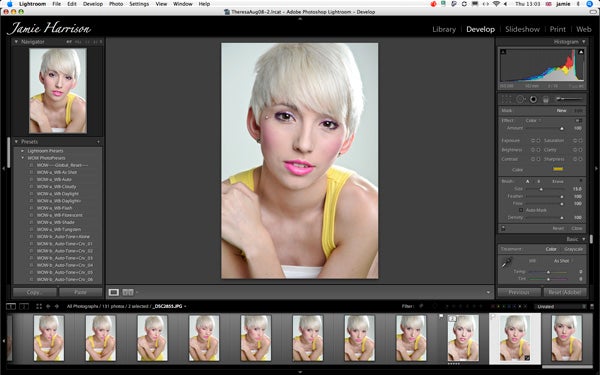
The Develop module is where the real makeover has occurred giving Lightroom the option to finally make localised changes to images, rather than global or tonal and colour specific changes. The primary tool, for me at least, is the new brush tool that allows you to selectively paint into areas to adjust contrast, exposure, saturation, brightness, clarity and colour. A new addition, which I don’t remember on the Beta, is a ‘soften skin’ option, which is terrific for reducing wrinkles under eyes or just giving skin a softer glow. Of course there’s options to change the brush size, the opacity and flow and there’s even a limited masking tool. 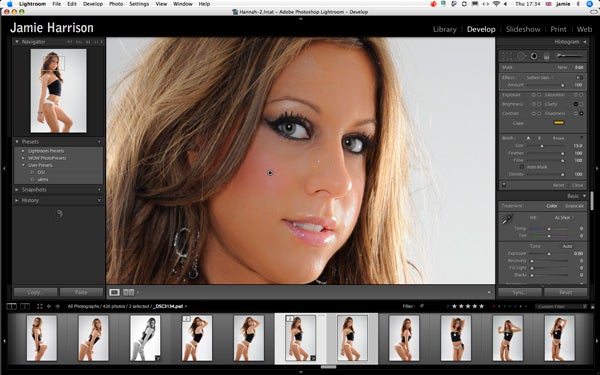
Also in the Develop module Adobe has shifted around some of the older tools. The vignette option is now in its own box, presumably because many people use it as a creative tool, rather than an optical correction device – me included. 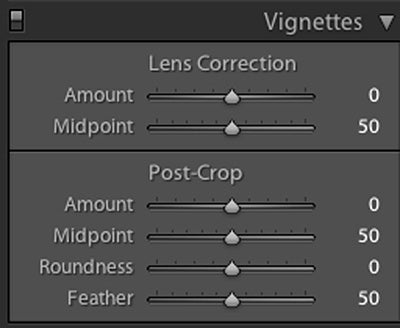
Usefully the sharpening and noise reduction panel has received an improved preview box, with a location selector that allows you to find selected areas to preview, tied into the main image panel. It’s a small improvement but a welcome one.
Some of the tools haven’t been improved and this is a disappointment. I sometimes use the heal and clone tools, but I prefer Photoshop’s version of these. A word of warning here, too. If you try to synchronise corrections to images with the healing tool, it doesn’t work too well unless all the marks are in the same place and against a plain background. So, if you have dust marks in areas of detail, it is better to deal with them individually. 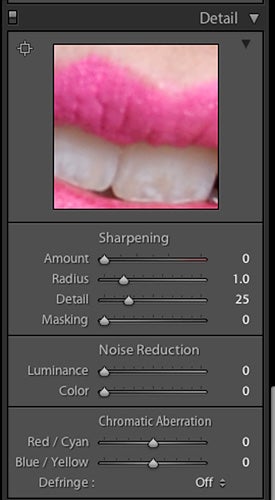
The last of the major changes are in the Print module. First, the Picture Package section has been improved to provide the best paper usage, either using preset grids or automatically with user specified image dimensions. Secondly, there’s also the option to print to JPEG by defining your print parameters and including ICC profiles, then save the image as a JPEG for sending to your choice of printing lab.
Finally that sharpening tool that I mentioned in the Export box is expanded somewhat in the Print dialogue, letting you define the sharpening depending on the media and output resolution being used. This is based on the Pixel Genius Sharpening plug-in for Photoshop and is an absolute godsend.
”’Verdict”’
It takes about a day to get used to the fundamental changes in Lightroom, notably the PSD outputs to Photoshop and the search tools. After that, a few days playing with the new localised tools and you should be up to speed. So, in terms of features, it’s not a major upgrade by any means but the new tools are fantastic and worth the upgrade price.
Lightroom was never meant to be a replacement for Photoshop, but it does enhance it and for photographers who don’t do major image edits, it covers most, if not all of their needs. Version 1.0 was brilliant, and was seriously enhanced by v1.4, but v2.0 is the best yet so it well deserves our highest accolade.
Trusted Score
Score in detail
-
Value 10
Editorial independence
Editorial independence means being able to give an unbiased verdict about a product or company, with the avoidance of conflicts of interest. To ensure this is possible, every member of the editorial staff follows a clear code of conduct.
Professional conduct
We also expect our journalists to follow clear ethical standards in their work. Our staff members must strive for honesty and accuracy in everything they do. We follow the IPSO Editors’ code of practice to underpin these standards.