Verdict
Key Specifications
- Review Price: £425.00
Adobe Photoshop has been a fixture of the image editing business for so long that despite the best efforts of Adobe’s marketing department its name has taken on the status of a household word for image editing. The first version was launched for the Apple Macintosh computer in 1990, and the program quickly became the industry standard, a position it has held ever since. New versions of Photoshop have been released every year or two since 1990. They were numbered up until the launch of the eighth version, called Photoshop CS, in 2003. CS stands for Creative Suite, since Photoshop is now part of a range of creative graphics and media programs published by Adobe. 
The eleventh version of the program, Photoshop CS4, was launched in September 2008. I wrote a beta preview of it at the time, detailing some of the new features, but since then I’ve been using it on a daily basis and I’ve got to know the program pretty well, so it’s finally time for a thorough in-depth review.
While the first Photoshop CS was a major upgrade from the previous version, the two subsequent versions, CS2 and CS3, were criticised by some people as being only minor updates, and many private users never bothered to update to the newer products. CS4 however is far more than a minor update of CS3. Whole chunks of the program have been re-written to make them faster, smoother and more effective, and many new features have been added.
If you’re familiar with earlier versions of Photoshop, the first thing you’ll notice is a marked improvement in the appearance of the interface. The basic default layout hasn’t changed too much, so you’ll still find all the familiar tools in the usual places, but now there is far less wasted space. The various windows and palettes fit together more closely and dock more tidily, and also re-size intelligently, so that information is always visible. If you have to reduce the size of the Photoshop window, the interface elements automatically re-arrange themselves to avoid overlapping, and return to their original positions when the size is restored. If you’re using Windows Vista with transparency enabled then some parts of the interface are also semi-transparent, which doesn’t add much functionality, but it does look nice. 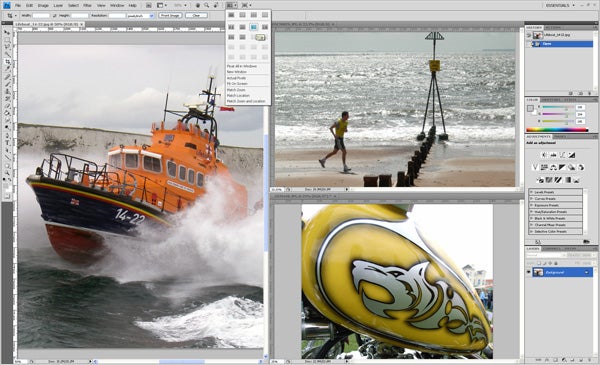
The main work area now uses tabs to help keep your work organised. If several documents are open at once, a row of tabs across the top of the work area allows quick changing from one to another. As well as this the interface also has a new menu for multi-document view options, arranging open items in a range of different patterns, rather than just the “tile vertically” or “tile horizontally” or previous versions. Images open in the main work area also now have a nice drop-shadow around them, which can be useful for distinguishing grey tones on the edge of an image from the grey background.
One completely new addition to the interface is the Adjustments panel, which in the default workspace configuration is found in the palettes on the right of the screen. This palette provides a quick way to apply one of Photoshop’s most under-utilised tools, the adjustment layer, a feature first introduced with Photoshop 4.0 in 1996. Adjustments to a wide range of image parameters and effects can be added as a separate layer, and can be independently altered without affecting either the other adjustment layers or the original image. Non-destructive editing is always better, since it preserves the data in the original image and is therefore completely reversible. The layers are saved as part of the PSD file format, and so can be altered even after the file has been saved, closed, and re-opened.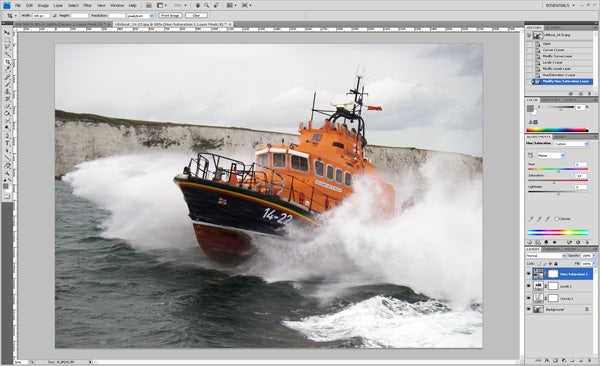
The Adjustments palette contains options to create adjustment layers for the usual parameters, including Brightness/Contrast, Levels, Curves, Exposure, Hue/Saturation/Lightness and Colour Balance, but also adds new adjustments, such as Vibrance and a very useful Black and White function, in which the lightness of various tones can be adjusted in a monochrome image. This is similar to the traditional way of making monochrome images in Photoshop, but is even more versatile. I may have to re-write that tutorial to accommodate the new function.
Alongside the Adjustments panel is another new feature, the Masks panel. This helps to simplify and streamline another under-used Photoshop filter, its ability to use pixel and vector masks when editing an image. Using this panel, selected areas can be quickly converted into layer masks, and can then be adjusted using simple sliders, or created from a colour range.
Many familiar Photoshop features have received a thorough overhaul. The Dodge, Burn and Sponge tools, used to selectively adjust exposure and colour saturation in particular areas of an image, have new algorithms that produce far better results. Previously using the dodge tool would often cause lighter tones to be bleached out while attempting to enhance shadow detail. With the improvement it is far better at preserving those tones.
The ever-useful Clone Stamp tool has also had a bit of a makeover. Now, when the sample point is selected the cursor shows a live preview of the pixels that will be copied, which makes it much easier to match up lines and textures.
There has also been an improvement in the way that brush sizes are changed. When using any brush, holding the Alt key and the right mouse button (Command and Ctrl on a Mac) shows a preview of the brush size and hardness, and this can be altered on the fly by simply moving the mouse. This is one of those features that is so amazingly useful that I’m surprised it wasn’t added five years ago.
One of the most impressive enhancements is to the automatic panorama stitching function that has proved to be a popular feature of the last few versions of Photoshop. The new version has much better pattern-matching ability, and also has features to automatically correct vignetting and barrel distortion, so it can produce panoramic scenes from a much wider range of starting images, and produce much better results. This gives users a wider latitude in the shots that can be turned into panoramas, and negates some of the (linkout:https://www.trustedreviews.com/digital-cameras/review/2007/08/26/Digital-Photography-Tutorial-Panorama-Stitching/p1) careful preparation that was previously required to ensure good results. The program can also stitch photos together vertically, and in another completely new feature it can also create 360-degree panoramas.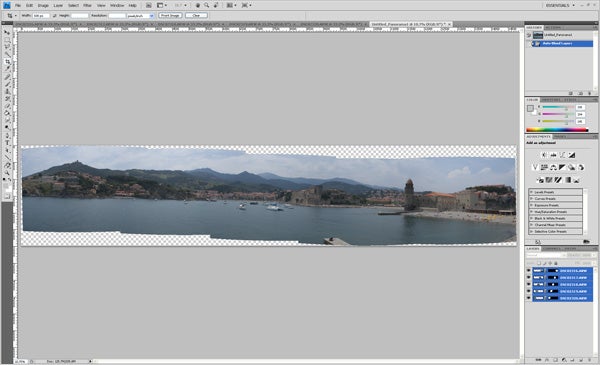
This same pattern-matching technology is used in another clever new pair of features, Auto-Align Layers and Auto-Blend Layers. Auto-align is useful if you have a series of very similar images shot hand-held or with other slight movement between frames, but where you need to align the frames so that the background is the same between shots, such as when compiling animation frames. Previously this would have been a tedious process of aligning semi-transparent layers by eye, but using pattern-matching the program now detects similar features between shots and automatically lines them up for you.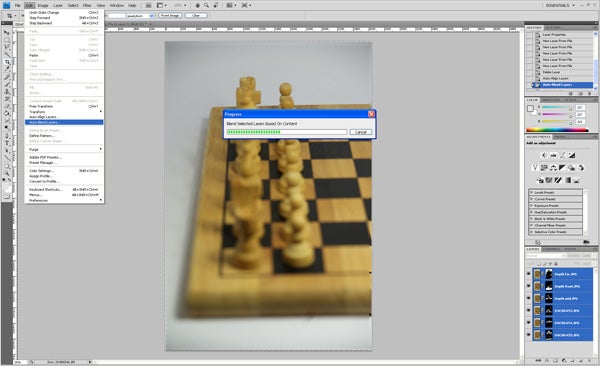
Auto-Blend is a similar pattern-matching feature, and can be used along with Auto-Align to produce a new and remarkable Photoshop effect called Extended Depth of Field. If you take a series of images of a scene with limited depth of field, but altering the plane of focus with each shot, Photoshop can merge the resulting images together into one image that looks sharp from front to back. This will be useful for macro photography, where limited depth of field is a real problem. See the sample images at the end of this review for the results.
The much talked-about integration with OpenGL accelerated graphics is, to be honest, a bit of a let down. I had hoped that it would use the high-speed RAM and extra processing power to speed up rendering operations such as the Liquefy filter and large photo-merges, but in fact unless you’re using CS4 Extended and working with textured 3D models, the effects are largely cosmetic. They’re very pretty to be sure, but they don’t do a huge amount to improve the operation of the program for day-to-day photo editing.
The most frequent application of OpenGL integration is in zooming images on the screen. The zoom action is now animated using OpenGL, giving the impression of a smooth continuous zoom in and out, but only when using the Zoom tool. While this does look very pretty in product demonstrations, in practice it’s not a lot of actual use, because there is a slight lag as the zoom motion accelerates and then decelerates smoothly, making it impossible to zoom in to a precise magnification factor. In practice most people will continue to use the CTRL+ and CTRL- keyboard shortcuts to zoom images, as they always have. One useful addition though is the pixel grid which appears at the highest zoom settings. It helps to distinguish between adjacent pixels, handy if you have to make very fine adjustments to your pictures.![]()
![]()
The other OpenGL function is a little more useful, but only under certain circumstances. If you are drawing or painting on paper on a desktop, it’s natural to rotate the paper as you work to give a more comfortable drawing angle. It is now possible to do the same thing in Photoshop. Simply press the R button, and then use the mouse to drag the canvas round to the desired angle. This rotation is entirely non-destructive, and has no effect on the final image. I have found this feature useful when using a pen tablet for photo editing and drawing, but to be honest you can get much the same effect by rotating the tablet.
There is another immensely clever graphical trick that is incorporated into Photoshop CS4, a feature called Content-Aware Scaling. I first saw this technology demonstrated in 2007 in a YouTube video by the two guys that invented it, which has since received over a million views. I remember thinking at the time “If Adobe sees this they’re going to hire those guys on the spot.” It seems I was right, because their invention is incorporated into CS4.
If you resize a picture in one direction using conventional methods, people and objects in the image will become distorted in proportion to the scale of the change in size. What Content-Aware Scaling does is to look for lines of pixels that don’t change much across the width of the frame, since these contain the smallest amount of useful image date. As the image is resized it then removes or adds pixels so as to minimise the change in the amount of information. The practical upshot of this is that you can shrink pictures by a surprisingly large amount in any one direction without causing figures or objects in the scene to become distorted. Of course the effectiveness of Content-Aware Scaling varies from one image to the next, but it is still a very impressive technology. See the sample pictures at the end of this review for an example of Content-Aware Scaling.
Photoshop CS3 had a special Extended edition which included the ability to work directly with 3D and video content, and this ability is expanded in CS4 Extended. In this enhanced version of the program it is possible to paint textures directly onto 3D models in Photoshop, and 2D layers can be converted to 3D layer that can be re-sized and rotated in three dimensions. This 3D integration probably won’t be much use to the average home user, for whom the standard version of the program will be more than sufficient, but to those working in 3D animation it means that textures and shading can be created and edited without having to constantly export and import files between different programs. The same applies to video content, which can also be imported and manipulated directly in CS4 Extended, with limited timeline editing functions and video rendering.
Photoshop CS4 Extended also has a number of other features useful to professionals working in graphics production, as well as in specialist scientific and forensic fields, such as an enhanced counting tool and the ability to share work over networks.
Any review of Photoshop would be incomplete without also taking a look at Adobe Bridge, the file browser and organiser that is installed along with Photoshop. Bridge too has received a substantial upgrade, and has a number of new and useful features.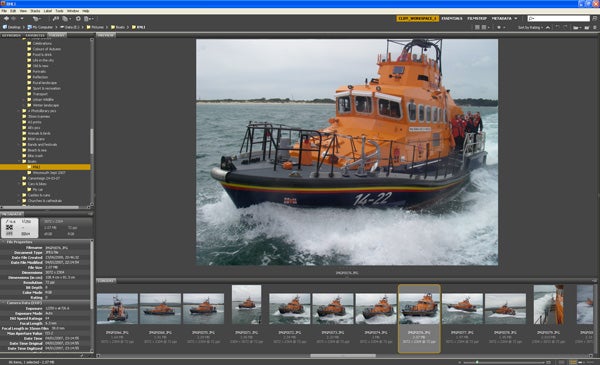
Changes to the interface include the addition of Forward and Backward buttons like a web browser, a full file path bar so you always know what it is you’re looking at, and a number of pre-set workspace layouts. Search functions have been improved, with the addition of a search bar and improved keyword system. Bridge can now export Web galleries, including some pretty sophisticated Flash-based slideshows, ideal for uploading direct to a gallery website. It can also export PDF contact sheets, and import images direct from a camera. Any image can now be opened in Camera Raw, to take advantage of its advanced exposure and tone controls.
Photoshop CS4 is also closely integrated with Adobe Lightroom 2, the professional Raw file processor, image organiser and photo editor. See our review of that product for more information.
”’Verdict”’
Version CS4 is the most complete upgrade of Adobe Photoshop since the launch of the original CS version in 2003. If you have avoided buying CS3 because it was not enough of an improvement on CS2, then now is definitely the time to upgrade. It goes without saying that it is the most powerful, the most comprehensively complete and the highest quality graphics editor on the market, but CS4 really does add so many new features, and so many improvements to existing tools, that it is an essential purchase for any professional, and an aspiration for most amateurs. It’s expensive, and annoyingly significantly more expensive in the UK than in America, but if you want the very best you have to pay the price.
—-
Here’s an example of Content-Aware Scaling. First, here’s the unaltered image:
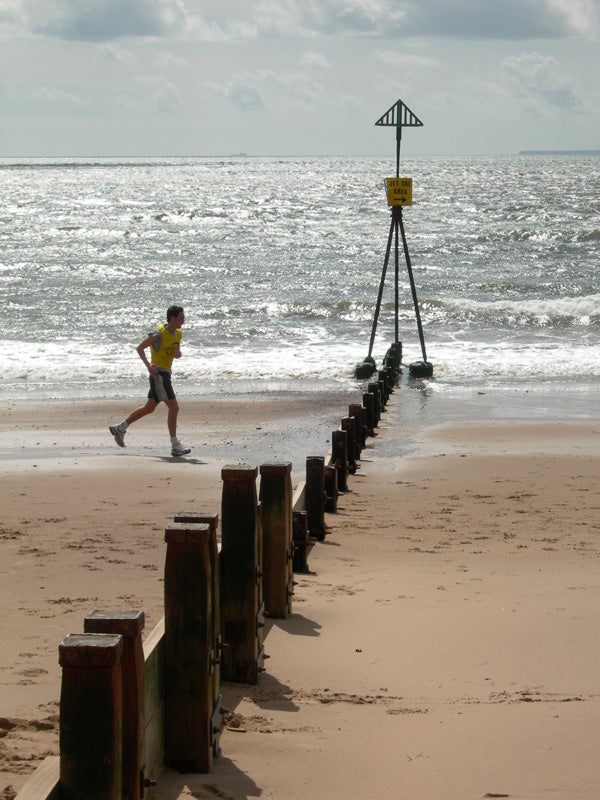
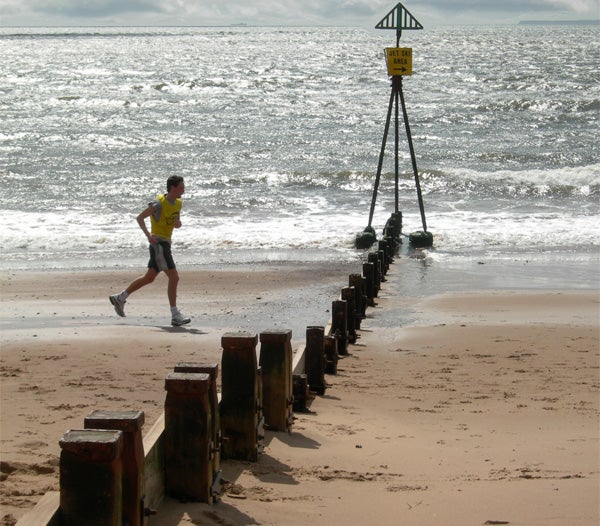
Here’s the same image, but reduced vertically by one third. As you can see, the whole image is distorted, and the runner looks short and squat:

Here’s the same image reduced in height by one third using Content-Aware Scaling. The image is much less distorted, and the runner is correctly ptoportioned:
—-
New features of Photoshop CS4 include Auto Align and Auto Blend. These can be used to artificially create images with massively increased depth of field. Start with a series of images with limited depth of field, but focused at different points in the scene:
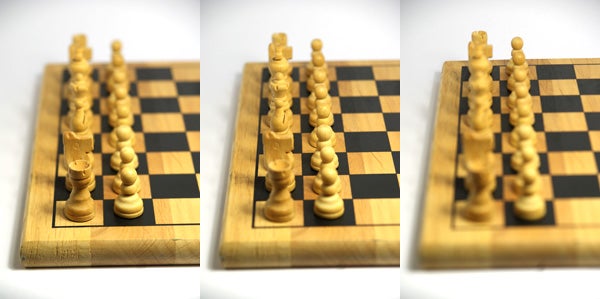
Photoshop CS4 can combine these images to produce a result like this:

—-
Trusted Score
Score in detail
-
Value 9
-
Features 10
Editorial independence
Editorial independence means being able to give an unbiased verdict about a product or company, with the avoidance of conflicts of interest. To ensure this is possible, every member of the editorial staff follows a clear code of conduct.
Professional conduct
We also expect our journalists to follow clear ethical standards in their work. Our staff members must strive for honesty and accuracy in everything they do. We follow the IPSO Editors’ code of practice to underpin these standards.