Raspberry Pi projects: 10 of the best

6. Raspberry Pi Supercomputer
The Raspberry Pi Supercomputer demonstrates the Pi project working as intended. It’s a huge array of 64 Raspberry Pi computers linked together in a structure made of Lego, constructed by computer engineering students of Southampton University. There was even a six year-old on the team – James, son of Professor Simon Cox, head of the group.
Southampton University has published a guide on how to make your own Raspberry Pi supercomputer, at the price of a mere £2,500. However, before you start thinking you’ll have a processing powerhouse on your hands, the Rapberry Pi Supercomputer is really there to teach people how to program for such a thing.
As Professor Cox says, “The team wants to see this low-cost system as a starting point to inspire and enable students to apply high-performance computing and data handling to tackle complex engineering and scientific challenges as part of our on-going outreach activities.”
7. 3D printed case
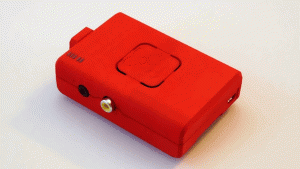
Ever since the Raspberry Pi landed back in February 2012, the net has been flooded with cases to hold the tiny computer. The neatest way to make a Raspberry Pi case is through 3D printing – offering the clean, perfect design of a mass produced case without the giant costs associated. 
Over at the Shapeways website, you can find a bunch of well-designed 3D printed Raspberry Pi cases that aren’t much larger than the circuit board itself. They tend to cost a bit more than the computer, but if you want your Raspberry Pi to act as a gadget that lives in your lounge, they’re the perfect solution.
8. Wi-Fi camera grip
A seriously clever and practical implementation of the Raspberry Pi, David Hunt hollowed out a camera grip for the Canon 5D Mk II and made it a new home for the mini computer. He even used the Canon battery that slots into the grip to power the computer. 
How does it work? The Raspberry Pi automatically harvests new pictures from the camera every second and send them on to an iPad connected to the same Wi-Fi network. The Pi can also remote trigger the camera, as it is hooked up to the camera’s shutter via a dedicated circuit.
The core parts needed for the construction are pretty simple too, just a Raspberry Pi, a Wi-Fi dongle, USB cable, the Canon battery, a DC converter and the camera grip itself.
9. Time lapse dolly
Another ingenious Raspberry Pi camera hack that could cost thousands to recreate with pro-grade equipment is the Rasberry Pi time lapse dolly, or RasPiLapse as its maker likes to call it.
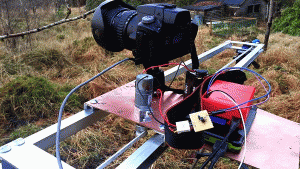
The RaspiLapse isn’t much to look at, but is capable of creating some seriously impressive visual effects. The Raspberry Pi controls the shutter of a connecter DSLR, as well as its movement across the dolly rig – which looks a bit like a workbench. 
Time lapse effects on their own are relatively easy to apply, but incorporating a dolly lets the budding cinematographer create a much more dramatic look. The match of fast environmental changes matched and slow foreground movement is something even pro film directors would be proud of. Take a look –
10. FireHero 3
The pyrotechnics of rock shows are carefully choreographed, but FireHero 3 proves that the Raspberry Pi can do the job, when partnered with a few other components. Probably the most dangerous Raspberry Pi project we’ve ever seen, FireHero 3 uses the computer to act as the brain of an on-stage pyrotechnics system.
And it all begins with a guitar. The electric guitar’s sound is converted into a MIDI signal using a Roland GI-20 converter. This information is fed into a system run by a Raspberry Pi and Arduino Mega – another low-cost circuit board computer.
The system then controls a Silicon Nitride ignition system capable of pumping out eight flumes of fire up to 100 foot long, all in time with whatever the rocksmith up front it playing. It’s genius. Terrifying, roll-on-the-floor-screaming genius.
Seen another slice of Raspberry Pi gold on the net? Let us know in the comments.


