
How to take better photos with the iPhone 6S and the iPhone 6S Plus
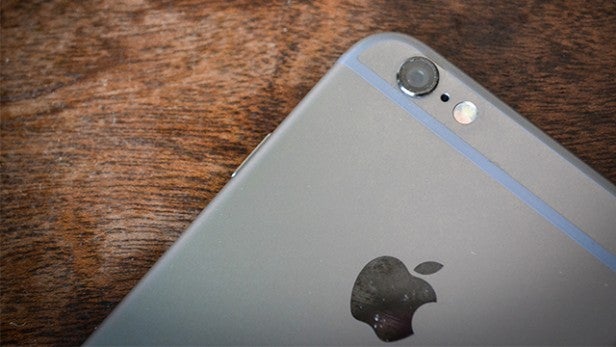
While it may not pack the same number of megapixels as the Sony Xperia Z5 or the Nexus 6P the iPhone 6S and 6S Plus is still one of the leaders when it comes to taking fantastic pictures with a smartphone.
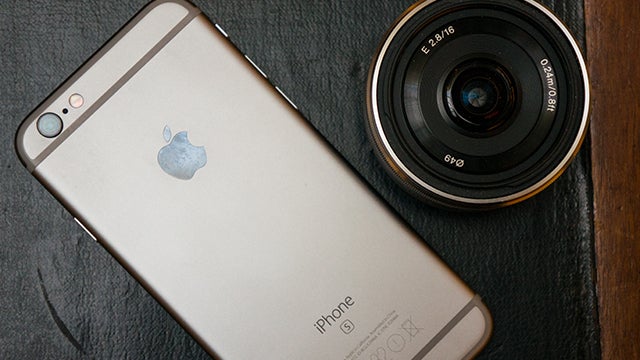
The combination of classy optics, a sapphire coated lens and focus pixels create a fast and detailed shooting exprerience that we just love snapping with. But if you’re looking to get that bit more out your Apple smartphone camera, these handy tips are for you.
Related: How do Live Photos work on iPhone 6S?
iPhone camera tip #1: Use the camera grid to set-up your shots
When casually shooting with your iPhone, it’s very easy to produce wonky photos, where the horizon is accidentally tilted at an angle. Skew-wif photos can look good if it appears deliberate, but it’s best to know what you’re shooting, rather than occasionally stumbling upon some photographic gold.
Switching on gridlines is the easiest way to do this. The grid superimposes a series of lines on the screen of the camera app, to make it much easier to compose your photos.
This feature isn’t something you switch on in the actual camera app, though. Apple got rid of that way back iOS 7. Instead, go to Settings and scroll down to Photos & Camera. This holds the camera options that are kept out of the app itself in order to keep things less cluttered.
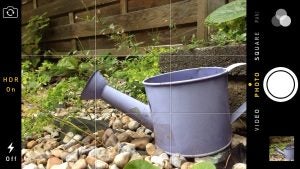
Switch the grid on, and use it to line-up the horizon properly, giving you straighter-looking shots.
While many people use the iPhone’s grid view just to make their photos straighter, there’s a actually another objective. In purer photographic terms, the gridlines are there to be used as a rule of thirds guide.
The rule of thirds is a principal based around the idea that photos look better when your subject isn’t slap-bang in the middle of the scene. Place them to either side, with perhaps another secondary element to interest the eye on the other side, and you have a recipe for a winning photo.
iPhone camera tip #2: Turn-on Auto HDR
One of the easiest ways to improve image quality in your iPhone photos is to experiment with HDR, a mode that you switch on and off at the top of the camera app. You can’t miss it.
HDR stands for high dynamic range, and is a mode that artificially enhances dynamic range by merging together three exposures: a bright one, a normal one and a dark one.
But what is dynamic range? In cameras it refers to how well a sensor can render the darkest and lightest parts of an image, before they become overexposed or crushed into blackness. HDR is all about opening-up these extreme ends of the brightness spectrum, bringing out details that would be missing when shooting in the standard Auto mode.
Related: iPhone 6S vs Samsung Galaxy S6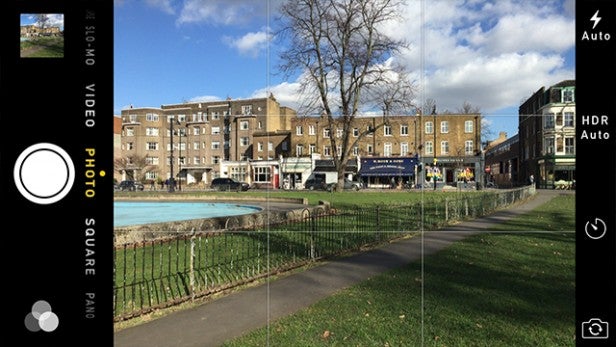
With our iPhone 6S we tend to keep ‘Auto HDR’, a feature that was introduced in iOS 7.1 for iPhone 5S and up, on the majority of the time, as this seems to get the right mix. Keeping just HDR on often resulted in strange looking, non-realistic pictures, while suffering over-exposure was rife if we left it off completely. The ‘Auto HDR’ mode switches HDR on when it senses the time is right. but doesn’t force you in to using it all the time.
iPhone camera tip #3: Things to avoid
There are two things that it is always best to avoid when you’re taking pictures on the iPhone 6S, and that’s the zoom and the flash.
The iPhone 6S uses digital zoom, which basically involves cropping the image, blowing it up and the applying a noise reduction algorithm to reduce the noise of the resulting photo. It results in pretty soft-looking images, though. The issue is that the iPhone just doesn’t have the resolution or detail to spare to make digital zoom viable. Even when zooming in just slightly, you can tell it has been used without blowing-up the final image.
Instead of using the zoom, we tend to take a picture further out and then crop in and zoom later, this means you’re still left with full size image to play around with. So no compromising on the quality. You could also try and get closer to your subject, this often helps you frame the shot better and, of course, gets you moving. Getting really close to your subject can also leave you with some pretty unique looking shots.
Next, the ruiner of night time shots – the flash. Pictures taken with the flash turned on are easy to spot. They lack detail, are always over-exposed and faces turn a ghostly bright colour.
Even though the iPhone 6S boasts a TrueTone duel LED flash, it is far from perfect and normally best left off. Instead, try to use any natural light around you or play around with the settings in an editing app, like the ones we mention in tip five.
Related: iOS 9 Tips and tricks 
iPhone camera tips #4: Be careful with Live Photos
A new feature for the iPhone 6S and 6S Plus, Live Photos add a few seconds of video to the start and end of the pictures. It’s hardly an original idea, but when it’s used well the results can certainly look cool.
By default, Live Photos are on all the time. We’d say switch this off – by pressing the circular icon at the top – and then manually tap it on and off when you’re in situation where a moving photo suits. Moving vehicles or sports look great, though a snap of your dinner less so.
Live Photos eat threw about double the space, important to note if you’ve got a 16GB iPhone.
iPhone camera tip #5: Apps and processing
When we’re shooting photos with our iPhone we mostly take the initial shot with the native camera app. Why? Well, it’s easily the fastest, both to shoot and to open, especially as a swipe up from the lock-screen puts you straight into shooting mode.
On rare occasions when we want to really layout our shot, we might use ProCam, which boasts a much more feature rich and customisable experience to the regular Camera app. With ProCam you can alter the image size and play about with multiple modes, including night mode, face detection and anti-shake. You can also split the exposure and focus, giving you more flexibility especially when the conditions are far from perfect.
Apps really come into there own when the photo is taken and can often bring a relatively middling shot back to life. Our go to processing app is VSCO cam, which not only packs some of the best looking filters on iOS, but also a full suite of manual editing options.
We’ve got into a bit of routine with processing snaps and it all starts with importing the photo into VSCO Cam. From here, depending on the type of photo, we’ll go one of two ways. If it’s portrait shot that is a little blurry we will use the ‘Sharpen’ option to crisp up the image, but don’t take it too far. Increasing the ’Temperature’ adds warmth to the photo and is great for making landscape shots look better, while moving the ‘Exposure’ slider a few notches either way can do wonders for overly bright or dark images.
VSCO also has great sharing features, so you can’t go directly to Instagram or to a number of other services without leaving the app. It also has its own sharing service ‘Grid’ which is full of pretty pictures.
Another great editing app that’s worth a look is Darkroom. It lets you create custom filters and requires no separate picture importing, a major time, and storage, saver. It also utilises a nifty slider system for editing, so you get real time updates on how the snap is looking.
Instagram is probably the obvious choice and the editing app of choice for many, but we prefer to use it simply for sharing. The processing options it boasts have grown sizeably and you can now do many of the same things you can in VSCO and Darkroom, but the results, to us anyway, look a little more artificial.
Buy Now: iPhone 6s at Amazon.com from $499
iPhone camera tip #6: Social sharing
Mentioning Instagram leads nicely into our next tip, which also happens to probably be the most obvious yet. Sharing.
Once you’ve avoided all the Starbucks coffee cups and over edited selfies, Instagram is a thriving community packed to the brim with an ever expanding feed of actually really great pictures.
And you can join too, it’s one of the most accessible forms of social networking, in our opinion. Twitter also offers a photo sharing option, but it’s very basic and of course you could upload your snaps to Facebook, but with Instagram it’s all about the photos.
Getting a bit of praise for your artfully crafted snaps is also a plus and whilst sharing your snaps with the online world won’t make you a better photographer, it is a great motivator and a way to find inspiration.
Buy Now: iPhone 6s Plus at Amazon.com from $584
iPhone camera tip #7: Taking better night photos
We’ve already mentioned that we’d advise against using the flash on the iPhone 6, but that doesn’t mean you have to ditch the device completely when the sun-sets.
One handy tip is having a play around with the ‘Exposure’ slider Apple introduced in iOS 8. It’ll pop up when you focus and you just have to move the slider up and down, depending on what you want to achieve. Increasing the exposure will brighten the photo, as the shutter will stay open longer and let more light hit the sensor.

iPhone camera tip #8: Accessories to supercharge your photos
The immense popularity of iPhones has sparked off other photographic accessories too. One of the most interesting is the Olloclip. It’s a lens that sits on top of your iPhone’s native camera lens, giving you a completely different field of view and visual quality to your photos.
Olloclip’s growing lens line-up is built specially for the iPhone 6S and 6S Plus and there are a few options to choose from. The 4-in-1 lens boasts, you guessed it, four different options – fisheye, wide-angle, macro 10x and macro 15x, with giving a distinct effect to your photos.
We’ve used this OlloClip extensively and we have to say that it works really well, once you’ve get over the annoyance of taking it off and putting it on every time you use it. The wide-angle lens is our pick of the bunch, it’s great for landscape shots and really widens the field of view.
Aside from OlloClip, Moment also has its own range of add-on lens. Born on Kickstarter, Moment currently has two lenses – wide and tele. The wide version is great for fitting more content into the shots and capturing rolling landscapes, while the tele lets you get closer to your subject without losing any of the picture quality. Both cost $99 each, a fair whack more than the OlloClip, which retails for about £69, so they’re probably for only serious iPhone shooters.
You could also pick up a tripod, a great accessory for ensuring your snaps are still and shake-free. We love the Joby GripTight, which securely folds around your phone and keeps everything sturdy. You can pick one up from Amazon for about £17.
(apester:5697a35dbb46ccdb05475724)
Do you have any great iPhone 6S camera tips to share? Let us know in the comments section below.
Editorial independence
Editorial independence means being able to give an unbiased verdict about a product or company, with the avoidance of conflicts of interest. To ensure this is possible, every member of the editorial staff follows a clear code of conduct.
Professional conduct
We also expect our journalists to follow clear ethical standards in their work. Our staff members must strive for honesty and accuracy in everything they do. We follow the IPSO Editors’ code of practice to underpin these standards.