How to Install Windows 10 Technical Preview

Step-by-step guide to installing the Windows 10 Preview
The build up to the launch of Windows 10 is well underway, with Microsoft having already made an initial Technical Preview version available to try back in October 2014.
Now a new version is available that includes loads more of the key new features that make Windows 10 a genuinely exciting prospect, including the Xbox app, some of the new Spartan browser features, Cortana and more.
So if you’re finally ready to give the new operating system a try, below we present our step-by-step guide on how to install the Windows 10 Technical Preview.
Also, if you’ve already got Technical Preview installed and want to fast track getting the latest update with all the new features, we’ve instructions on how to do that too.
Before You Install
Here’s a couple of obvious points to consider before you head down the path of mucking about with your PC.

First, make sure you have all your data backed up. Even if you’re careful with how and where you install the update, it’s still a good idea to have everything duplicated just in case anything goes wrong.
The update won’t be reversible, even with a recovery partition so make sure you have everything you need to re-install your original version of Windows – serial numbers, installation discs, etc.
Where to download the Windows 10 Technical Preview
Once you’re sure you have a PC that’s backed up and ready to have Windows 10 unleashed on it the next port of call is to download the upgrade.
The place to head to is http://windows.microsoft.com/en-gb/windows/preview.

Here you’ll be signing up for the Windows Insider Program, which allows you to download and test out the software. You’ll need a Microsoft account – Hotmail, Outlook, etc – to login and you’ll need to agree to some terms and conditions along the way.
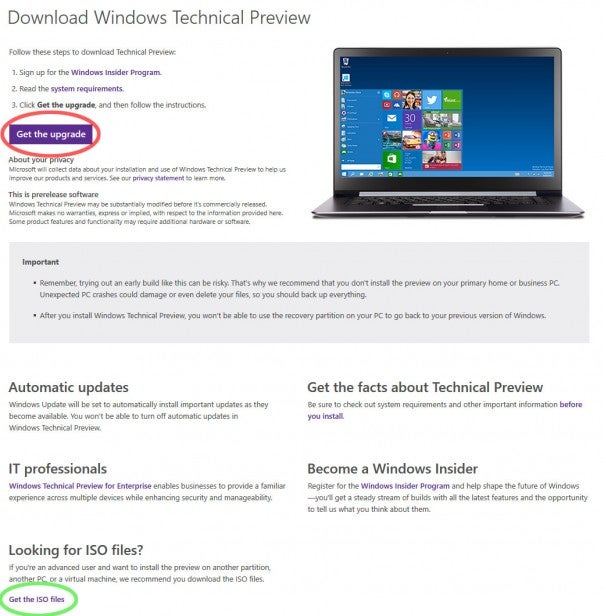
Now the next step is where you have to be a bit careful. Microsoft – for some bizarre reason – has sought to guide the user to download the upgrade version of the software, which will upgrade the very PC you’re using.
Don’t do this!

Even if you are planning to upgrade the PC you’re using – i.e. it’s already a spare – it still makes far more sense to download the installation separately in case something goes wrong and you have to start again. It really is a very silly way for Microsoft to have setup the preview website.
Instead, head to the bottom of the upgrade page where it says “Looking
for ISO files?”. Click on “Get the ISO files” and download the version
that’s right for your machine. There are options for US and UK English,
Chinese, and Portuguese as well as 32-bit or 64-bit versions. They’re around 3-4GB so be prepared for a little bit of a wait.
How to Install the ISO
To get the Windows 10 Technical Preview onto your test PC you’ll need to either burn the ISO onto a disc or copy the files onto a USB drive.
Windows has built in burning capabilities these days so you can just use that – just insert a disc, right click on the ISO and select “Burn Disc Image”. Or you can use your choice of burning software if you have something else installed – Nero or ImgBurn for instance.
For USB installs, if you have software that can read ISO files you can just copy the contents onto a USB drive or you can download and run the Windows 7 USB DVD Download Tool which will format the drive and copy the ISO to it for you.
What if I Don’t Have a Spare PC or Hard Drive?
If you don’t have any spare hardware on which to install Windows 10 Technical Preview but you don’t want to upgrade your current Windows Install, you have a couple of options: install to a separate partition on your existing hard drive or install to a virtual machine.
To create a separate partition you’ll need to resize your current partition. You can do this from the Disk Management tool – right click on My Computer and select “Manage”. Just right click the disk partition you’d like to resize and select “Shrink Volume”. Assuming you’ve got enough hard drive space you’ll be able to shrink this partition and leave enough room for another Windows installation on the left over space – anything over about 10GB should be enough for a basic Windows 10 installation.
Once the original partition is shrunk click on the empty space left and select to create a new partition. Then, when you run the Windows installation make sure to select this new partition to install to.
Removing this new partition and getting back to your old installation can be a bit of a bind but that’s for another article…
As for installing to a virtual machine, you can find a comprehensive guide here.
Installing the software
Once you’ve either burned your disc or copied the files to a USB drive, insert either into the PC you’d like to upgrade.
If you do have an old version of Windows – and haven’t elected to just upgrade direct from the website – you can start the installation from the desktop by just clicking setup.exe and following the instructions.

If you don’t have a copy of Windows already on the machine you’ll need to boot from the disc or USB drive by changing the boot options in your motherboard’s BIOS.
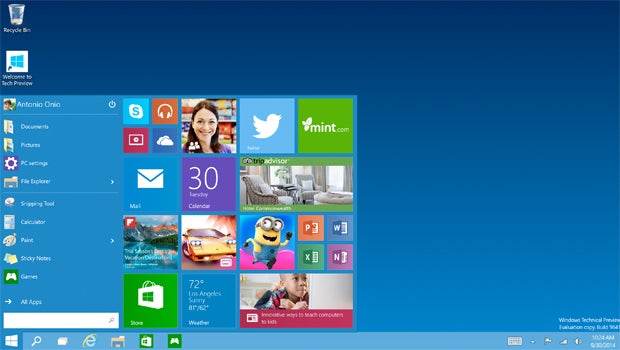
Once booted, just follow the setup instructions. Behold a new world of “Live Tiles in the Start Menu? What’s that all about?” awaits…
Get the latest build of Windows 10 Technical Preview now!
For those of you already rocking Windows 10, all you need to do is wait for the automatic update schedule to arrive and the update to the latest build with all the new fun features will happen of its own accord.
If you want to force the upgrade to happen straight away you need to go to PC Settings > Update & Recovery > Preview Builds > Check Now. You’re looking for Build 9926.
The new update is essentially a fresh install so make sure any data you need is backed up. It will keep your personal files and attempt to reinstall comptible programs but it’s not foolproof.
Next, find out Everything else you need to know about Windows 10

