Make your laptop run like new again with this simple upgrade.
There’s no better way to boost the performance of a laptop than to replace its mechanical hard disk with a solid-state disk. SSDs have read and write speeds many times greater than classic hard disks, and while they’re more expensive, the performance benefits can be felt throughout your PC.
Booting into Windows will go from taking minutes to seconds; programs, too, will take no time to load; and searching for files will be snappy. If you don’t want to shell out on a brand-new laptop then it’s well worth the investment.
Video: How to choose a laptop in 2016
Before you upgrade
Before you purchase an SSD for your ageing laptop, there are a few things you need to consider.
First, you need to ensure that it’s possible to get inside the laptop. While most devices will allow you to remove a potion of the underside of the laptop to get to the hard drive within, others such as super-thin UItrabooks will be more challenging.
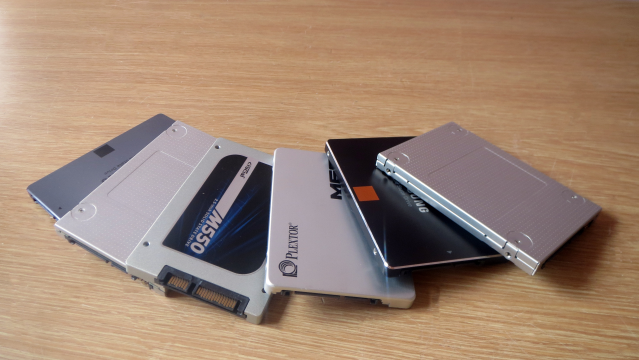
Related: Best SSDs to buy right now
It could simply be a case of removing a single screw and sliding out one side to reveal the hard drive. Or, it may involve taking off the entire back of the laptop, then a few components, followed by an aluminium guard and the cradle in which the hard disk sits.
By the end of which you’ll be surrounded by tiny screws and a number of the components of the laptop; this can be a daunting prospect for some. Never fear, though: laptops are designed to be opened up and fiddled with, and in the main fit together like a jigsaw. Just don’t lose any of the pieces.
Note that opening up your laptop and switching out the SSD will almost certainly void your warranty, though. If you damage your machine, you’re unlikely to get a free repair since any technician worth his or her salt will easily be able to figure out that you’ve been messing around inside. You have been warned.
Related: Our pick of the best laptops
Finally, ensure that your model of laptop is compatible with the SSD. Although the majority of laptops from the past 10 years use a SATA connection between the hard drive and the motherboard, older models might use a parallel ATA connector. You’d be wise to check this before shelling out on an SSD, as you’ll struggle to fit a converter between your SSD and the connector inside the laptop.
Consider the current size of the hard drive and the expense of an upgrade too. Although SSDs have dropped considerably in price over the past few years, a 500GB SSD will still set you back around £150.
Buy Now: Samsung 850 EVO 500 GB at Amazon.co.uk (£123) | Amazon.com ($164)
An equivalent mechanical hard disk of the same capacity will cost only around £40/50. Furthermore, if you’re using nearly all of the 500GB of your current hard drive, then you’re going to need clean out files you don’t want before attempting to clone your drive.
Buy Now: Crucial MX200 250GB at Amazon.co.uk (£74) | Amazon.com ($79.99)
To check all of the above, consult the laptop manual, contact the manufacturer, and check out the forums and technical support relating to your disk’s make and model. There are countless laptops out there, so it’s prudent to do a little research before attacking the laptop with a screwdriver.
Of course, the most important point here is to remember that any upgrade of this type can also put your data at risk. We’d strongly recommend that you back up your data to an external hard disk before embarking on any of this, as things can go wrong.
The upgrading process
There are two ways in which you can upgrade your laptop’s hard drive to an SSD:
1) Swap out the old drive for a new SSD, providing you’ve taken into consideration all the above, and re-install the operating system, along with all your programs and data – if you’ve got an up-to-date backup.
OR
2) Clone your current hard drive and transfer everything stored on the laptop to the new SSD.
There are advantages and disadvantages to both methods. With a clean install of Windows on a new SSD, you’ll be removing any issues that you may have experienced on your old installation.
For example, there will be no more lost Registry links for programs you’ve installed and removed in the past, your temp files won’t be hanging around, and you can install only the programs you’re actually going to use this time around. Plus, any sneaky malware you may have picked up over the years will be banished forever.
The disadvantage here is the time it will take to re-install everything, the potential for losing some data or programs – although that should still be safe on the old drive – and any lost product keys that will stop you from re-installing the operating system or any programs.
The advantage of cloning your current hard drive to an SSD means that you’ll be up and running in a matter of minutes, you won’t lose any work or programs, and your desktop will be as you left it before starting the upgrade.
A disadvantage of cloning is that any issues with the old installation of Windows and its programs will naturally be transferred to your new SSD. Also you may not have enough space on the new SSD to fit the install of Windows, programs, games and data. Plus, any irritations such as malware, pop-ups and junk files will continue to haunt you.
Here, we’re going to take the route of cloning. If you’re planning on a re-install, skip to later in the article where we discuss fitting the SSD.

To successfully clone your current hard drive to an SSD, you’ll need a way to attach the new SSD to the laptop, so it’s recognised as another hard drive. You can either purchase an SSD upgrade pack, such as one offered by Kingston SSDs, where there’s a USB enclosure complete with cables that will allow you to attach the SSD to the laptop and thus communicate with it. Or you can opt to buy a SATA to USB adapter.

Next up you’ll require cloning software. You can either pay for a more detailed product, with extra features. Or you can opt for a free cloning product, such as AOMEI Backupper.
Start by connecting your SSD to your laptop via the USB cable. Then download the cloning software and run the installer.

Accept the usual authentication box to install software, as well as the licence agreement for the software itself.

It’s usually best to opt for the defaults for the cloning software, unless of course you have a specific area where you install programs, or you’re a little suspicious as to what else might be installed alongside the program.
When the install is complete, click on Finish, and launch the cloning software via the newly placed icon on your desktop.

In the case of AOMEI Backupper, click on the Clone tab located on the left, followed by Disk Clone from the three possible options.

If your SSD has been plugged in to the USB port, and it’s recognised by Windows, then it should appear underneath the currently installed hard drive.
Usually, the installed hard drive is Disk0, and the SSD will be Disk1, but that depends on the number of disks you already have installed in your laptop.
Take a moment to double-check the disk sizes as shown under the “Disk0” or “Disk1” label to the left; if you have a 500GB hard drive, and your new SSD is a 1TB model, then you’ll be able to recognise the difference. Of course, your new drive will be completely empty, which will be a fairly big hint.

You’ll need to select the Source disk, which is your current hard disk, by clicking on the correct disk entry followed by Next. Then you’ll be asked to select the Destination disk, which is the new SSD you’ve connected to the laptop via USB; and click on Next to continue.

When both Source and Destination disks are selected, you’ll be given a brief outline of the process that’s about to take place. If everything looks okay, click on the Start Clone button.

The cloning of the drive may take some time depending on how big the drive is, and the speed of the connection to the destination SSD. When it’s done, click the Finish button and exit from the cloning software.
Fitting the new drive

As we mentioned earlier, this next stage all depends on the make and model of your laptop. In our case, we’re using an older Dell E6410. Pulling out the hard drive here is simply a matter of removing two screws and sliding the drive out from the side of the laptop chassis.

With the old hard drive removed, we can transfer the chassis catch by extracting the screws on either side at the top of the hard drive and moving them across to the new SSD that we’ve just cloned the old hard drive to.

The last step in this process is to slot the new SSD into place, and replace the screws holding the drive.

Checking the BIOS
Most of the time, just power up the laptop and the new drive will be instantly recognised. But there are occasions when you may need to tweak the BIOS first to ensure that the drive has been detected and that the laptop will boot from it.

To do this, you’ll need to enter the BIOS on your laptop. Again, this is something that’s unique to your make and model of laptop. Generally speaking, the BIOS is usually accessed by pressing the F2, F12, or Del keys on first bootup, before it begins to try to access the operating system on the hard drive. In the case of our old Dell laptop, it’s the F2 key that gets us into the BIOS/Setup screen.
Check that the newly installed SSD has been recognised, you can find this in the System Information section, usually. And check that the SSD is the first boot option in the available Boot Sequence.

If the SSD fails to be recognised, it could be that it hasn’t been refitted correctly. Power off the laptop and double-check that you’ve pushed the SSD into the SATA connection on the laptop correctly and all the way in; also double-check that by screwing it all back up again you’re not moving it from the connection.
If it continues not to be recognised then may need to double-check that the SATA connection inside the laptop is capable of accepting that particular make of SSD.
Enjoy the benefits of an SSD
All being well, you’ll now be enjoying the fact that your laptop is booting to the Windows desktop in mere seconds, as opposed to being able to make a cup of tea while you wait for Windows to warm up.
Got your own method? Let us know in the comments below.
Editorial independence
Editorial independence means being able to give an unbiased verdict about a product or company, with the avoidance of conflicts of interest. To ensure this is possible, every member of the editorial staff follows a clear code of conduct.
Professional conduct
We also expect our journalists to follow clear ethical standards in their work. Our staff members must strive for honesty and accuracy in everything they do. We follow the IPSO Editors’ code of practice to underpin these standards.