How to use a bread maker: Tips and tricks for making bread at home

Bread makers are designed to be pretty much automatic, letting you throw in the ingredients and get a perfect loaf of bread. While that’s mostly true, there are some things to watch out for and learn in order to get great results each time.
In this guide, we’ll show you how to use a bread maker to get perfect bread. Whether you have recently acquired a bread maker or are looking to achieve better results with your machine, there are some basics to keep in mind when baking. First and foremost, it’s essential to get the right ingredients if you’re to achieve bread baking success.
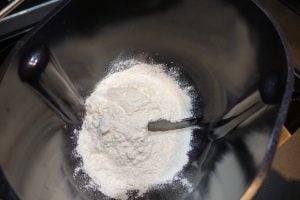
Use the right flour
When baking bread, use strong bread flour. It contains more gluten than plain flour, which helps the bread to rise. Plain flour can be used in breadmakers with a cake program – but this usually involves pre-mixing your ingredients and using the breadmaker simply as an oven. Even then, you may not get the rise that you want, so proceed with caution and if your bread doesn’t have the volume that you’d expect, check that you’re using the right type of flour.
Use yeast designed for bread machines
Another vital ingredient for a beautiful loaf is yeast, which through the fermentation process produces the carbon dioxide necessary to make bread rise. Dried yeast that doesn’t require pre-fermentation is most suitable. It’s usually indicated on the packaging whether the yeast is breadmaker compatible. “Easy bake”, “fast action” and “quick” are words to look out for such yeast. Dried active yeast can be used, but it should be dissolved in water before using it in a breadmaker.
Dried yeast is usually sold in sachets or small tins. It’s important to ensure the sachet or tin is sealed properly after each use, and stored in the fridge after opening. Once opened, use the yeast within two to three months – using expired yeast can leave you with an inedible loaf (trust me, I’ve tried).
Some machines come with automatic yeast dispensers, while others require you to place the yeast in the baking pan. In the latter case, it’s best to add yeast first or last, so that flour prevents it from coming into contact with the liquid too soon. If this were to happen, your loaf might not rise enough. This is particularly important when a delay timer is used.

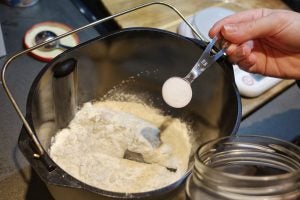
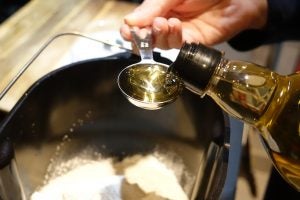
The balance of ingredients is important
It’s crucial to measure out the correct amount of ingredients; follow any recipe closely.
For example, adding some salt helps to strengthen the gluten, while too much salt can kill the yeast. Sugar nourishes the yeast, so the yeast will consume a small amount of it during the fermentation process – but too much sugar can result in an overly brown loaf. Not enough liquid in your dough can lead to a dense, flat loaf, but too much may leave your bread full of cavities, cause it to rise too much, or even sink in the middle.
You can find some recipes and advice on the right flour and yeast balance in our breadmaker recipe guide.
Use room-temperature ingredients for most recipes
It’s best to keep all your ingredients at room temperature unless otherwise specified in the recipe. Using liquid that’s too warm will kill the yeast. While there’s also a general warning about adding fridge-temperature liquids – your bread may not rise as well – it’s best to err on the side of coolness rather than attempt to heat any refrigerated ingredients, such as dairy.
Room temperature and humidity are also factors – although they’d only affect the bread in extreme cases. Some breadmakers, such as the Panasonic SD-ZP2000, purport to measure the ambient temperature and self-regulate during the baking process.
Machine basics
Your results will, of course, depend on your breadmaker, so check out our guide to the Best bread makers. But regardless of the model, you’re likely to be using a machine with a baking pan and detachable kneading blade.
To avoid spilling anything inside the breadmaker, you should remove the bread pan from the machine. I find it easiest to place the pan on the scales and weigh the ingredients that way. But make sure your kneading blade is in place beforehand. Getting it in there once you’ve added the flour is messy at best; at worst you’ll be coming back to a bread that hadn’t mixed or baked properly – which is disappointing.
Finally, remember to remove the bread from the pan soon after baking. Otherwise, the bread can turn soggy and even collapse due to excess moisture. Kneading blades can sometimes become stuck in the loaf – make sure to cut it out carefully before slicing. Some machines, such as the Swan SB1041N QuickBake, come with a hook to remove the blade; any sharp, thin object will be helpful here.

Breadmaker programs
Breadmakers normally have a selection of programs that come with pre-set baking times, although some also boast customisable functions. In general, it’s best to follow through with a program, unless you’ve noticed that the designated time leaves a loaf under or overdone.
As for which setting to use, it depends on your recipe. Usually, there are programs for white, wholewheat, gluten-free and “quick” or “rapid” bread at the very least. The “quick” or “rapid” setting cuts the baking time in half – but this means your dough will have less time to rise and more yeast needs to be added. In my testing experience, the pricier breadmakers are usually more successful at this, with little difference between loaves, while budget options may struggle a bit.
Most breadmakers have a program called “bake-only” or “cake”, which doesn’t involve kneading or proving. You’d normally also find a program that anticipates the addition of dried fruit, nuts or other small chunks. Some breadmakers beep to let you know when to add these other ingredients – others have an automatic dispenser. More premium breadmakers can include programs for brioche, sourdough and rye bread.
Think outside the mixing bowl
A bread maker is primarily designed to make a loaf of bread the same size as its pan. For most days this will probably do you well, but what if you want to make pizza or bread rolls? Well, the bread maker can help here as can mix the ingredients and prove the bread for you. Once this is done, you can remove the dough and then use it how you want, say creating a pizza or cutting the dough up into roll-size chunks and cooking them in the oven. Using this technique also allows you to create more rustic-looking loaves, shaped by hand before putting the bread into the oven.
Dough prepared in a breadmaker doesn’t need to be used right away. It can be refrigerated in an airtight container for up to 24 hours. Just bear in mind that despite the cold, the dough will continue to rise, so you should leave some space for it in the container. Once it’s out of the fridge, the dough should be punched down and left to rest for a while at room temperature.
While the majority of dough recipes are suitable to be made in the machine, it’s advisable to adhere to the minimum amounts of flour recommended as per your manufacturer’s instructions. If you’re using very little ingredients, they may not get mixed and kneaded properly in a large baking pan. Here’s a selection of dough recipes you can make in a breadmaker.
Freeze your dough
If you’re making more dough than you might need, you can also freeze the results. It’s best to freeze the dough after it has first been mixed, before the first rise. Lay the dough that you want to freeze on a tray or plate, then stick it in the freezer. After about an hour, take the dough out and wrap it in clingfilm and place it in an airtight container.
When you’re ready to use it, remove the dough from the freezer and let it thaw overnight in a refrigerator. Take the dough out and place it somewhere warm for the first rise, noting that it will probably take twice as long to work. Then, use your bread as normal. The frozen dough should last around four weeks.
Additional functions
Most breadmakers aren’t just limited to baking loaves and loaf cakes; they often include other functions. Another popular function with breadmakers is a jam program – simply add sugar and chopped fruit or berries (and some powdered pectin, if you like your jam firm). Check out these recipes for summer fruit, apricot and blueberry jams.
Other possible programs include yoghurt – a 10-hour process available on the Morphy Richards Homebake – as well as pasta, as seen on the Panasonic SD-ZX2522.
Editorial independence
Editorial independence means being able to give an unbiased verdict about a product or company, with the avoidance of conflicts of interest. To ensure this is possible, every member of the editorial staff follows a clear code of conduct.
Professional conduct
We also expect our journalists to follow clear ethical standards in their work. Our staff members must strive for honesty and accuracy in everything they do. We follow the IPSO Editors’ code of practice to underpin these standards.