
Are you daunted by the prospect of upgrading the graphics card for your desktop PC? That’s understandable since these components can cost a lot of cash, but it’s actually a pretty easy and straightforward process – but first, you need to know how to upgrade your graphics card.
In this guide, we’ll tell you how to install the graphics card into your motherboard and also how to update it with the latest drivers, so your hardware is running at optimum performance.
The process is the same for both Nvidia and AMD graphics cards, with only slight changes for when updating the drivers, but we’ll get to that point later. Without further ado, let’s get to it.
Related: Intel vs AMD
How to upgrade your graphics card
The main steps for upgrading your graphics card are as follows:
- Ensure new graphics card fits inside your PC
- Uninstall old drivers
- Install the new graphics card
- Download new drivers
This quick summary should prove a useful checklist when integrating a new graphics card into your computer, but If you need more guidance, then we’ve also gone into more detail for each step below.
Step one: Ensure your new graphics card fits inside your PC
Firstly, you’ll want to be safe and make sure your new graphics card is compatible with your PC and will actually fit into your PC case.
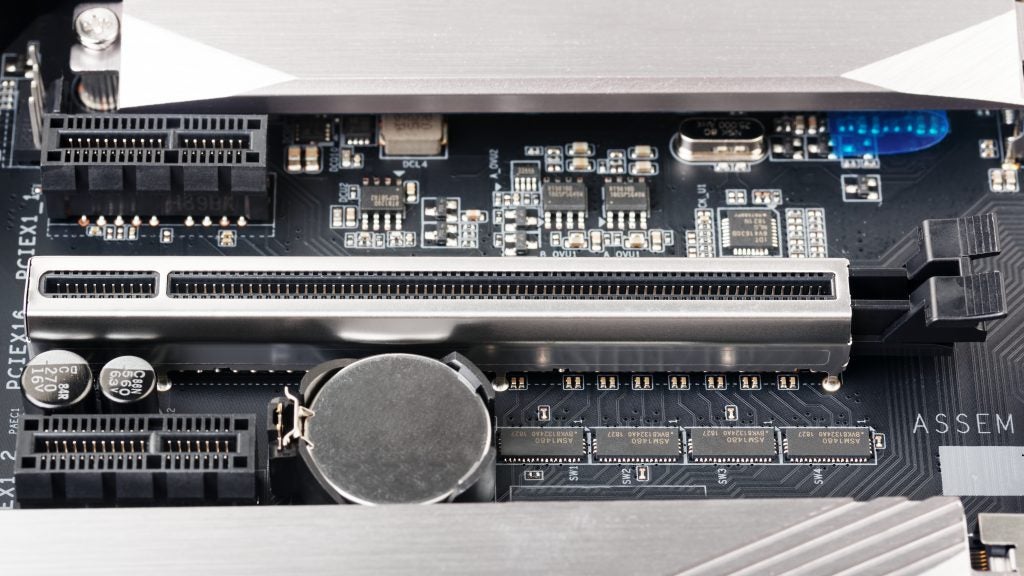
Modern graphics cards plug into the PCI-E slot, which can be seen in the below image. Almost every motherboard currently available should feature this, so it shouldn’t really be an issue.
Related: Best Graphics Cards 2020
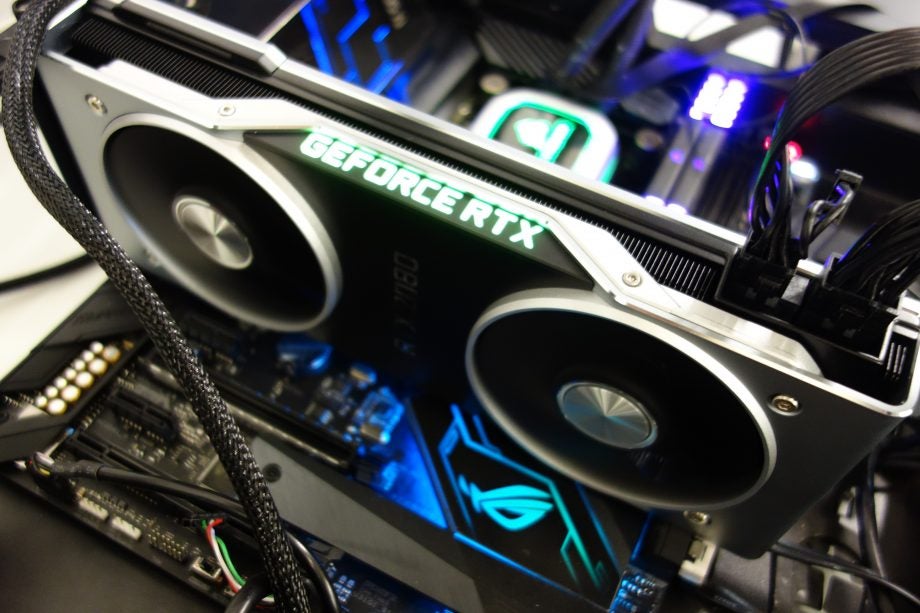
The only thing you really should be concerned about is the size of the graphics card. Monstrously powerful models such as Nvidia’s RTX 2080 Ti are pretty chunky, and so take up a lot of room.
If you’re using a Mini ATX and a compact PC case, you may not be able to fit some of the larger GPUs. If you’re using a full-sized motherboard and PC case though, then the size of the graphics card shouldn’t be an issue. Still, it’s something worth checking before advancing to the next steps.
You’ll also want to make sure your PSU is capable of powering your new graphics card. Bear in mind that you need to consider the total power consumption of your computer (CPU, RAM, motherboard etc.) rather than just your GPU when balancing it with the wattage of your power supply.
Step two: Uninstall old drivers
Before you start plugging in your new graphics card, it’s worth uninstalling the drivers of your current GPU. It’s technically possible to skip this stage, but that can sometimes lead to issues when installing the new card. Uninstalling the old drivers is so easy that you might as well do it to be safe.
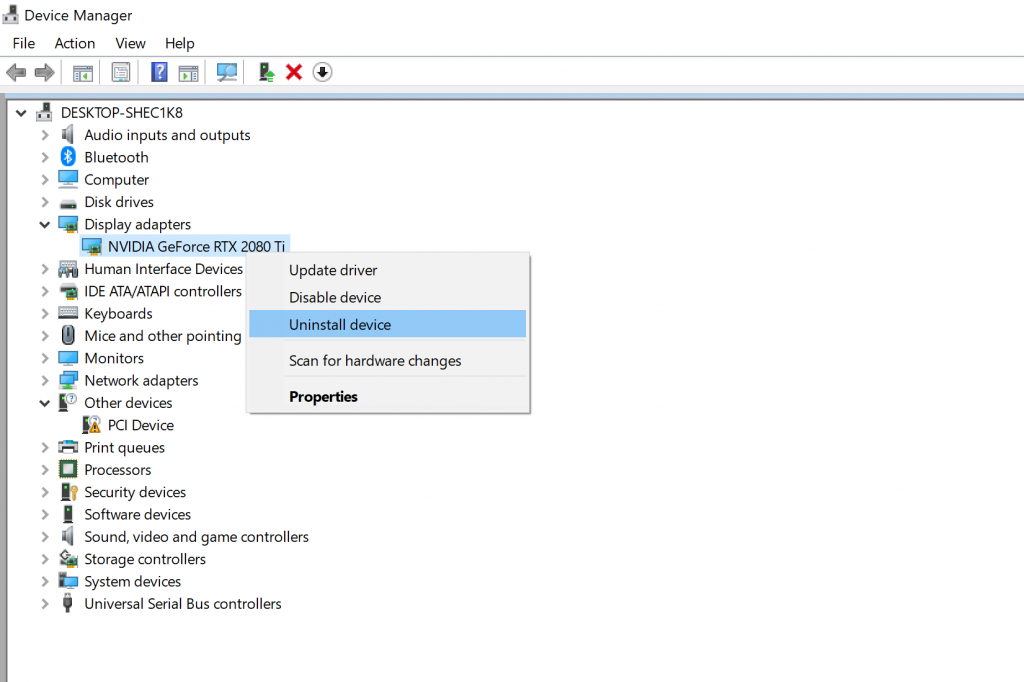
Search for “Device Manager” in your Windows 10 search bar. Selecting this will open up a new window which features a breakdown of your system. You’ll want to find and open up “display adapters”. Now your graphics card should appear, potentially along with your processor’s integrated graphics.
Right-click on your discrete graphics card (likely labelled as Nvidia GeForce or AMD Radeon) and then select “Uninstall device”. Once that is done, power down your computer and unplug all the cables.
Related: Nvidia Ampere
Step three: Install the new graphics card
Once your computer is powered down, and the cables have been detached, you can start opening up your PC. The process for this will vary depending on what PC case you own, so it’s best to check your case’s manual. That said, most feature a removable side panel that you can open by twisting or unscrewing a bolt.
Once you’ve removed the cover, you should turn the computer on its side, so the motherboard is facing upwards. The graphics card should be easy to spot, being one of the biggest components inside.
Firstly, you’ll want to disconnect the power cables which can be seen below. It essentially looks like a black block with various plastic pins. It’s possible your graphics card doesn’t have one connected, as low-powered graphics cards can function without.
Related: AMD Navi 2X
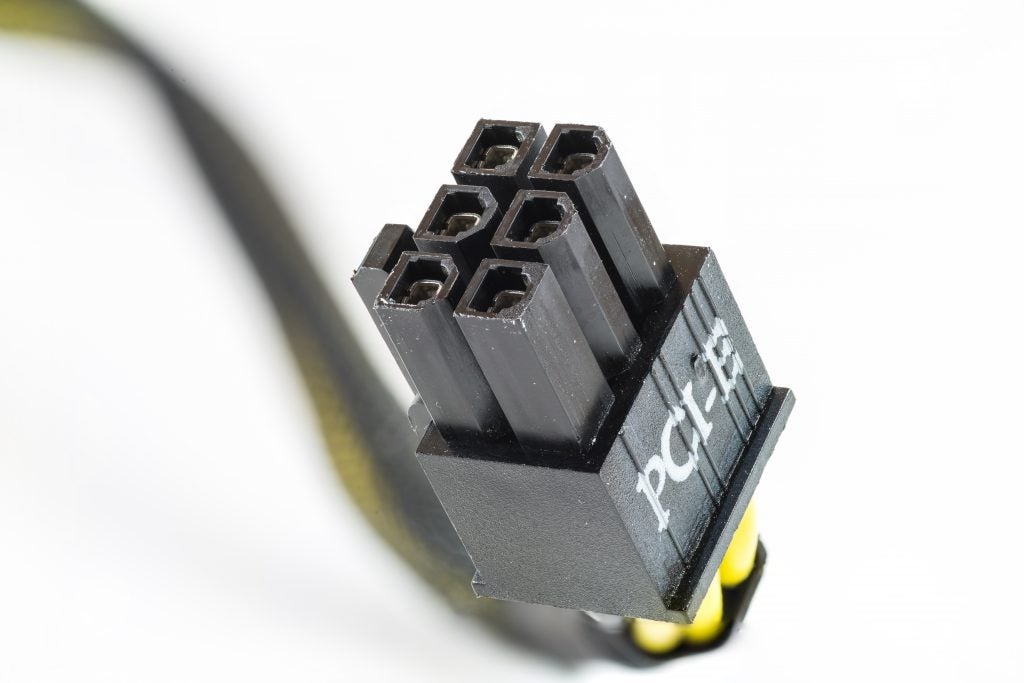
6-pin PCI-E Connector
Now look round the back of your PC (where you usually plug in your HDMI / DisplayPort), and you’ll likely see the graphics card has been screwed into the case. Remove these screws and make sure you put them somewhere safe.
To finally remove your old graphics card, you’ll find a plastic tab by the side of the PCI-E slot. This can sometimes be hard to reach depending on how crowded your motherboard is. Apply pressure to it, and you should hear a faint click, which will then release the graphics card so you can easily pull it free. Store your graphics card somewhere safe, as it’s fairly easy to damage these things.
Now get out your new graphics card and be sure to remove all packaging, including plastic sheets that may be stuck to the main body. Then you’ll be able to slot your new graphics card into the unoccupied PCI-E slot. You should hear another click once it’s slotted in, although you may have to apply a little (stress, little!) pressure to make sure it’s securely fitted.
Now reclaim those screws and fasten the graphics card into the back of the PC case. The graphic card’s ports should line nicely up with the rear of your case for easy access.
Finally, you can plug in the power cables to the graphics card. The graphics card may require a 6-pin or 8-pin connector or even multiple power connectors – it really just depends how power-hungry your graphics card is. Just make sure every power port is occupied and hooked up to your PSU.
If you’re confident everything is plugged into your graphics card securely, then you’ll be able to reattach the case’s side panel and then position your computer upright again. Plug the power connectors back into your PC, and then you can turn your PC back in.
Step four: Install new drivers
If you followed each step correctly and all of your components are functioning, then your PC should turn on. If you’re faced with a blank screen, then repeat Step Three to ensure your graphics card is plugged in correctly.
If your computer does boot up, your graphics card will likely be running on basic drivers provided by Windows. You’ll want to download the latest drivers from your graphics card’s manufacturer (Nvidia or AMD) to ensure optimal performance.
Explained: What is ray tracing?
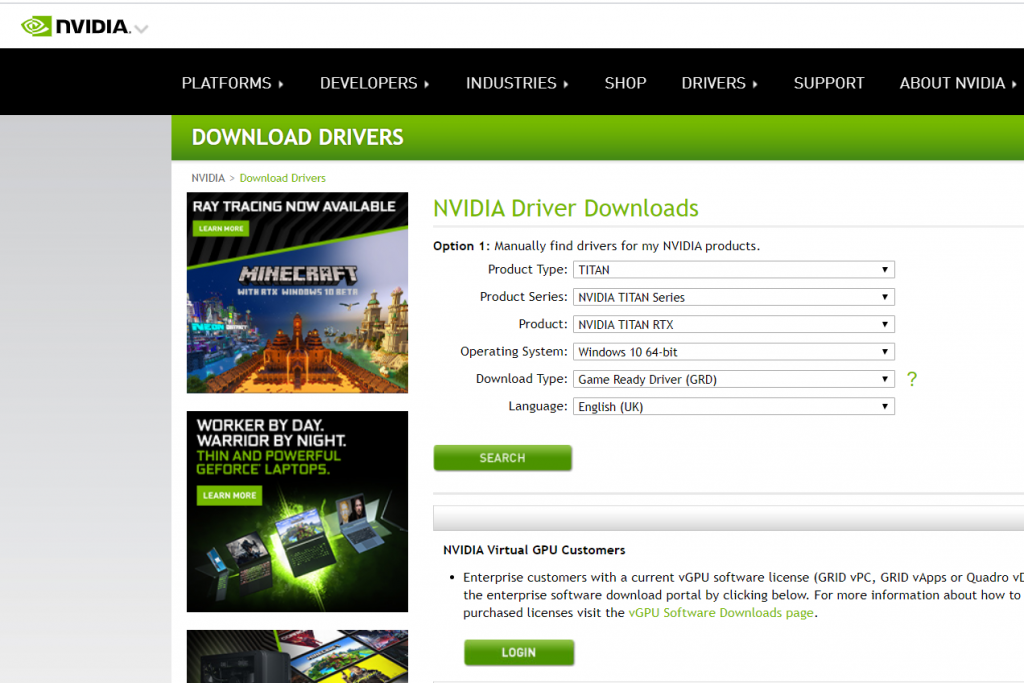
This is very easy to do though, as you simply visit Nvidia or AMD’s driver website (depending whichever company manufactured the graphics card), search for your graphics card and then download the latest driver.
This should also automatically download Nvidia’s GeForce Experience /AMD’s Radeon Software Adrenalin 2020 Edition too, which are very useful for ensuring you have the latest drivers when newer iterations are released.
Once the drivers have downloaded and you’ve restarted your PC, you should be good to go. Enjoy gaming and creating with your new graphics card!
Editorial independence
Editorial independence means being able to give an unbiased verdict about a product or company, with the avoidance of conflicts of interest. To ensure this is possible, every member of the editorial staff follows a clear code of conduct.
Professional conduct
We also expect our journalists to follow clear ethical standards in their work. Our staff members must strive for honesty and accuracy in everything they do. We follow the IPSO Editors’ code of practice to underpin these standards.