
How to setup an outdoor projector: Lockdown has ensured the public at large hasn’t been venturing out to the cinema much in 2020.
But that hasn’t stopped people from bringing the cinema to their home, with interest sparking in the home cinema market over the course of this curious year. If you don’t have space to enjoy films in the house, why not try outdoors? For those looking to become a silver screen projectionist and setting up an outdoor cinema in the garden, here are the steps you need to follow.
Related: Best Projector
Pick a projector
The first step, of course, is to choose the projector. Although we’d be inclined to say that any projector can be used outside, some are much better and less hard work.
Brightness is the key factor, especially if you’re going to be watching films during the day, as you’ll need a projector that’s bright enough to combat the sun and any other ambient light sources. You may think that a pico (mini) projector would be useful, considering their small size and potentially large image. But the brightness of these models is low (The BenQ GV1 offers 200 lumens), which means they’re only usable when it gets dark.
No home projector is going to be usable during full sunlight, but you’ll find models that can work in the shade (a gazebo can be useful). A projector that can produce 2000 lumens of brightness is a good start for watching during the day or at night. Go brighter if you can. Remember, brightness is related to distance, so you can always start with a smaller picture with the projector closer to the screen when it’s very light, then move backwards as the night sets in.
Related: How to set-up a projector
Connections and sources
HDMI is your best course of action, and with an HDMI cable in tow, you can connect a Blu-ray player, laptop or even a streaming player.
Another type of connection is a MHL HDMI input. If you come across a projector with this type input (it should be listed clearly in the specs), then it allows a connection to a compatible smartphone with a MHL HDMI cable. Some will require an adaptor to make them work, such as an iPhone.
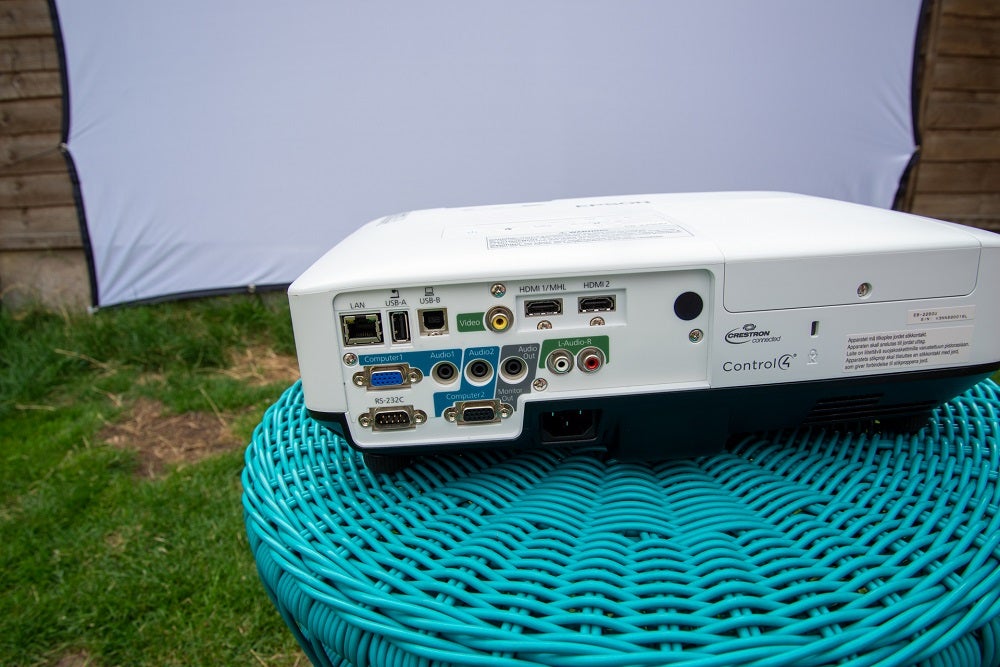
In fact, if the connections don’t line up between the projector and source (HDMI, VGA, etc) consider an adaptor for whatever connection there is to marry the two together.
The easiest source is a laptop (unless you’re some sort of film connoisseur who wants to use their 4K Blu-ray player). With some streaming services it’s easier to stream from a laptop than a smartphone because of access rights. If you use a laptop, you can also use the laptop’s HDD to store (legal) rips of your DVDs and Blu-rays for movie nights.
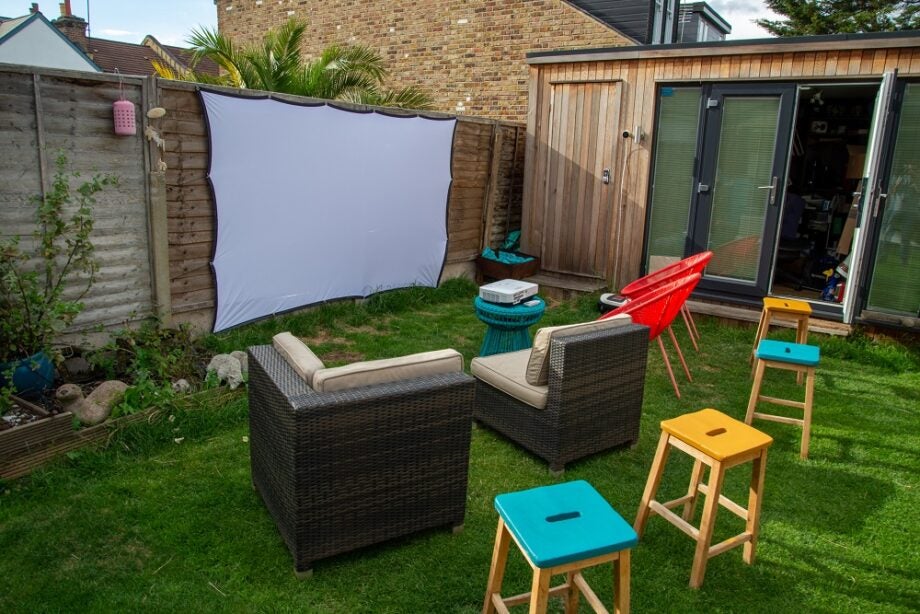
Set-up and position the projector
A surface is required to beam the images on, and it’s here where things could get tricky.
The surface needs to be flat and white, which means you can use a wall (as long as it’s not dirty). Another option is a white sheet – though this isn’t an option we’d highly recommend. Much better is a foldable projector screen, preferably one with a stand for more flexible positioning. Some are as wide as 120-inches and that’s certainly big enough.
If you’re streaming then check you’re not too far from the Wi-Fi connection (check out our best Wi-Fi extenders if you’re struggling). One workaround is to place your laptop near your home, so it gets a strong signal, and then use a longer HDMI cable to reach where your projector is.
Figure out the throw ratio (there are some pointers over in our projector set-up guide) to determine how far back to put the projector. Plug the projector into the mains extender (you’ll absolutely need one) and place it square on to the screen.
To line it up just right, a number of projectors include keystone correction though this can distort the image at its edges. Lens Shift is the much preferred option if the projector supports it, as it more naturally ‘shifts’ the image up, down or side-to-side.
Hook up your sound
An even trickier consideration than setting up the projector and screen is what you’ll use for the sound. If you use a Blu-ray player, then you’ll need a projector which has an audio output to plug into some speakers, or you could even lug your soundbar outside and run the player through that. If you’re using a laptop – the easiest option – then your best option is to run the picture over HDMI and then use a Bluetooth speaker for audio.
To add a Bluetooth speaker in Windows, simply go to Start, Settings, Devices, Bluetooth & other devices, and select Add Bluetooth or other device. Send the speaker into its Bluetooth pairing mode and it should appear in the list for connection. Mac users need to put the speaker into pairing mode, choose the audio device from the Bluetooth status menu in the menu bar and press connect.
For those on a budget, perhaps the Wonderboom 2 would do. If you purchase two of them, you can set them up in stereo pairing mode for left and right channels. If you can stretch your budget slightly further, we’d consider a desktop speaker like the Edifier R1280DB that’s a decent alternative to a soundbar.
Just place the speaker in front of the screen and that should be all you need to get your outdoor cinema up and running.
Editorial independence
Editorial independence means being able to give an unbiased verdict about a product or company, with the avoidance of conflicts of interest. To ensure this is possible, every member of the editorial staff follows a clear code of conduct.
Professional conduct
We also expect our journalists to follow clear ethical standards in their work. Our staff members must strive for honesty and accuracy in everything they do. We follow the IPSO Editors’ code of practice to underpin these standards.