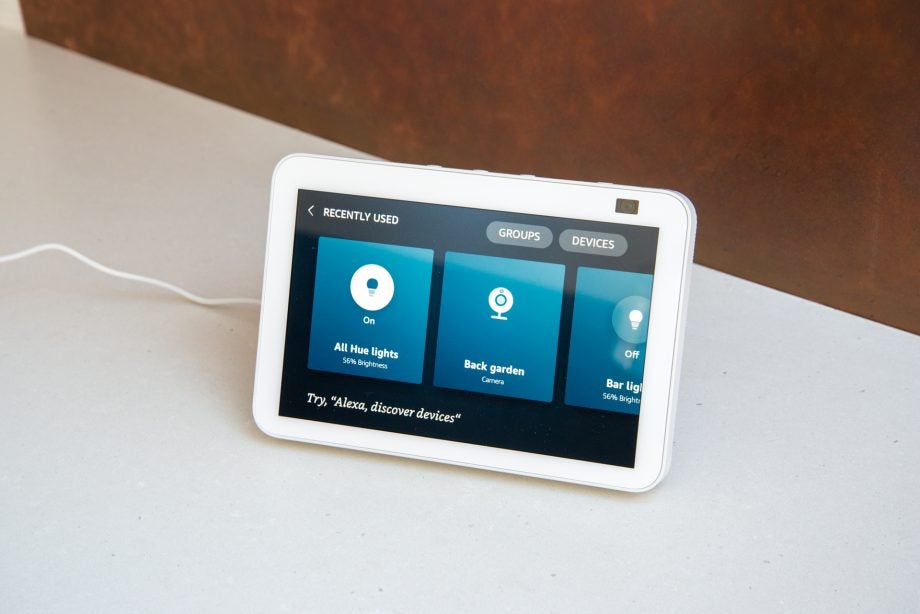
You don’t have to search very hard to find nightmare stories of Amazon Echo and Alexa devices breaching privacy and recording what they shouldn’t. In the worse cases, human screeners even listened to conversations.
Amazon says that the data it collects is designed to help it improve the service, but that probably doesn’t make you feel any better. Fortunately, you can manage your Alexa privacy settings to take back control. Here’s what you need to know. As ever, for true protection we also recommend any privacy conscious buyer use a VPN wherever possible to protect their data. You can see a list of the best VPNs we’ve tested in the attached guide.
Find your privacy settings
Alexa privacy settings are available through a web browser and the Alexa app (Settings, Alexa Privacy). I find it easiest to use the web browser version, although it’s a little tricky to get to the setting. Open up a browser and go to Amazon, then hover the Accounts & Lists menu (top left) and select Manage Your Content and Devices. Now click Privacy Settings in the third menu panel from the top, and select Alexa Privacy.

Save 81% on a VPN with SurfShark
Surfshark has dropped the price of its VPN to £1.94 a month. Head over to Surfshark now to pay a one time price of £46.44 for 24 months of Surfshark and save 81%.
- Surfshark
- 81% off
- £1.94 a month
See what Alexa is recording
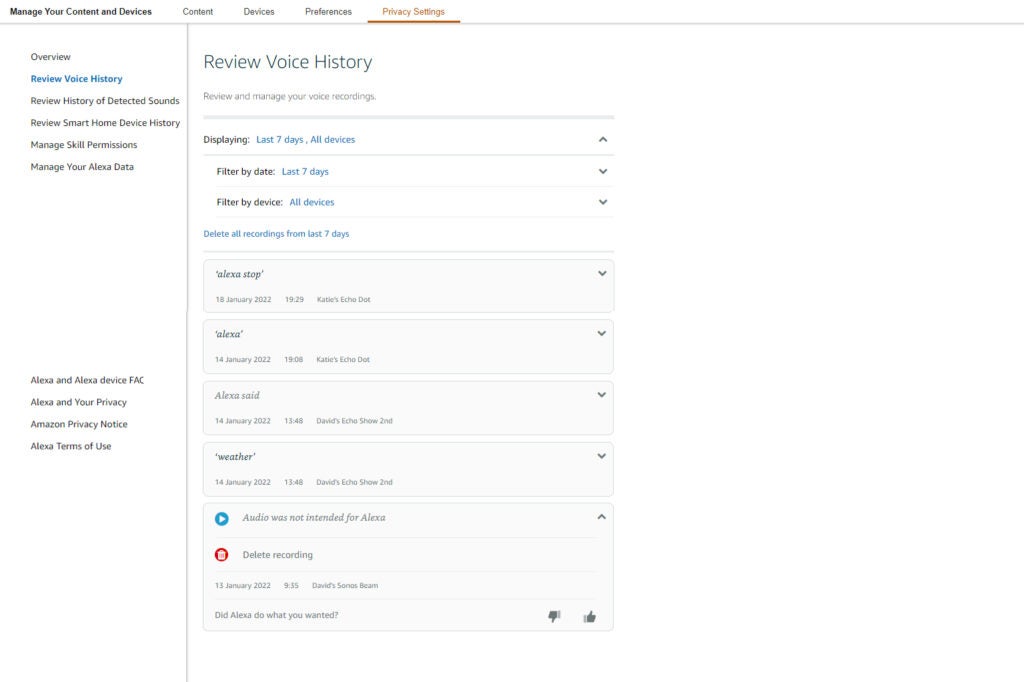
Click Review Voice History and then you use the filters to select which (or all) devices you want to review recordings from, such as your Echo Show 10, and the review period: Today, Yesterday, Last 7 days, Last 30 days, All History or Custom. You’ll be quite surprised at how far back recordings can go: I had some from more than two years ago.
You can scroll through the list to see what Alexa has recorded. Use your browser’s find feature (CTRL+F or APPLE+F) to search the list for words that you might not want Alexa to have picked up on, such as ‘doctor’ or ‘appointment’.
In the list, you may see some entries that say ‘Audio was not intended for Alexa’. These are instances when Alexa has thought it’s heard the trigger word and has started to record audio.
For an entry, you can click the down arrow, and then hit the play button to review the audio that was recorded. It’s typically just a short burst of audio. Click Delete recording to remove that recording forever.
At the top of the list, there’s an option to Delete everything in the current list. To delete all recordings forever, select All History and then Delete all of my recordings.
Manage your voice recordings
Having to remember to go in delete your voice recordings is too annoying, but Amazon provides the tools you need to manage how and when recordings are deleted. Click Manage Your Alexa Data. The first option at the top is Voice recordings.
Leave the option Enable deletion by voice turned on. On any Alexa device, you can say ‘Alexa, delete what I just said’ or ‘Alexa, delete everything I said today’. You can even tell Alexa to delete everything. You’ll get a warning that if you do delete everything, Alexa may have problems understanding you.
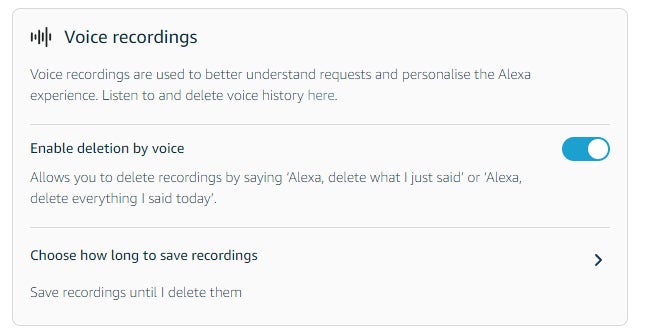
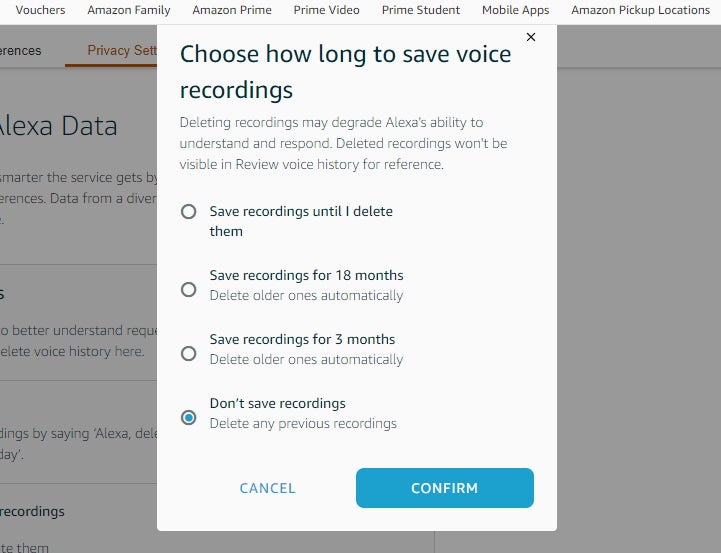
Select the Choose how long to save recordings option to customise how long recordings will be kept for. The default is to Save recordings until I delete them, but you can choose 18 months, three months or not to save recordings at all. Again, there’s a big warning telling you that not saving recordings can cause problems. If you don’t save any voice recordings, Alexa will also delete voice profiles that give you customised information when you ask. We pick the three months option as a good compromise.
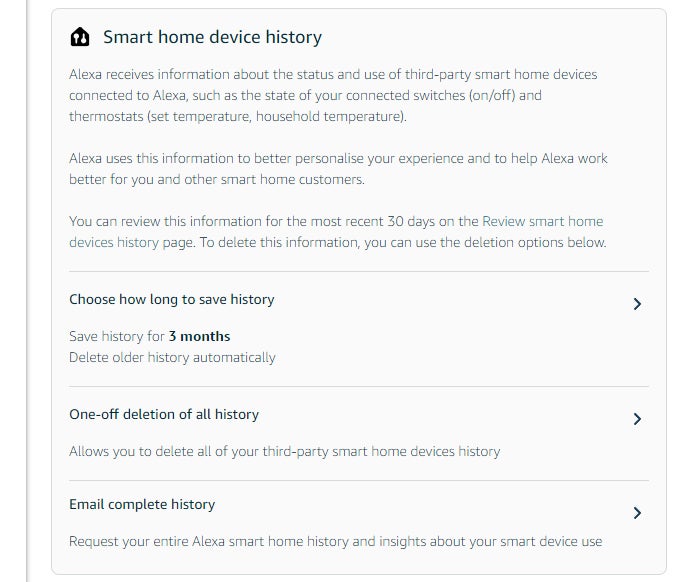
Manage smart home device history
Alexa also stores information about how your smart devices have been used. The data is there to help Alexa understand how people use smart devices. You can click the Review smart home devices history to view the last 30 days of control.
The One-off deletion of all history option clears everything. Before you do that, you might want to click Email complete history, which sends you everything Alexa knows about your smart home use, plus some insights.
Finally, you can adjust how long Amazon stores data for. Click Choose how long to save history, and then pick the option that you want. There’s no option to not save history at all, so 3 months is the minimum option.
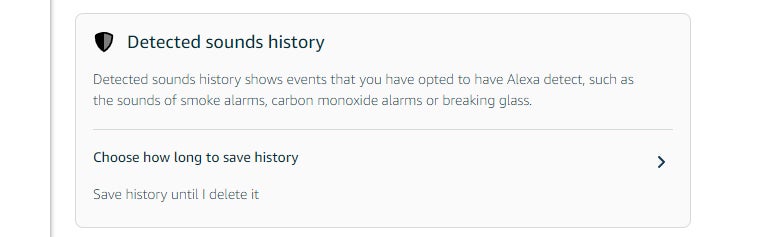
Manage detected sounds history
In the US, but not the UK, Alexa Guard can be used to listen out for breaking glass or alarms. In the UK, you won’t have any history, but the feature may get enabled in the future. Here, you can choose how long to save history for, with the minimum being three months.
Manage how Alexa uses your data
The final privacy section is Help improve Alexa. These are settings that allow Amazon to use your data to improve its service, including manual review (Amazon says that only “an extremely small fraction of voice recordings are manually reviewed”). Turn the slider off to prevent any of your recordings being used this way.
Next, Amazon has permission sliders for each person in your house, allowing them to use any messages you send to improve transcription. Turn off the permissions for any accounts that you don’t want to be involved in this.

You might like…


Save 81% on a VPN with SurfShark
Surfshark has dropped the price of its VPN to £1.94 a month. Head over to Surfshark now to pay a one time price of £46.44 for 24 months of Surfshark and save 81%.
- Surfshark
- 81% off
- £1.94 a month
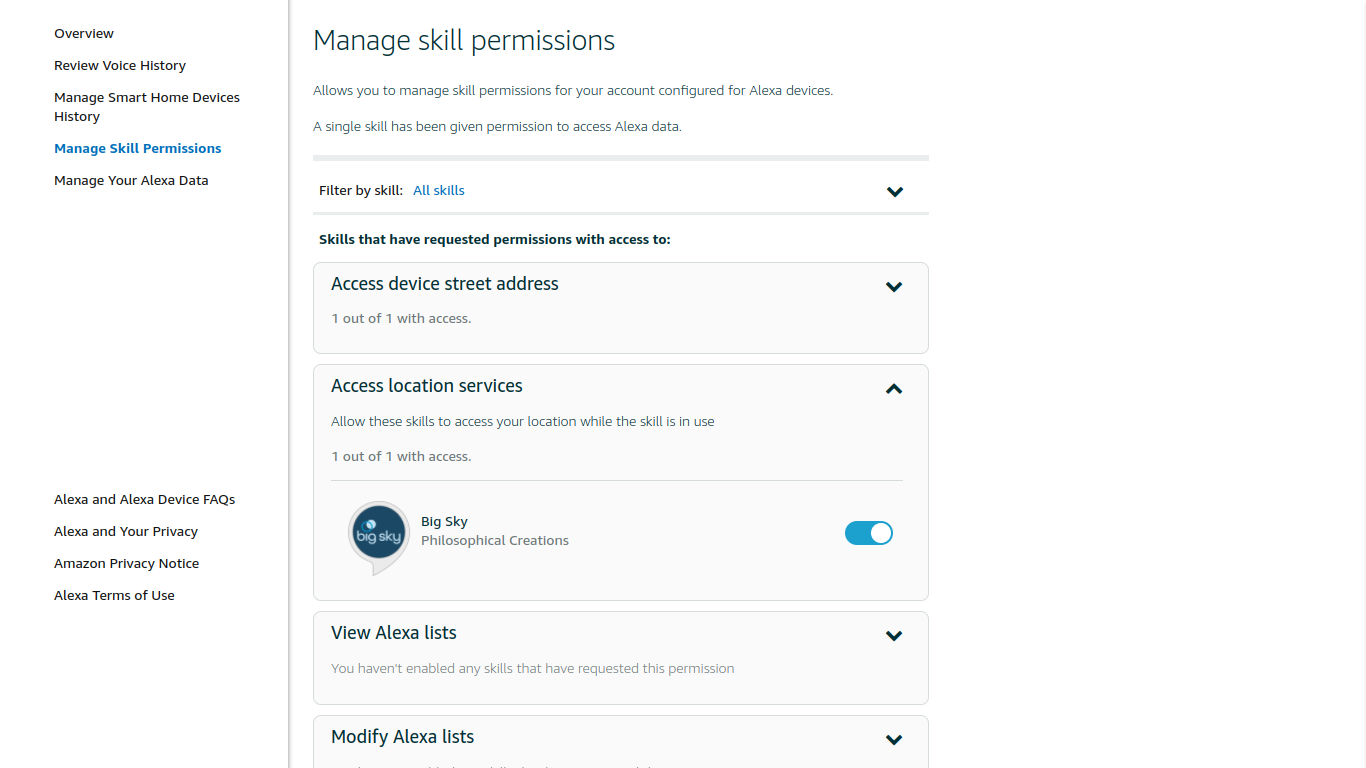
Manage Alexa Skill permissions
Alexa gives you more detailed control over the permissions you grant to skills. Click or tap ‘Manage Skill Permissions’ (again, in the app you might need to tap ‘Menu’ first) and you’ll see a list of the available permissions, and whether you’ve granted them to any apps. Scroll down this list to check that you’re not providing data you’re unaware of or uncomfortable with. For example, you might not want to allow some apps access to your mobile number or email address.
For each data type, you’ll see a summary of whether any skills have access. Tap the downward chevron to expand the box and see the details. You can revoke a skill’s permission to any data type by clicking the slider, and selecting Confirm. It may be that you’re concerned about the permissions you’ve granted to a specific skill. In this case, tap or click the chevron in the ‘Filter by skill:’ header and tick the skill you want to review. Now you can see at a glance which permissions it has.
Remember that revoking skills’ permissions may stop them from working. If you don’t trust a skill, or you don’t want to use it anymore, disable it by opening the Alexa app on your phone, then tapping More and then Skills & Games. Tap the Your Skills heading, select the skill, tap Disable Skill, then click Disable to confirm.

Editorial independence
Editorial independence means being able to give an unbiased verdict about a product or company, with the avoidance of conflicts of interest. To ensure this is possible, every member of the editorial staff follows a clear code of conduct.
Professional conduct
We also expect our journalists to follow clear ethical standards in their work. Our staff members must strive for honesty and accuracy in everything they do. We follow the IPSO Editors’ code of practice to underpin these standards.