If you want to create a smooth transition from one colour to another in Photoshop, the gradient tool is the easiest way to achieve it. Read on to learn how to use it.
There are a number of different types of gradients you can create in Photoshop, including linear ones that go in a straight line, radial ones that form a circle and angular gradients that shade in a counter-clockwise sweep. There are also reflected gradients that mirror linear gradients and diamond gradients that shade from the middle to the outer corners of your image.
All of these shapes can be created using one button – the Gradient tool. Scroll down to learn how to use the Gradient tool in Photoshop.
What you’ll need:
- Adobe Photoshop
- A Creative Cloud subscription
The Short Version
- Hold down the Paint Bucket tool
- Select the Gradient tool
- Pick your colours
- Choose a type of gradient
- Click on your image and drag your mouse to create a gradient
How to make a gradient in Photoshop
Step
1Click and hold the Paint Bucket tool
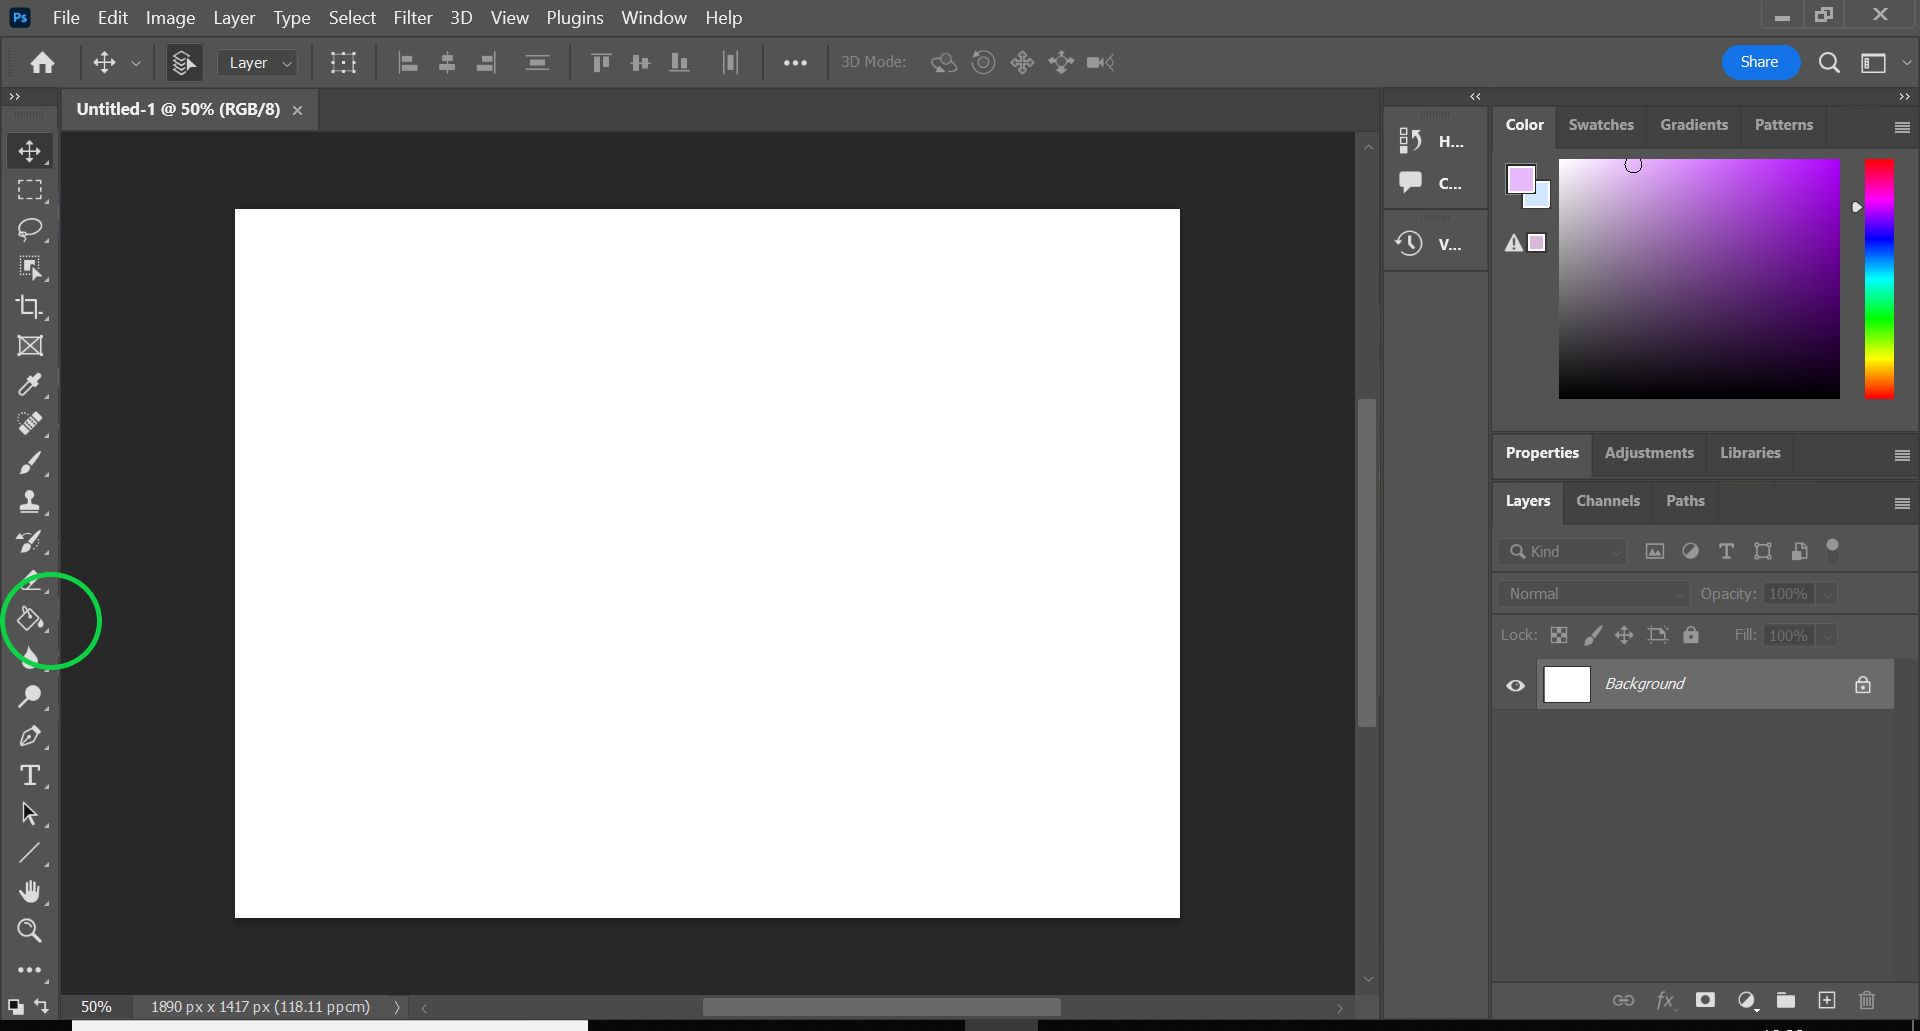
You may be able to skip this step if you can already see the gradient tool in the sidebar.
Step
2Select the Gradient tool
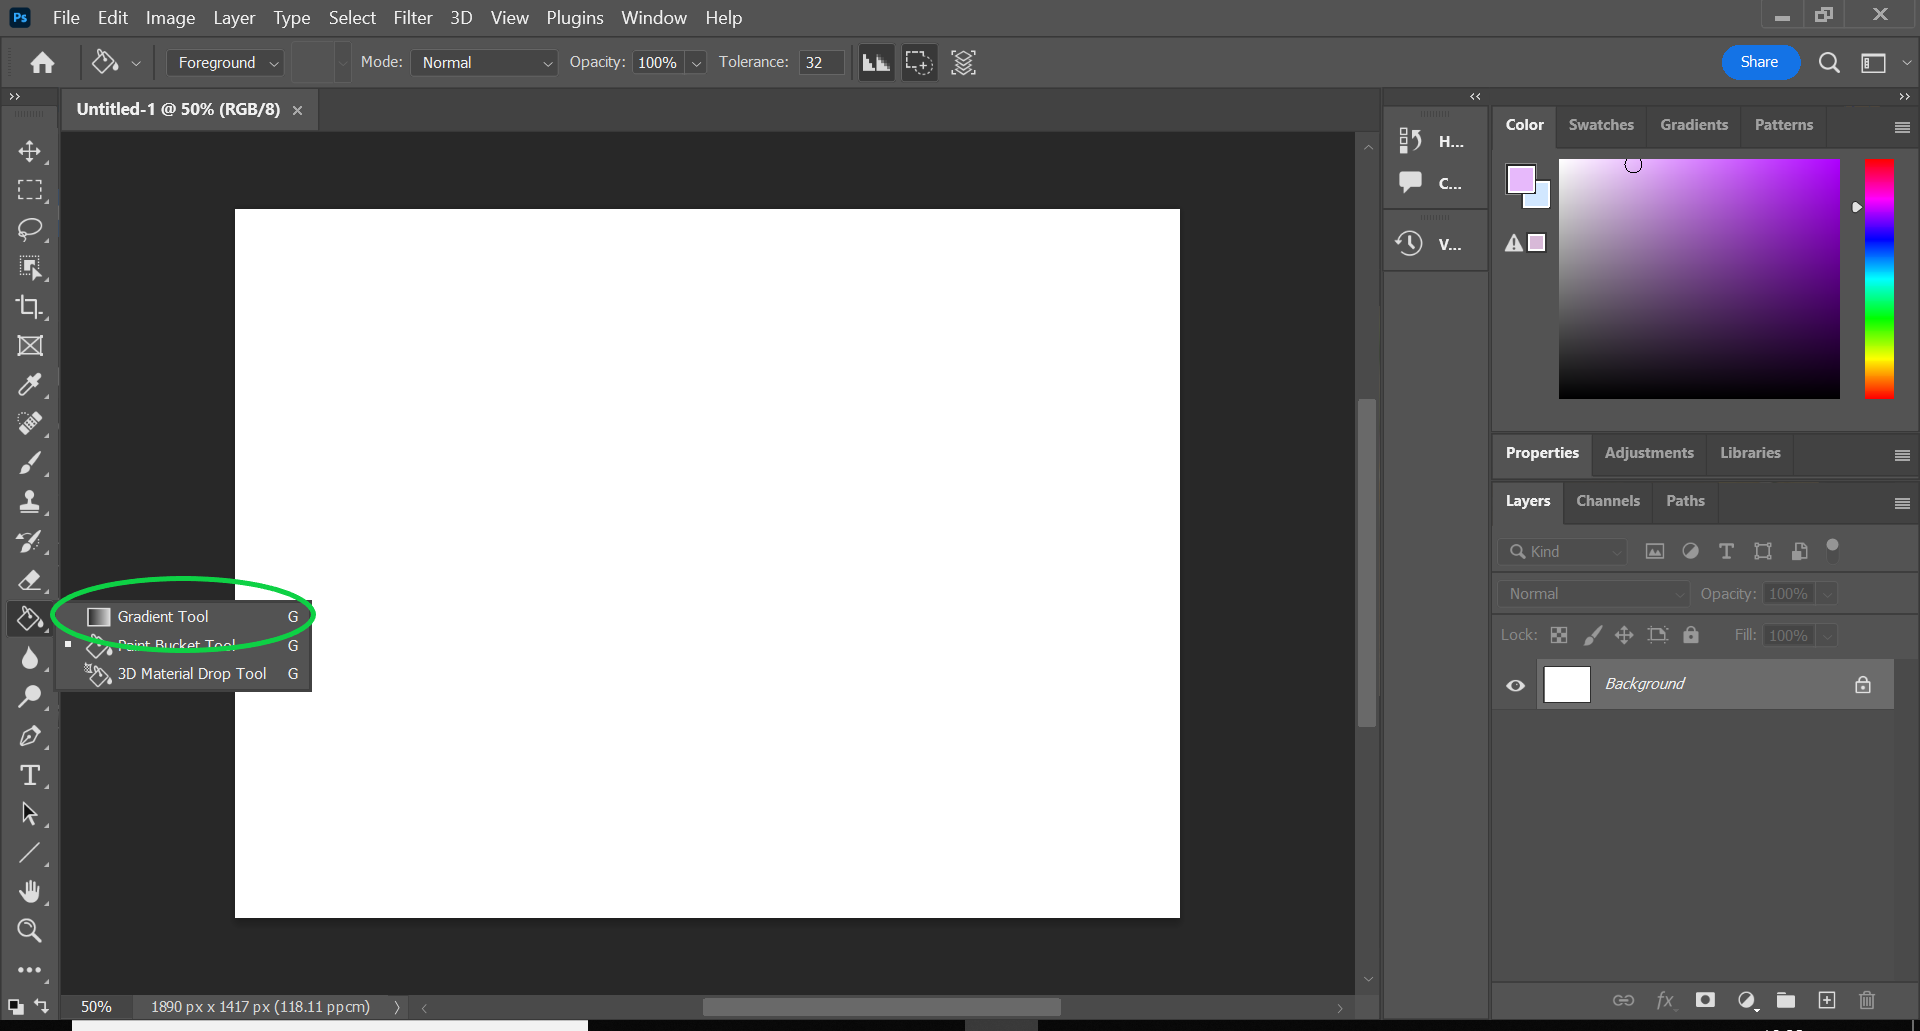
The icon resembles a gradient.
Step
3Pick your colours
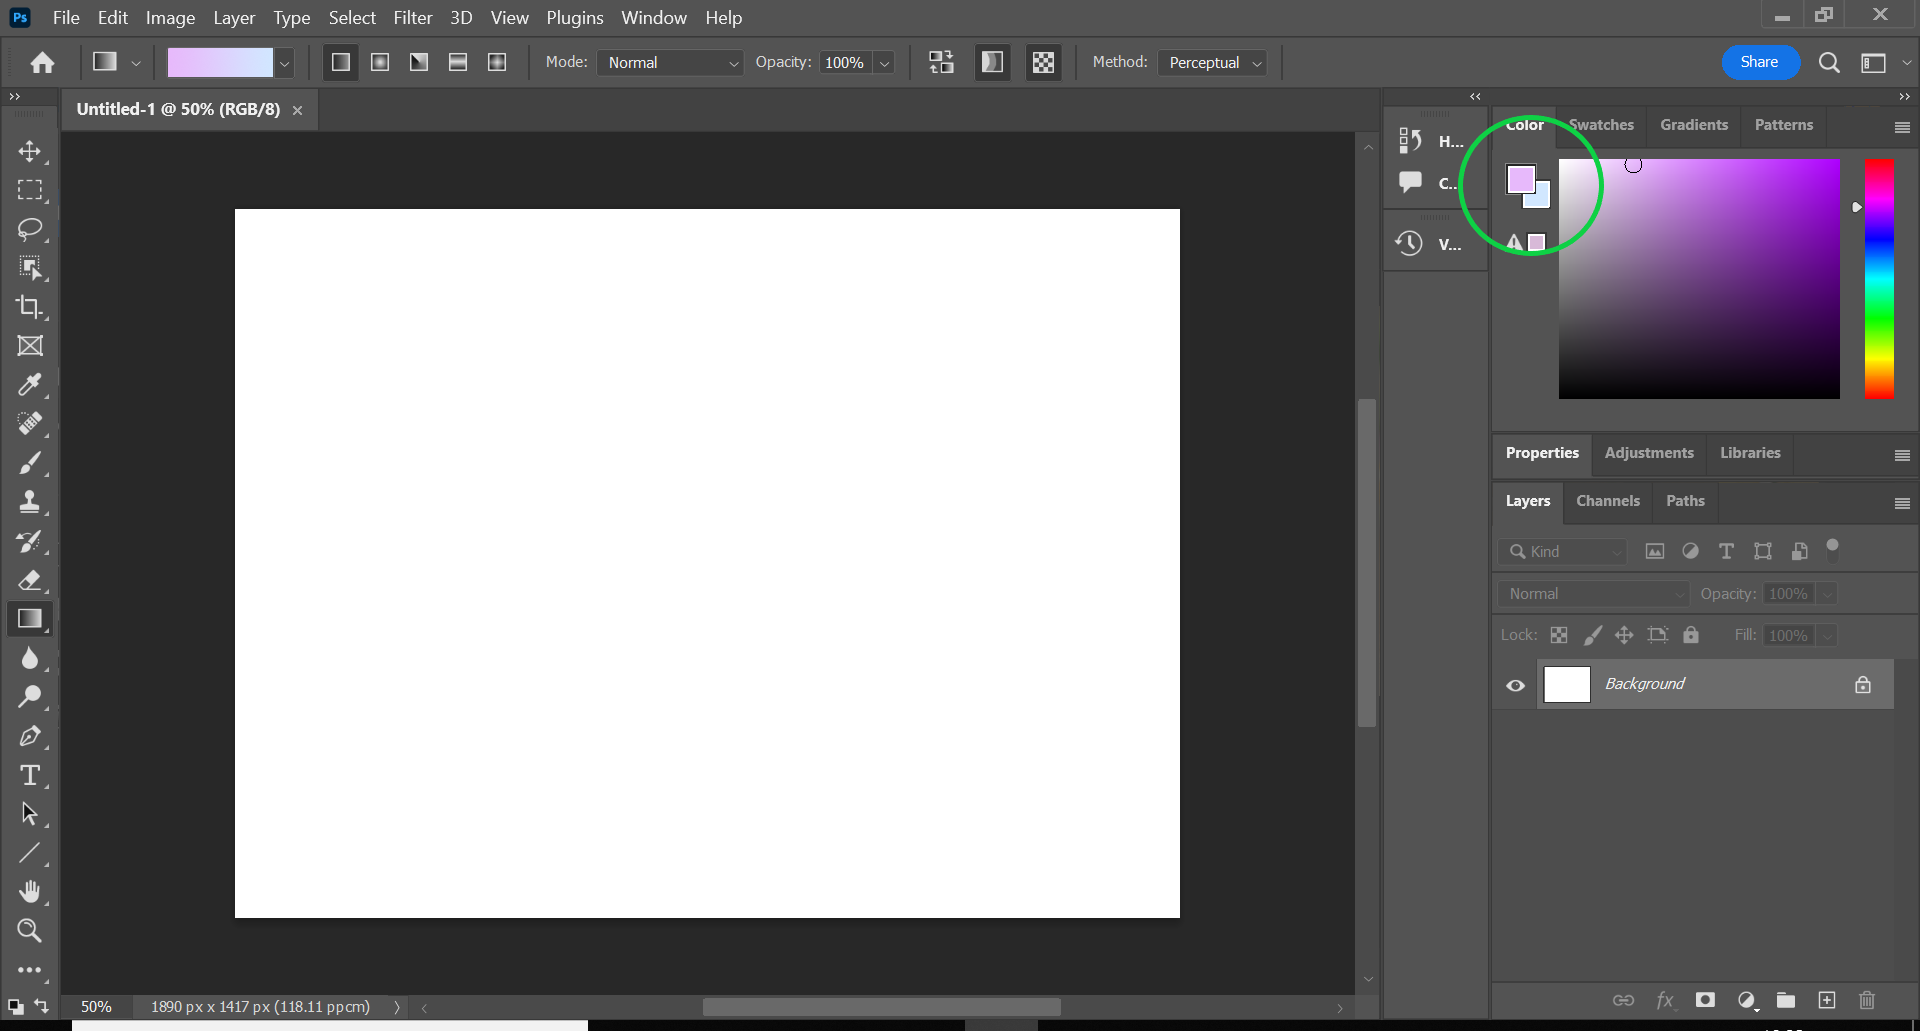
Double-click on either colour to change it or skip step 4 if you’re happy with the colours selected.
Step
4Click OK
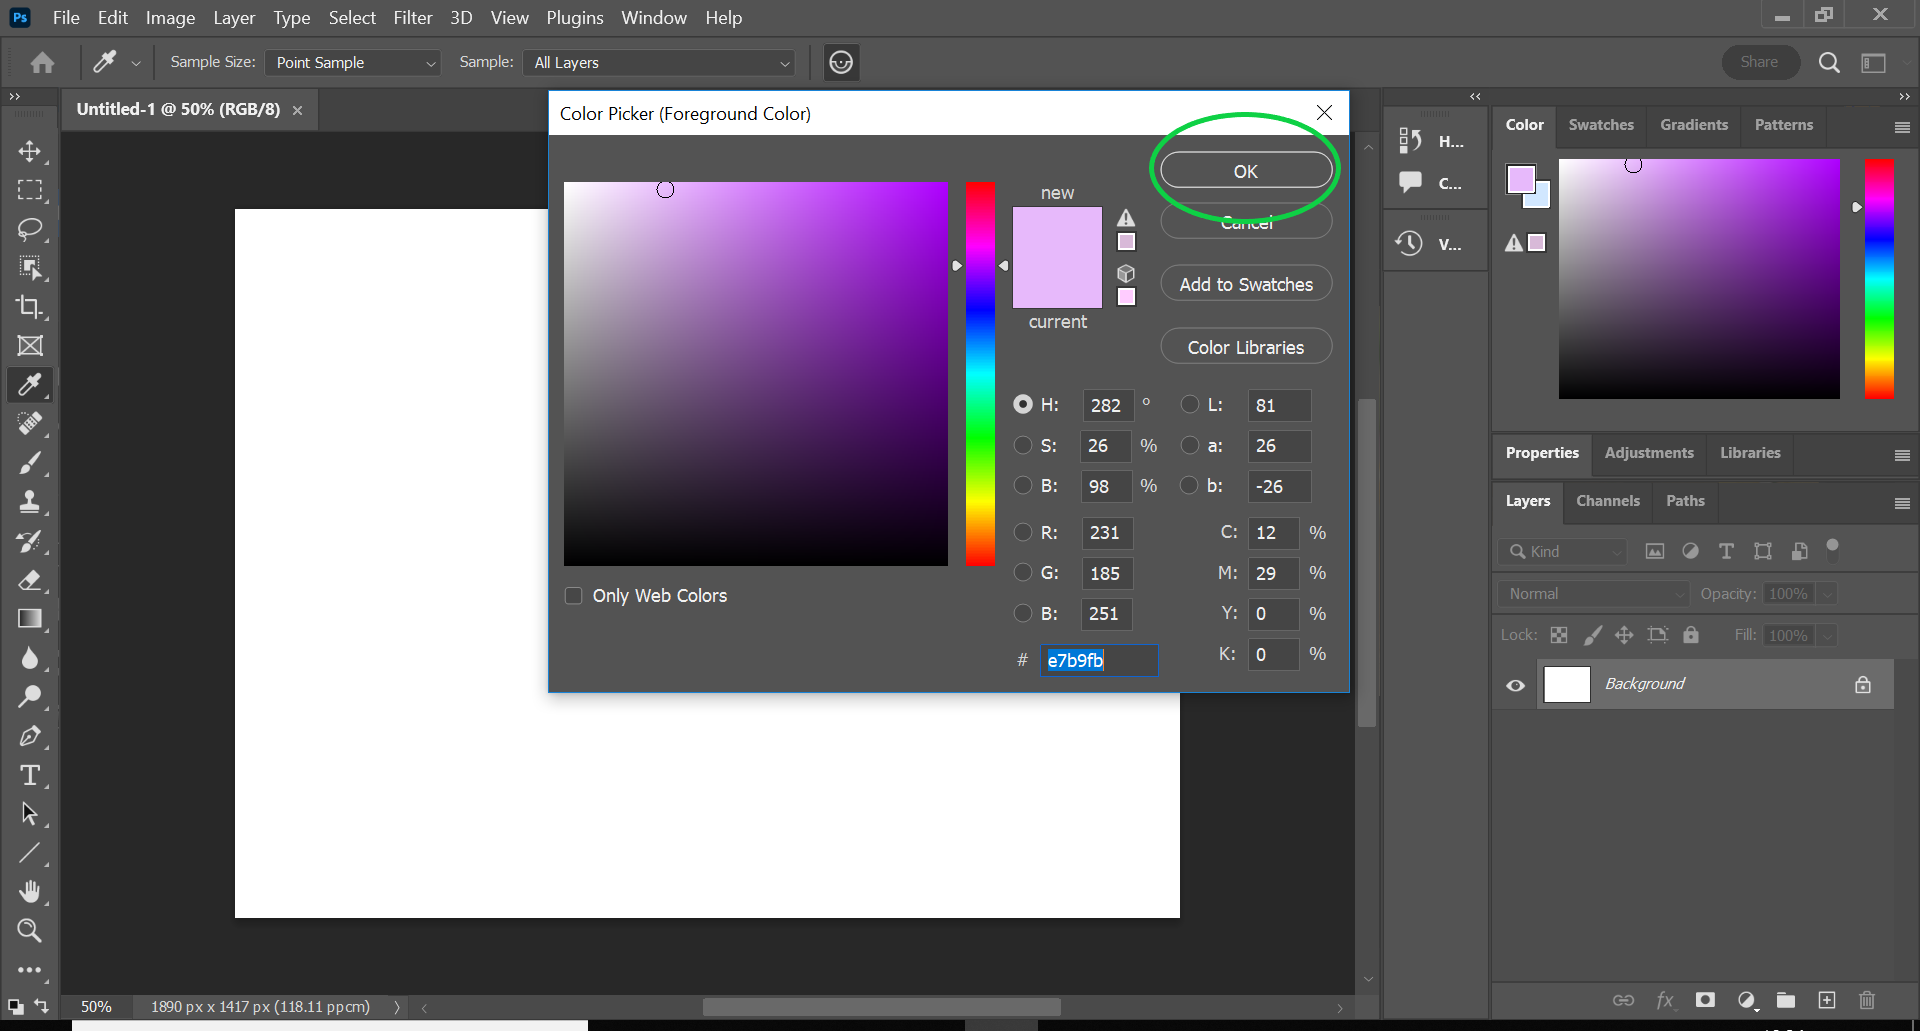
You can use the colour picker to choose any colour.
Step
5Choose a type of gradient
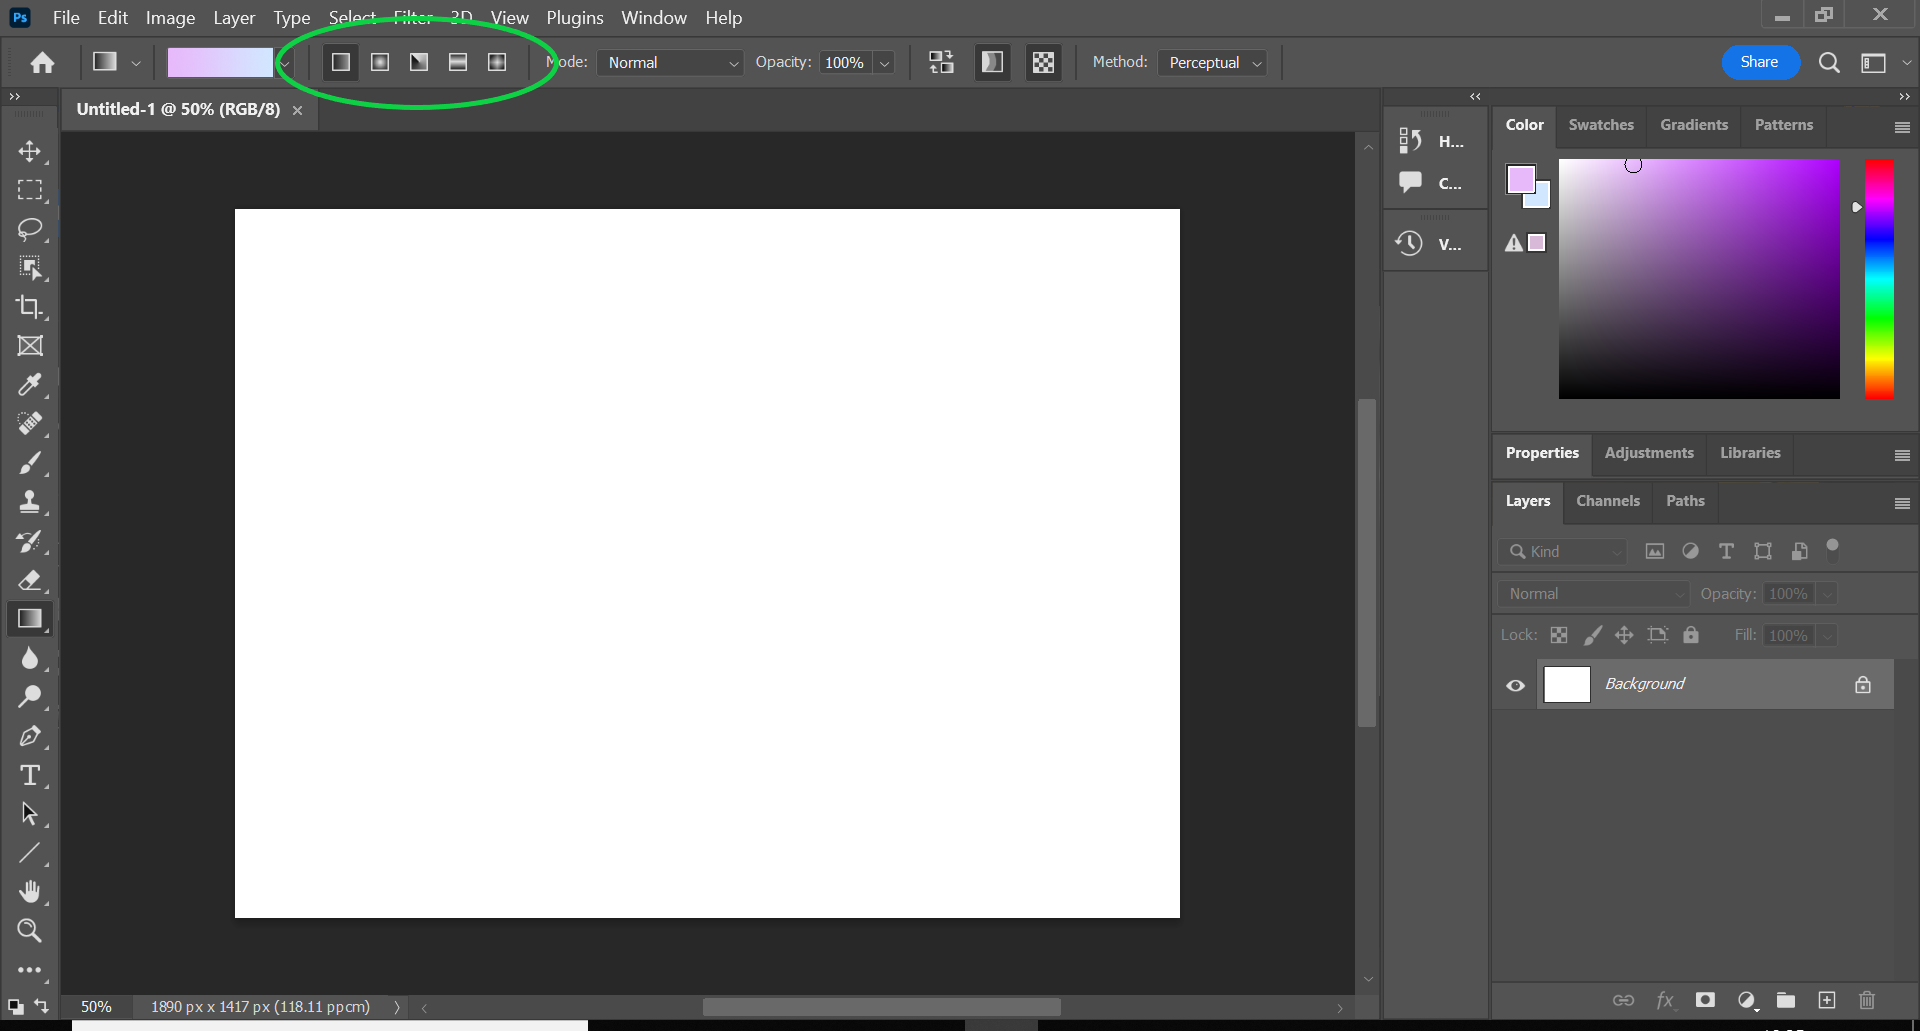
You can pick between linear, radial, angular, reflected and diamond-style gradients.
Step
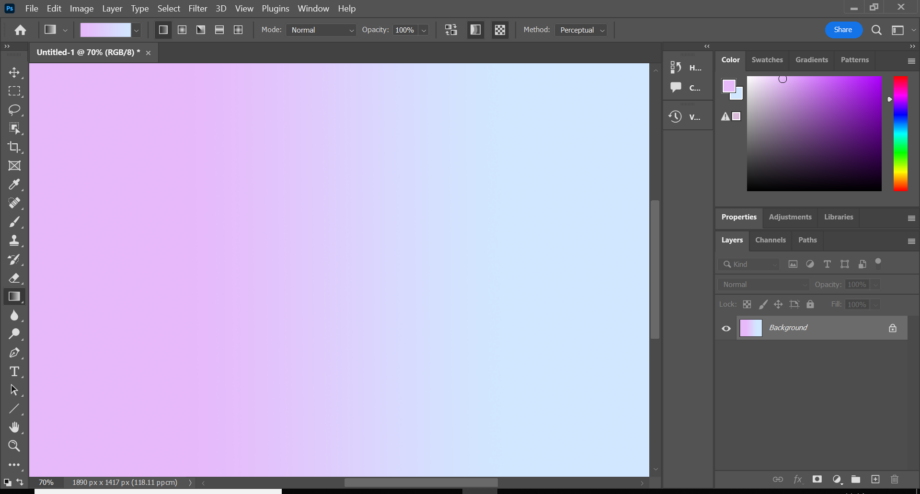
6Click on the image and drag to create a gradient
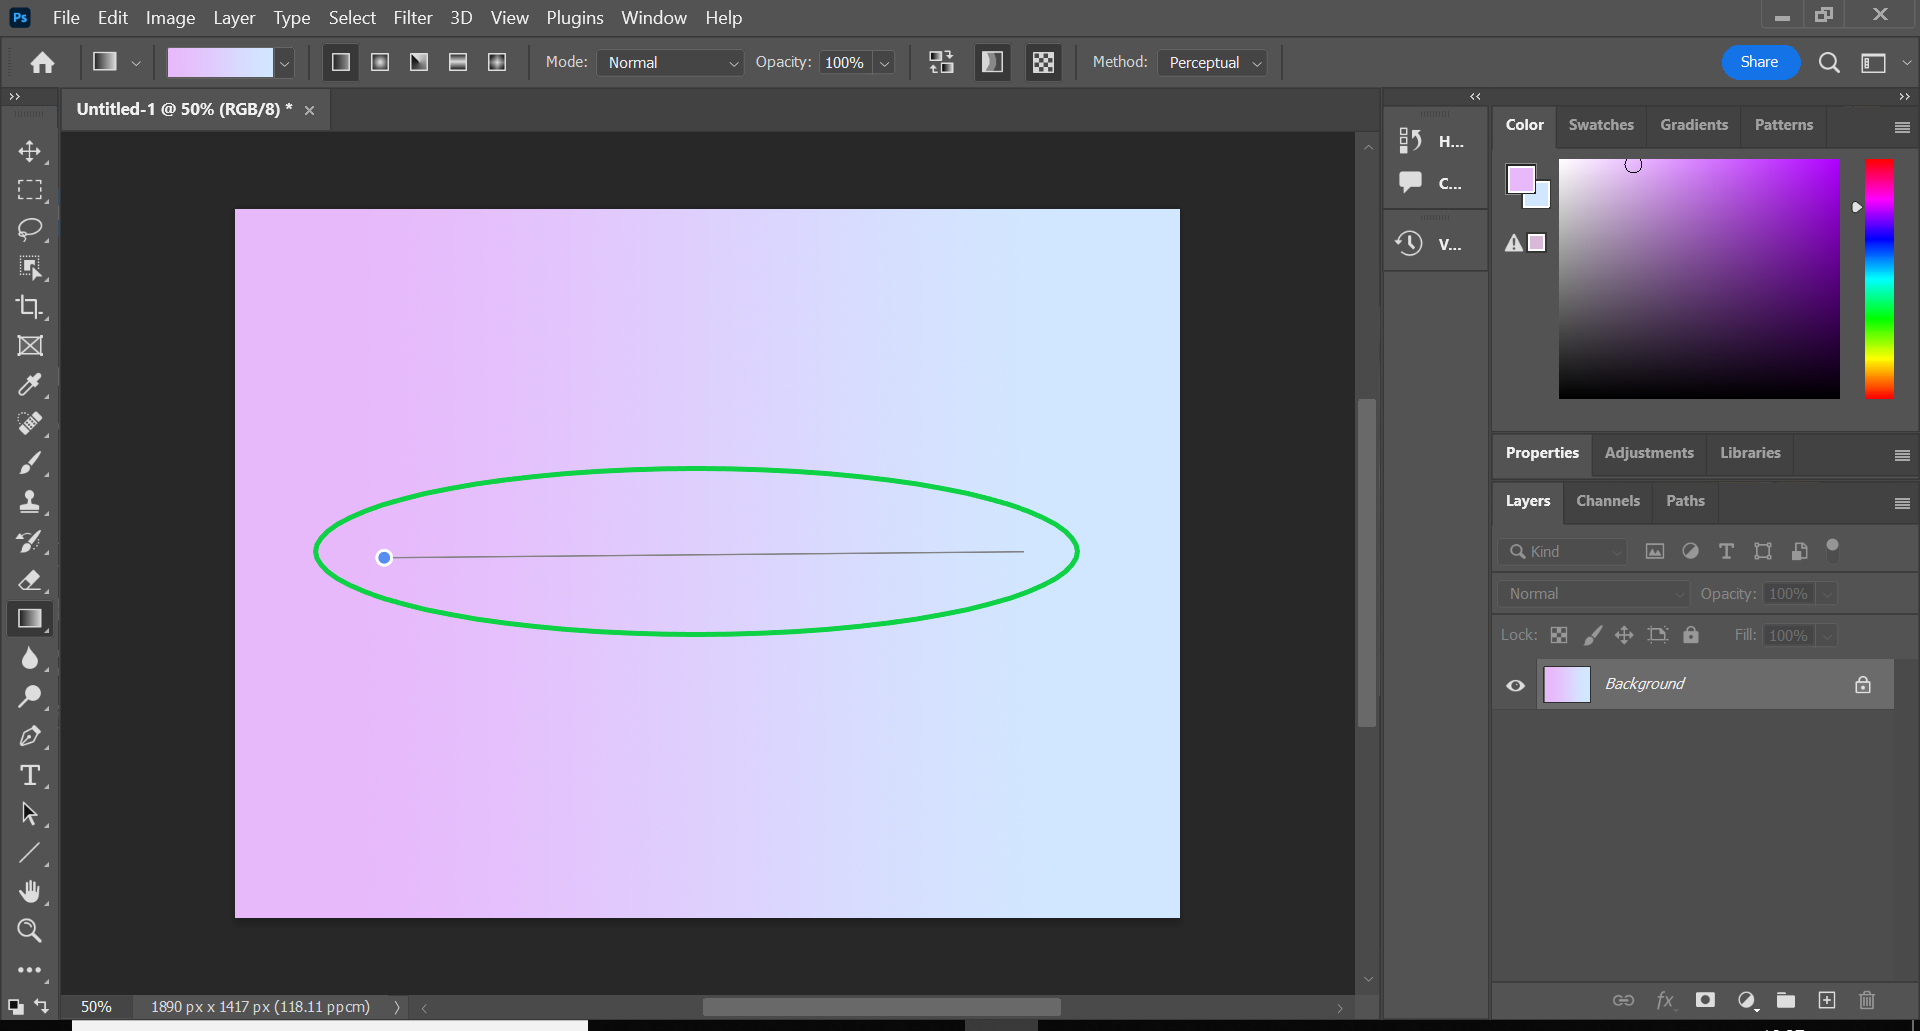
You can drag in any direction to create different results.
Troubleshooting
To create a gradient that goes from colour to transparent (or vice versa) just click the drop-down arrow next to your colours at the top of the screen.
If you don’t like the gradient you’ve created, simply click Edit then Undo Gradient and try again.
You might like…


Editorial independence
Editorial independence means being able to give an unbiased verdict about a product or company, with the avoidance of conflicts of interest. To ensure this is possible, every member of the editorial staff follows a clear code of conduct.
Professional conduct
We also expect our journalists to follow clear ethical standards in their work. Our staff members must strive for honesty and accuracy in everything they do. We follow the IPSO Editors’ code of practice to underpin these standards.