How to make a clipping mask in Photoshop

If you want to add a mask to a group of layers in Adobe Photoshop, you’ll need to create a clipping mask. We’ve put together this guide to show you how to make one.
When it comes to using clipping masks, the bottom layer – or base layer – will determine the boundaries of the mask. This can be useful if you want to change the shape of an image or text layer. In this instance, these elements will also take on the opacity of the base layer.
Clipping masks make it possible to apply adjustments to specific layers, which can be great when you’re working on complex projects with lots of different layers and effects.
What you’ll need:
- Adobe Photoshop
- A Creative Cloud subscription
The Short Version
- Choose a layer in Photoshop
- Right-click the layer
- Choose Create Clipping Mask
Step
1Open your file in Photoshop
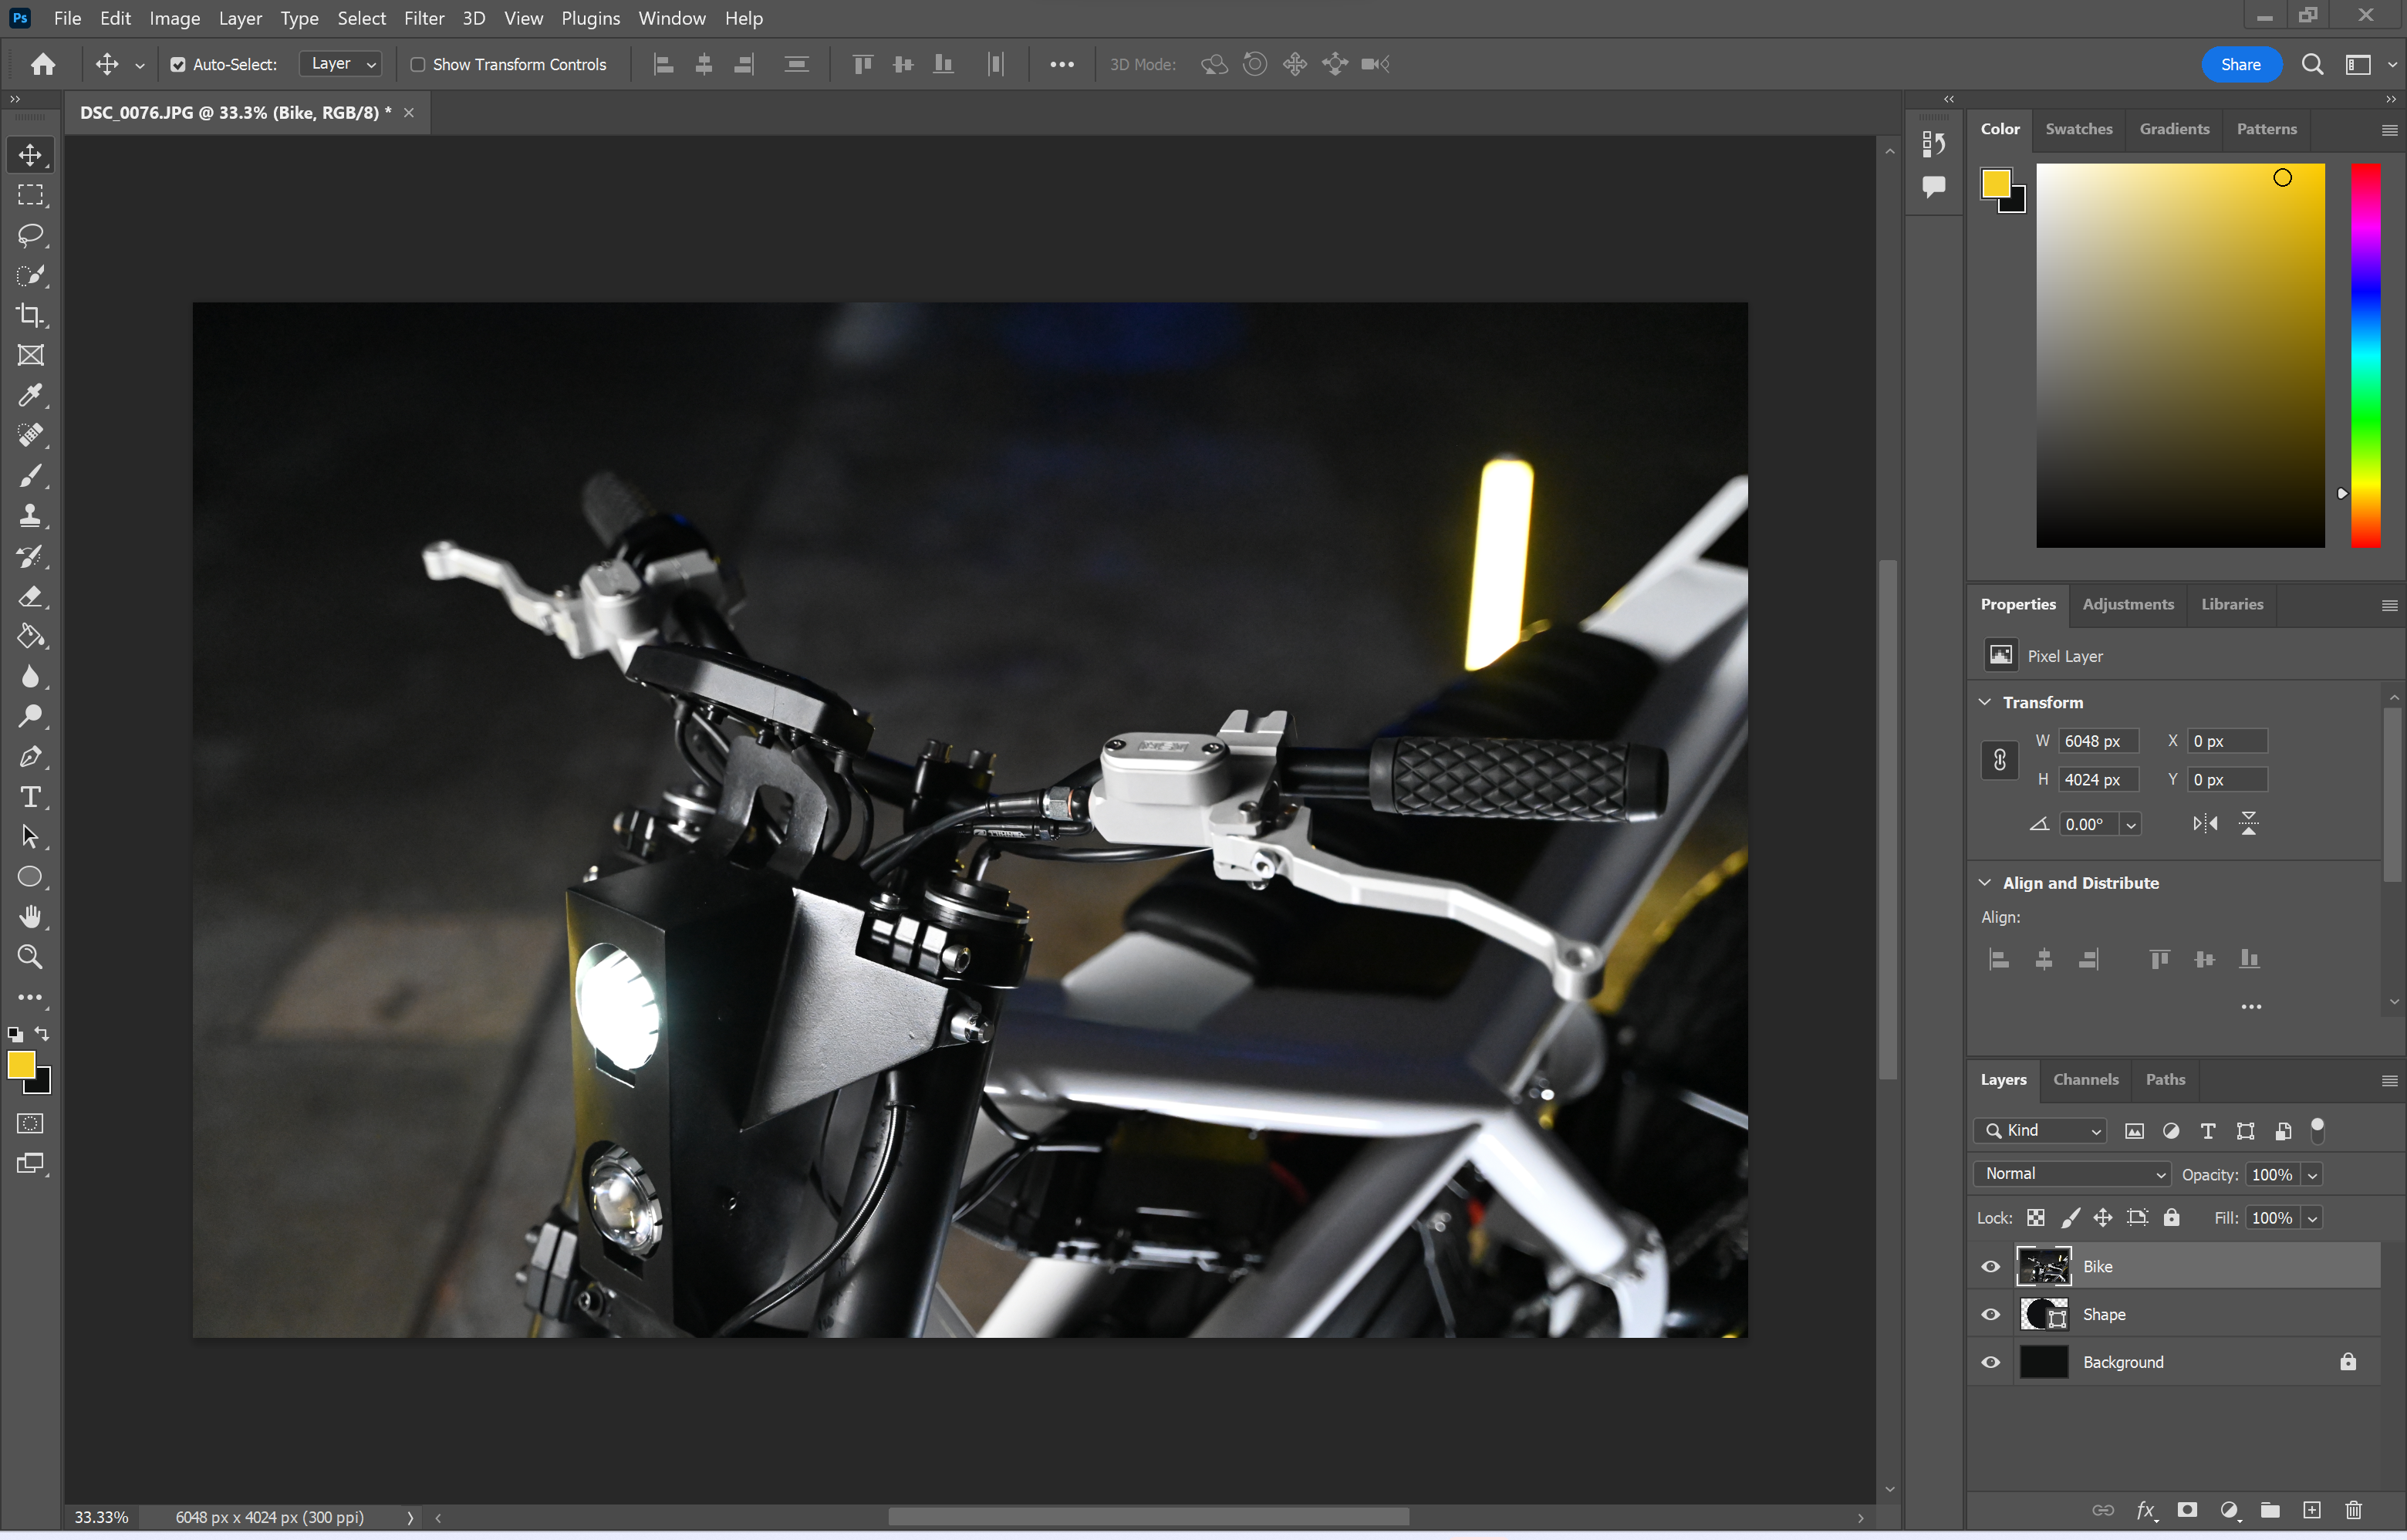
The first step is to identify the layer you want to use to create a clipping mask.

Step
2Right-click on the layer you want to use
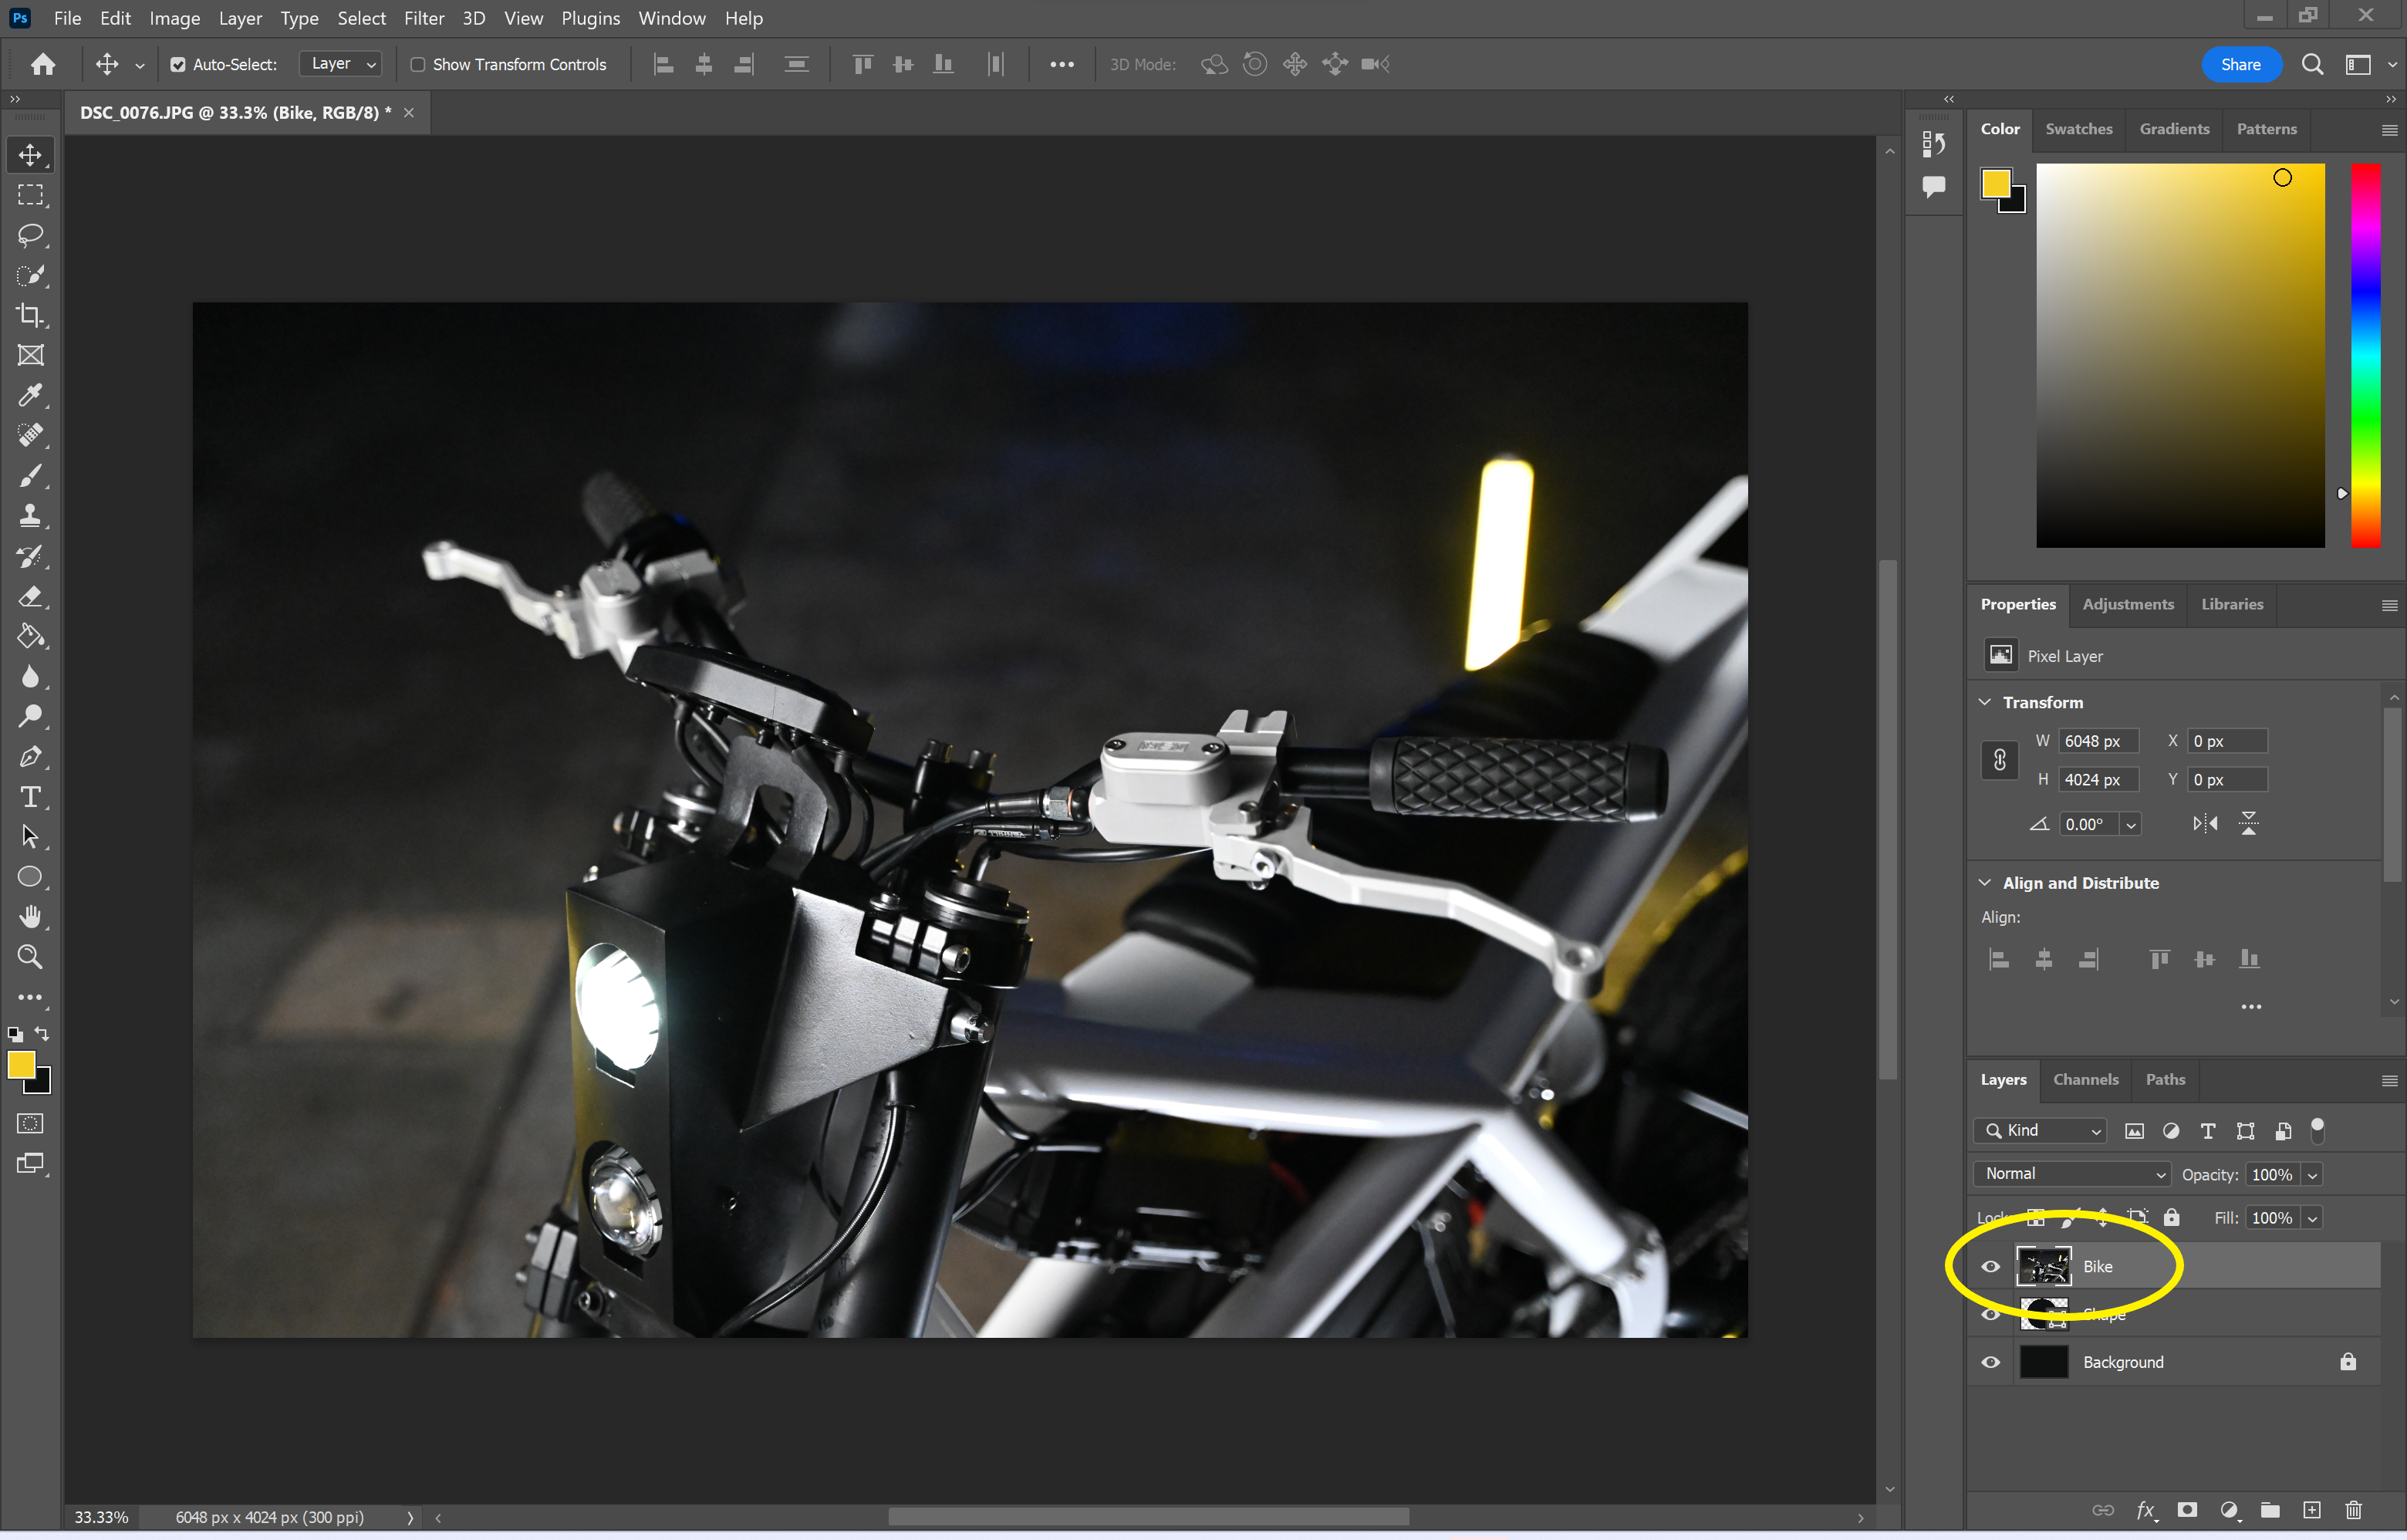
You’ll want to make sure this layer is above the edits you wish to apply.

Step
3Choose Create Clipping Mask
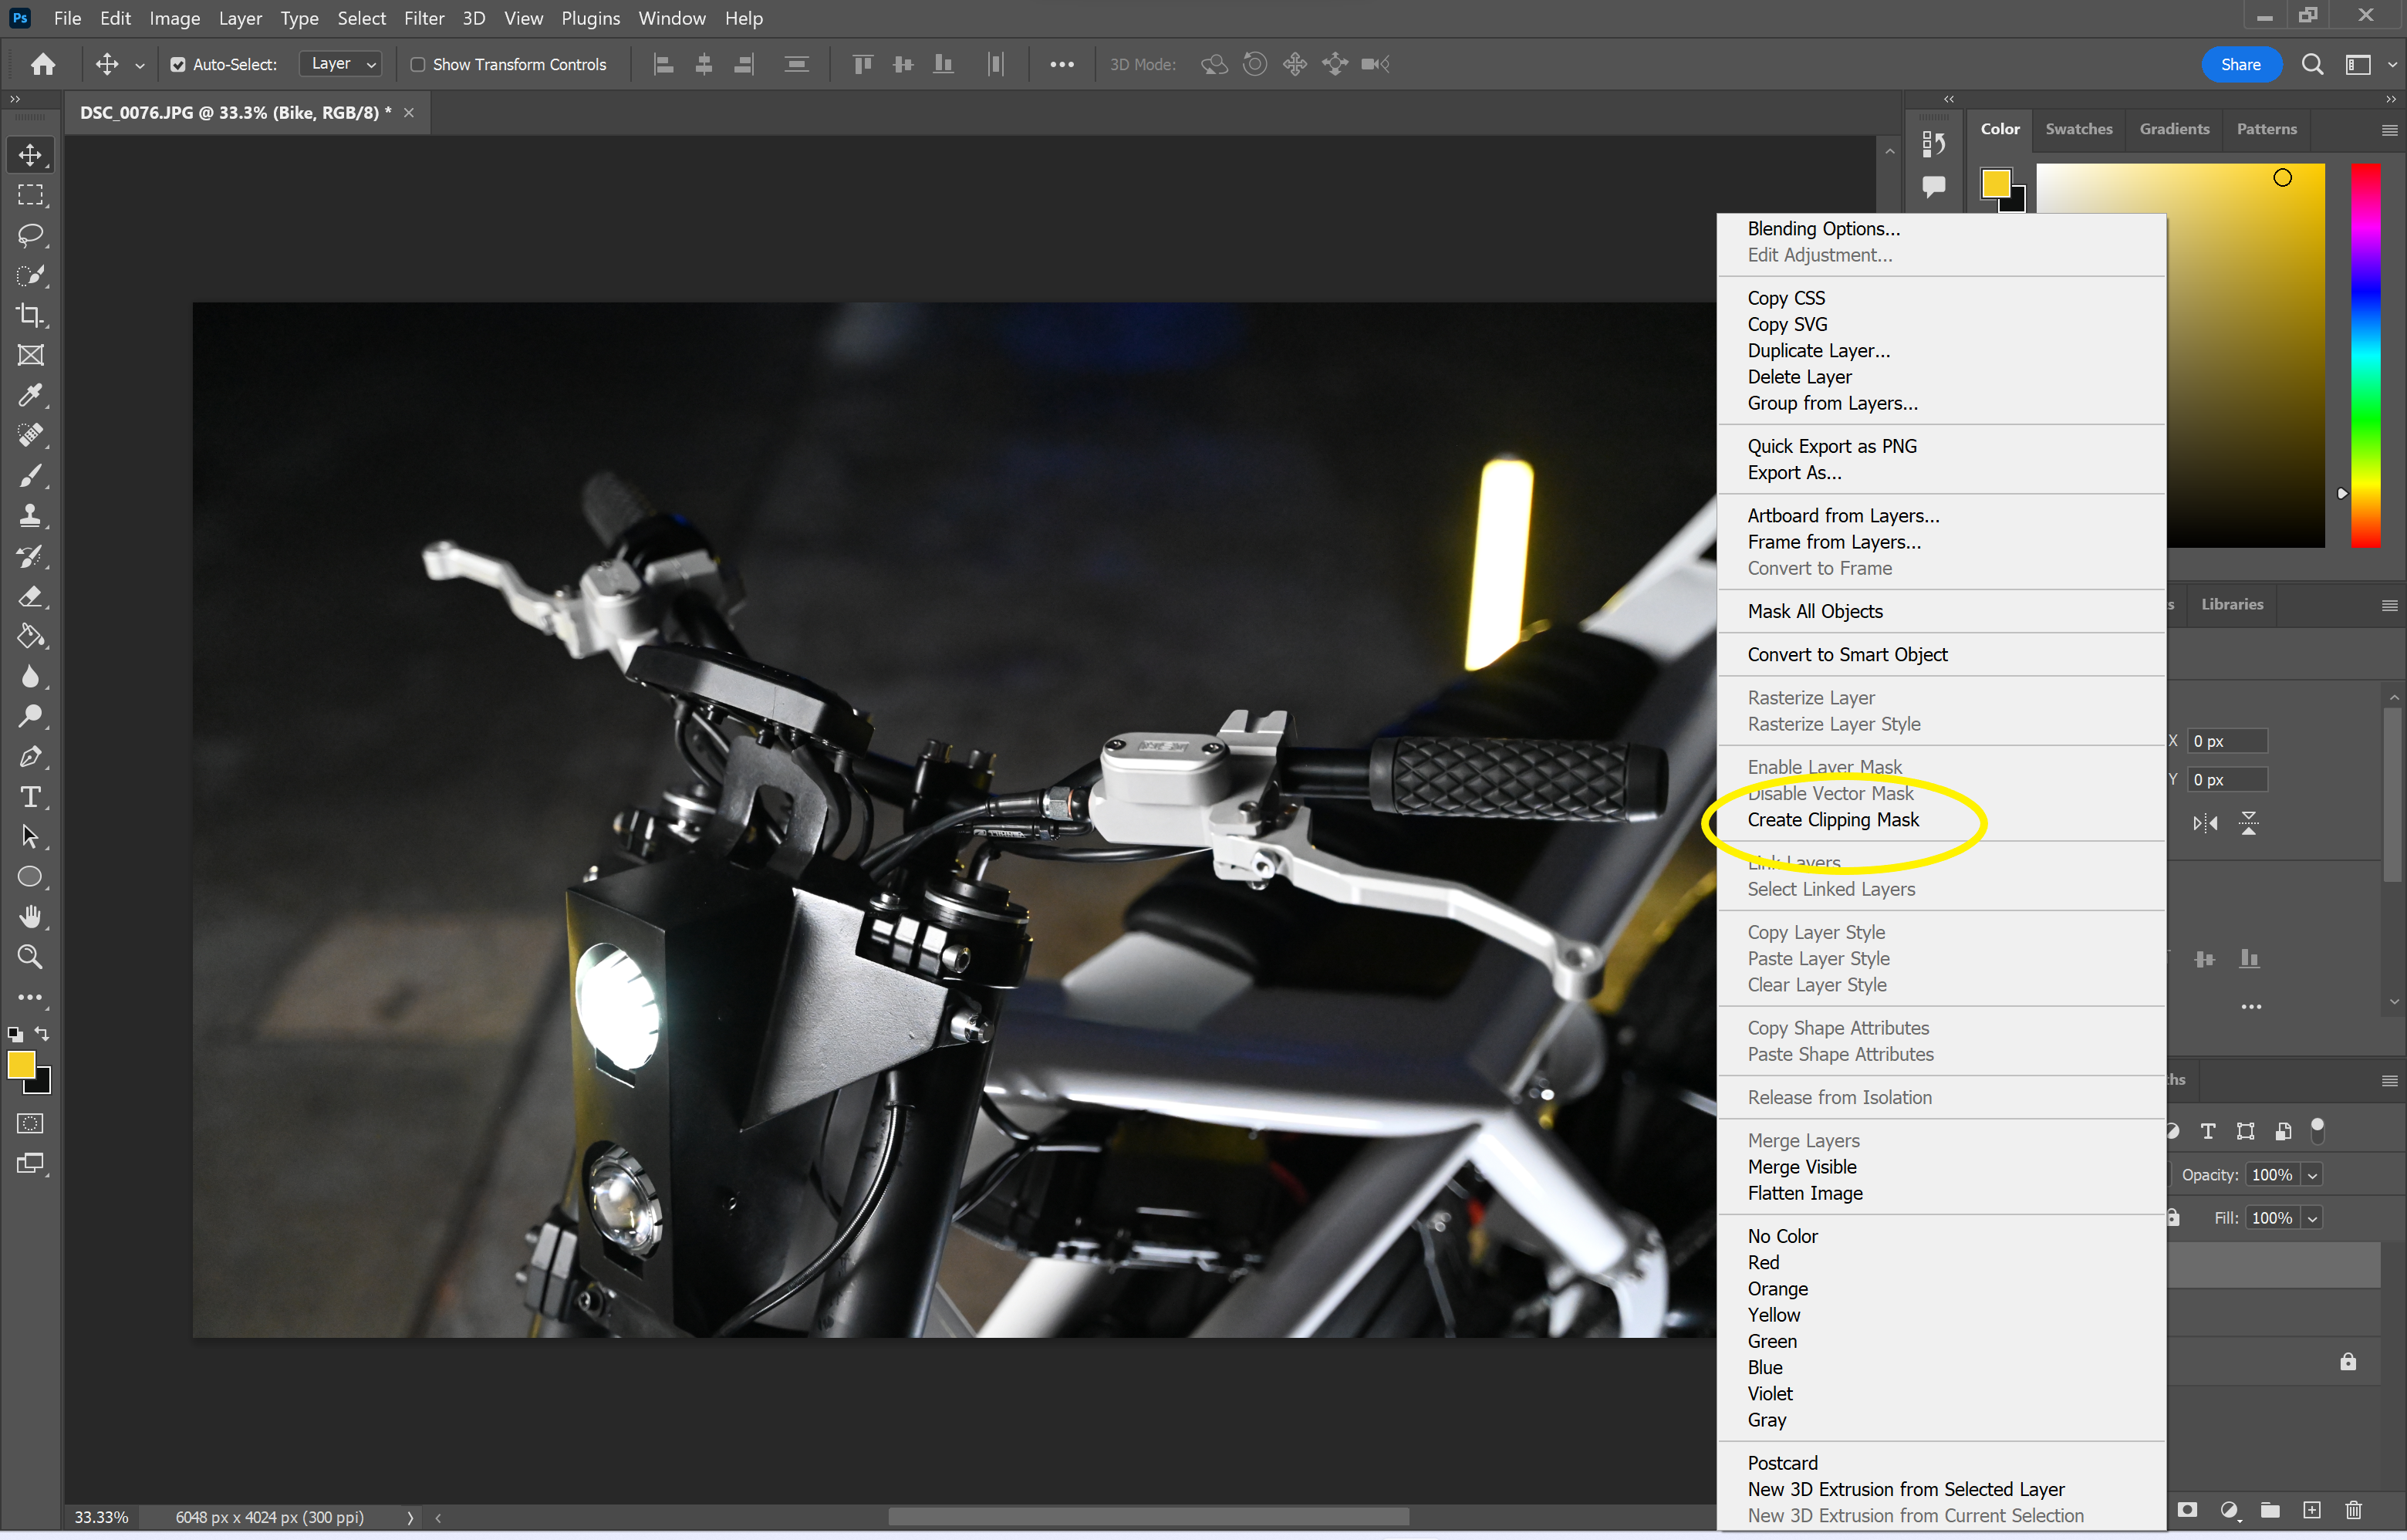
This option should be about midway down the dropdown menu.

Step
4That’s it!
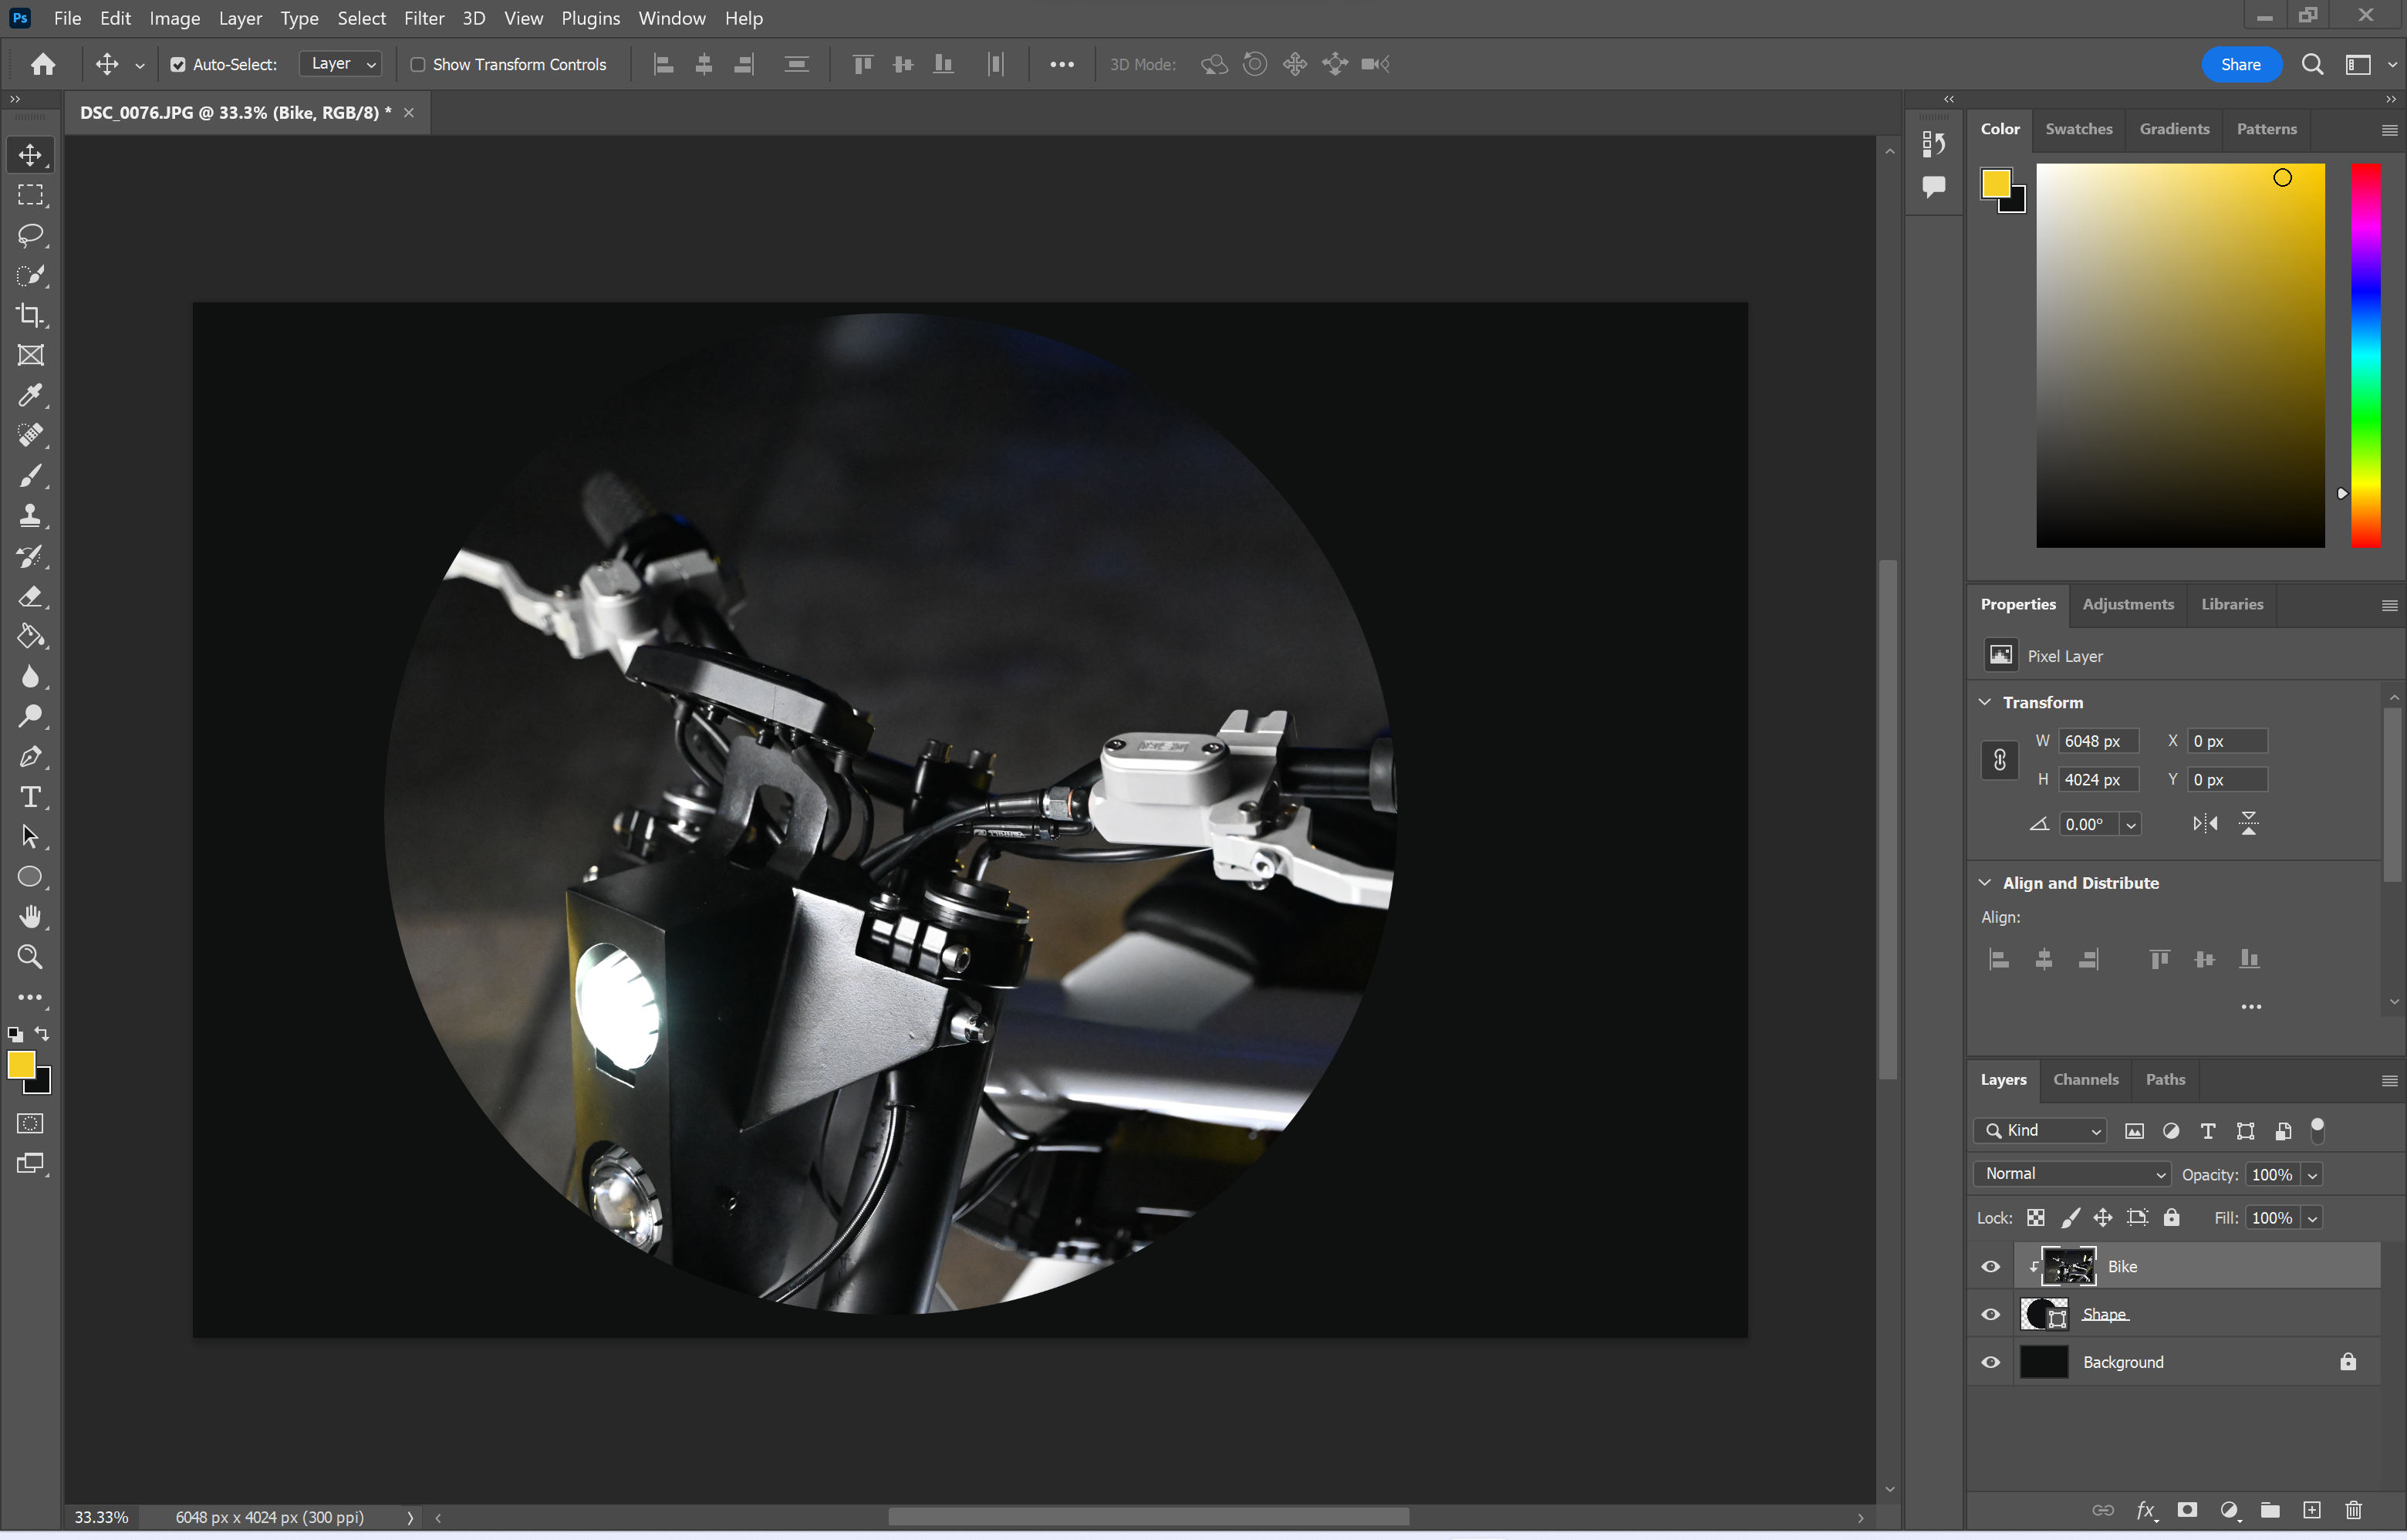
You can always remove the clipping mask by right-clicking on the layer again and selecting Release Clipping Mask.

Troubleshooting
If you’re in a hurry, you can quickly create a clipping mask by holding down Alt on a Windows PC or Option on a Mac and clicking on the line that divides the two layers in Photoshop.
If you change your mind, you can easily remove a clipping mask by right-clicking on the layer again and choosing Release Clipping Mask.


