

Recording a voice memo can be an immensely useful way to get your thoughts down quickly and easily, as well as to organise your day. Helpfully, there’s a built-in way to voice record on iPhone.
It comes through an Apple app called Voice Memos, which comes preinstalled on every iPhone. It’s extremely easy to use.
Here’s how to voice record on iPhone using Voice Memos.
What we used
- We used the iPhone 13 Pro, but these methods will work on any iPhone
The Short Version
- Open Voice Memos
- Tap Record
- Pause, Resume, and finish recording
- Enhance your recording
- Edit your recording
Step
1Open Voice Memos
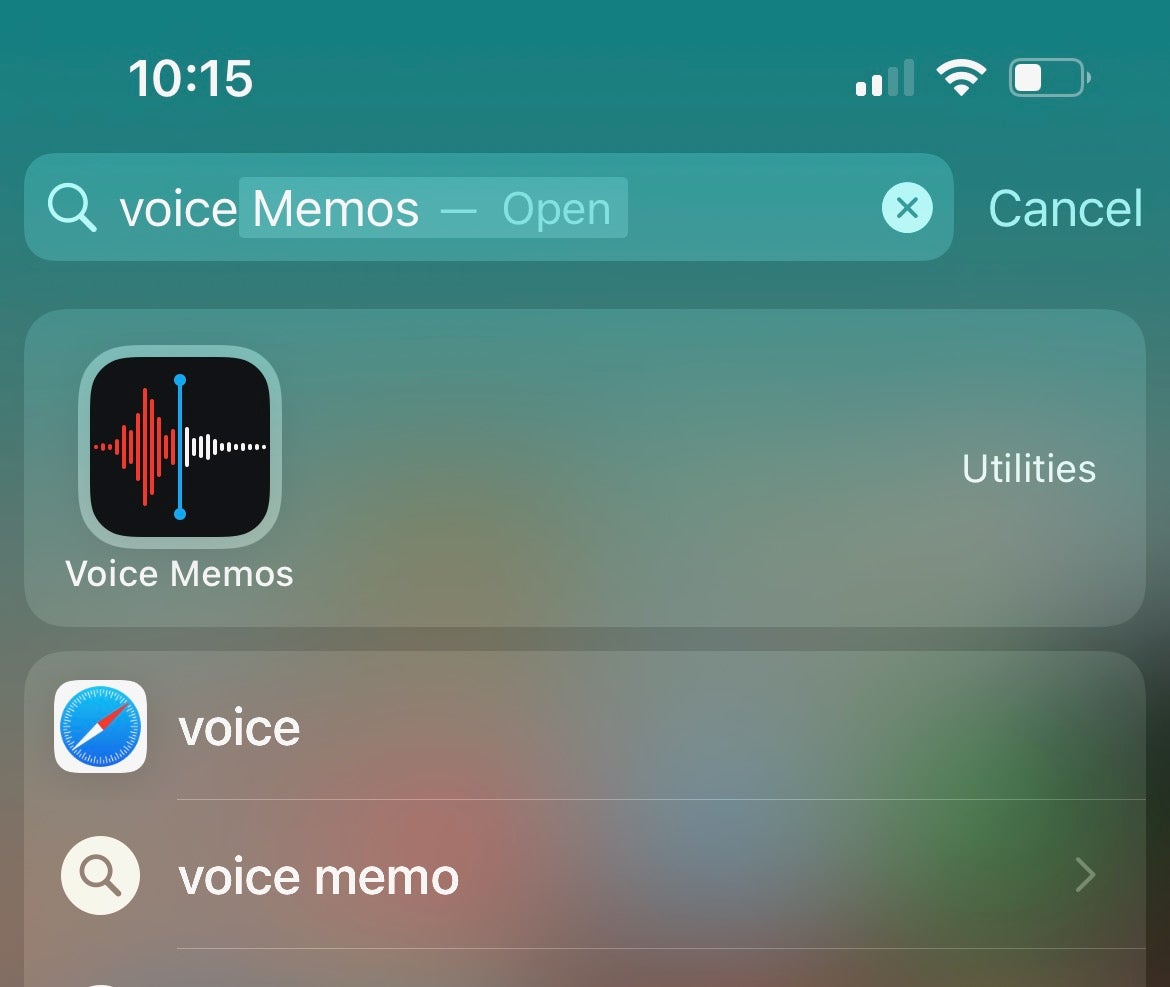
You should find Voice Memos on your iPhone’s home screen, potentially in a folder marked Utilities. If you can’t see it, simply drag down from the middle of the home screen to bring up the Search field, and start typing Voice Memos. Tap the icon to open the app.
Step
2Tap Record
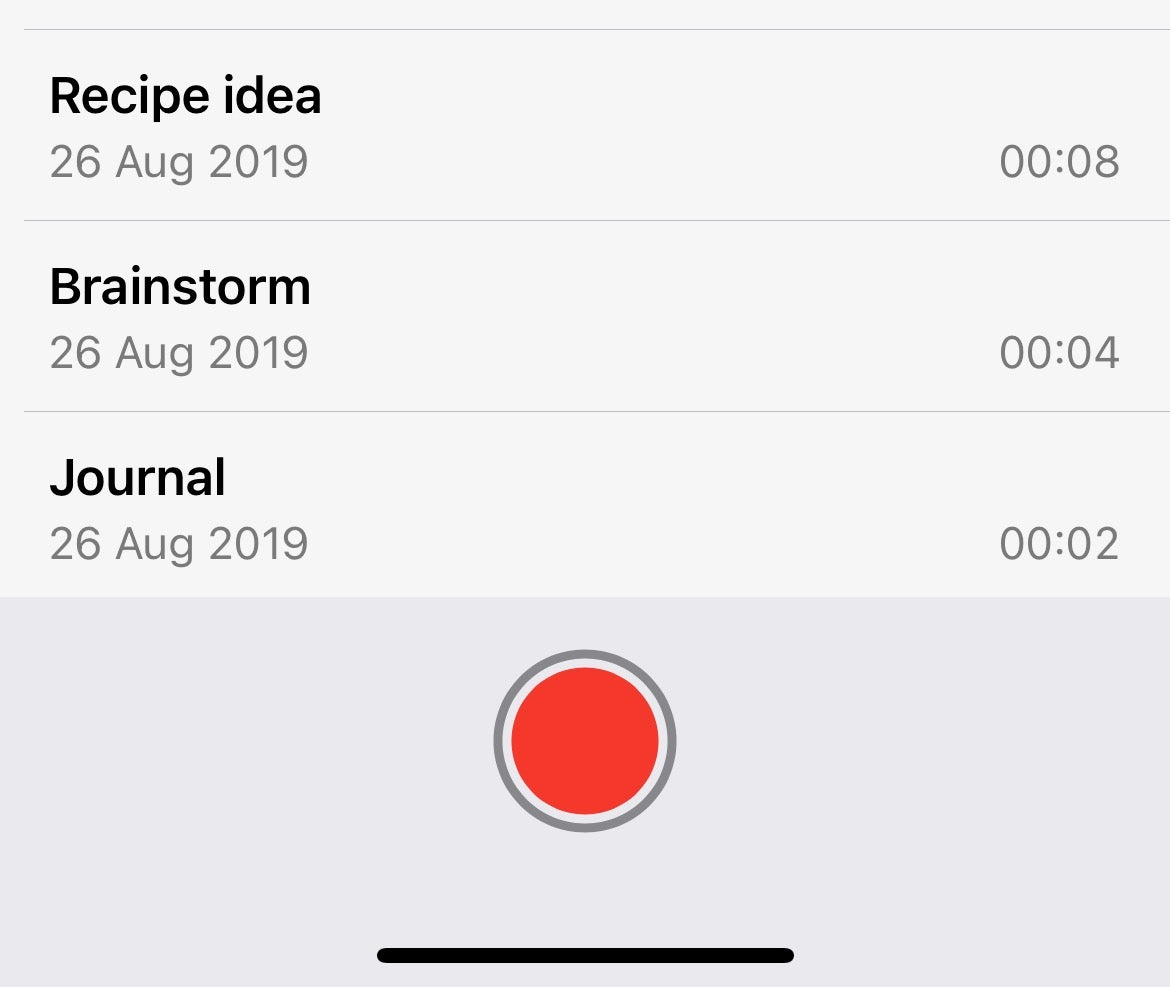
Tap the red Record circle to start the recording process. Make sure you’re talking reasonably close to your iPhone’s mic, or into your connected headphones. You’ll know your voice is being successfully recorded by the vocal imprint indicated on the Voice Memo timeline.
Step
3Pause, Resume, and finish recording
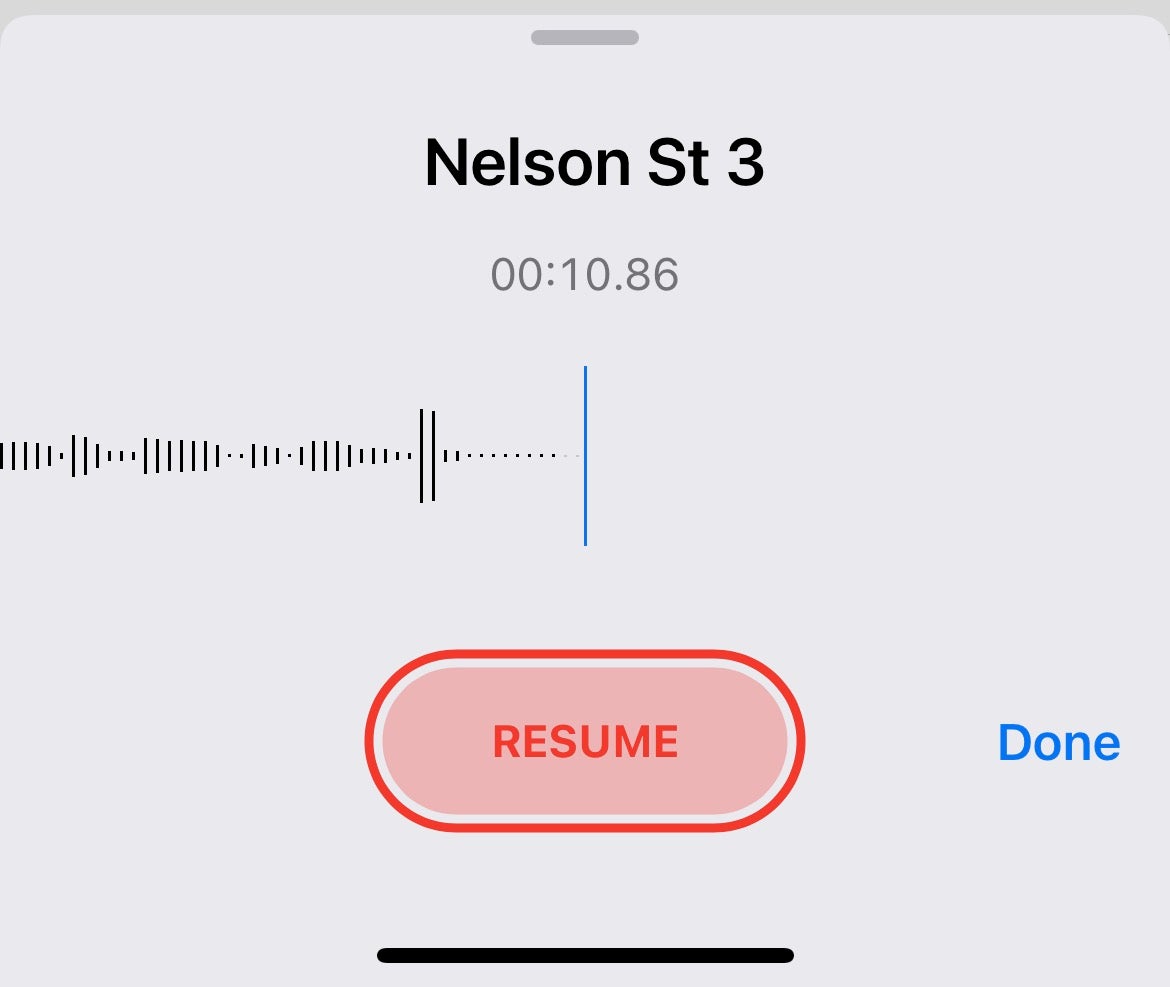
At any point in the recording, tap the pause button to hold the recording. Then either hit the Resume button to continue, or hit Done to complete and save the recording. Your current location will be used as the title, but this can be changed manually.
Step
4Enhance your recording
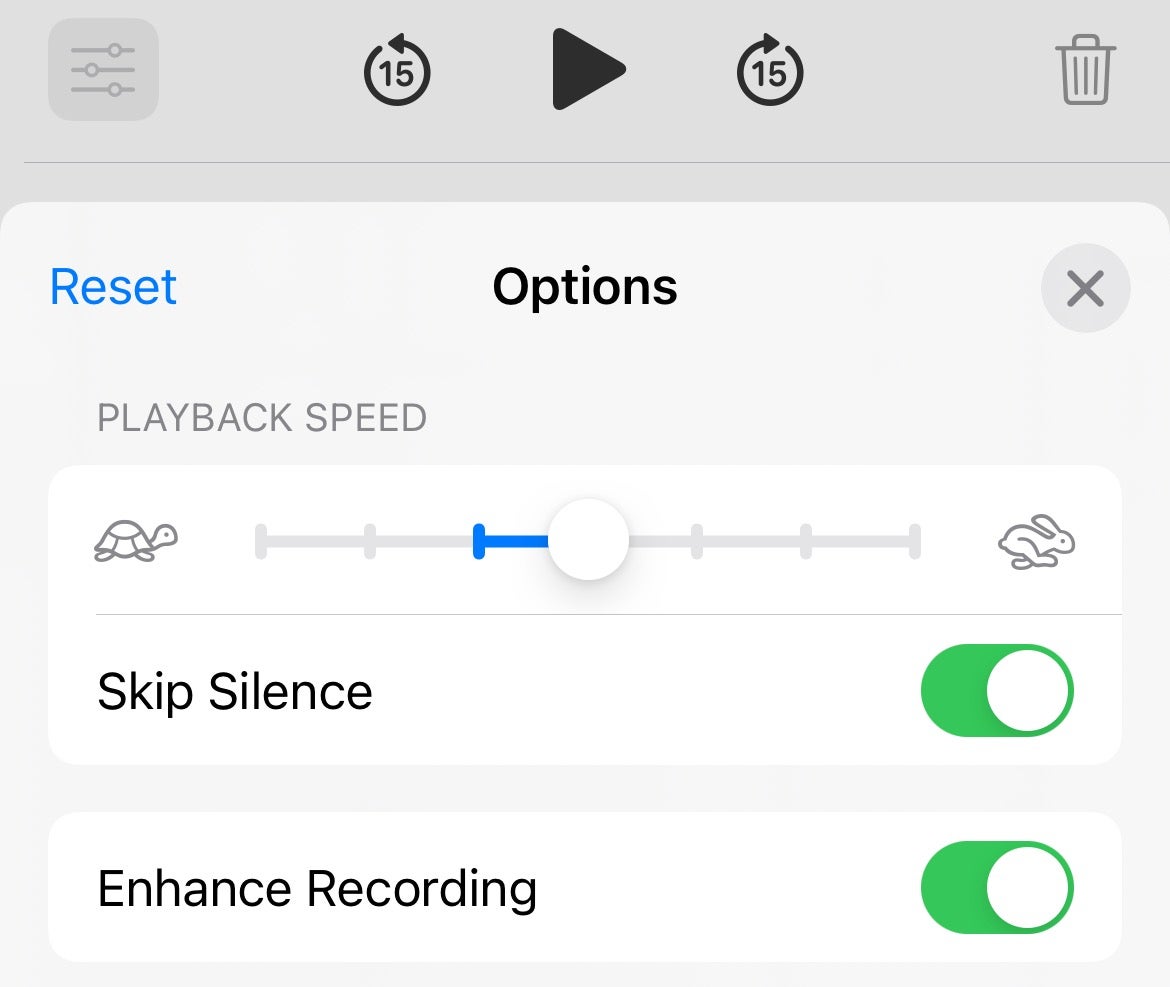
Your recording will be saved on the main All Recordings page of the Voice Memos app, with the most recent at the very top. Tap on the recording to expand it, then hit the blue edit icon in the bottom left corner.
This lets you alter the playback speed, clean up the recording quality with Enhance Recording, and automatically edit out any silent sections with Skip Silence.Step
5Edit your recording
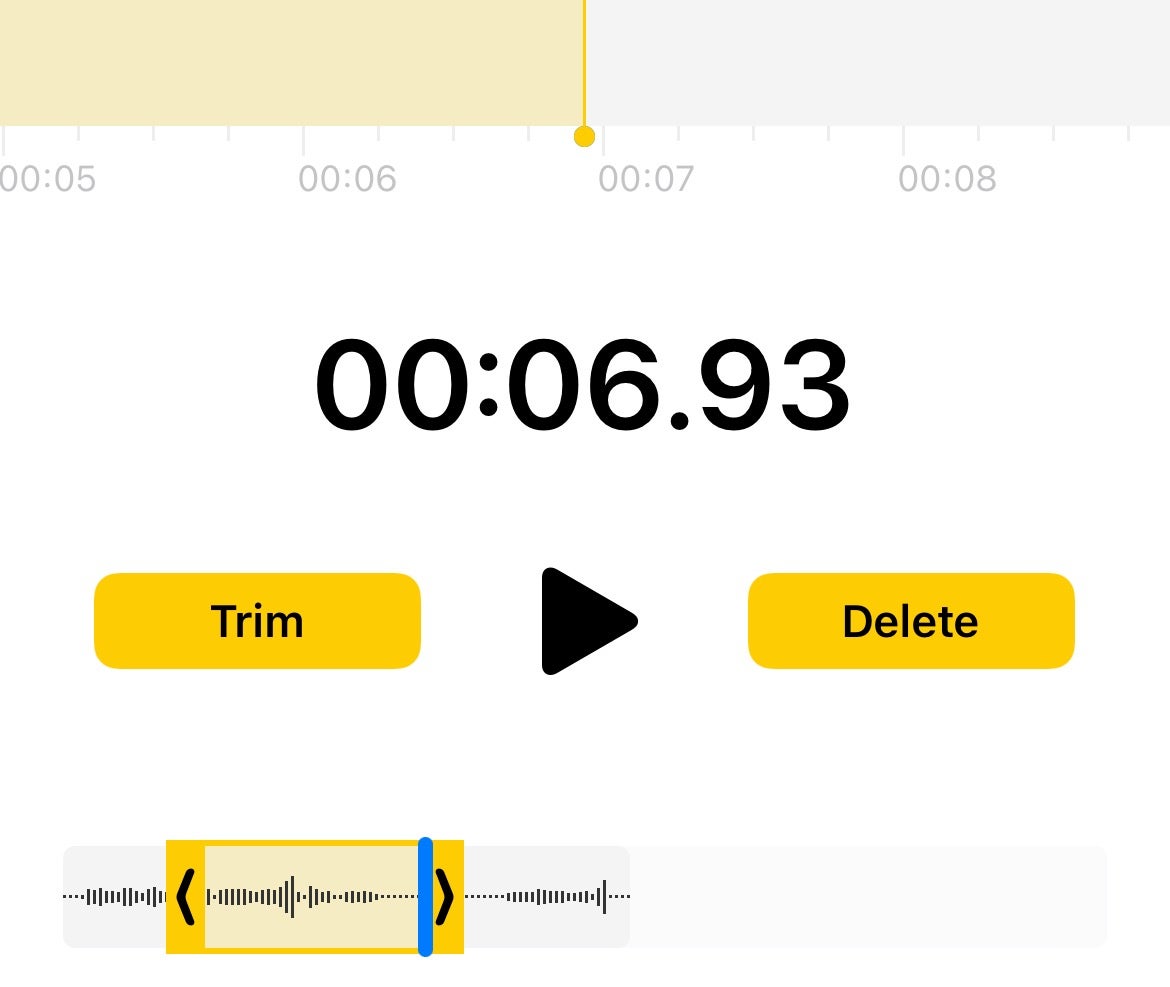
You can jump in and edit your recording by expanding the recording, tapping the menu button (the three dots) in the top right corner, and hitting Edit Recording.
From here, tap the trim button in the top right corner and drag the left and right timeline arrows at the bottom to cut out any unwanted sections.
FAQs
Yes, if you have connected a set of headphones to your iPhone over Bluetooth or wired, and they have a mic, this would be ideal to record your voice.
Yes. Once completed and saved, tap on the recording, then again on the title, and type in your preferred title.
You might like…

Editorial independence
Editorial independence means being able to give an unbiased verdict about a product or company, with the avoidance of conflicts of interest. To ensure this is possible, every member of the editorial staff follows a clear code of conduct.
Professional conduct
We also expect our journalists to follow clear ethical standards in their work. Our staff members must strive for honesty and accuracy in everything they do. We follow the IPSO Editors’ code of practice to underpin these standards.