
An internet protocol (IP) camera is a cheap and effective way to keep extra eyes on your home. There’s no shortage of choice – whether indoor or outdoor, connected via wires or Wi-Fi – but the trick to using any camera effectively is being able to store and analyse what it sees.
You can view a camera’s live feed over your local network, and sometimes the internet, but add storage to the mix and you have a far more powerful home security setup. Rather than relying on paid-for cloud storage or limited SD card storage, we’ll show you how to use Synology Surveillance Station to store recorded footage for free.
IP cameras can usually send video to locations such as a network-attached storage (NAS) device, but this can be tedious to configure. The ideal solution is to have a central CCTV controller with its own storage.
If you happen to have a Synology NAS then this is exactly what you have, in the shape of Surveillance Station – a powerful CCTV package that supports most IP cameras and almost any Synology NAS (check out the full list of supported cameras to see if your model will work). It’s free for up to two cameras; to add more, you need to make a one-off payment of about £50 per camera.
In this feature, we’ll explain how to configure cameras, schedules and recording in Surveillance Station, and show you how to use your smartphone to view cameras and receive alerts wherever you are.
Related: Best security cameras
1. Install Surveillance Station
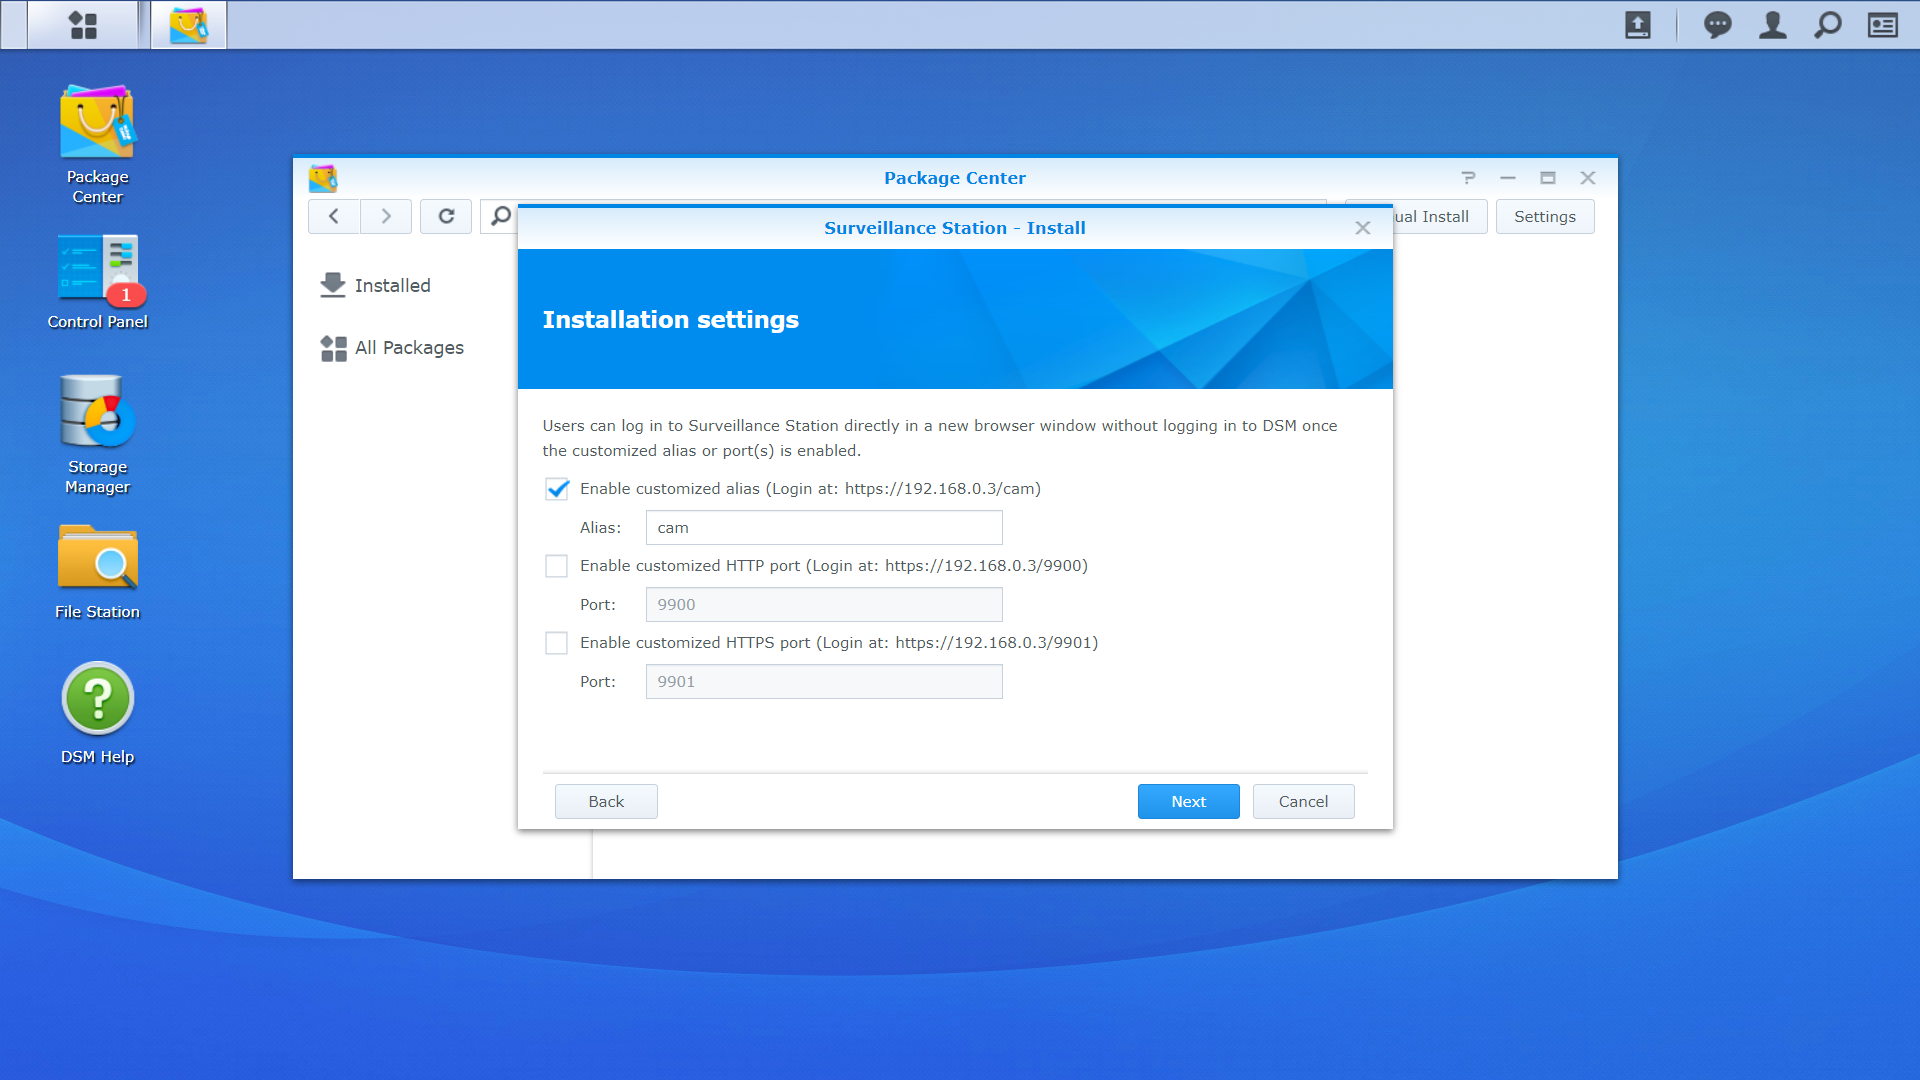
We’re going to assume you’ve already installed cameras and joined them to the network; now it’s time to configure your NAS. Begin by logging in to Synology DiskStation Manager, then click the top-left button to open the main menu. Click Package Center. Type “surveillance” into the search bar (without the quotes), hit Enter, and click the Surveillance Station install button. You may be asked where to install the package or where to store your video recordings – if you’re not sure, choose the volume with most space.
On the first Installation settings page, tick the top box to enable a customised alias, which will make future logins easier. Accept “cam” or replace it with something you’ll remember, then click Next. Leave Run after installation ticked, and click Apply to finish the installation.
2. Connect your cameras
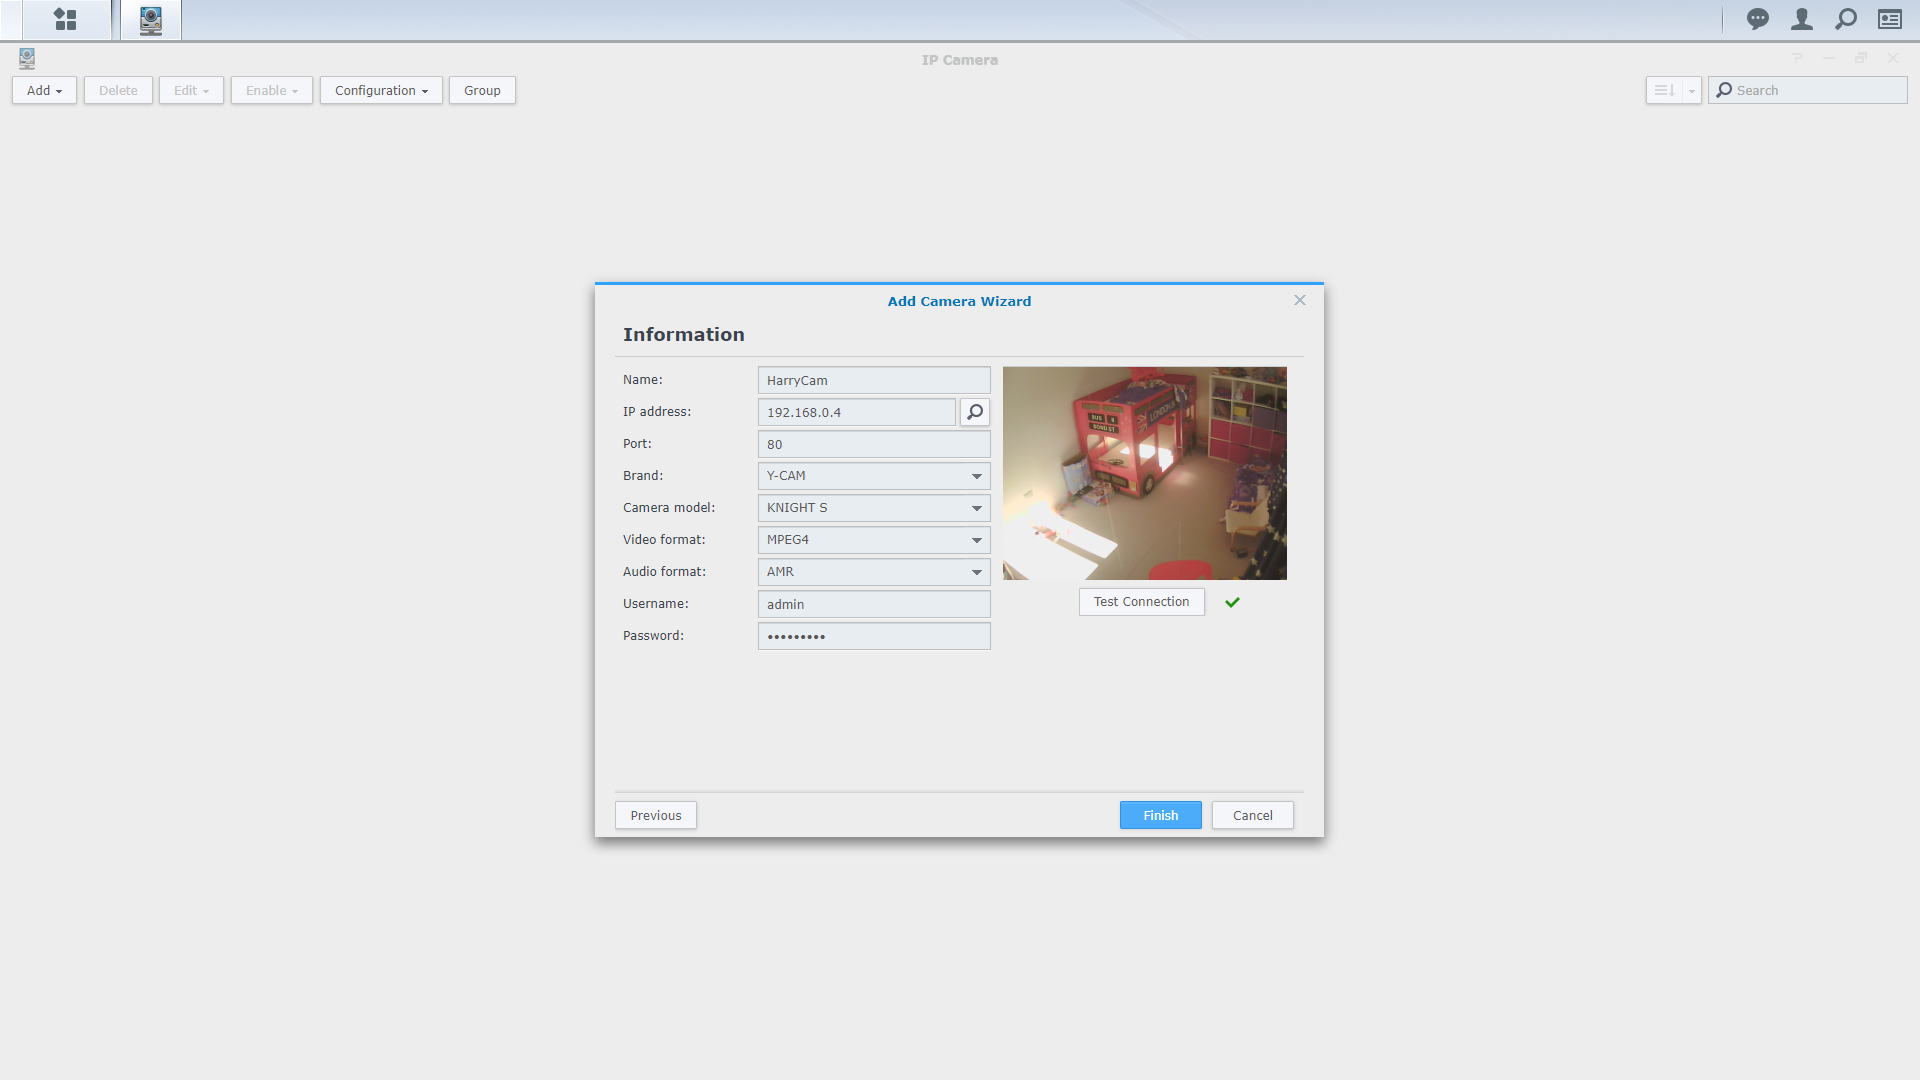
Surveillance Station should now launch in a new browser tab – if it doesn’t, open DiskStation Manager’s main menu and launch it from there. On the Surveillance Station desktop click IP Camera, then click the Add button to configure your first camera. Depending on the age and type of your camera(s), you may find that you can add them simply by choosing Add Batch, selecting Quick Setup, clicking Next, then selecting General Interface (ONVIF) and clicking Next to search.
If this doesn’t work, add your cameras manually. Click the Add button, select Add camera, then Quick Setup. Provide a name for the camera and enter its IP address, then choose its make and model from the list. Enter the correct username and password, click Test Connection and – assuming you connected successfully – click Finish.
3. Set a schedule
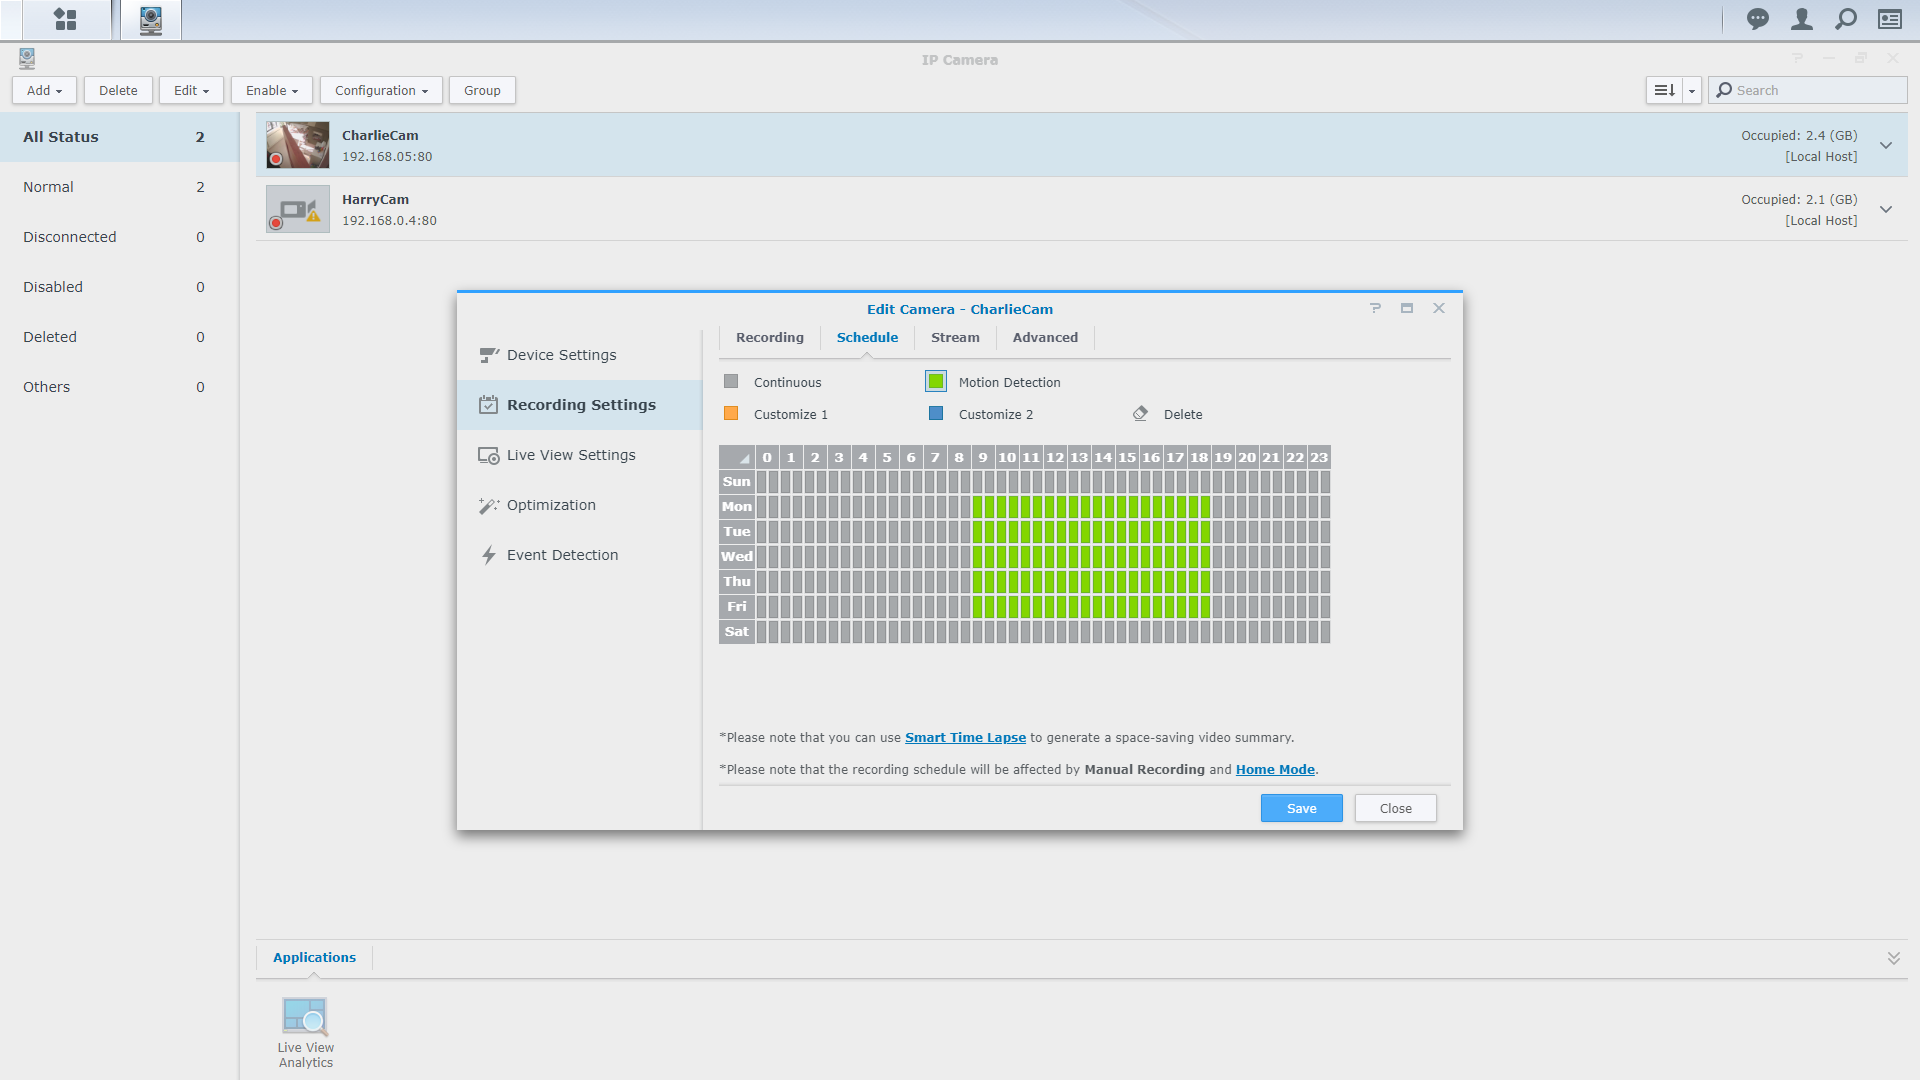
IP Camera will now show your installed camera(s), and Surveillance Station will already be recording their output. Select the first camera, click the Edit button and select Edit, then click Recording settings in the left-hand pane. On the Recording tab you can configure the maximum amount of video to store, either in days or gigabytes. Set a sensible figure taking into account the storage you have available.
The Schedule tab lets you set the times during which your camera will record either continuously, based on motion detection, or not at all. If you have plenty of disk space, leave the default “always on” setting; otherwis,e schedule other recording modes by clicking the colour block in the key, then “painting” that colour onto the schedule.
4. Configure motion detection
Assuming you didn’t already configure motion detection in your camera’s admin interface, click Event Detection in IP Camera’s left-hand pane, switch Detection source to By Surveillance Station and click Edit Detection Area. Click “+” to paint detection zones onto the live image, and click “-” to remove areas, then click Save. Consider setting Ignore short-lived motion to one or two seconds to help reduce false alarms, then click Save. Repeat if necessary for other cameras.
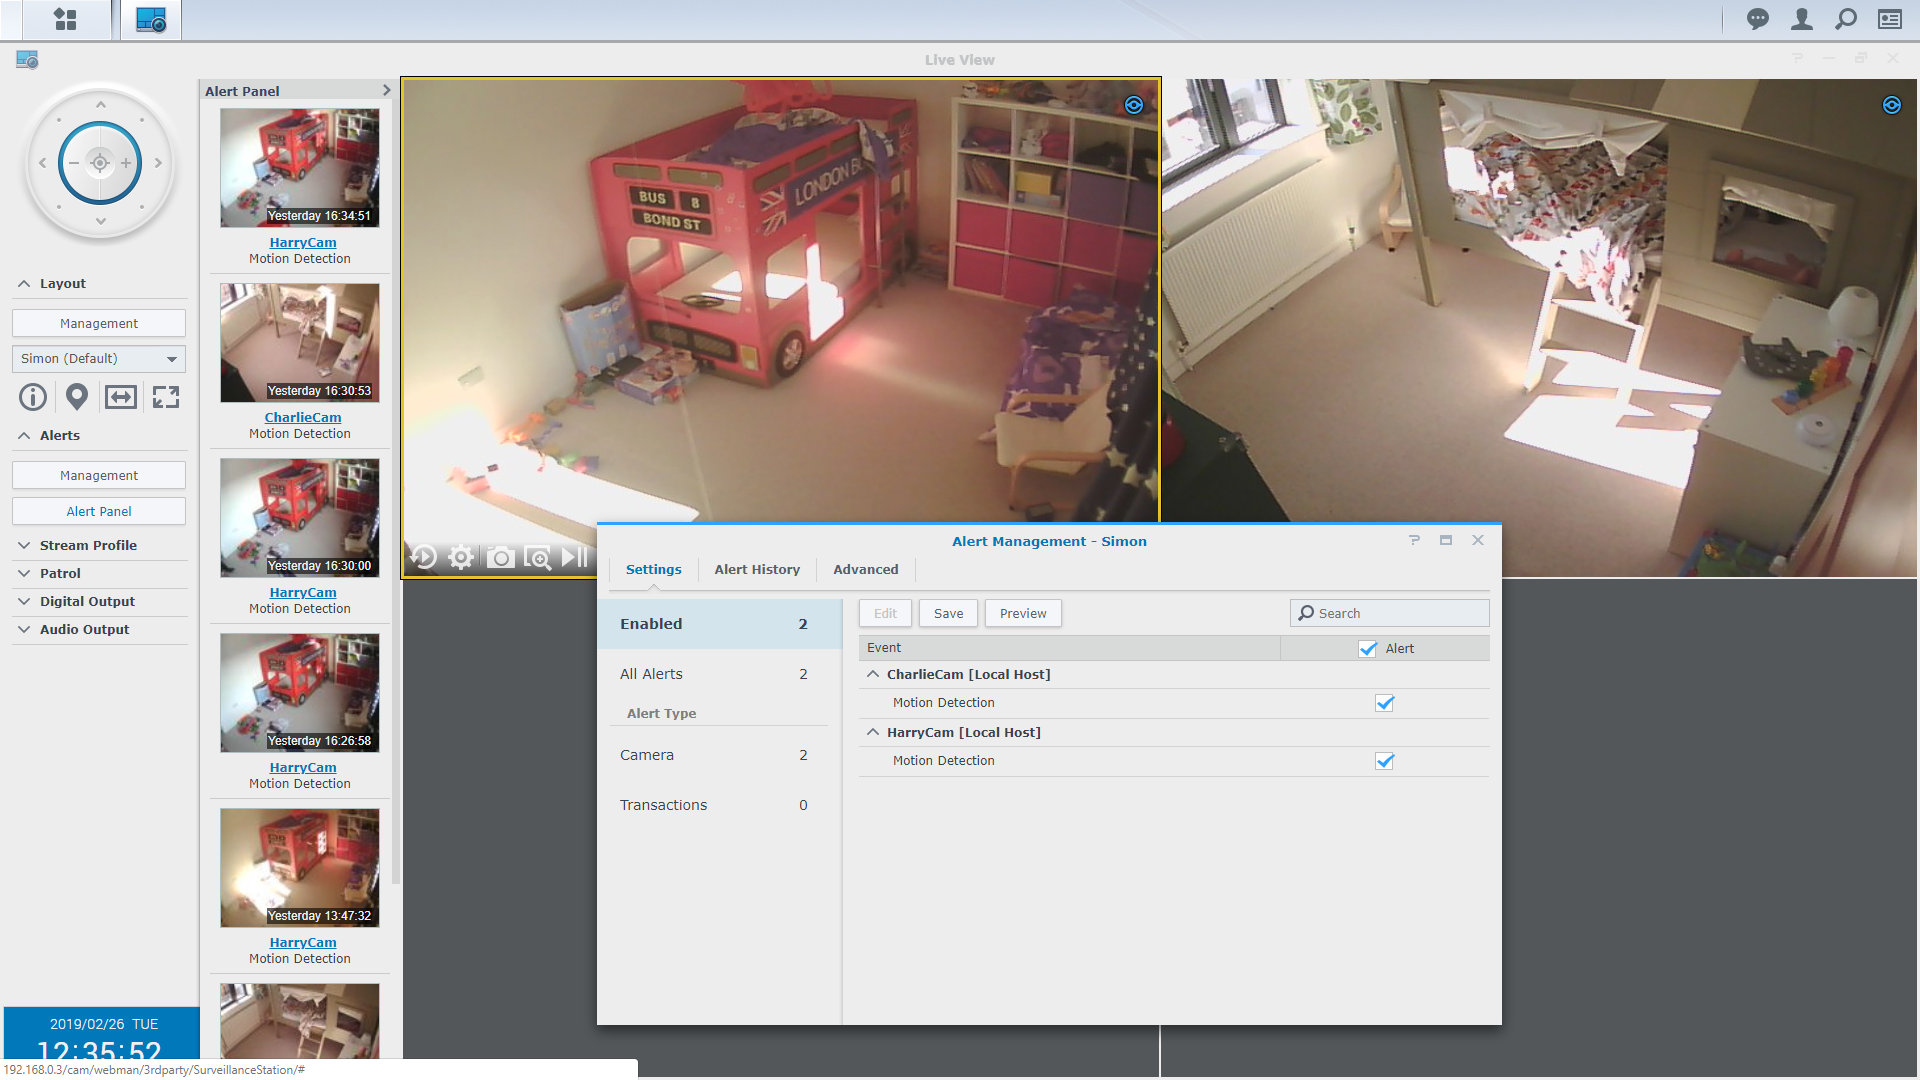
You’ve now configured the basics. Click Live View on the Surveillance Station desktop to see the live output from your cameras. Expand Alerts in the left-hand pane and click Management, then select Motion Detection under any cameras for which you set it up. Now click Alert Panel; whenever motion is detected, snapshots of the event will appear automatically. Test this at day and at night to be sure your motion detection settings work.
5. Remote control
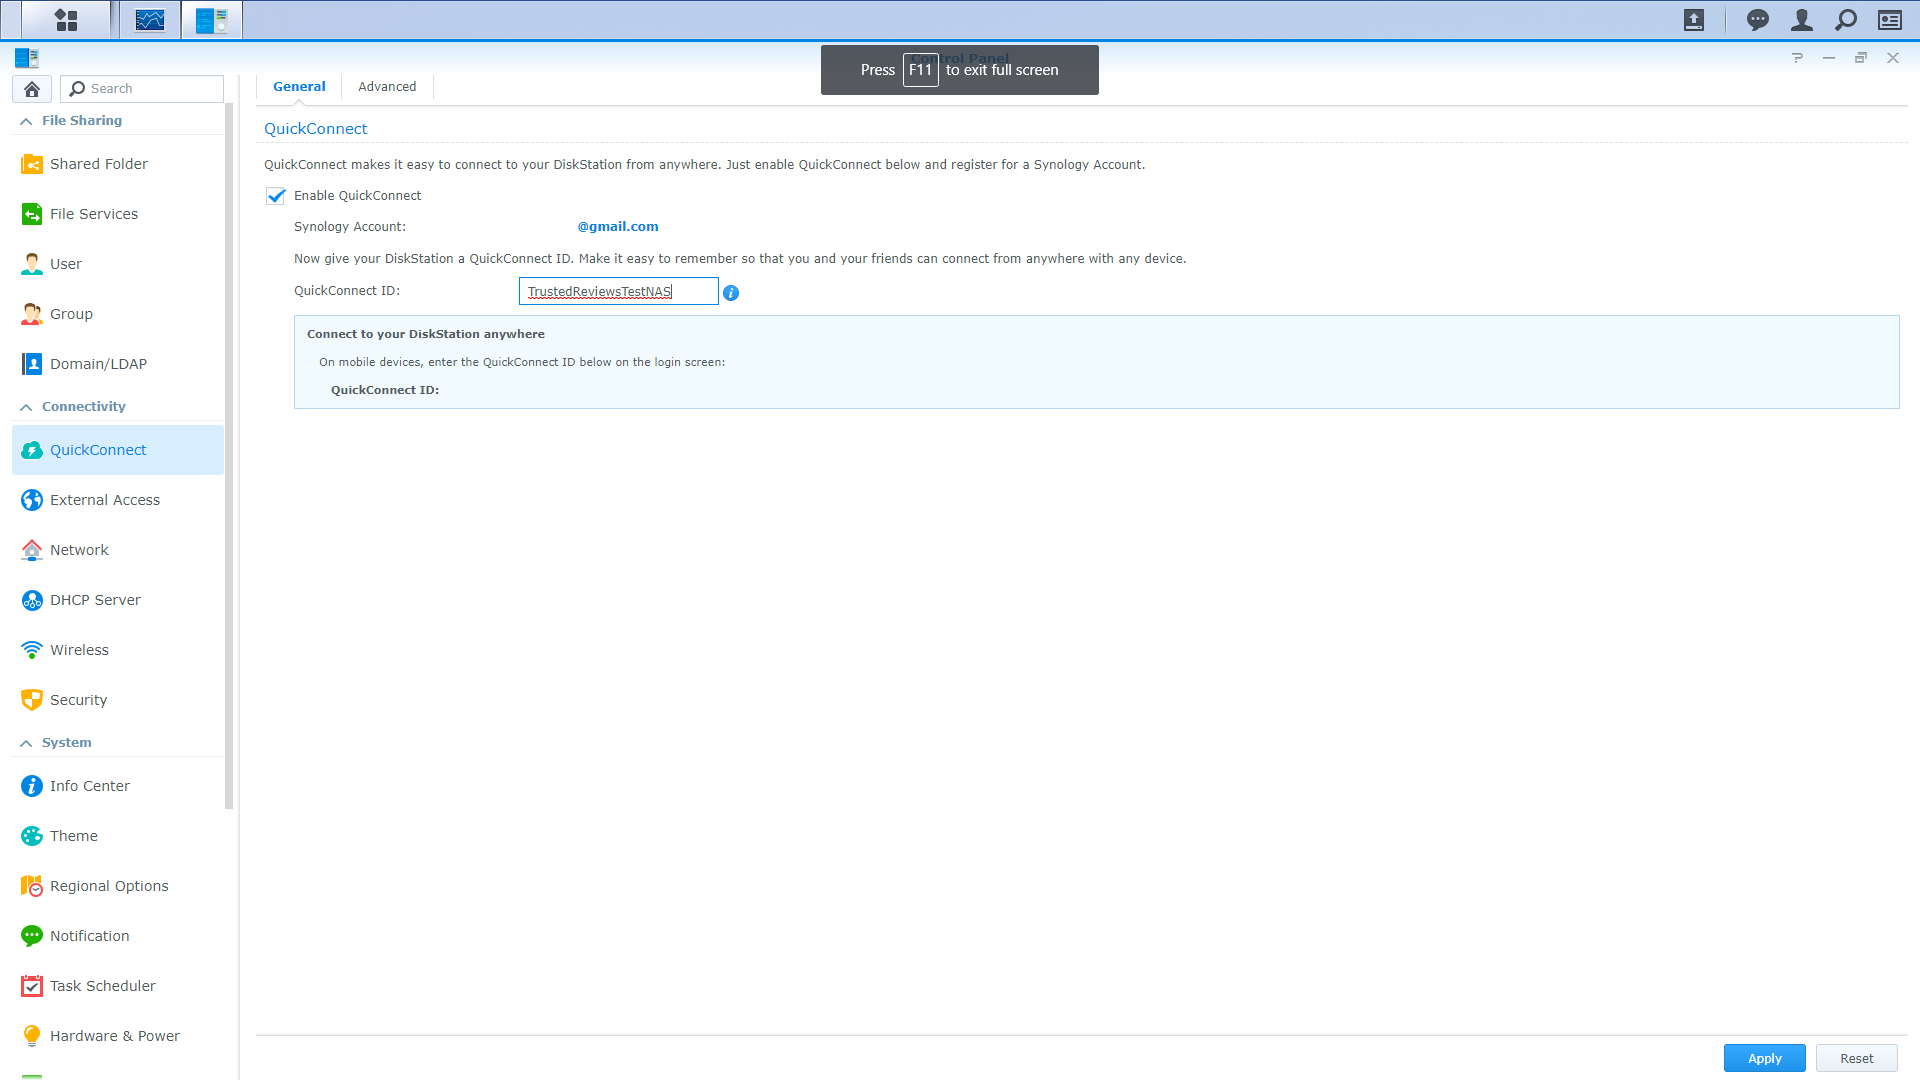
To view your cameras remotely and to receive notifications if they detect motion, you’ll need to set up Quick Connect on the NAS if you haven’t already. Log in to DiskStation Manager, open Control Panel and click Quick Connect under the Connectivity heading. If necessary, click the link to create an account, and confirm it when you receive Synology’s email. Now log in to Quick Connect and give your NAS a unique QuickConnect ID.
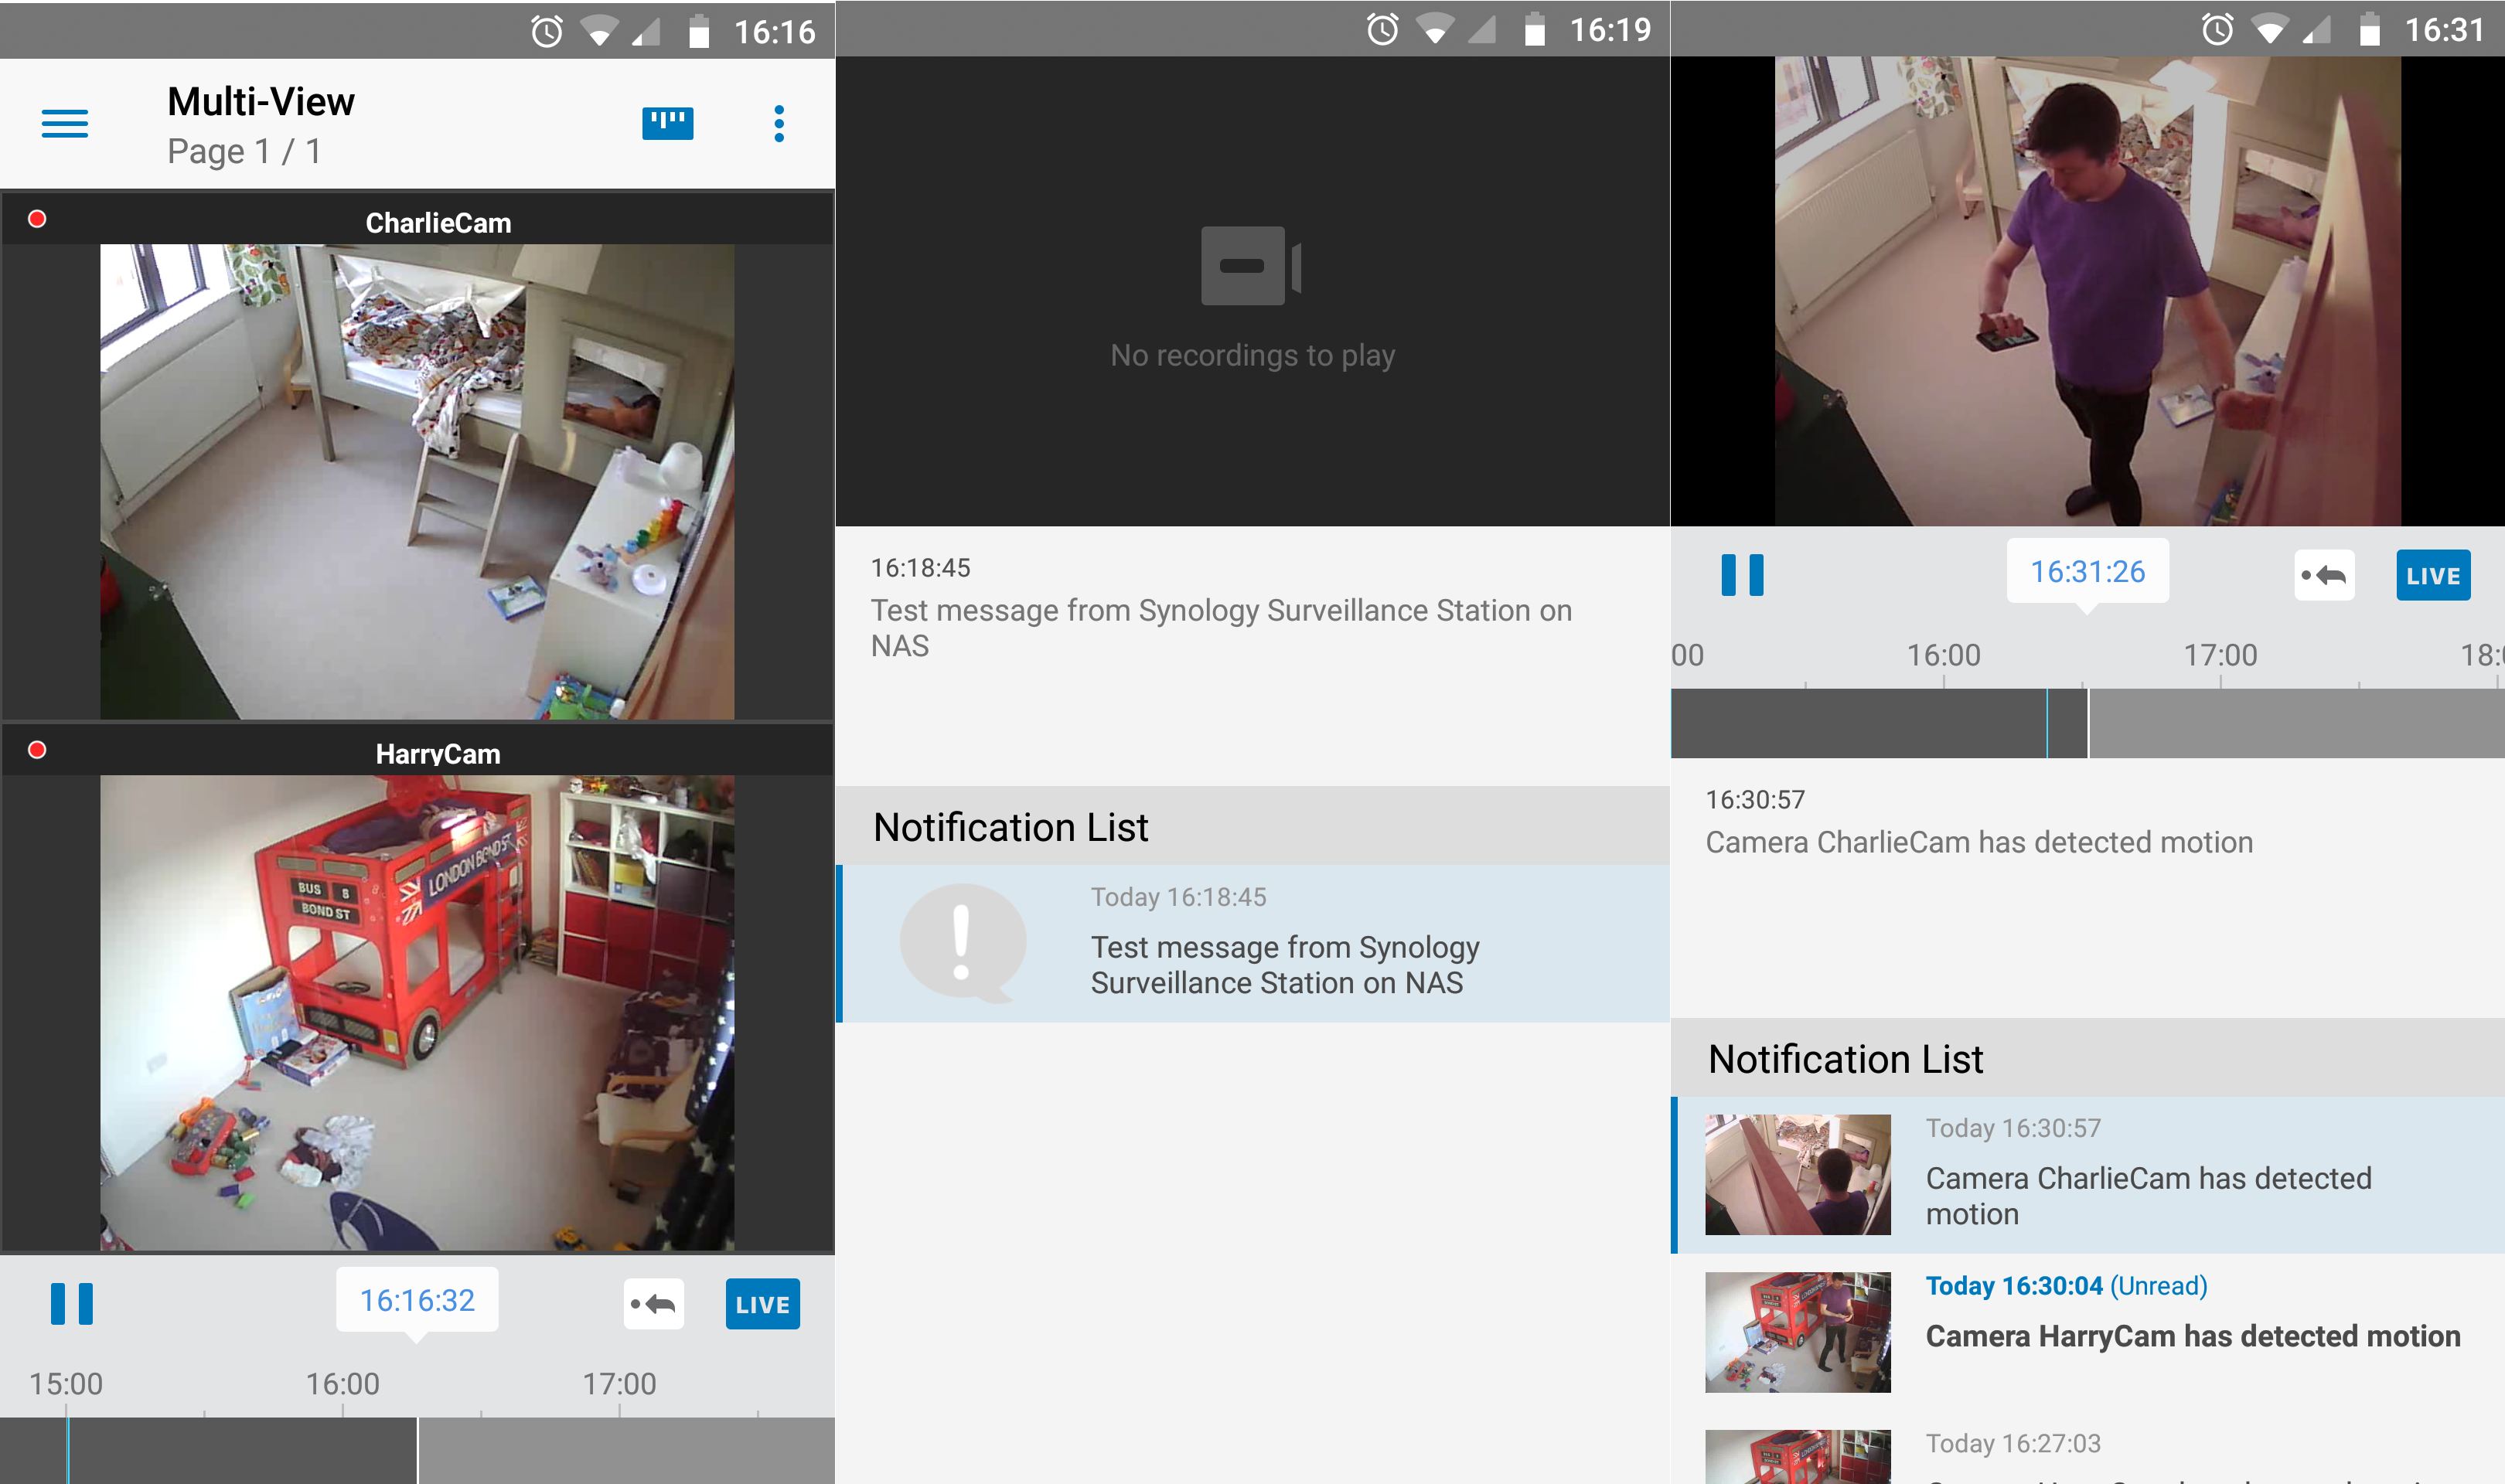
Once QuickConnect is enabled, use your phone to visit the Apple or Play store, install DS Cam, start the app and use your QuickConnect ID and your username and password for the NAS to log in. You should see a live view on your phone.
6. Set up notifications
Log back in to Surveillance Station, choose Notification from the Main Menu, then on the Push Service tab, tick Enable mobile device notifications and click Send a test message. Assuming this works, select the Settings tab, tick the box in the Mobile column for Motion detected and click Save. Your mobile will notify you with a snapshot if any of your cameras generate an alert, and tapping the notification will take you directly to that camera’s feed.
7. Check your timeline
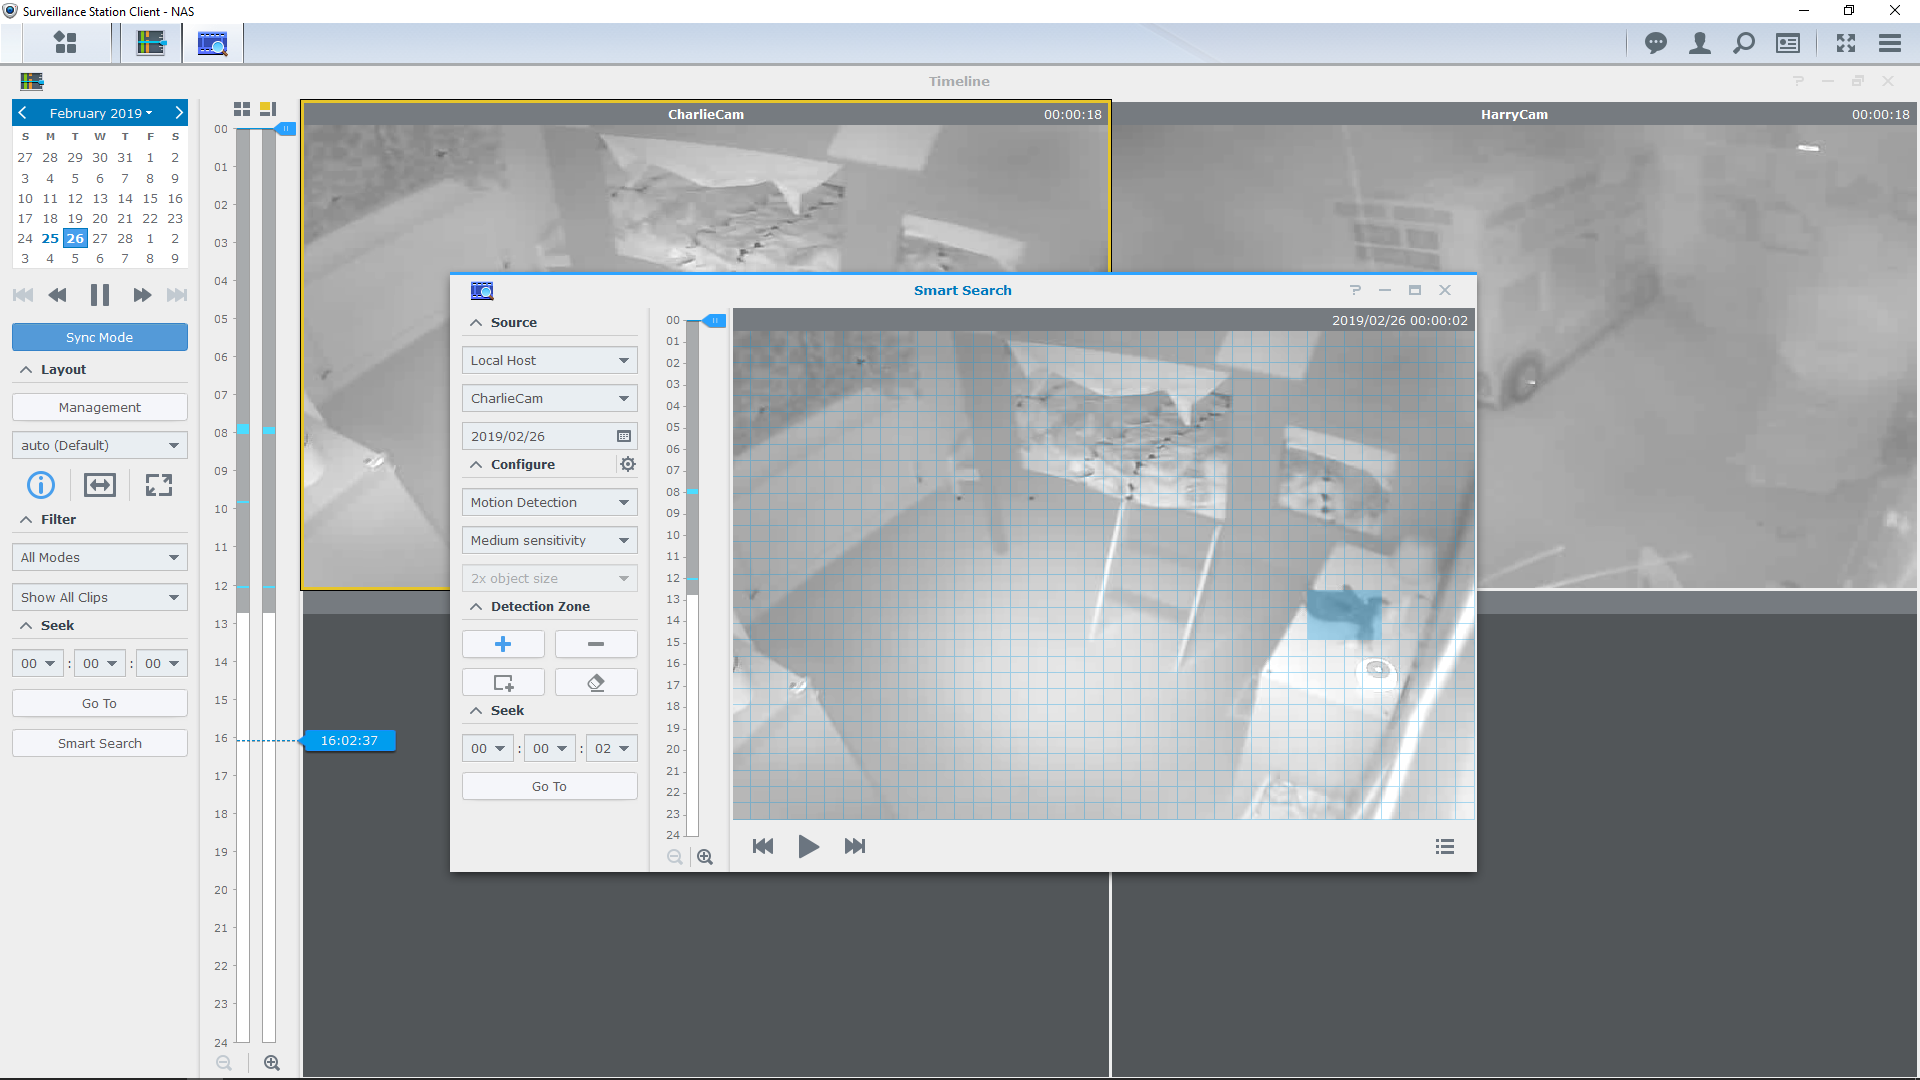
Surveillance Station will capture and store video according to the storage and schedule settings you made in step three. Start Timeline from the Surveillance Station desktop and you can browse specific days and times.
Surveillance Station Client for the PC adds a Smart Search feature, which can analyse recorded video to discover events such as motion, loitering, or when objects went missing or appeared in the frame. Download it by visiting Synology’s download page, choosing your NAS model and looking under Desktop Utilities.
Apart from its extra features, the PC client looks identical to the browser interface you’ve been using so far.

Editorial independence
Editorial independence means being able to give an unbiased verdict about a product or company, with the avoidance of conflicts of interest. To ensure this is possible, every member of the editorial staff follows a clear code of conduct.
Professional conduct
We also expect our journalists to follow clear ethical standards in their work. Our staff members must strive for honesty and accuracy in everything they do. We follow the IPSO Editors’ code of practice to underpin these standards.