
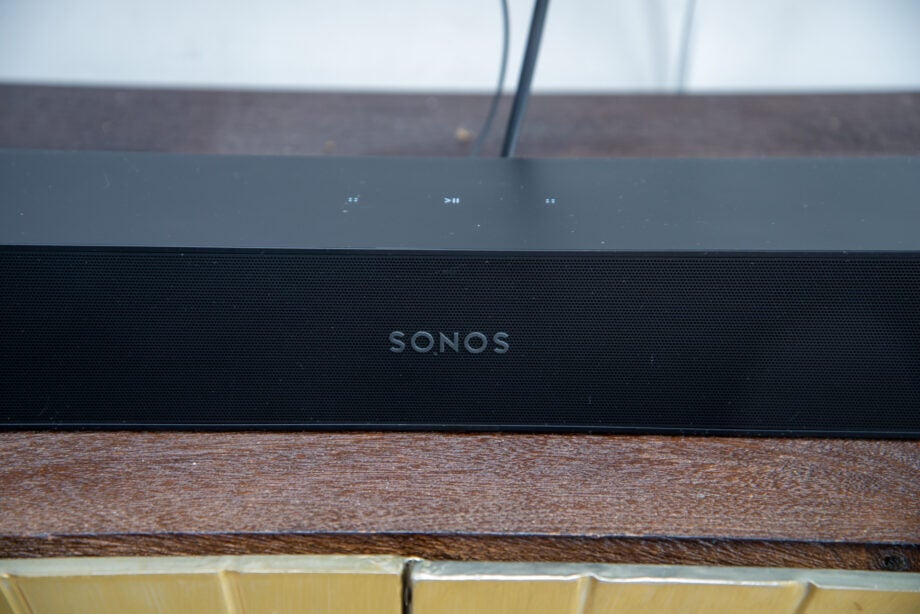
The Sonos Ray is a great little soundbar for improving the sound quality of practically any TV.
While the basic connection to the Sonos S2 app, and plugging in your optical cable are easy, the soundbar and your TV both need a bit of configuring to get them to work properly. Here, we’ll show you how to do that.
What we used
We used a Sonos Ray, connected to a JVC TV. Some of the options will be slightly different depending on your TV.
The short version
- Turn off your TV’s speakers
- Set the correct sound output
- Configure a remote control
- Set Sonos Ray to play automatically
- Fix lip sync issues
Step
1Turn off your TV’s speakers
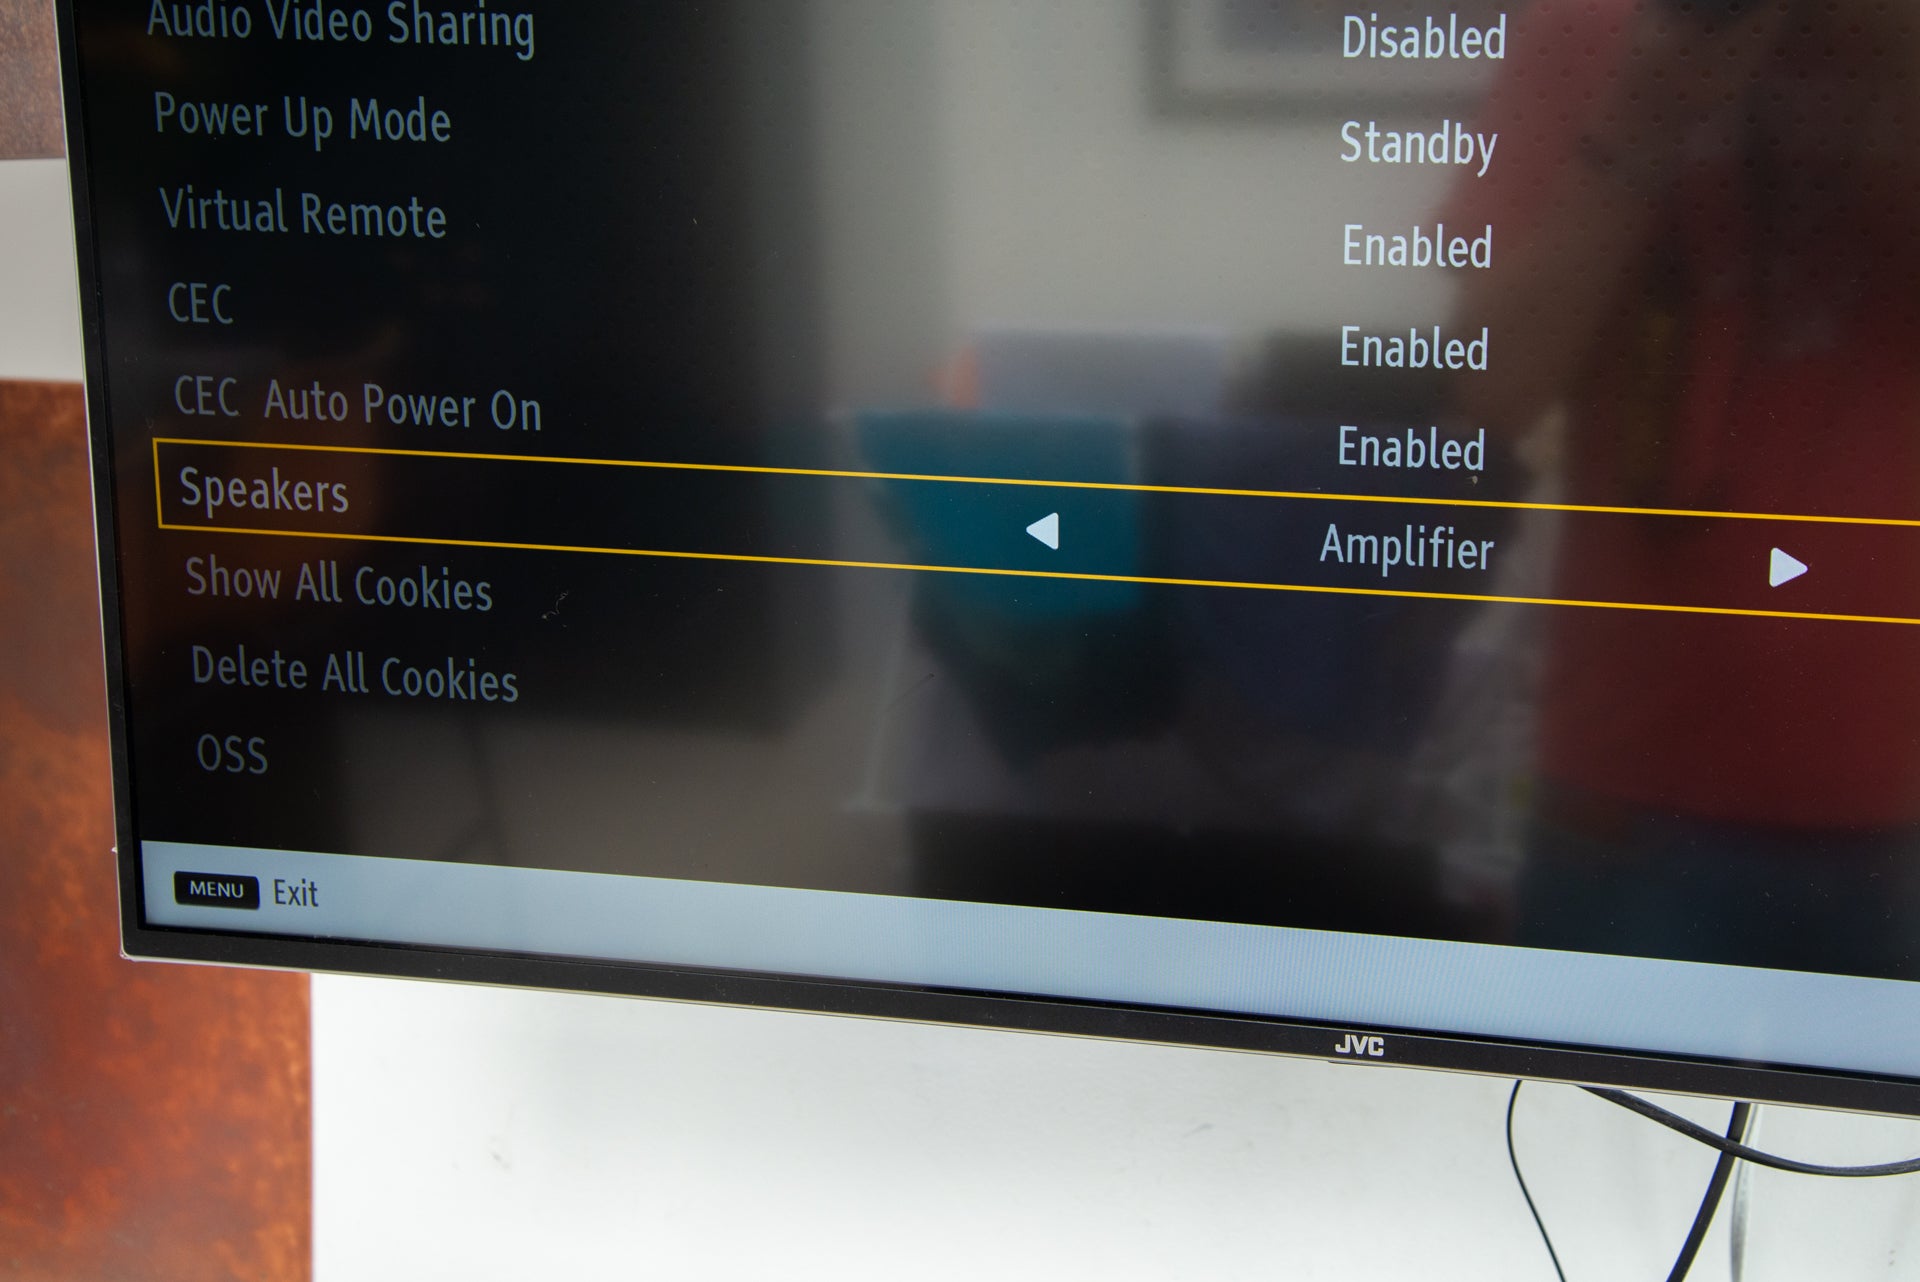
Depending on your make of TV, it’s possible that it will send sound to both its internal speakers and the Sonos Ray. That’s something we don’t want to happen, so you need to find the setting to turn this off. You may find this in your TV’s audio settings, although the setting can be in the advanced menu.
The exact wording differs from TV to TV. Some let you select a single destination, such as an amplifier (external) or TV (the regular speakers); some TVs let you choose to have sound come out of your TV, external speakers or both.
Just a word of warning: my budget JVC TV was set to Amplifier, but the internal speakers continued working and there was nothing we could do to override it. In the end, we just turned the volume down on my TV all of the way.Step
2Set the correct sound output
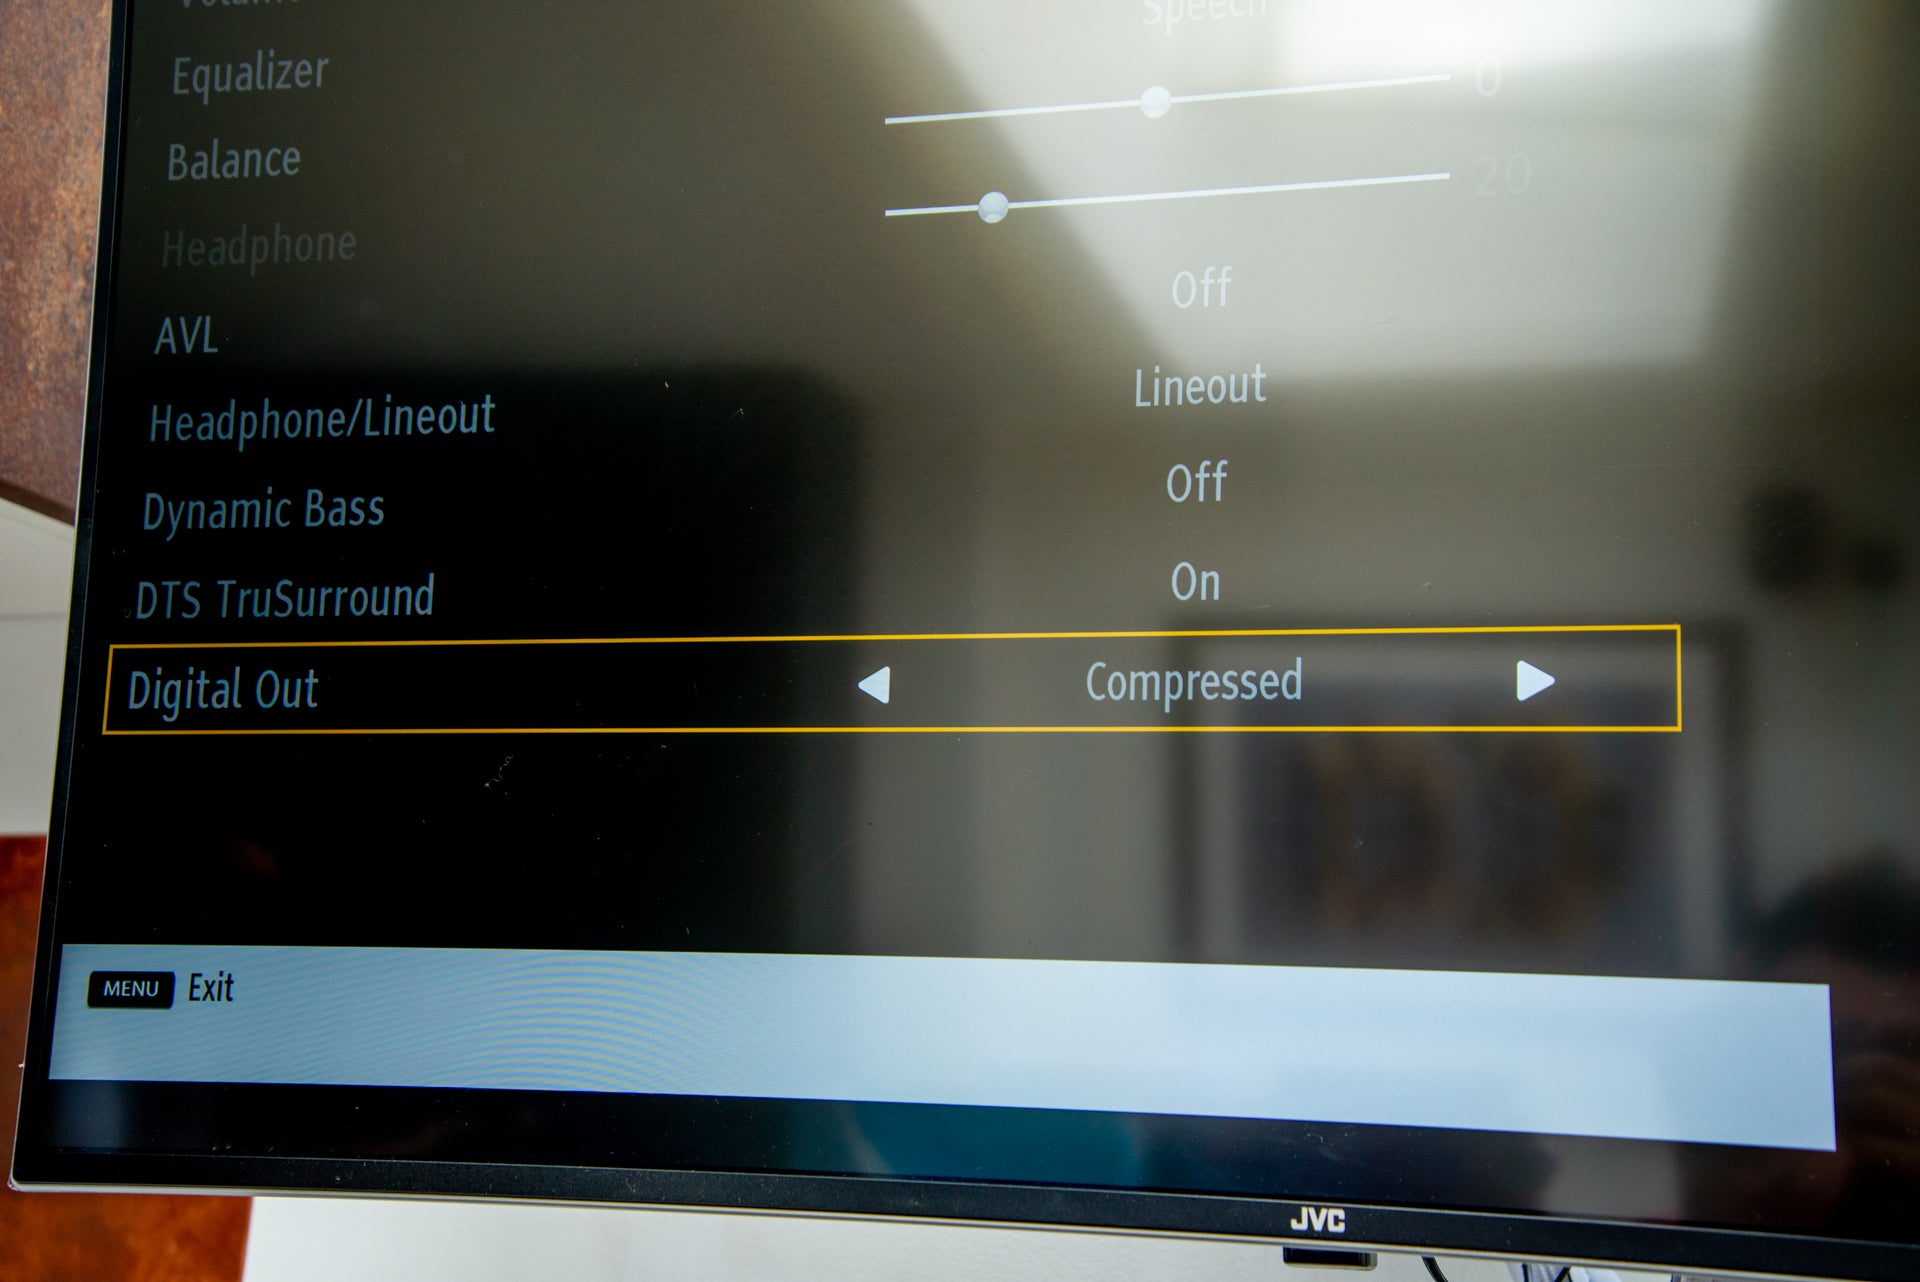
If you want to have Dolby Digital or DTS sound for the full high-quality experience, you need to make sure that every device is set to output Dolby Digital. Check the audio output settings for each device you’re using and look for either a Dolby Digital option. Note that some devices, such as my JVC TV, have an option for ‘compressed’ audio. That’s the right choice; the wrong options is PCM, which will limit the Sonos Ray to receiving stereo audio only.
You can check the sound that’s coming through to your Sonos Ray by opening up the Sonos app. If it says PCM, then there’s an incorrectly set device somewhere in the chain.Step
3Configure a remote control

Rather than reaching for the app or the touch controls on top of the Ray, it’s easiest to set up a remote control so that it can adjust volume via IR. To add a new remote control, you need to open the app, select Settings, System and then select your Sonos Ray. Tap Use IR and then tap the Remote Control Setup option.
Follow the wizard through and tap the buttons on your remote control while it’s pointing at the Ray. This should work, although we had the problem that our TV uses Bit Toggling: each button alternates between two IR codes.
If your Sonos Ray’s status light flashes when you hit a button but the app says the remote control is not recognised, you may have the same issue. To get around this, press the button that the app requests, then cover the remote’s IR transmitter and press the same button again. Continue to follow the instructions, alternating a proper button press with one where the remote is covered. This should work, although be aware that you may have to hit a button twice for the Ray to recognise it in future.
If you have Sky Q, the workaround is to use the remote setup in the Sky menus, which tells you how to re-programme your remote to work with Sonos.Step
4Set Sonos Ray to play automatically
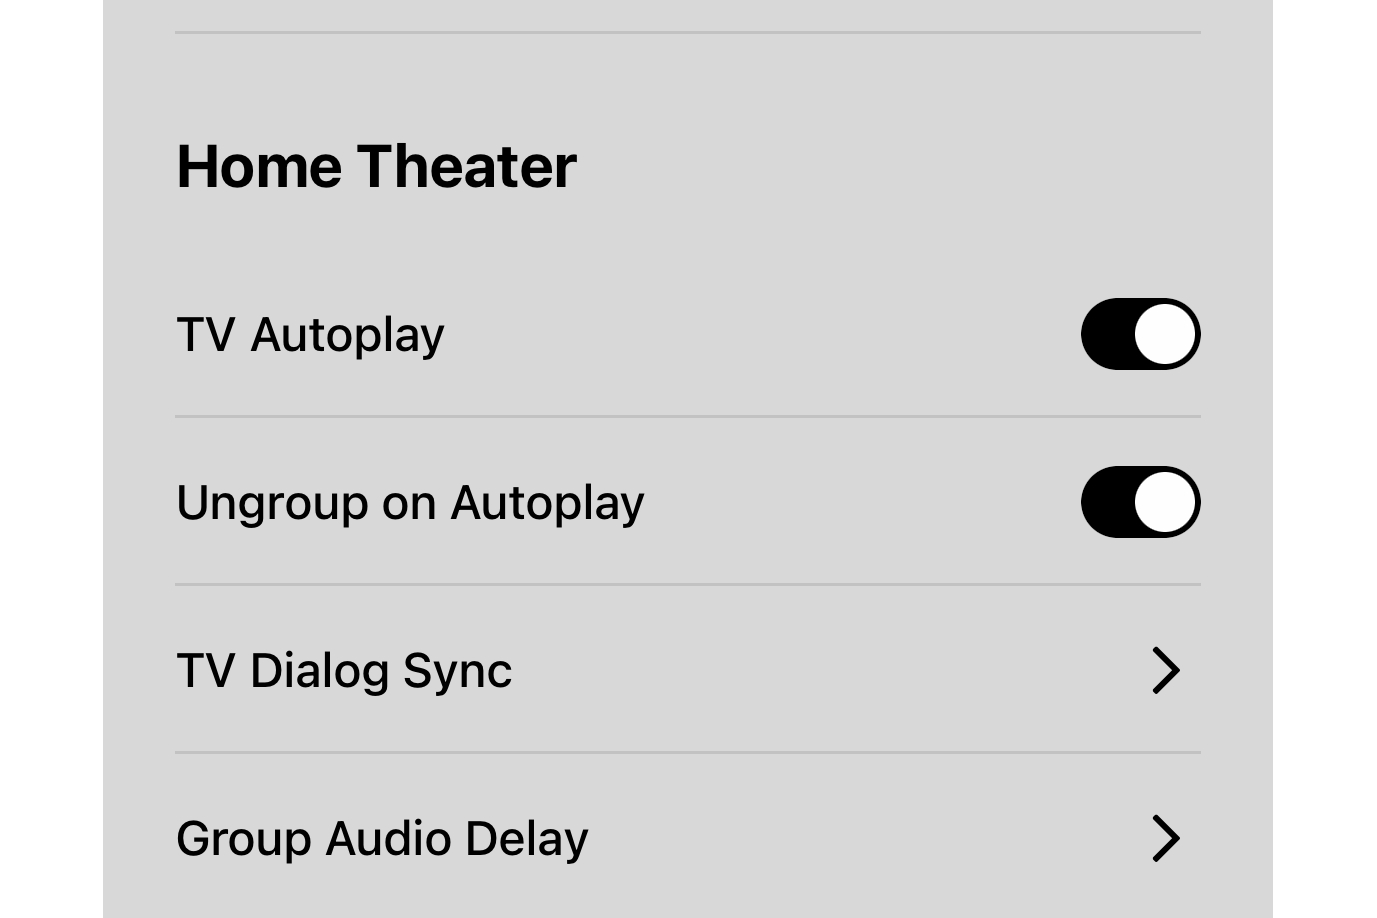
It’s worth checking that the Sonos Ray is set up to play sound from your TV when it turns on automatically. Open the Sonos app, go to Settings, System, and select your Ray. Turn on the TV Autoplay and turn on Ungroup on Autoplay. With these options, the Ray will drop out of a music group and automatically switch to the TV input when you turn your television on.
Step
5Fix lip sync issues
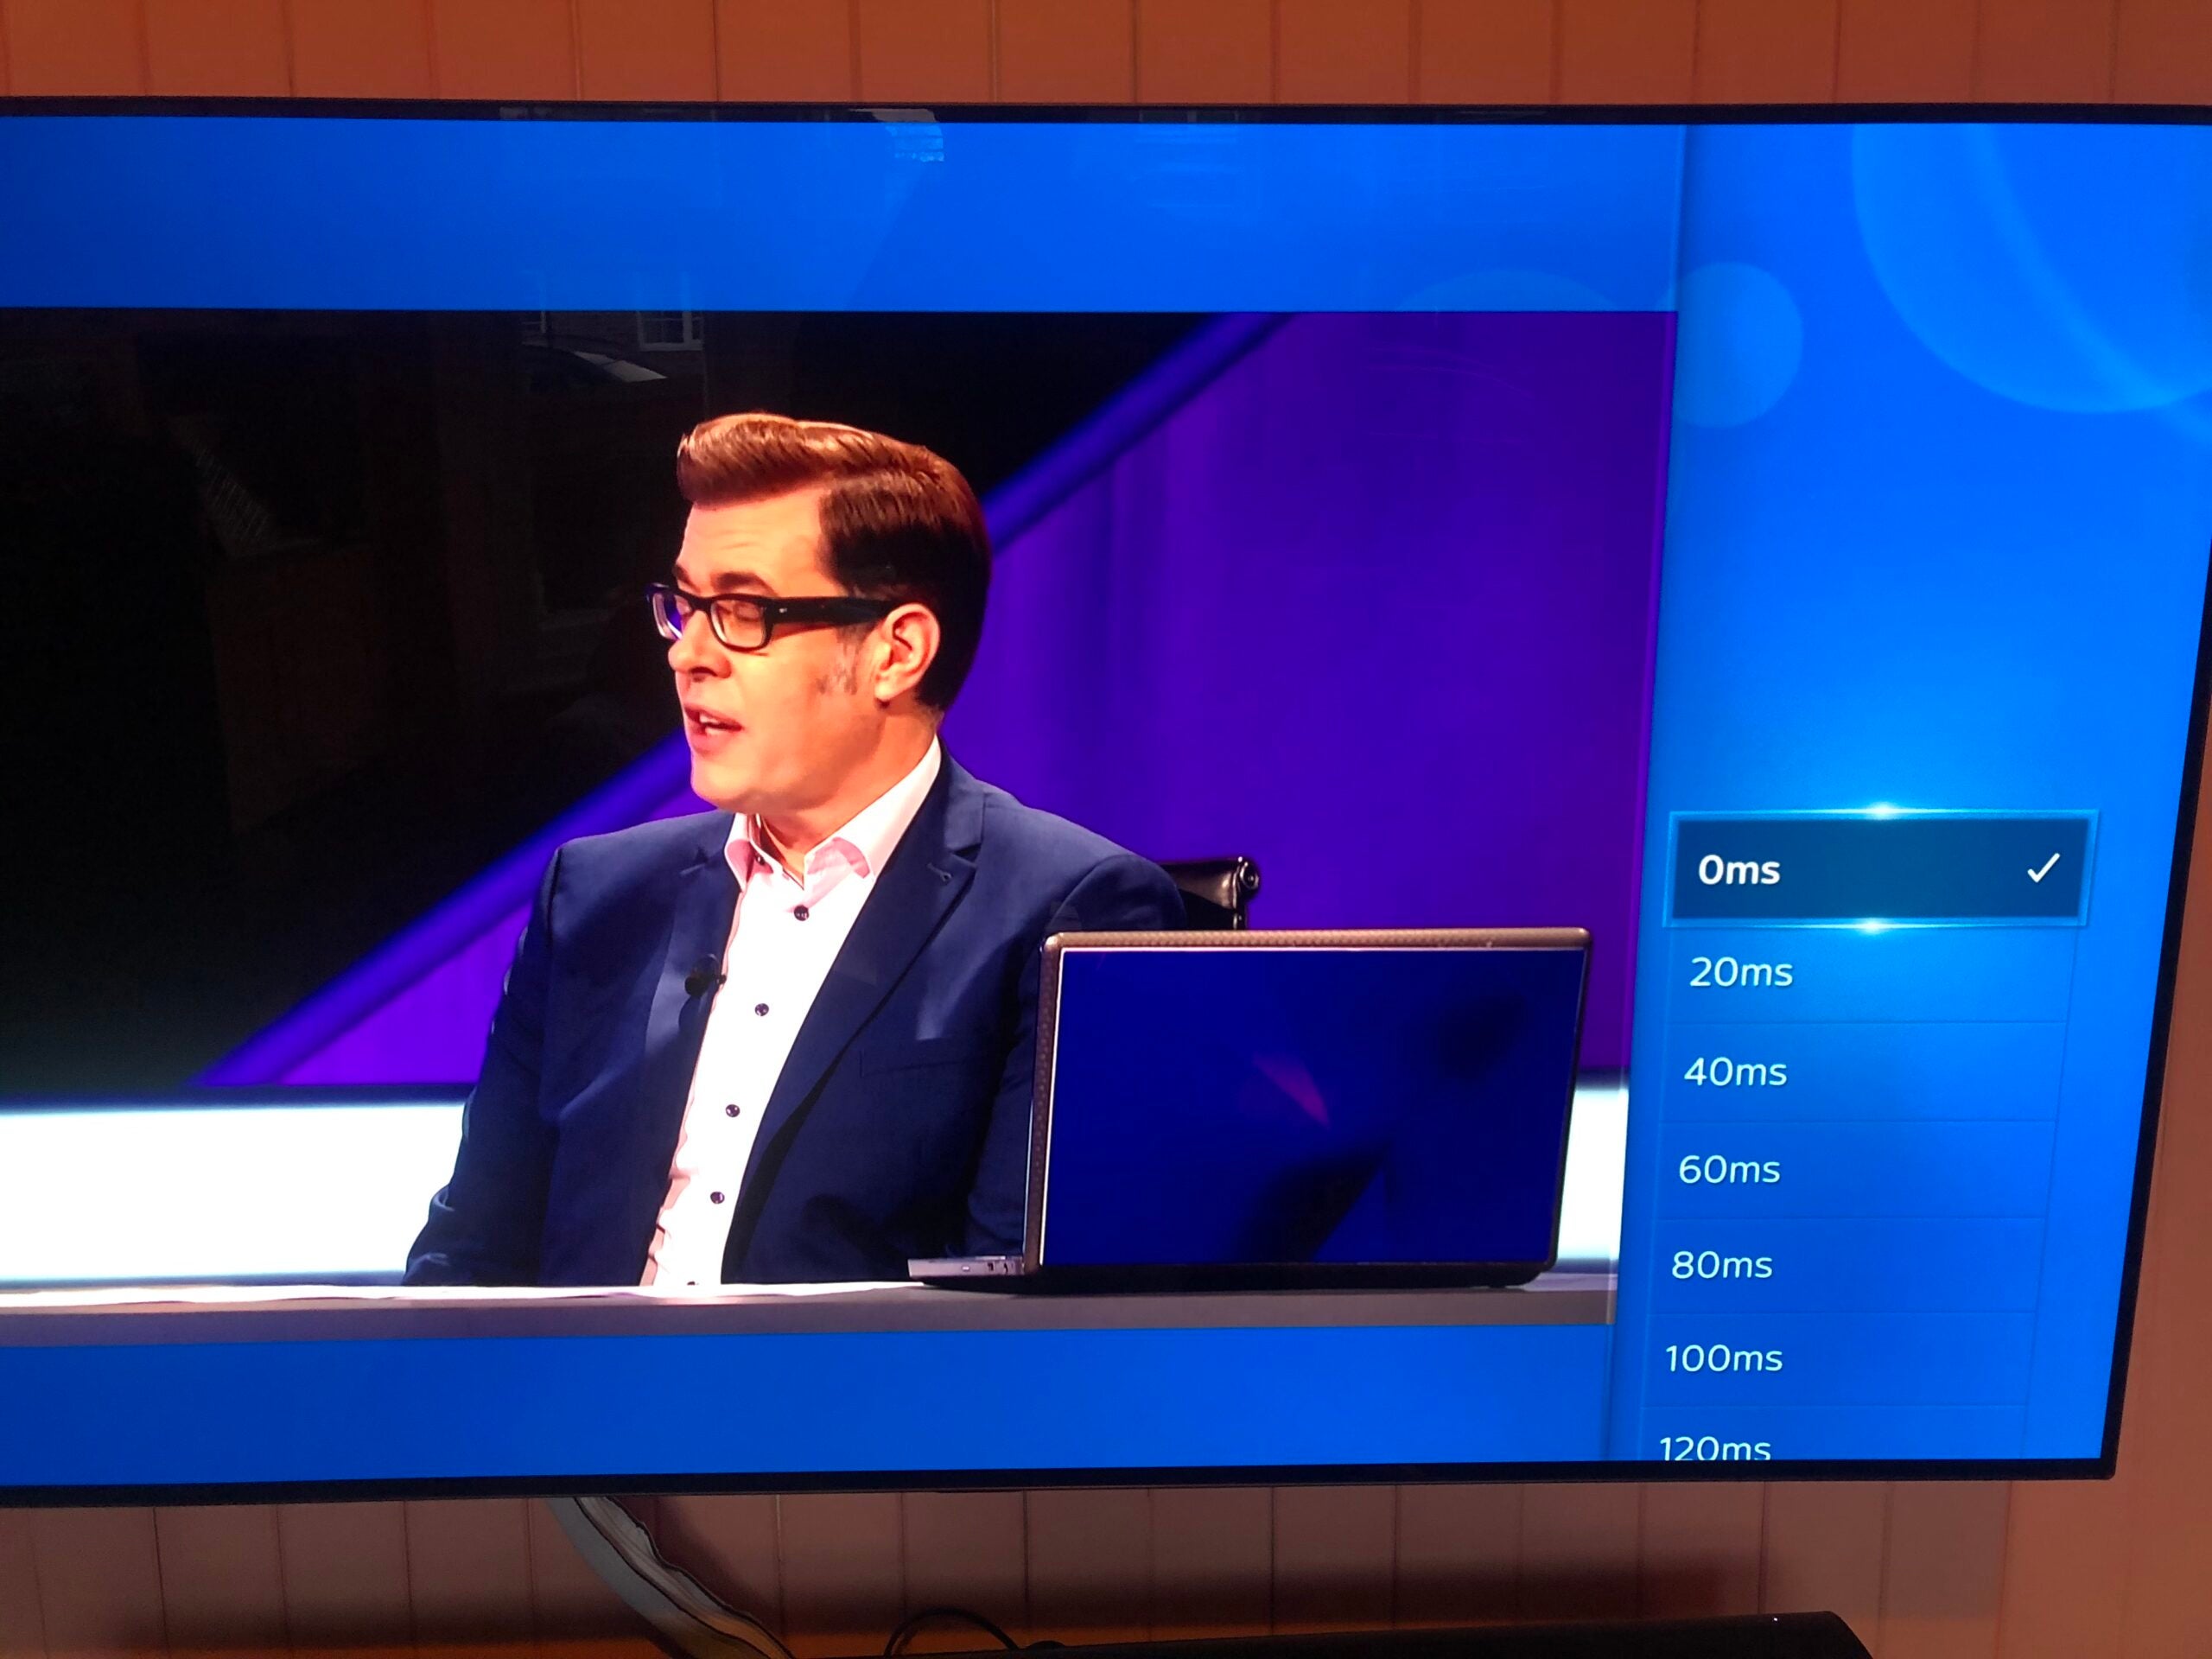
Optical inputs are usually better than HDMI and we’ve not had problems with lip sync issues. If you do, then you need to introduce a delay into the system so that the audio lines up with the video. The Sonos Ray has an option to do this in the app, but it’s often better to change the setting on the originating device, such as a Sky box. That way, you can adjust the setting per source, rather than having a blanket delay that might work with one device, such as a Sky box, but not another, such as a Blu-ray player.
Look in your device’s menu for the audio settings and find the delay option. Adjust this until the sound is in sync.
FAQs
You can connect the Sonos Ray to an optical output on another device, such as set-top box or Blu-ray player. Just be aware that the Ray will only play audio from that device.
You can buy a universal remote control or use one from an any older device, such as a Hi-Fi. You only need a basic model with volume and mute buttons
You might like…
Editorial independence
Editorial independence means being able to give an unbiased verdict about a product or company, with the avoidance of conflicts of interest. To ensure this is possible, every member of the editorial staff follows a clear code of conduct.
Professional conduct
We also expect our journalists to follow clear ethical standards in their work. Our staff members must strive for honesty and accuracy in everything they do. We follow the IPSO Editors’ code of practice to underpin these standards.