
Here is the easiest way to set up an eSIM on an iPhone.
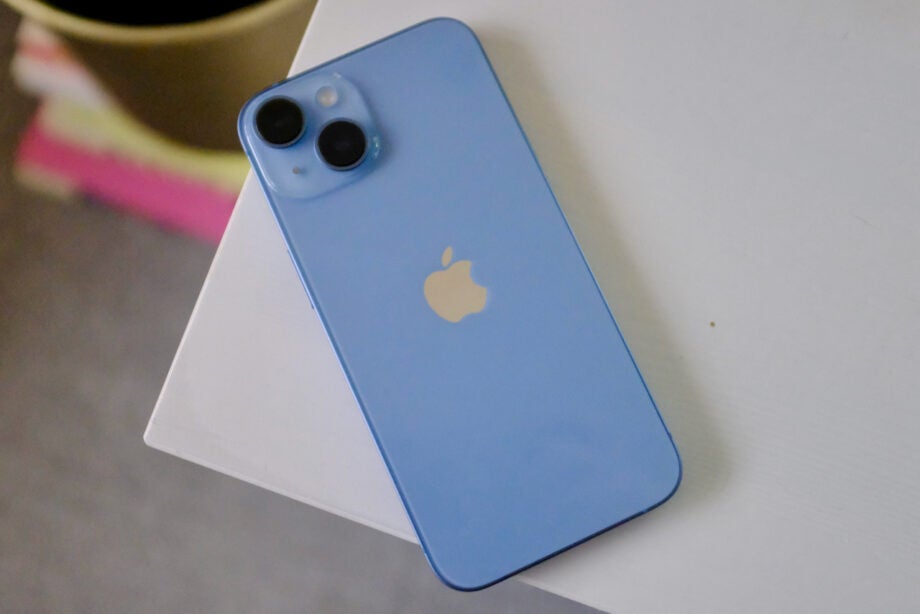
Apple has supported the use of eSIMs on its devices for a number of years now, and here’s how to set it up all from your iPhone. An eSIM works in the same way as a physical SIM, it is just done digitally via the iPhone.
Apple has even removed the physical SIM trays from the iPhone 14 Series of handsets that are sold in America as a bigger push for users to engage with the new feature.
If you’re interested in learning how you can use an eSIM with your iPhone, then make sure you keep reading, as we will be breaking it down in just a few simple steps.
What you’ll need:
- An iPhone XS, XS Max or XR or newer
The Short Version
- Go to Settings
- Click on Mobile Data
- Click Add eSIM
- Choose how you want to transfer
- Follow the instructions on the screen
Step
1Go to Settings
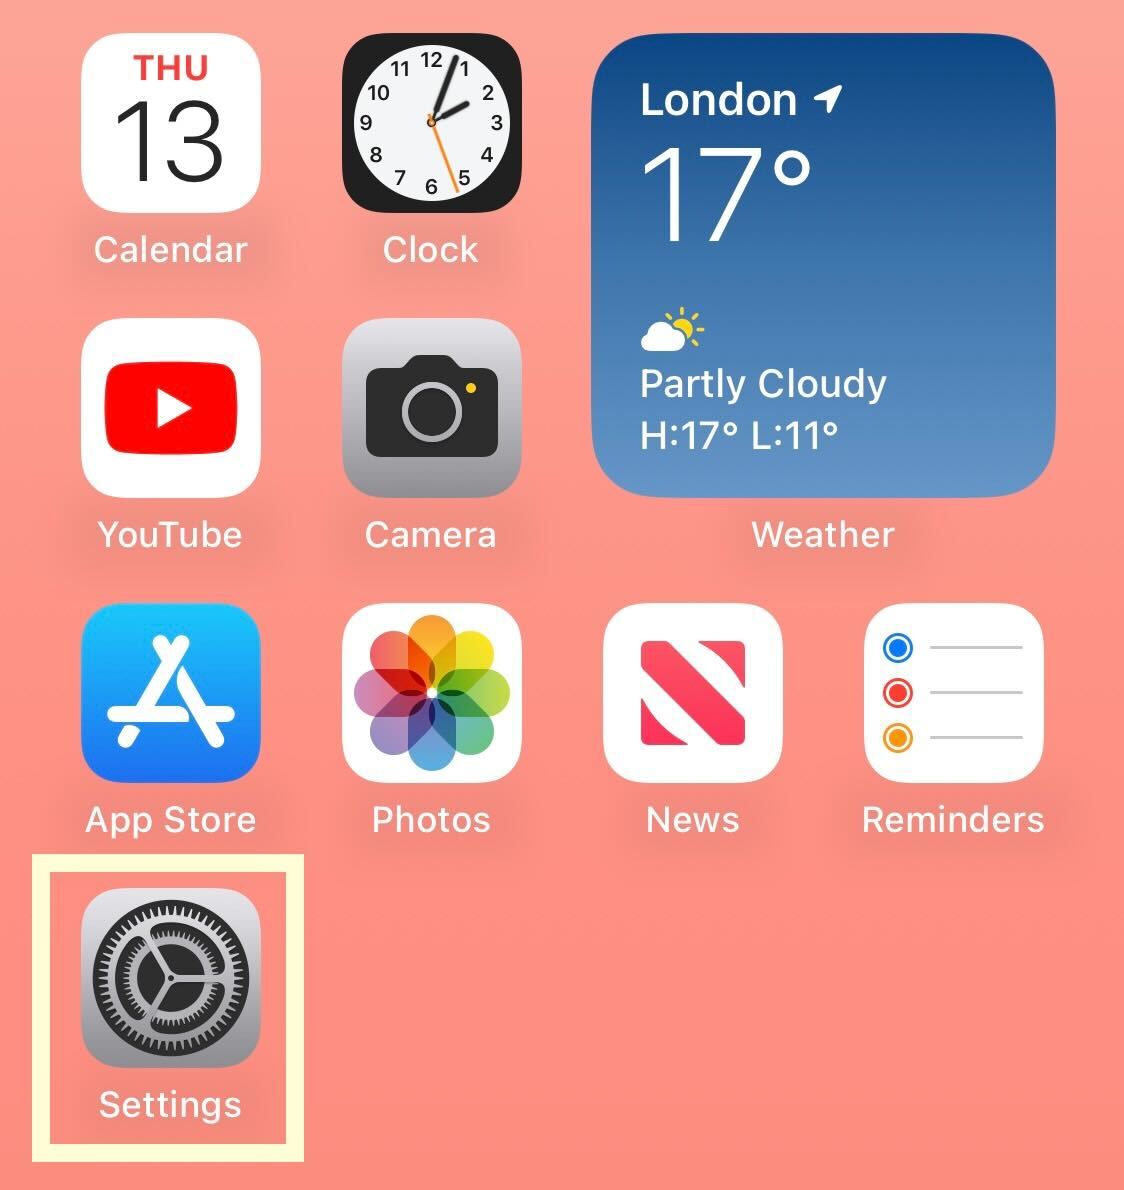
Unlock your device and click on Settings.
Step
2Click on Mobile Data
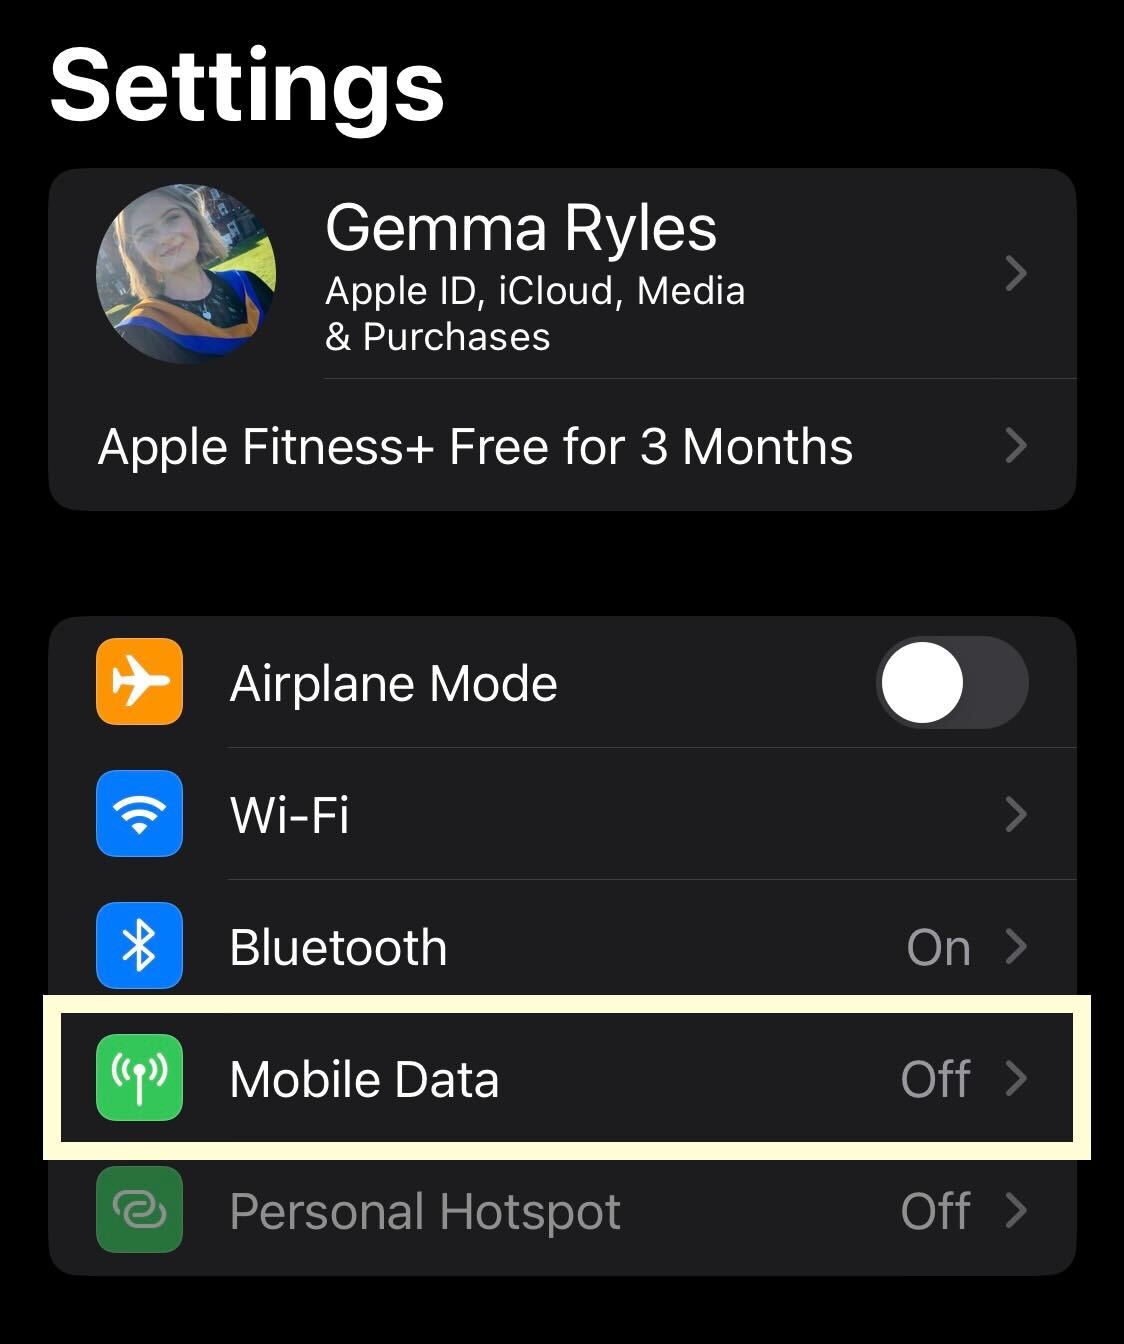
From Settings, click on Mobile Data.
Step
3Click Add eSIM
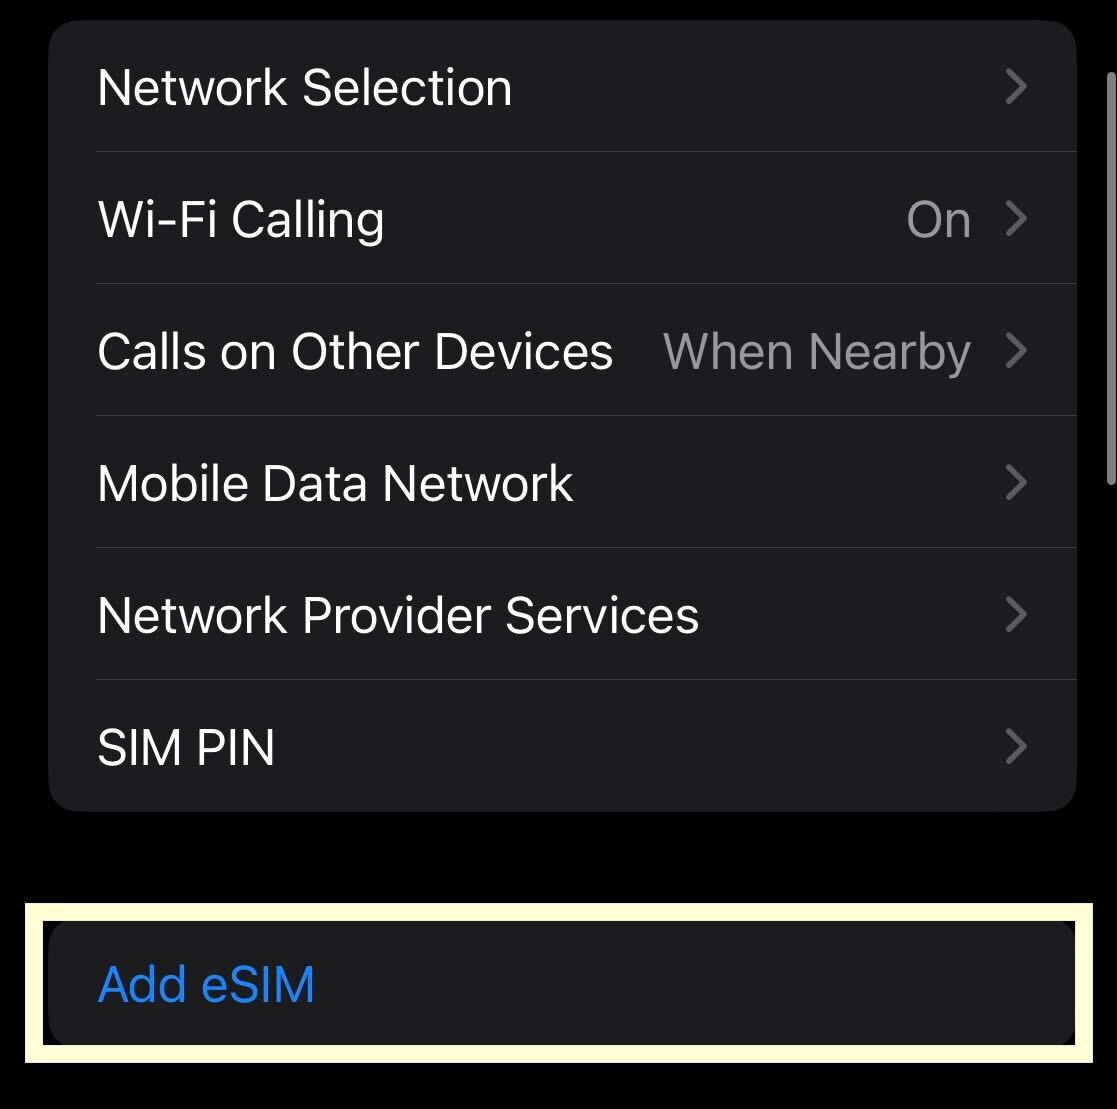
Scroll down and click on the button called add eSIM.
Step
4Choose how you want to transfer
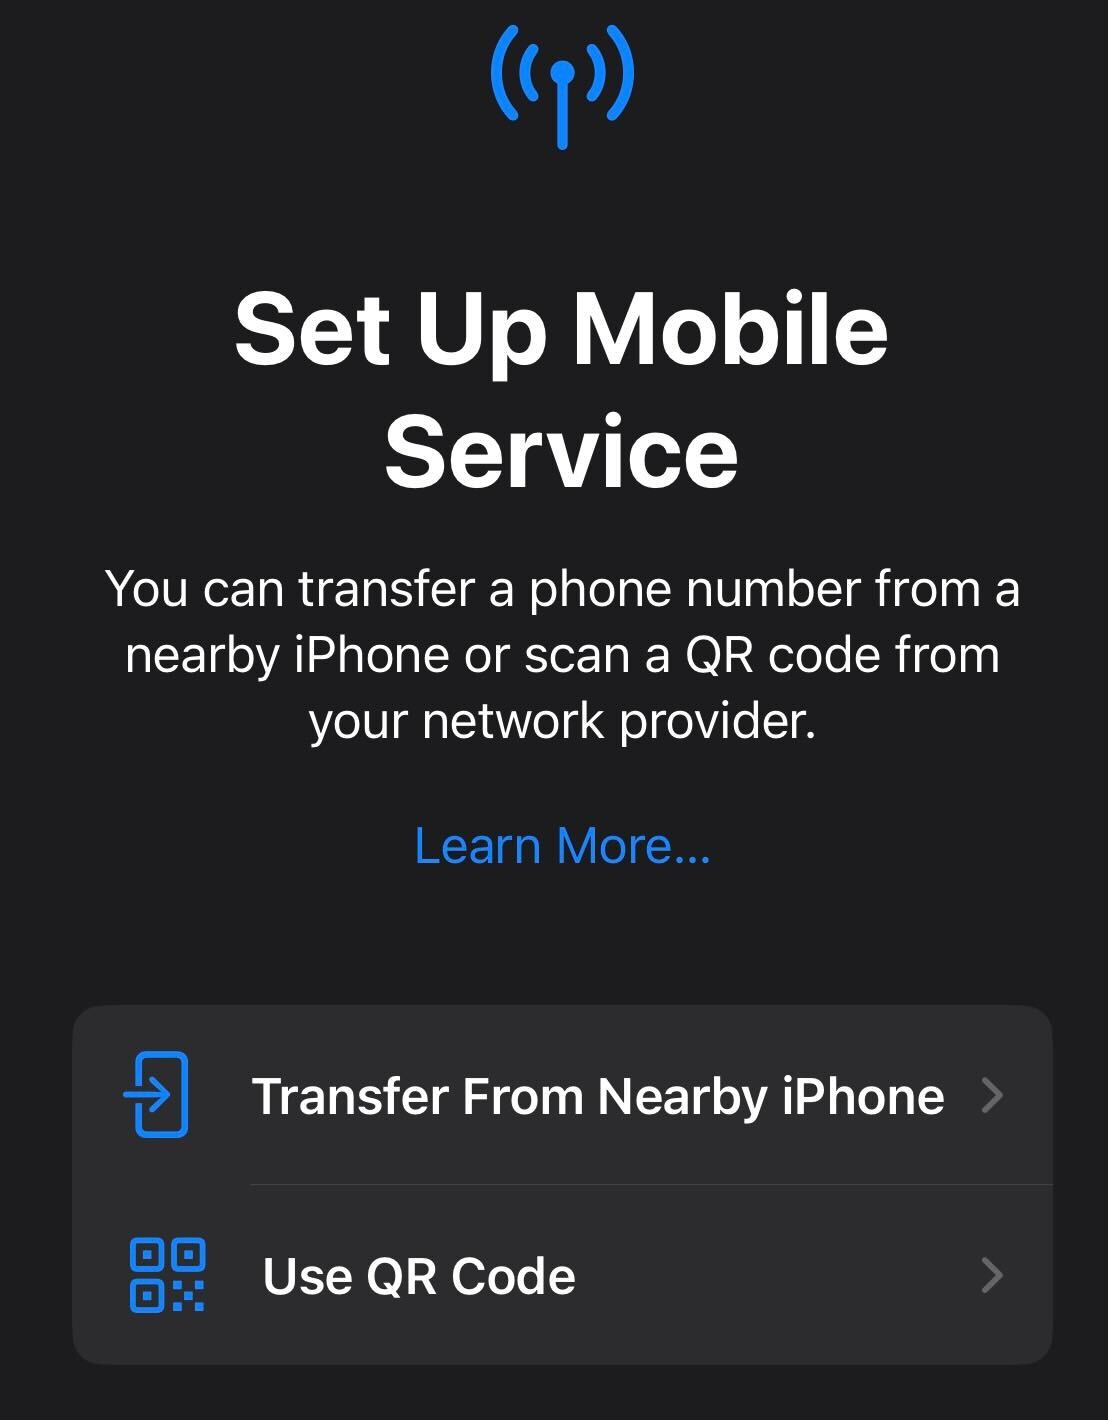
There will be two options presented, use a QR code or transfer from an old device. Pick whichever works best for you.
Step
5Follow the instructions on the screen
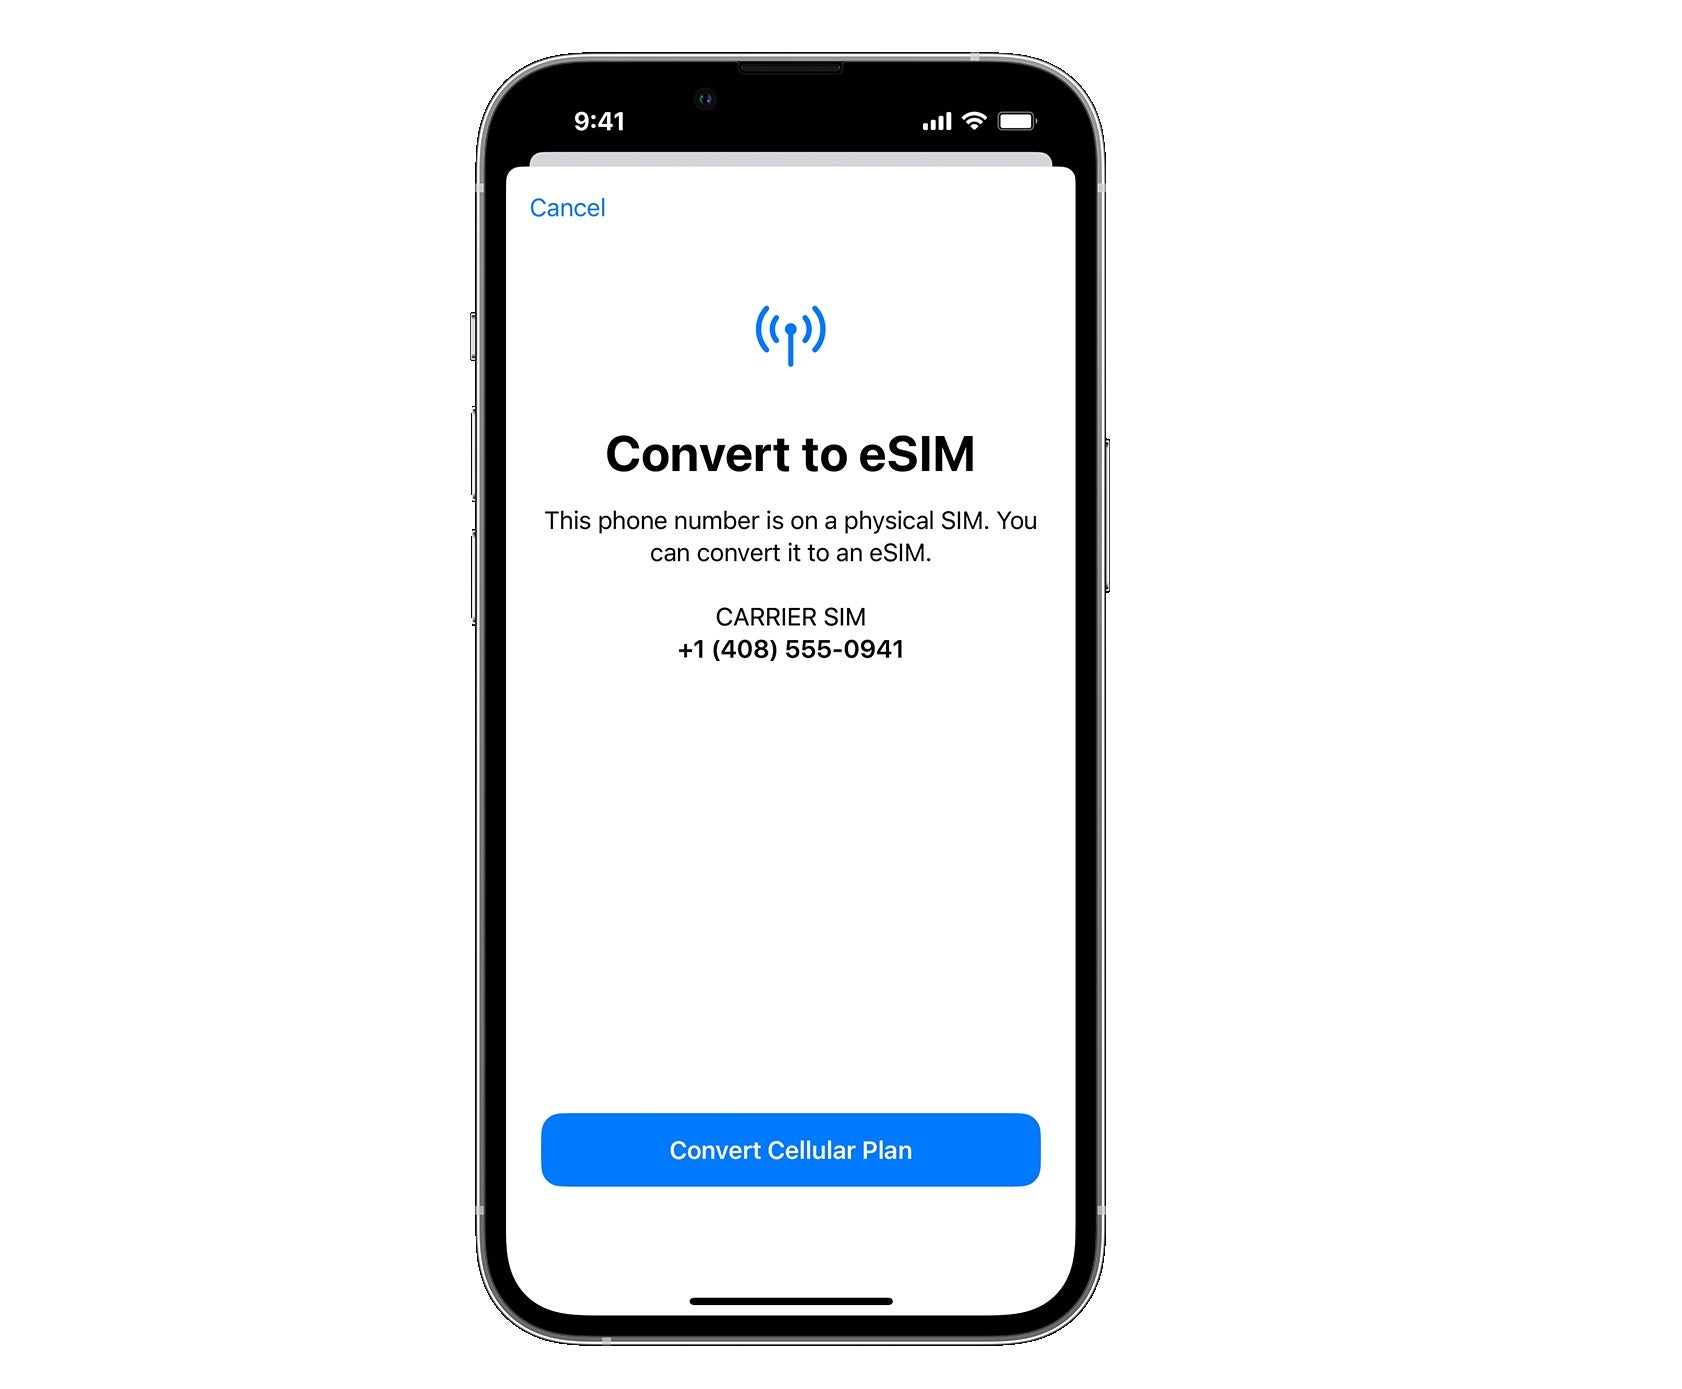
Follow the instructions listed on-screen to finish the process. It will look different depending on which option you choose and you may need to enter your details manually if the process stalls.
Troubleshooting
Not all mobile carriers will support eSIM technology. If you’re interested in changing over to an eSIM, you may want to research your own service, and you can always switch over to a service that does.
You might like…


Editorial independence
Editorial independence means being able to give an unbiased verdict about a product or company, with the avoidance of conflicts of interest. To ensure this is possible, every member of the editorial staff follows a clear code of conduct.
Professional conduct
We also expect our journalists to follow clear ethical standards in their work. Our staff members must strive for honesty and accuracy in everything they do. We follow the IPSO Editors’ code of practice to underpin these standards.