How to Screen Record on an iPhone
Did you know that it’s possible to record whatever’s happening on your iPhone screen? Here’s how to do it.
Whether you’re capturing a piece of red hot gameplay or demonstrating how to do something on your phone to your parents, recording your screen can be a powerful tool. Especially if you can also narrate that footage.
Apple first made this iPhone screen record process possible in iOS 11 back in 2017, and it’s refined the process since. Here’s how to get iPhone screen recording done in iOS 14.
What we used
- We used the iPhone 13 Pro, but these methods will work on any iPhone running iOS 14 or later
The Short Version
- Add the record button to Control Centre
- Start recording
- Include sounds in your recording
Step
1Add the record button to Control Centre
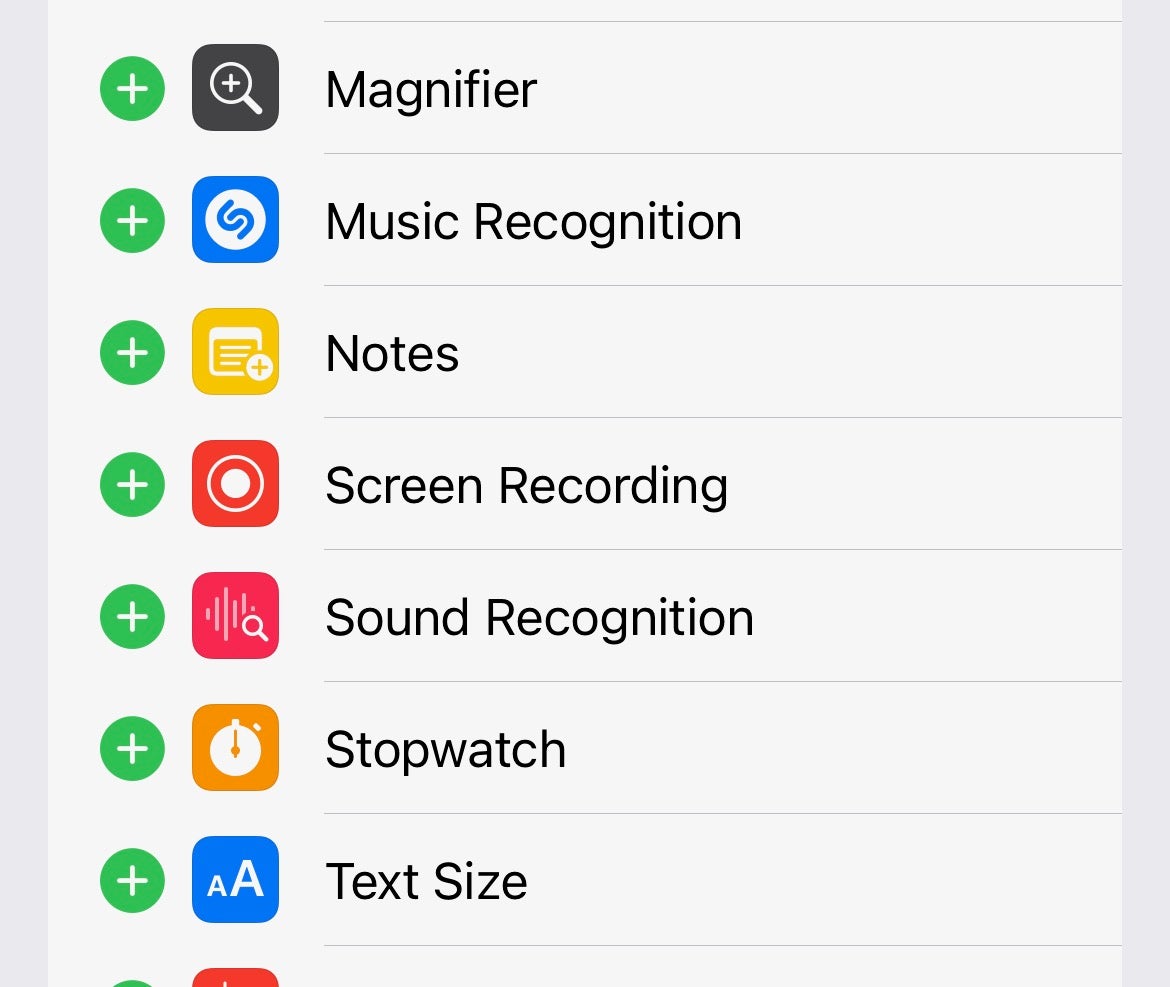
First up, head into the Settings app, then Control Centre, and scroll down to the list of functions under More Controls. Find Screen Recording and tap the little green ‘+’ symbol.
Screen Recording should now appear in the Included Controls section above. Exit out to the home screen.
Step
2Start recording
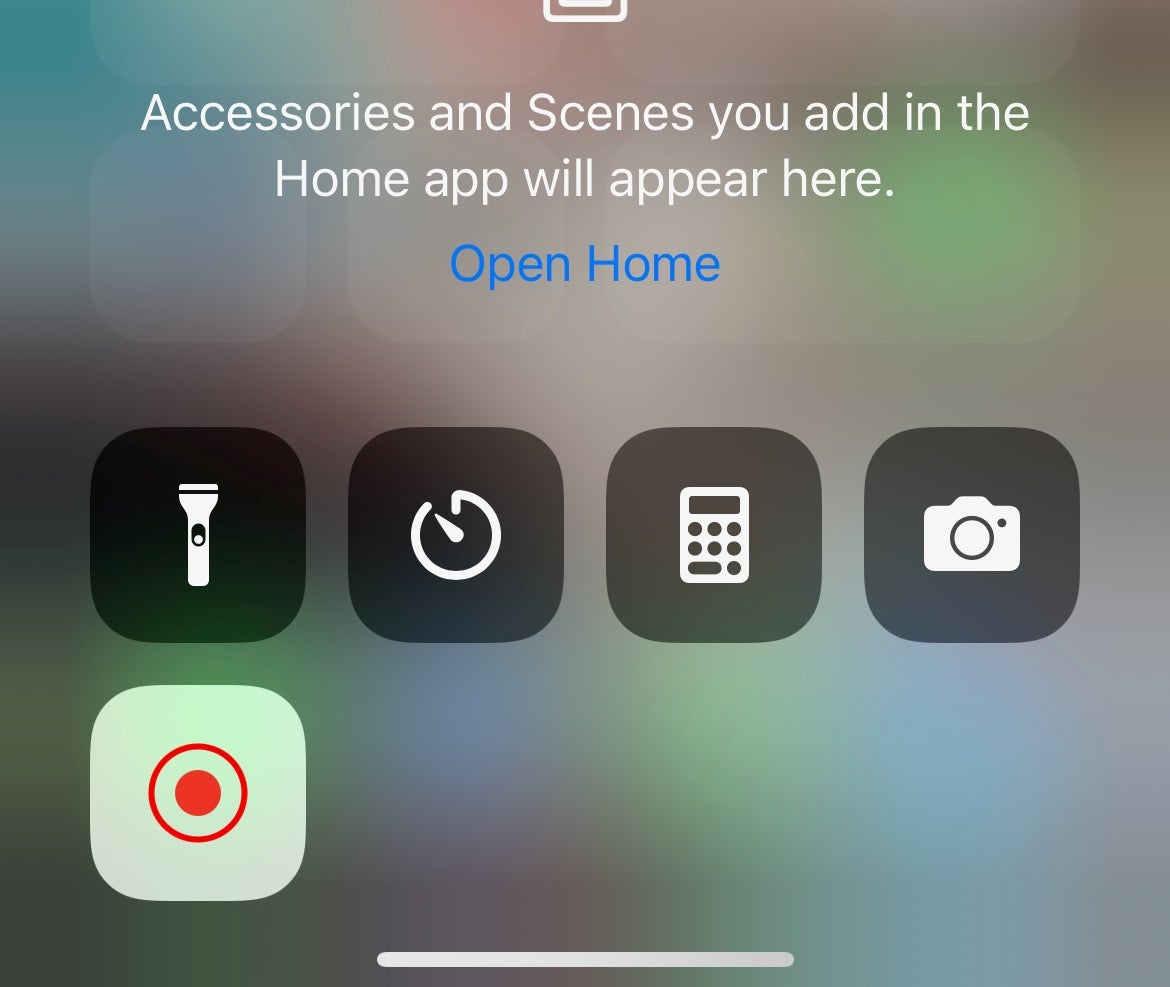
You’ll now find that a Screen Recording shortcut has been placed on the drop-down Control Centre screen, accessed by dragging down from the top right of your iPhone’s screen. It’s the little circle-within-a-circle symbol at the bottom of this screen.
Now, whenever you want to record what’s on your screen, bring down the Control Centre and tap this button. After a three-second countdown, the recording will begin. Repeat this process to stop the recording.
Step
3Include sounds in your recording
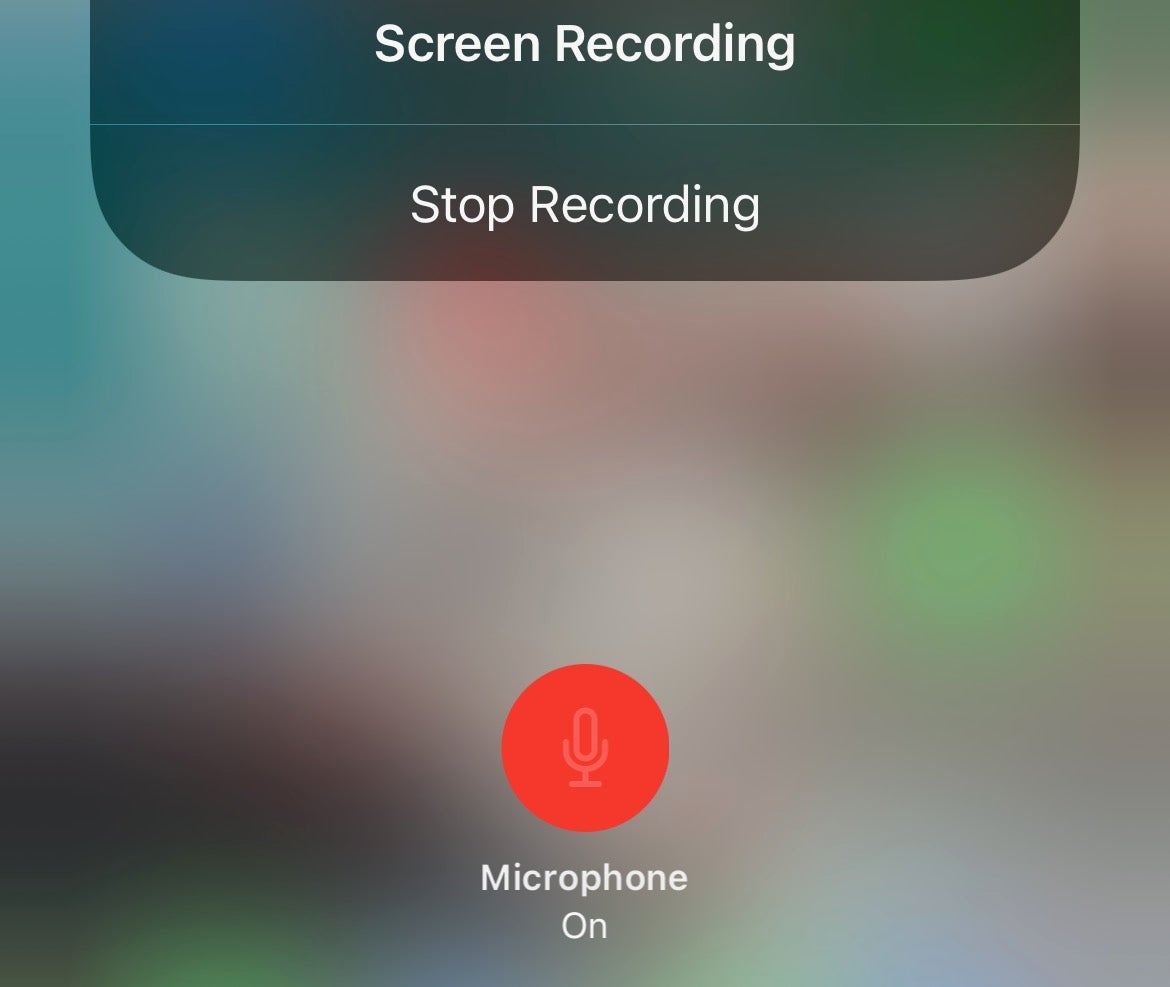
To include sounds with your screen recording (think narration), bring down the Control Centre screen, and this time tap and hold on the Screen Recording button. Now tap the Microphone button to turn your iPhone’s mic on, followed by Start Recording to commence the three second countdown.
Tap anywhere on the screen to exit, and navigate to the section you wish to record. Note that the microphone will be active for all of your ensuing screen recordings from now on, so you’ll have to repeat this process to turn it off again.
FAQs
The red icon indicates that your screen is currently being recorded. It’s also a shortcut to stopping your recording, so just press it when you’re ready to wrap up.
All screen recordings will be saved to the Photos app, where they can be viewed, edited, and shared like any other video you capture on your iPhone.


