How to Map a Network Drive in Windows 10
A mapped network drive can save you time by allocating a drive letter to a frequently accessed folder. Fiddling with networks and drive letters might sound a little technical, but the process is quick, straightforward, and great for productivity time savings.
After mapping a network drive, it will appear in File Explorer under a name you can set, and a drive letter which you choose during the setup process. Windows 10 will suggest a drive letter starting from the end of the alphabet. This is OK, but you can choose any letter that isn’t already used by the system, we chose ‘T’ for our Trusted Reviews work folder.
Once the letter is chosen and the drive is mapped, you can access the folder by this drive letter in command lines and so on – in our example it would be T:\ at the command prompt. Also, you can type T:\ in the address bar of File Explorer, but many will just double-click the new shortcut in ‘This PC’ to get to it quickly when loading and saving files.
What we used
- A Windows 10 PC
- A home network (Even if you have just one PC and one router, that’s OK)
Short version
- Open Windows File explorer and select ‘This PC’
- Choose Map network drive
- Select an unused drive letter and navigate to a folder
- Choose whether the network drive persists after reboots and say OK
- The network drive is now available in This PC and has been allocated a drive letter
How to Map a Network Drive in Windows 10
Step
1Open File Explorer
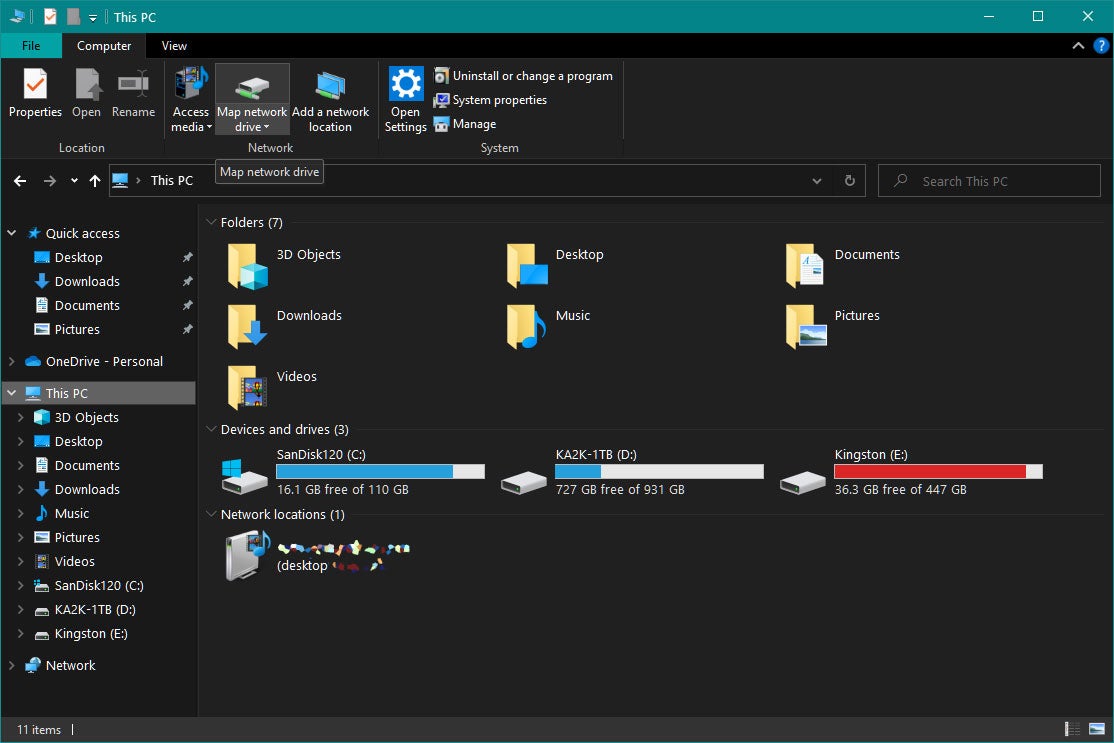
Open Windows 10 File Explorer by clicking the folder icon in the task bat or pressing Windows Key + E. In the left column of the window that opens you will see ‘This PC’, click it. You now have access to an icon above the window contents which is labelled ‘Map network drive’, click it.

Step
2Choose drive letter
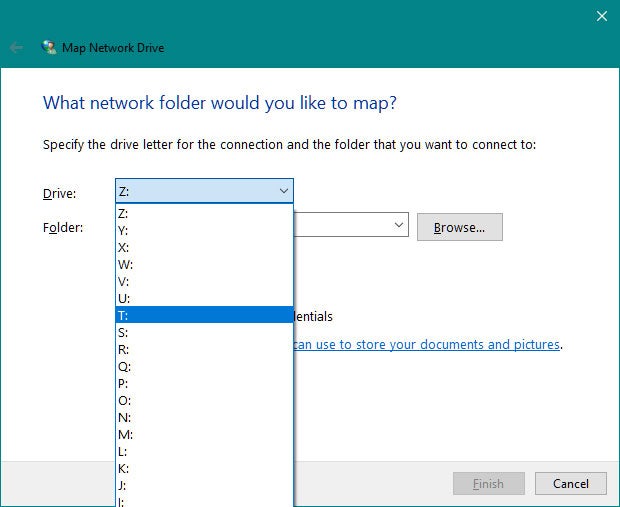
In the resulting dialogue box you will see a drop-down select menu from which to choose a drive letter, we chose ‘T:’. Then click the button for the Browse… option

Step
3Navigate to folder
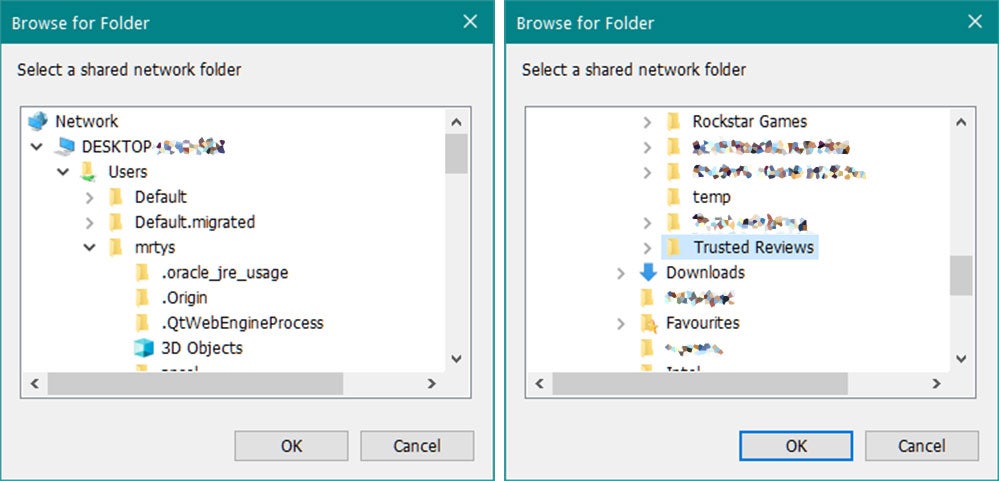
A dialogue pops up which allows you to navigate through your computer to a folder you want to map to the drive letter you decided upon. Clicking the little chevrons ‘>’ allows you to rummage through your disk for any folder you wish. We had to choose ‘Users’, then the current user’s data folder ‘mrtys’ – yours will have a different name. Going deeper we chose ‘Documents’, and then ‘Trusted Reviews’ and clicked OK

Step
4Select persistence option
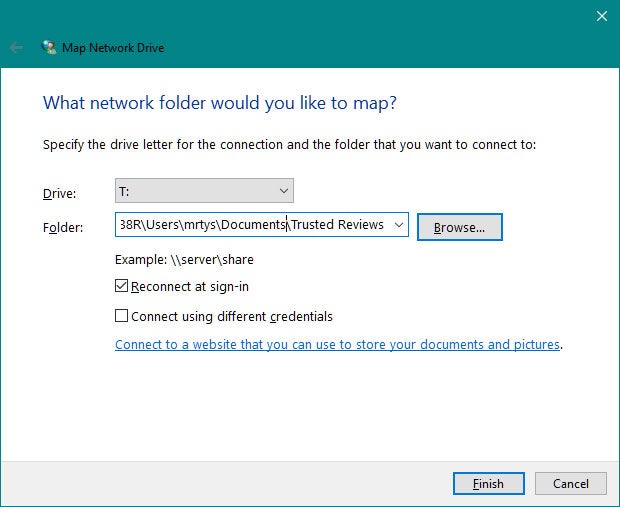
Finally, you can decide whether to reconnect this shared drive every time you restart your computer. We selected this option. You can always choose the ‘Disconnect network drive’ later if you don’t want or need this shortcut anymore.

Step
5Use the new shared location and drive letter shortcut
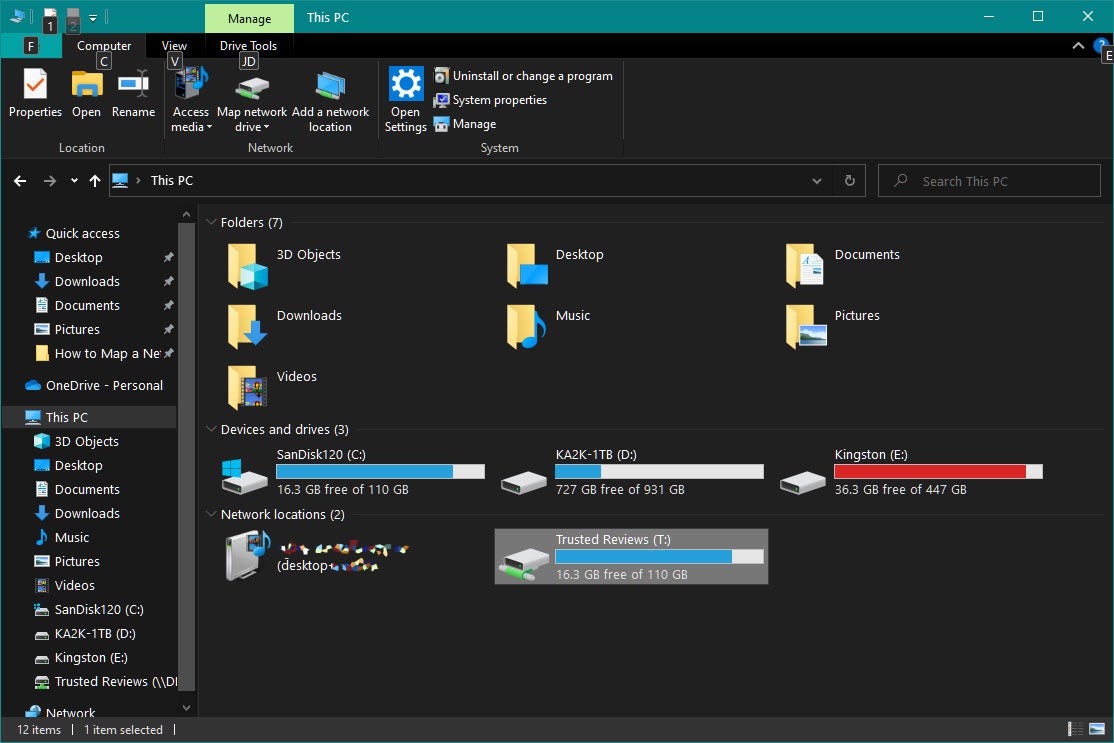
Now you are done, the mapped drive is available as a location in File Explorer and all your programs. You can rename this folder if you like. Ours was created with a very long name, so we just shortened it to Trusted Reviews. It is also accessible by the drive letter T:\, of course.

Troubleshooting
Simply go to File Explorer, then ‘This PC’, then right-click the drive and choose ‘Disconnect’. Don’t worry, no files are being selected, just the reference to the folder. You have also now freed up the drive letter you allocated to the share.
There are a number of potential issues here, but the most likely is that you have network discovery and / or file and printer sharing turned off. To check and change these settings, type ‘sharing settings’ in the Windows search bar and select the ‘Manage Advanced Sharing Settings’ icon that Windows suggests. This will take you directly to the toggles page for these settings for the current network.
No, other PCs won’t be updated with the drive letter and shortcut you created, they will have to go through the process individually.


