Looking to spice up your font library? Here’s how to find and install new fonts to use in Photoshop in just a few easy steps.
The easiest way to add a font to Photoshop (or indeed any Creative Cloud service) is with Adobe Fonts. Here you can find a variety of fonts available for personal and commercial use that will automatically be installed across any and all Creative Cloud apps you use.
However, there are also plenty of third-party sites that allow you to download unique and popular fonts under various different creative licences and add them to Photoshop.
Read on to learn how to install fonts with Adobe Fonts, or scroll down to the troubleshooting section of this guide to find out how to download them from other websites.
What you’ll need:
- Adobe Photoshop
- A Creative Cloud subscription
The Short Version
- Go to fonts.adobe.com
- Search for a font or click Browse All Fonts
- Choose a font you like
- Click Activate 1 Font
- Restart Photoshop and the font should be there
How to install fonts in Photoshop
Step
1Go to Adobe Fonts

You can find it at fonts.adobe.com.
Step
2Click Browse All Fonts

Or search for something more specific if you have a font in mind.
Step
3Use the search tools to refine what you’re looking for
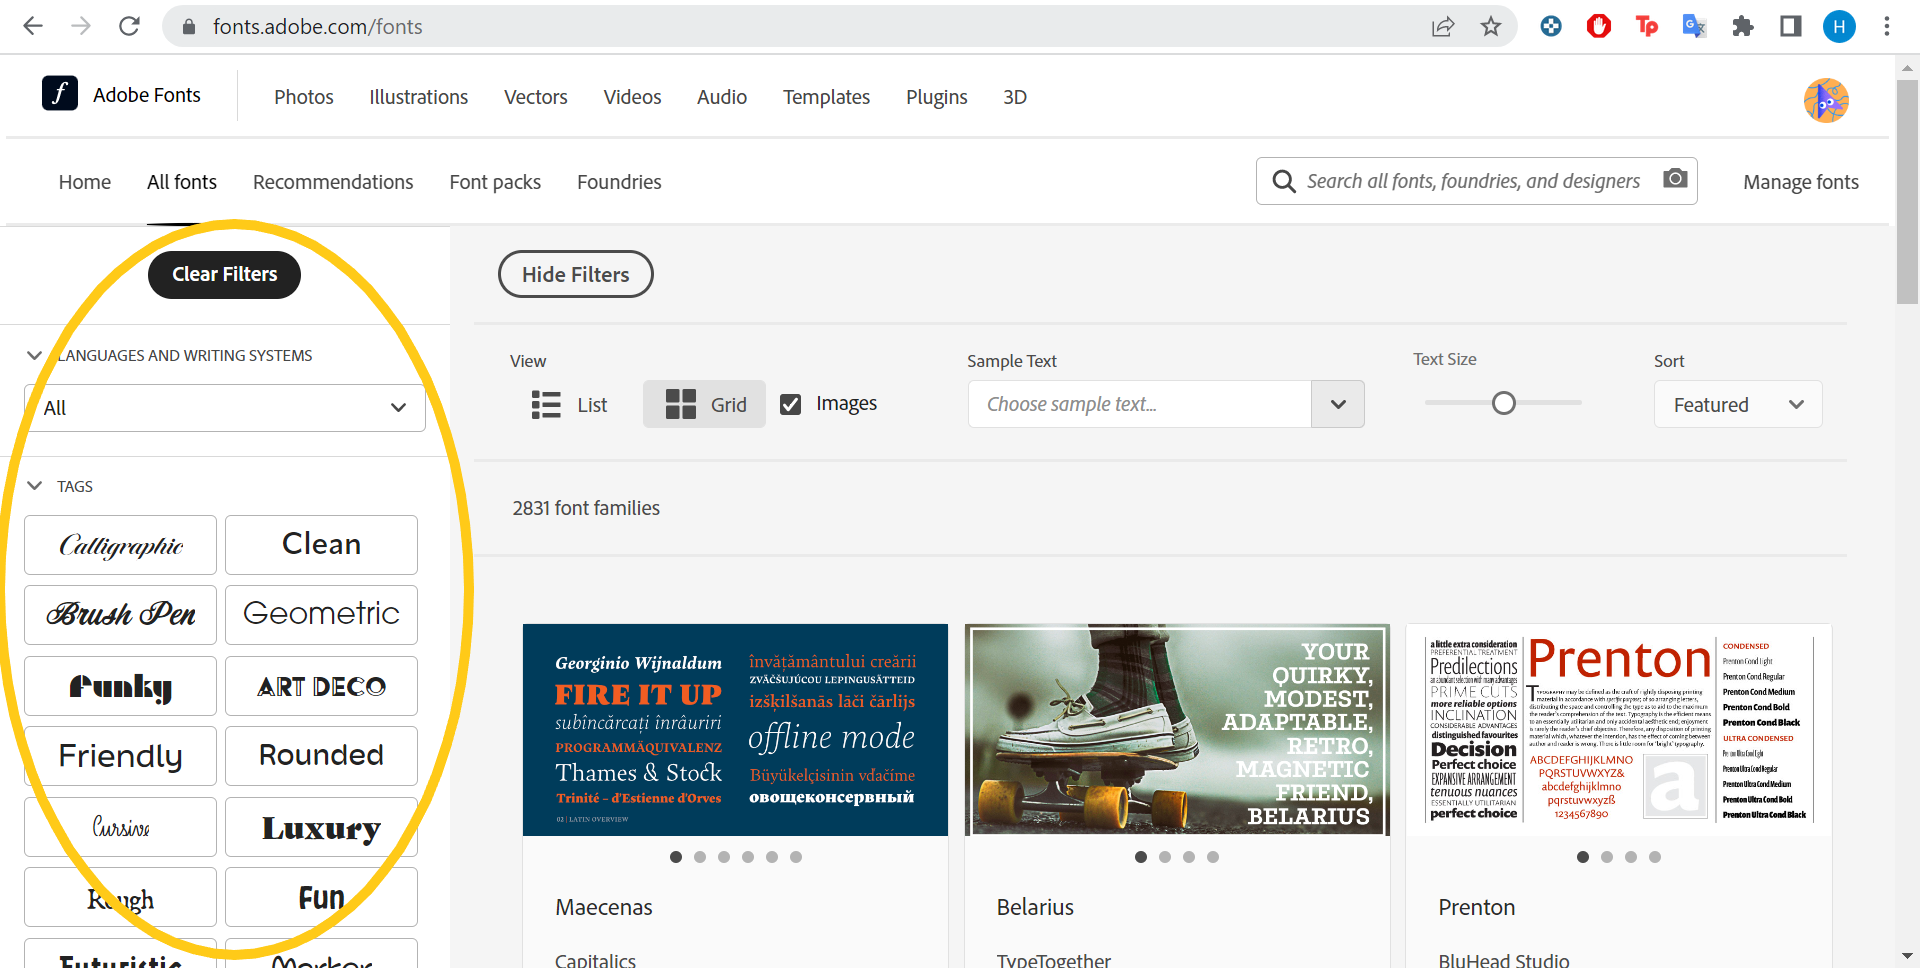
You can choose from different languages, styles and properties.
Step
4Choose a font
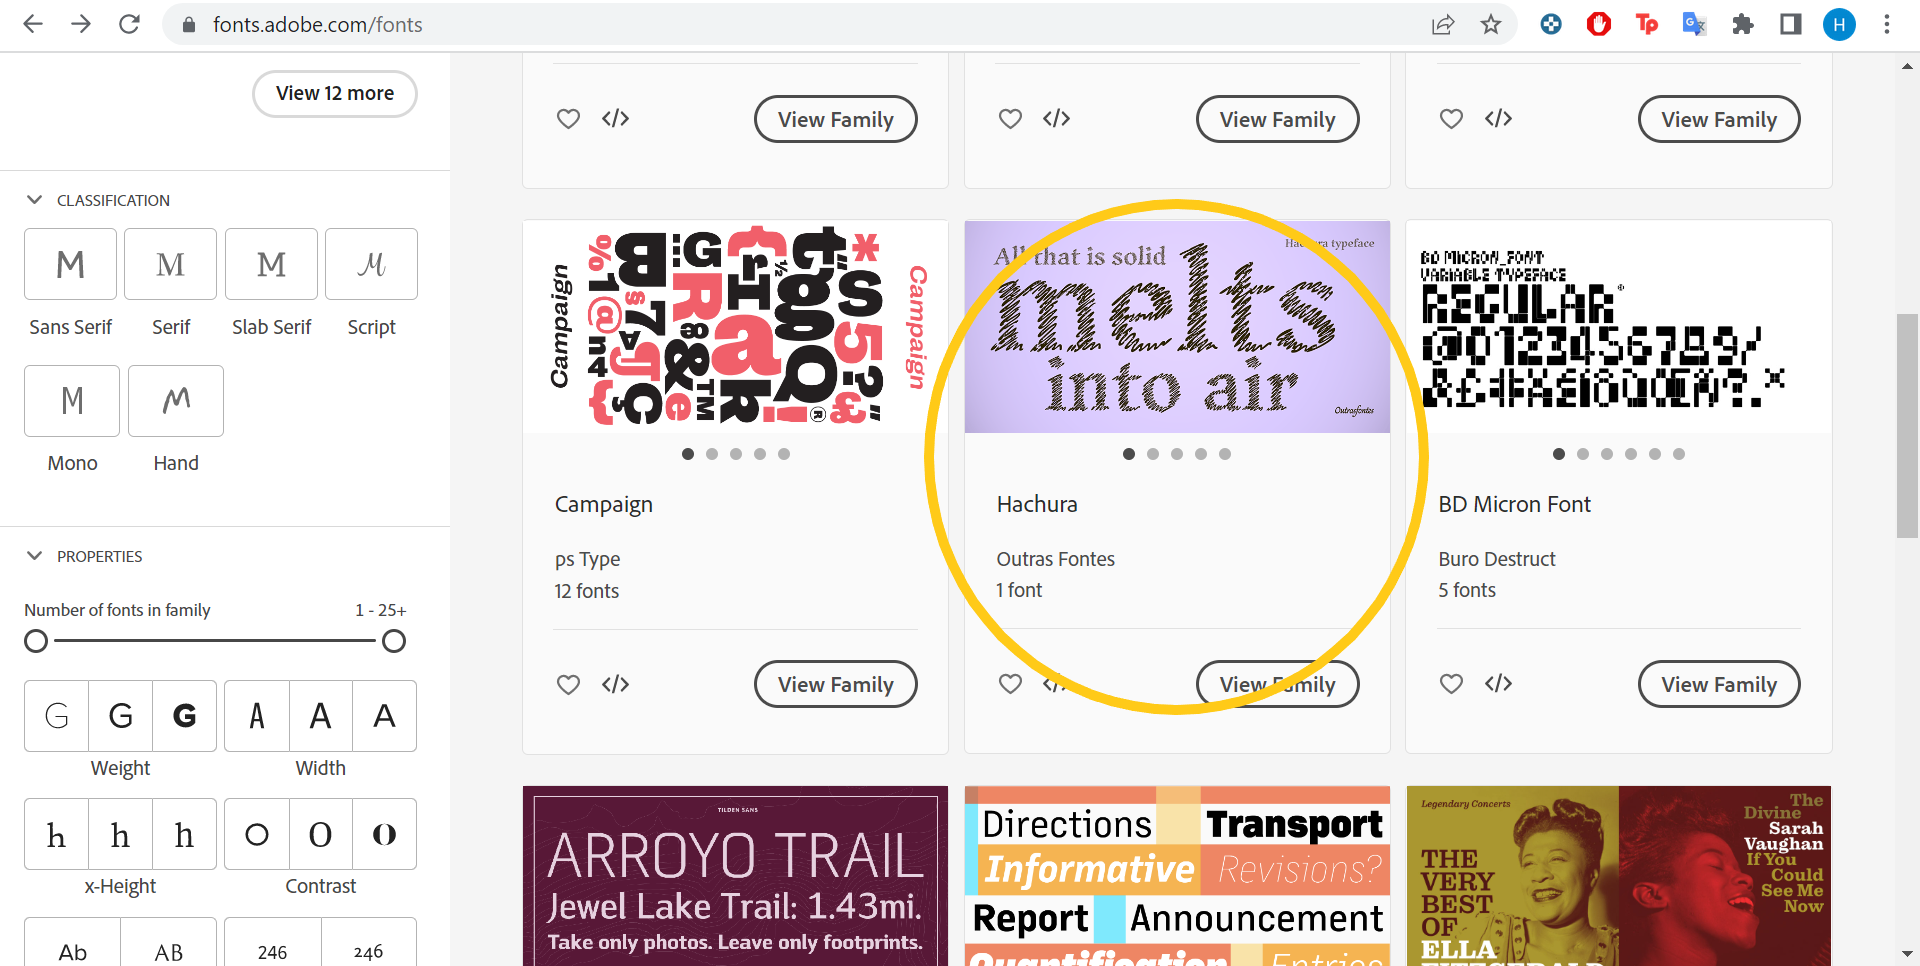
Click on a font you like.
Step
5Click Activate 1 Font in the top right corner
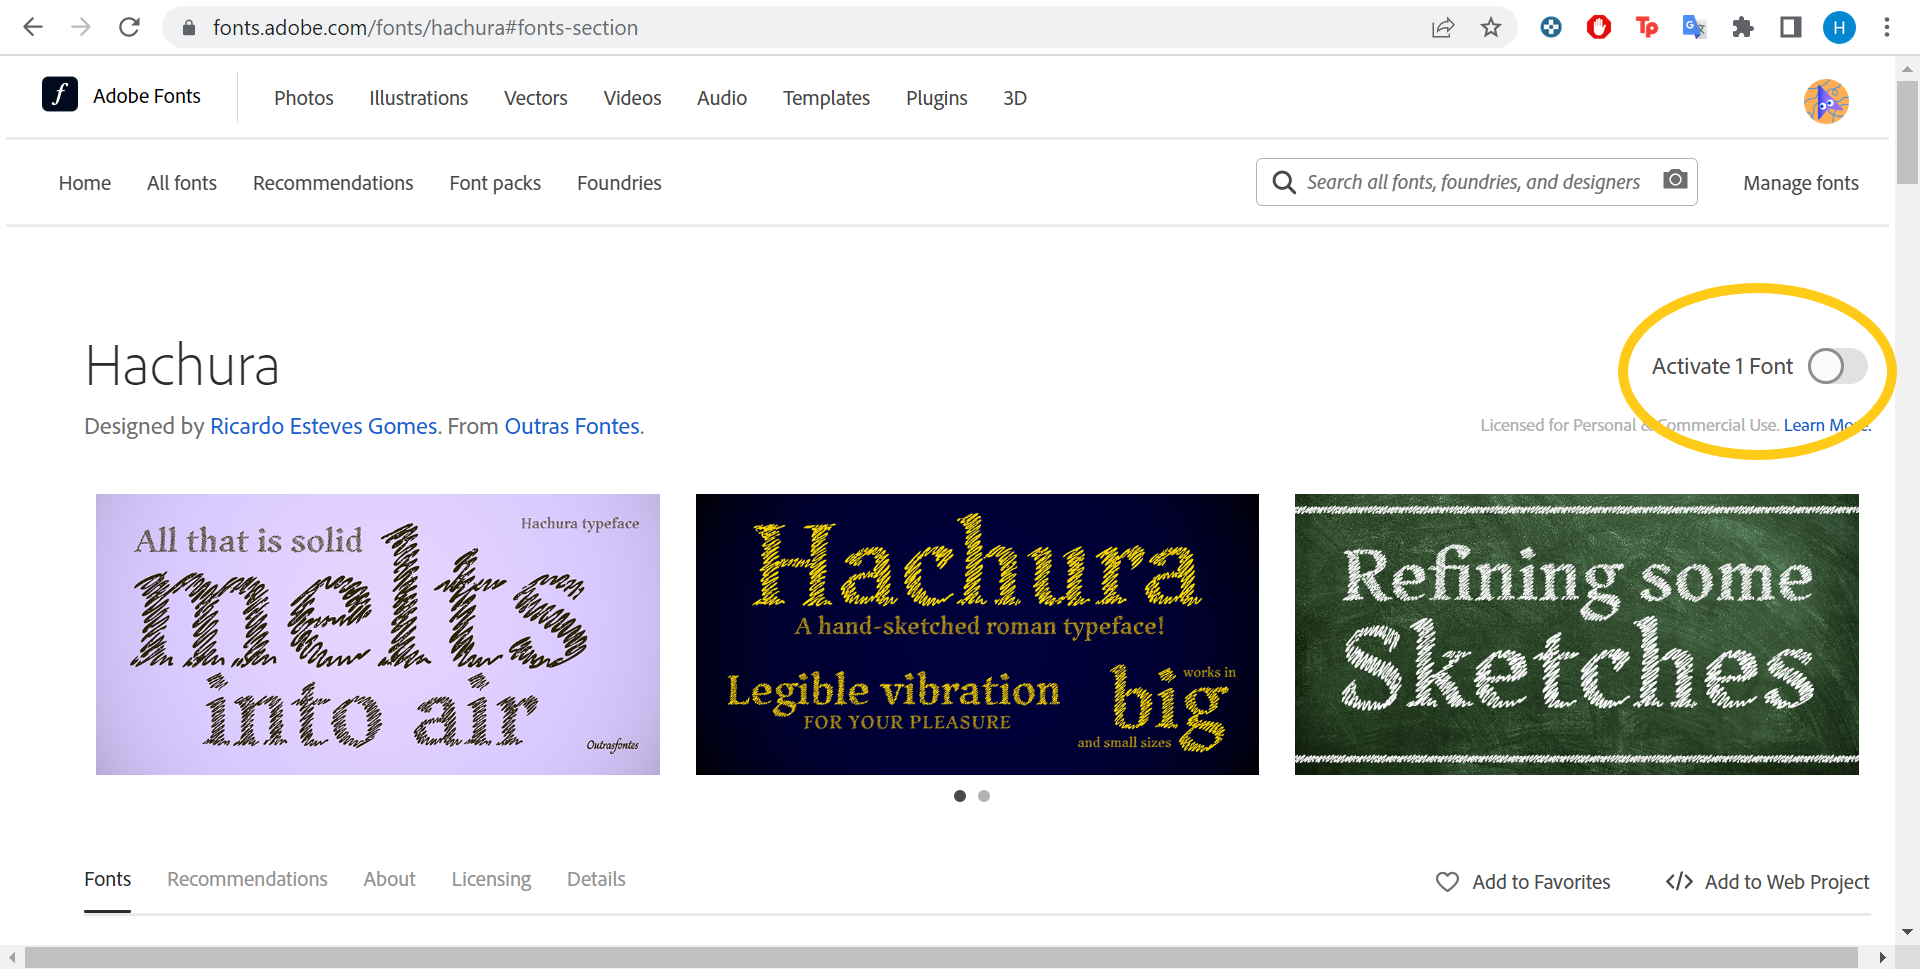
This will automatically install the font across your Creative Cloud apps.
Step
6Restart Photoshop
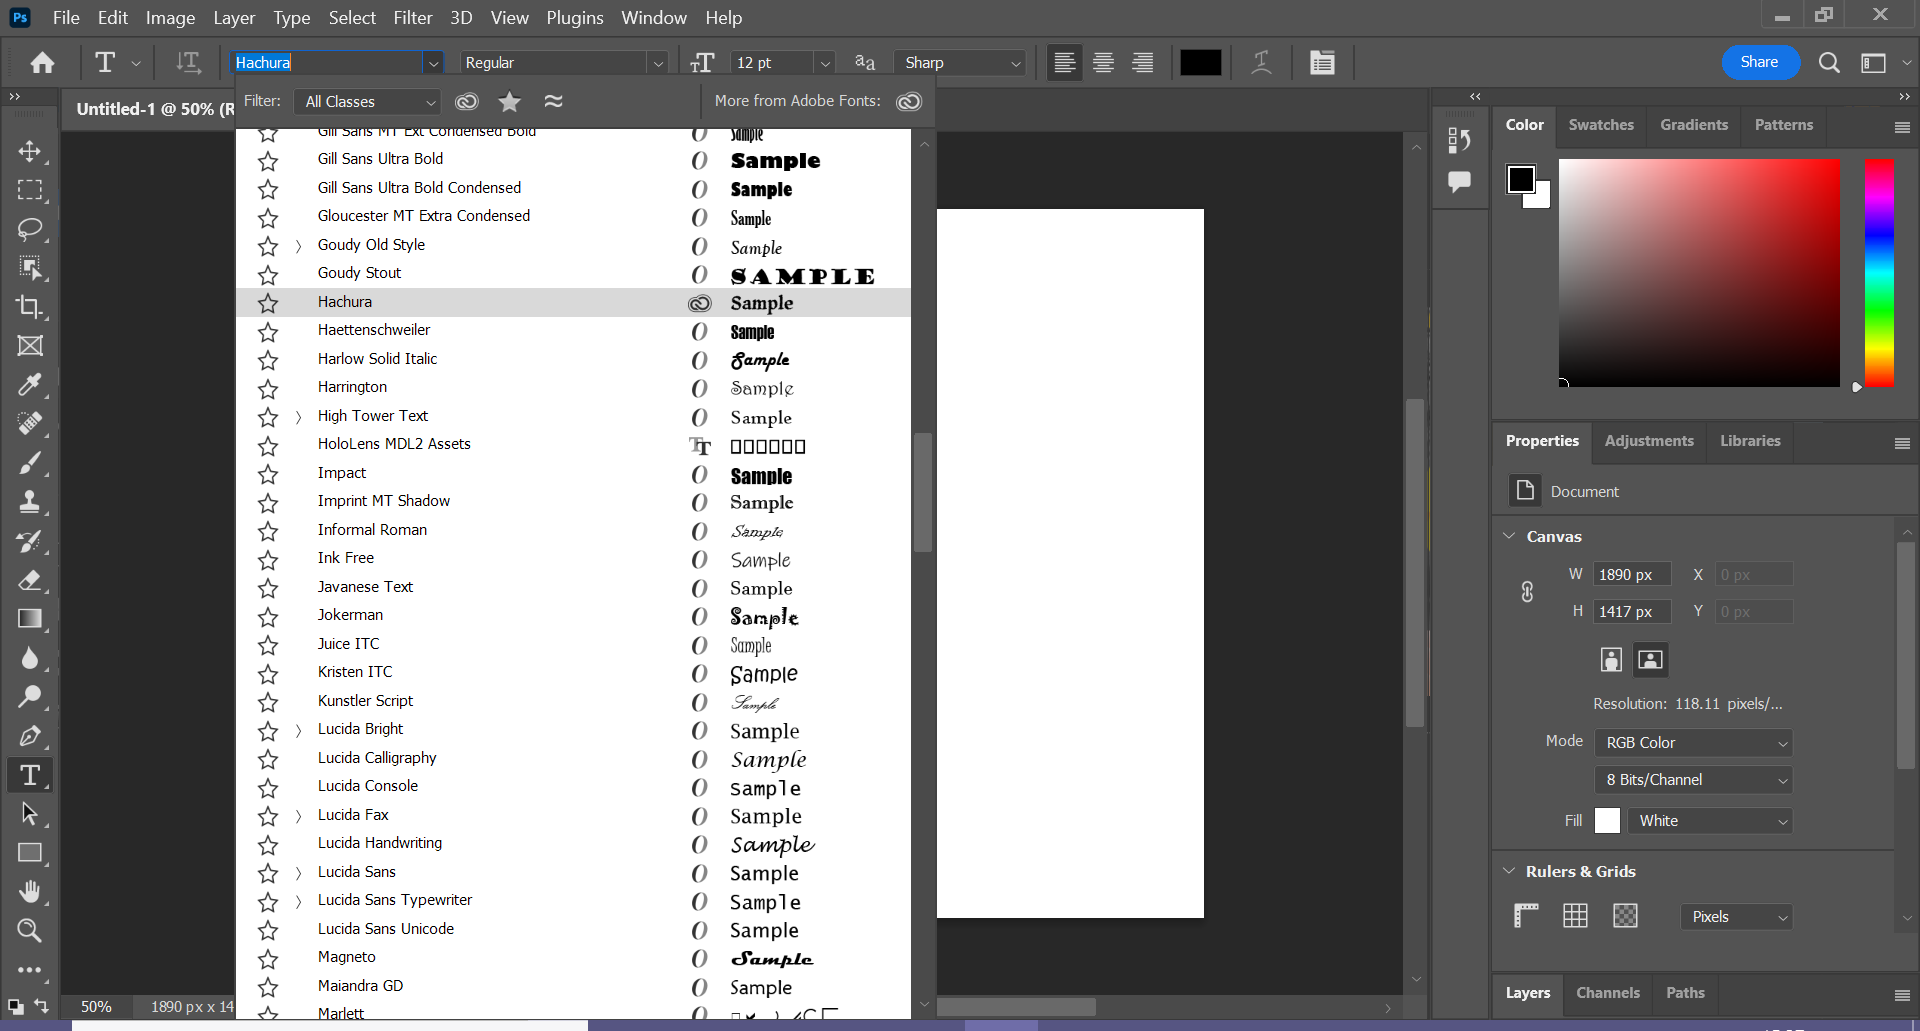
If you’ve already got Photoshop open, restart it and you should see your font sitting in the font library.
FAQs
Head to a font website – such as DaFont or Google Fonts – and choose a font you like. Follow the steps to download the font and locate the file on your Mac. Next, double click on the OTF/TTF file to open Apple’s Font Book app and click Install Font to add it to your Mac’s font library.
To install a font from a third-party website on your PC, follow the same steps described to pick and download a font on a Mac. Then right click on the OTF/TTF file and click Install to add the font to your computer.
You might like…


Editorial independence
Editorial independence means being able to give an unbiased verdict about a product or company, with the avoidance of conflicts of interest. To ensure this is possible, every member of the editorial staff follows a clear code of conduct.
Professional conduct
We also expect our journalists to follow clear ethical standards in their work. Our staff members must strive for honesty and accuracy in everything they do. We follow the IPSO Editors’ code of practice to underpin these standards.