

Adding a dedicated graphics card to your PC can dramatically transform both its gaming and content creation capabilities.
In this guide we take you through opening up your PC, plugging in a new graphics card, and getting it ready for service. If you are replacing a previous card, please check the FAQ for tips on removing the older model.
One of the most popular PC upgrades is a new graphics card. You might be moving from integrated graphics – the on-chip graphics provided by your CPU – or upgrading from an older, slower and less capable graphics card.
If you are reading this guide and have yet to decide upon and purchase a particular graphics card, then please make sure the model you are buying will fit in the PC case you have (check manufacturer specs pages of your case and graphics card). Another important consideration is making sure you have sufficient PSU power and spare power connectors for the graphics card you have chosen.
Hardware used
- A modern PC with PCIe slots available
- Graphics card
- Philips screwdriver
The short version
- Unplug your PC and open it ready for the upgrade
- Unpack and unwrap your graphics card
- Seat the graphics card above the vacant slot and push straight into the slot until you feel it seated
- Tighten up bracket screws, and connect the power cables from the PSU if any are required
- Reassemble your PC and make sure to plug your monitor into one of the ports from your new graphics card – not a motherboard / on-board graphics port
- You will probably have to visit your graphics card vendor’s drivers page to enable optimal features and acceleration
Step
1Unplug and open up

Unplug the power cable from your PC. You could leave it on your desk, or unplug all the cables and take it to a clean work surface with good lighting and access, like we did. Next, take off the side panel and remove PCI bracket covers on the back of your case to match the graphics card you have bought. Most modern graphics cards attach to two expansion brackets.
Step
2Unbox, line up and slot in the graphics card
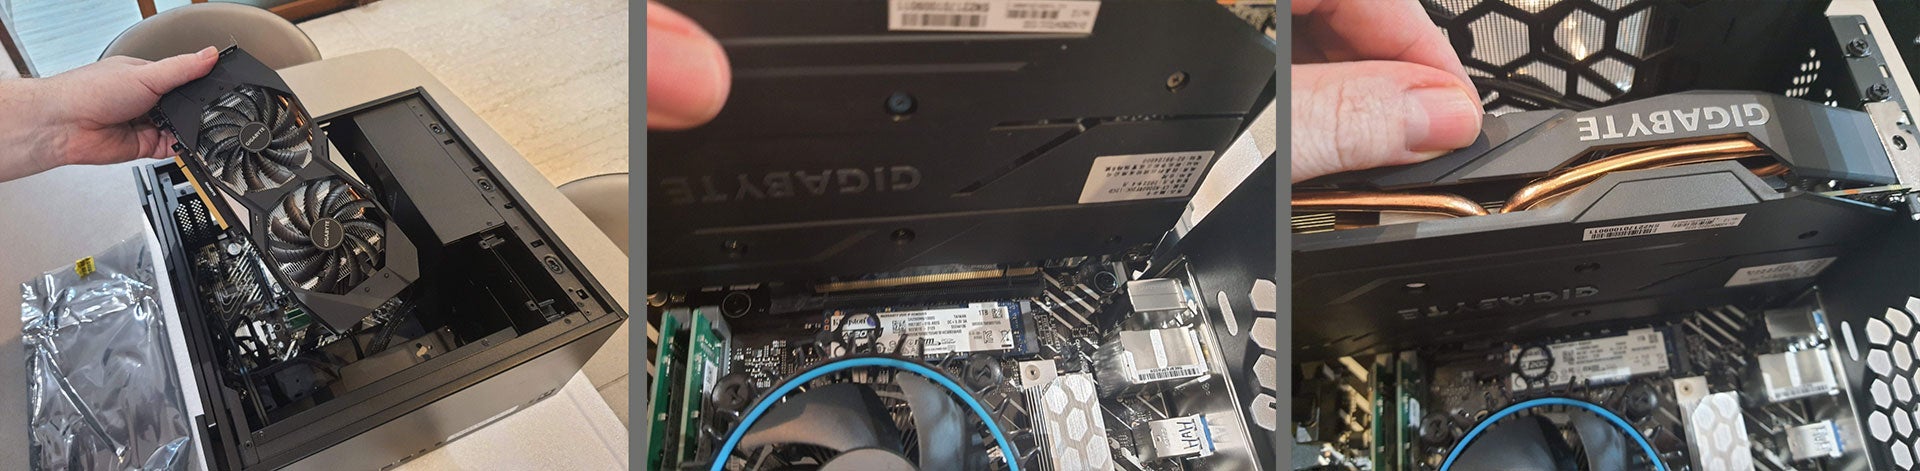
If your PCIe slot is vacant, you will now unbox and unwrap your graphics card, removing any plastic covers – ours had a bumper over the gold contacts which insert into your motherboard slot. Now position the graphics card gold contacts over the slot with the bracket connectors above the vacant bracket(s) too. You will be seating the graphics card and pushing down on its spine with even and positive pressure. You should feel the graphics card slip into the slot and reach its stable fitted position. Now insert and tighten the bracket screws, securing the card in place.
Step
3Connect cabling and make some checks
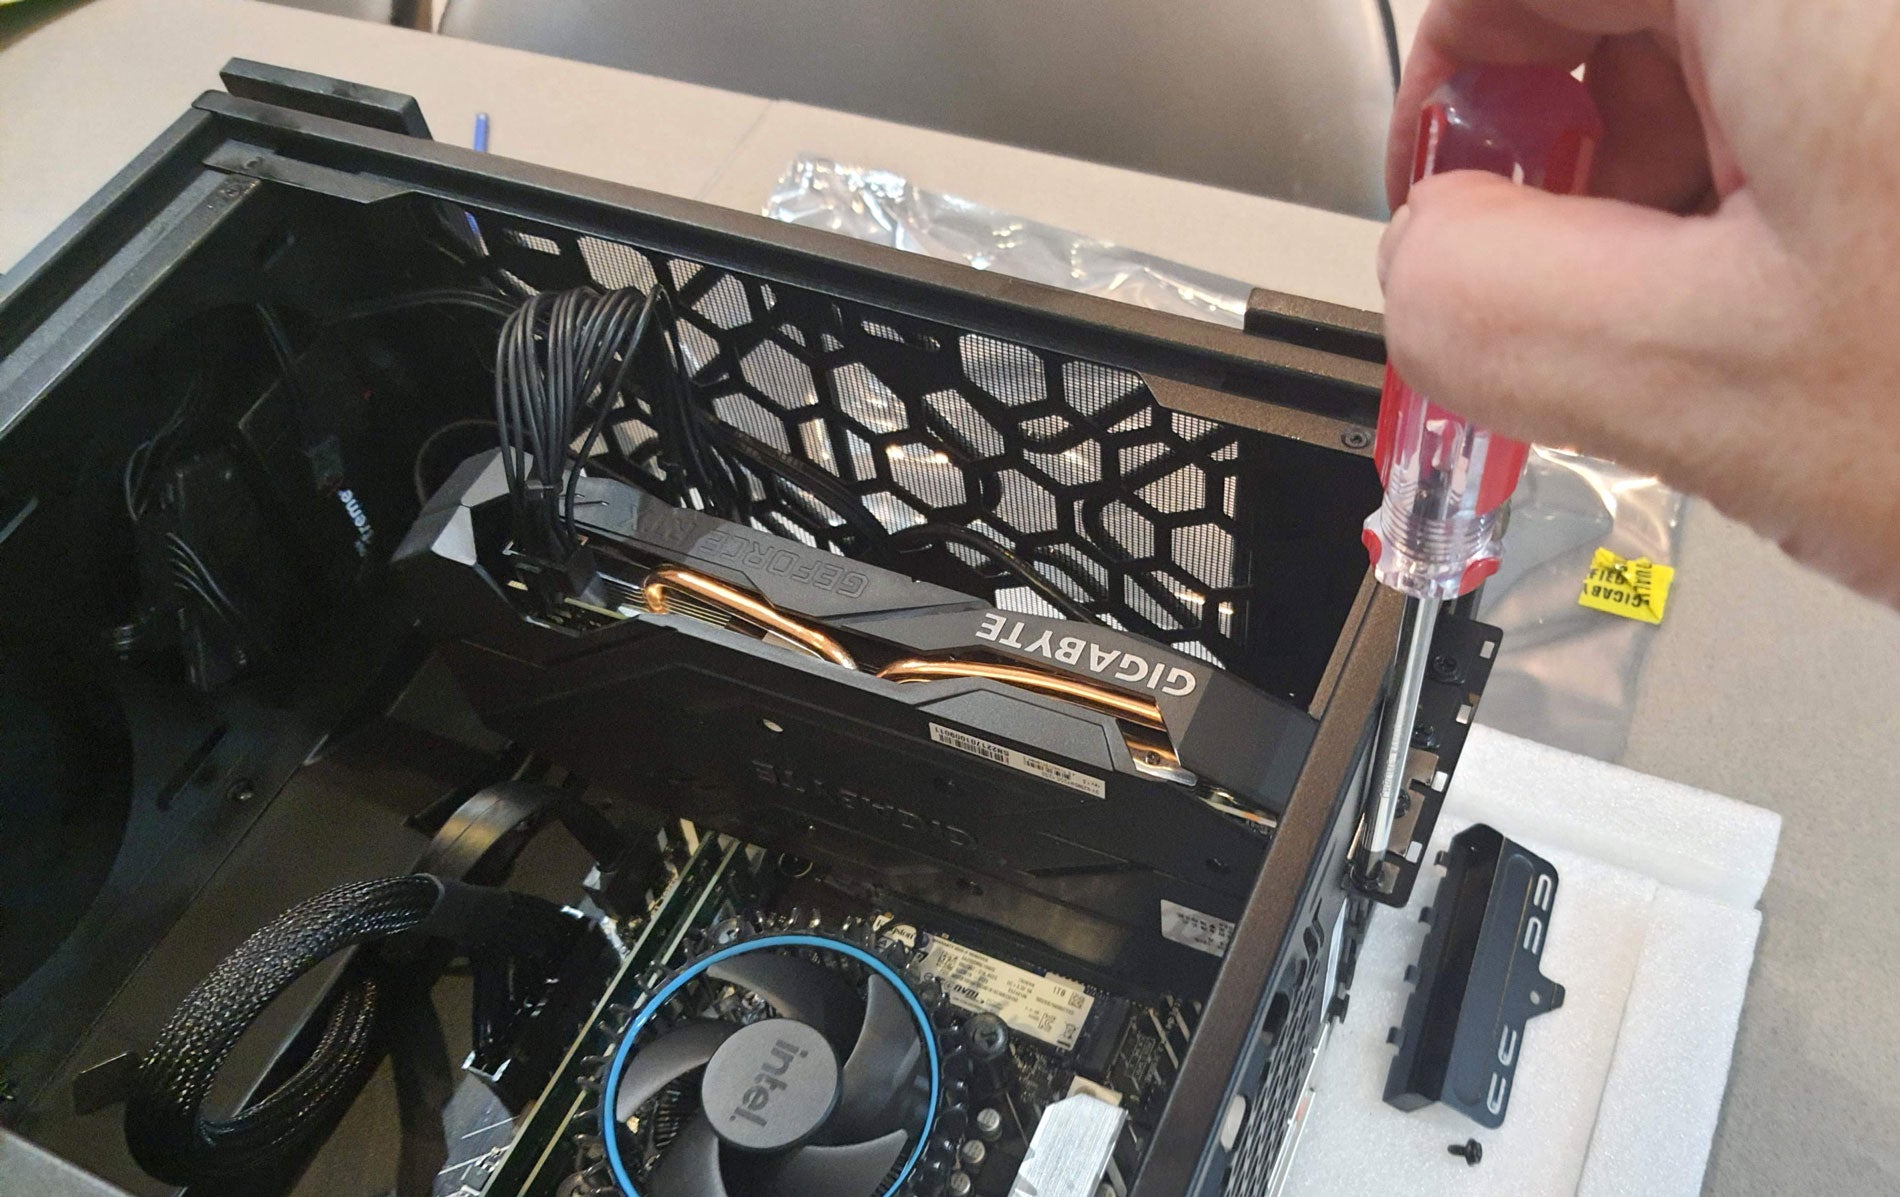
Plug any required power cable(s) from your PSU into your graphics card. Some graphics cards may not need any power connectors, drawing any required power from the PCI slot, but at the other end of the spectrum some very powerful graphics cards need up to three power connectors. Before closing up your case, have a quick check that your cabling is tidy, and the graphics card fans aren’t hindered by any cabling, so they spin freely.
Step
4Connect your monitor to one of your new graphics card display outputs
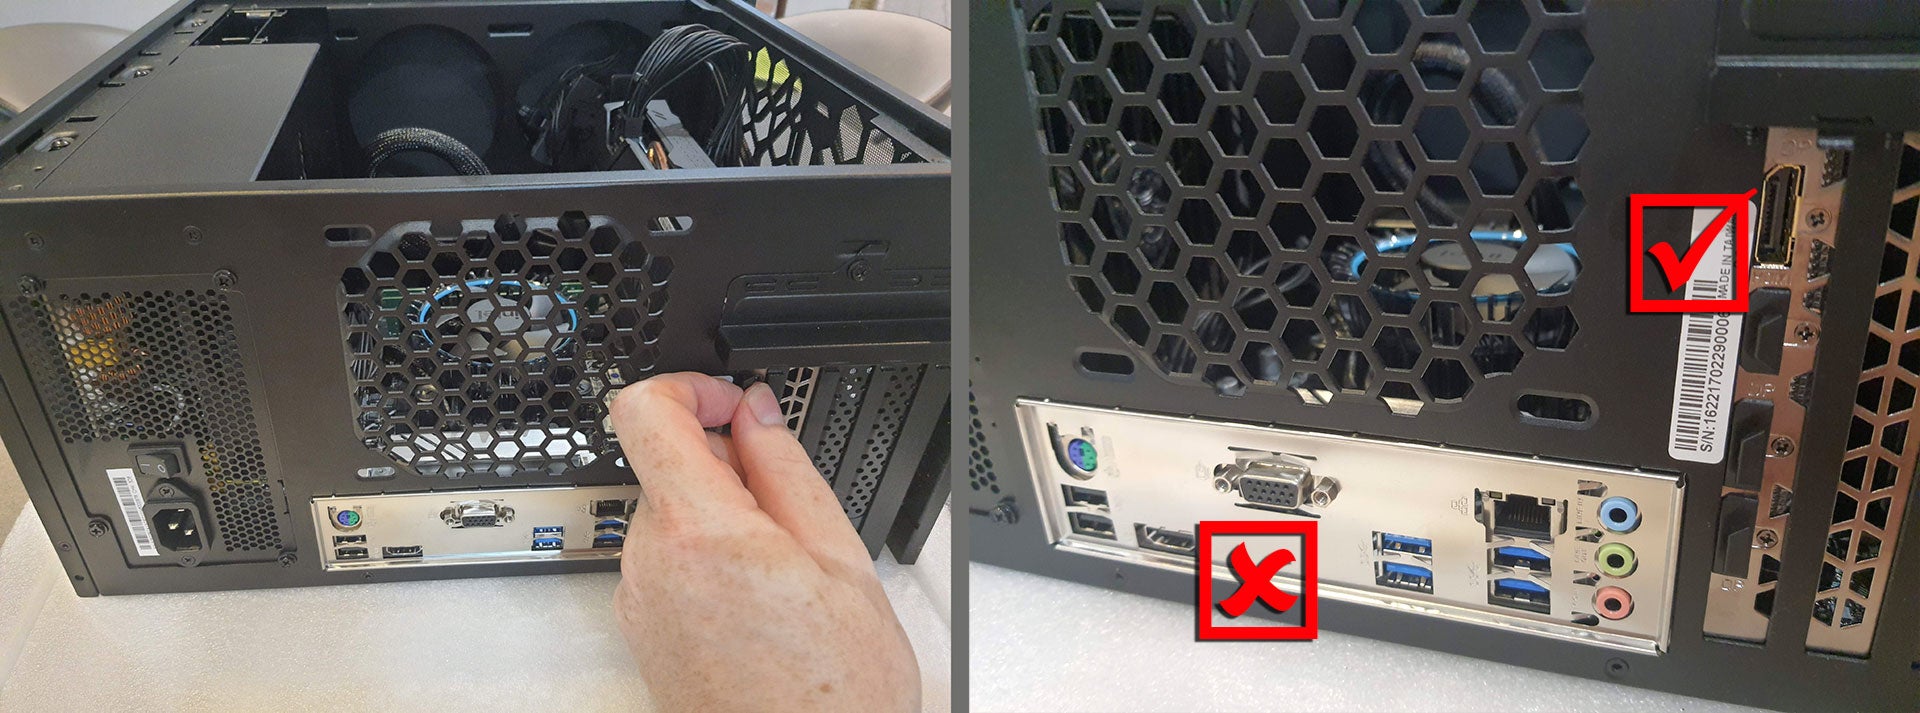
After closing your case, you might be eager to plug everything back in and check out your PC’s new graphics firepower. Please pay special attention to plugging your monitor into a graphics card port rather than one of your motherboard monitor outputs. In our example, we had been using integrated graphics via HDMI from the motherboard rear I/O plate. For the graphics card, we chose to connect to the monitor via a DisplayPort cable to benefit from Adaptive Sync (FreeSync/G-Sync).
With your hardware now installed, you might have to grab a new graphics card driver for Windows (if you switched brand or moved from an iGPU) to benefit from the hardware acceleration.
FAQs
AMD graphics drivers can be found here, Nvidia graphics card drivers are here, and Intel graphics drivers are here.
Firstly, uninstall the graphics card driver if you are switching brand. Then turn off and unplug your PC before opening it up. Next, you can unplug any auxiliary power connection your existing card uses, and undo the rear expansion bracket screw(s) and set them aside. Your graphics card slot might have a retainer mechanism, so as you lift out the old card, you will have to reach under the card and press the latch down to unhook your old graphics card. If you have done all this, you can follow our guide.
First, make sure your monitor is powered up and correct input selected using the monitor’s built-in menu system (often called the OSD). If that doesn’t help, turn off the PC and unplug it before opening up the side panel and checking the power connector(s) fit, the graphics card seating is firm, and you have plugged the monitor into the new graphics card and not, for example, a motherboard provided video output. If everything checks out, please consider your power supply might be insufficient for the upgrade you have chosen.
Editorial independence
Editorial independence means being able to give an unbiased verdict about a product or company, with the avoidance of conflicts of interest. To ensure this is possible, every member of the editorial staff follows a clear code of conduct.
Professional conduct
We also expect our journalists to follow clear ethical standards in their work. Our staff members must strive for honesty and accuracy in everything they do. We follow the IPSO Editors’ code of practice to underpin these standards.