How to reformat and partition a hard drive on a Windows PC
Our guide to wiping, formatting, and partitioning your hard drive using a Windows computer.
If you’re anything like us, then you’ll have fistfuls of USB flash pens and countless older hard drives stuffed in a drawer somewhere.
Hooking these up and going through the contents can be fun; looking at the various backups, game saves, ten year old CVs, long lost Linux distros, and programs that we used to use regularly. However, if you have no use for them anymore the drives themselves can be repurposed.
The problem is, if you come across a drive, USB or otherwise, that has some strange partition setup you’ll find things more difficult. Usually you’ll just need to format the drive and use the available space. Other times, you’ll need to wipe the drive and and re-partition it to your own preference, or in line with what you intend to use the drive for.
Related: Best laptop
Deleting and creating partitions in Windows is surprisingly easy, but it can be quite daunting to someone who’s never looked into it before. On the other hand, the built-in partitioning tools for Windows can be very powerful indeed, so even if you’ve been in this position before there may be something you’ve overlooked.
Windows has two options available when it comes to wiping and creating partitions, one is slightly more complex than the other so we’ll begin with the easiest of the pair.
Volumes or partitions?
A volume isn’t the same thing as a partition. A partition is basically space created from the available capacity of the drive, whereas a volume is a section within the partition that is formatted to a useable file system.
However, most people simply regard the two as one and the same, despite the fact that they are different. We’re not going to get into too much detail here over volumes and partitions, we’ll leave that for you to look up. In this instance we’ll regard the pair as the same thing, with the end goal being the creation of a volume that we can use, or a partition of allocated space that we can delete.
Disk Management – create a partition/volume
Windows Disk Management is a tool built in to Windows XP, Vista, 7, 8.1, and 10 that offers a graphical interface to view, wipe, create, and format partitions.
To access it you can either right-click the Windows 10 Start button and choose Disk Management from the menu, or you can press the Windows key and R on your keyboard and enter diskmgmt.msc into the Run dialog box, and press Enter.
Related: Best gaming PC
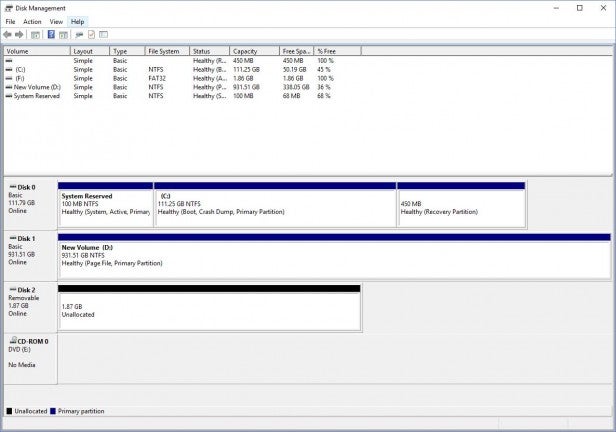
Once launched Disk Management will display all the detected physical drives in the system, along with the partitioning that each drive may or may not have. Disk 0 is your main Windows drive (most of the time), and you may have Disk 1, 2, 3 and so on depending on how many drives you have installed, including any USB pens or external drives you have attached. Also, if you have an optical drive installed this will be displayed here.
Before we go any further it’s worth pointing out that this is a very dangerous place to hang out. While it’s mostly safe to nose around and see how the system is setup, you can potentially end up wiping out all your data with very little chance, if any at all, of recovering it. So do be careful.
You’ll notice that the system drive is split, if you’ve got Windows 7, 8.1, or 10 installed, into at least three sections, or partitions. This is the Windows default, consisting of the System Reserved partition, which is where Windows stores the boot manager and configuration data (very important, since your system won’t be able to boot without it). Next there’s the actual C: drive, which is where Windows, programs and so on are stored and the only section that you’ll be able to see from Windows Explorer by default. And finally, there’s usually a Recovery Partition, which differs in size depending on the version of Windows you have, which holds the Windows Recovery Environment.
Of course, this may differ depending on your own individual setup, but essentially this is how Disk Management looks and separates each partition on the physical drive installed.
Related: How to virtualise your old PC
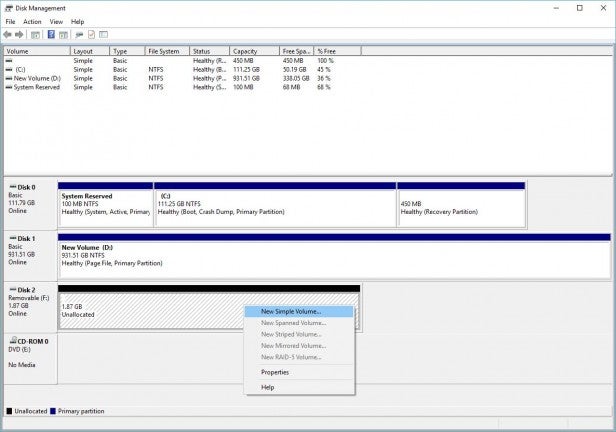
Hopefully you’re a little more familiar with it now, so if you want to create a partition all you need to do is locate the drive in question within Disk Management, right click the unallocated space on that drive, and select New Simple Volume from the menu.
Related: How to play the coolest retro games on your PC for free
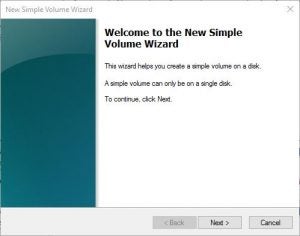
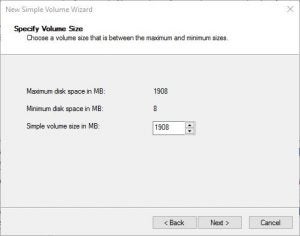
This will launch the Volume wizard. Click the Next button to continue. The following screen will allow you to specify the size of the partition/volume with the maximum possible size of the drive selected as default. You can alter the size in MB using the Simple Volume Size box, and when you’re ready click Next to continue.
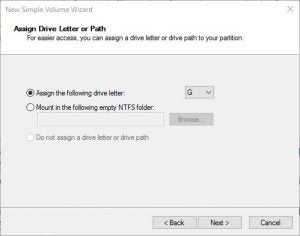
The next screen assigns a drive letter to the new partition, or you can choose to mount the partition to an NTFS folder. For this example, we’ll stick with the default drive letter assignment.
Next you’ll be asked if you want to format the new partition, which we’ll assume you do since you’ll want to use it once it’s created. In this section you can also name the partition within the Volume Label box, and opt for a different location Unit Size and so on. For now, we’ll leave the default options in place.
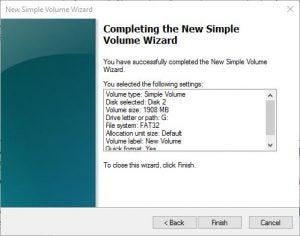
The final section simply details the choices you’ve made, and by clicking the Finish button you’ll begin the process of creating and formatting the new partition, thus making it a useable volume.
Disk Management – delete a partition/volume
Doing the opposite and deleting a usable volume is worryingly easy within Disk Management – worrying since you could easily wipe out all your data.
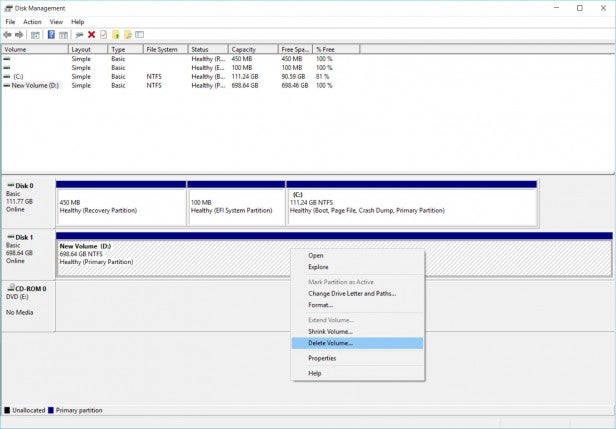
All you need to do is right-click the volume/partition you want to delete, and select Delete Volume from the available menu.
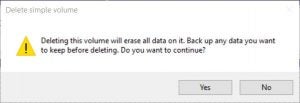
You’ll be given a warning which explains that by deleting the volume you’ll also wipe any data on it, but if you’re okay to proceed then click on the Yes button and after a moment or two you’ll be left with an unallocated disk.
DiskPart – create a partition/volume
DiskPart is the command line version of the Disk Management graphical interface. It allows you to view, create, delete, format, and manage any connected drives on the system. For those of you old to enough to remember Fdisk, DiskPart is the modern replacement.
Since it’s a command line interface there’s potential for the user to make more of a mistake simply because it’s lacking the visual representation that a GUI offers. However, with a bit of care and attention you’ll find that DiskPart is by far the more powerful tool when it comes to disk management duties.
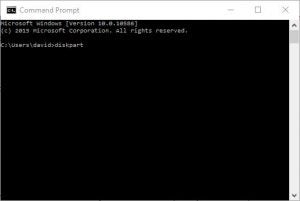
To begin with you’ll need to open up the command prompt by either right-clicking on the Windows 10 Start button and selecting Command Prompt (you can also choose the Admin option for the Command Prompt, but the standard will suffice as Windows will prompt you for elevated access later), or by pressing the Windows key and R and typing in CMD, and pressing Enter.
Once in the command prompt, type in:
diskpart, and press Enter
If you chose to run the standard command prompt then Windows will ask for permission to run the DiskPart command at an elevated permission level, so it has permissions to manipulate the disks. If you were already running the Administrator level command prompt, then you can continue.
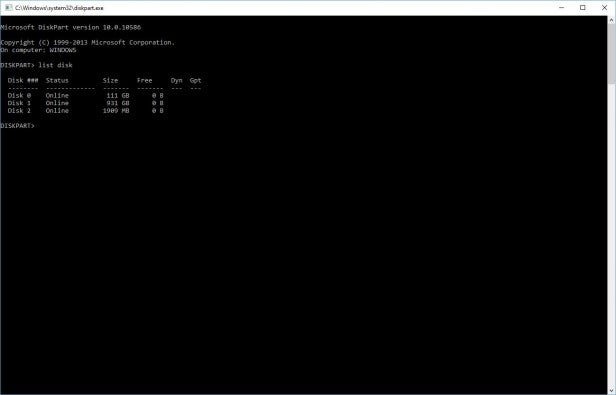
Once in DiskPart, start by viewing the available attached drives by entering:
list disk, and press Enter.
This will bring up a table displaying the disk number, its status, the available capacity of the disk, and how much is left unallocated.
To create a volume/partition, begin with identifying the drive in question based on the space available and if necessary look back at Disk Management to obtain the disk number. In our example, we’re looking at Disk 2.
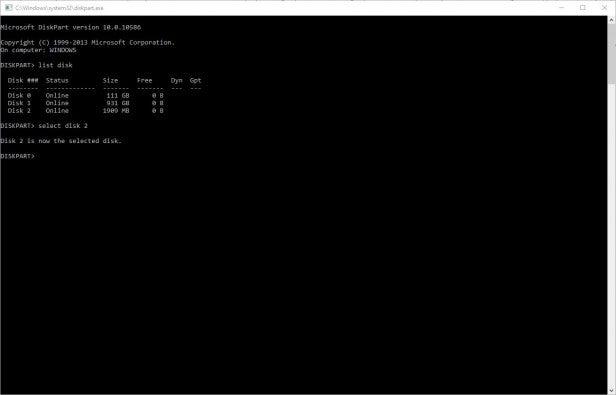
To manage Disk 2 you’ll need to be working on the disk, so type in:
select disk 2, and press Enter.
All being well, you should have the returned message that you’re now on the selected disk.
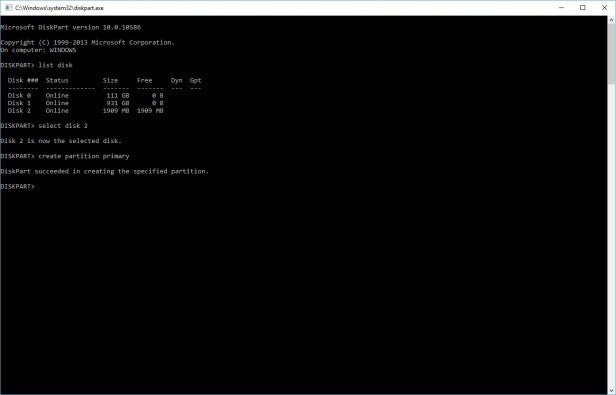
To create a new partition, enter the following:
create partition primary, and press Enter.
This will create a single partition using all of the available space on the drive. You can view the newly created partition within DiskPart by typing in:
list partition, and press Enter.
If you want to specify partitioning option then you can use one of the available syntax as listed in TechNet.
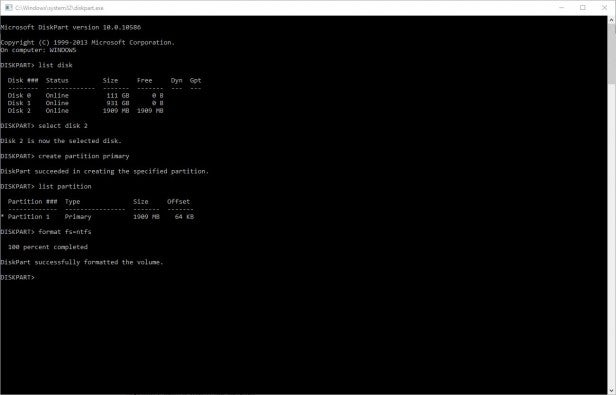
To format the partition and make it a useable volume, enter the following command:
format fs=ntfs, and press Enter.
The fx= syntax dictates which file system type you want to format the partition as, in our case we’ve chosen NTFS, but you can opt for FAT, FAT32 and so on.
When the percentage has finished, the newly created volume will be ready for use, and you can exit DiskPart by typing in:
exit, and press Enter.
DiskPart – delete a partition/volume
The last part to this How To looks at using DiskPart to delete a partition or volume. We’ve already mentioned how dangerous doing this could potentially be, so before doing any of the commands triple check you’re on the right disk and that you’ve got a backup in place just in case.
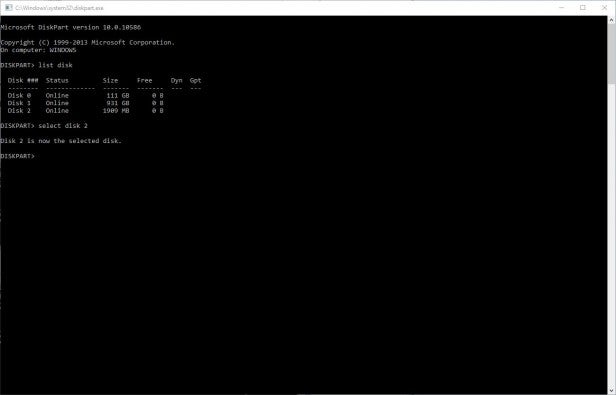
Within DiskPart again, list the available drives with the following command:
list disk, and press Enter.
Then enter the correct disk you’re going to delete the partition or volume from by entering:
select disk #, and press enter.
Where # is the number of the disk you’ll be working on, in our case it’s disk 2 again.
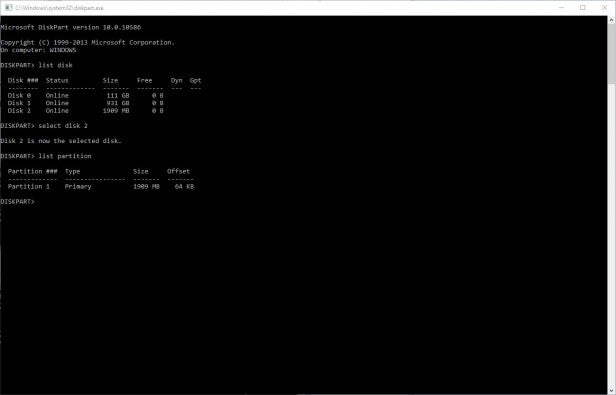
Now you need to see what partitions or volumes are currently on the disk. To do this, type in:
list partition, and press Enter.
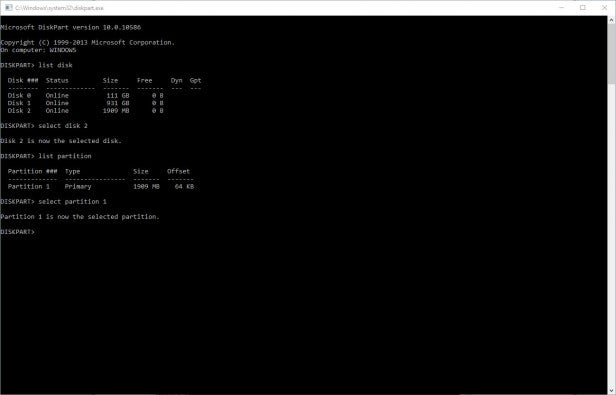
You’ll now need to enter that partition to be able to work on it, so as we accessed the disk in question, enter the partition (which in our case is partition 1), with the following command:
select partition 1, and press Enter.
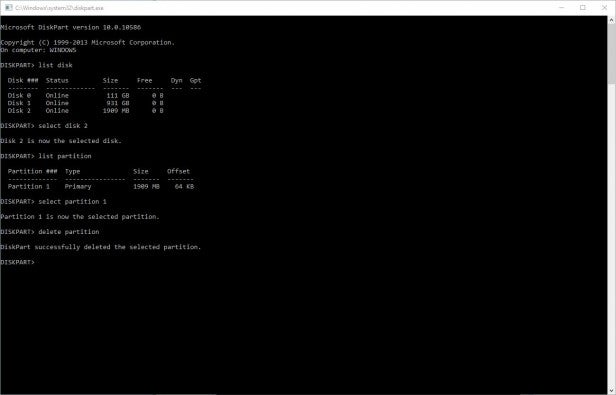
Finally, to delete the partition type in:
delete partition, and press Enter.
You’ll now be left with a disk with a section, or all, unallocated space. And you can leave DiskPart by typing in the Exit command.
More commands
Instead of deleting each partition one at a time, you can wipe the entire disk by typing in ‘clear’, followed by ‘clear all’ when you’re in the disk you want to work on. Obviously these commands are extremely powerful and can have disastrous effects if you’re working on the wrong drive. At least taking it step by step, as our approach did, you’re confirming that you are in fact working from the correct drive.
If the thought of the command line scares you half to death, and you can’t get your head around the Disk Management utility, then spend a bit of time researching some of the complete and easy to use third party disk management tools that are available for Windows – there are plenty of them to choose from.
And as usual, if you know of any great tools to use then please mention them in the comments section.

