
If you’ve ever enabled Google’s Location History feature for your devices, this is how to see what it has recorded, delete that record and disable future tracking.
Location History and Location Reporting as used by both Google apps – notably maps and photos – and third-party advertisers to provide you with local insights, travel time estimates, location-tagged photos, and personalised search results and adverts.
Because all of these features are actually useful, there’s a good chance that you have it enabled, especially as previous versions of Android weren’t always very good about explaining what was being activated and what data was being stored.
Updates to the service in 2018 and 2020 disabled Location History by default and enabled auto-deletion of locations after 18 months for active accounts. Here’s how to find out if Google is keeping track of your location and change those settings if you need to.

Save 81% on a VPN with SurfShark
Surfshark has dropped the price of its VPN to £1.94 a month. Head over to Surfshark now to pay a one time price of £46.44 for 24 months of Surfshark and save 81%.
- Surfshark
- 81% off
- £1.94 a month
The Short Version
- Open your Google Activity page
- To disable Location History, click Turn off
- Click Pause
- Click OK
- See where you’ve been
- Read or skip the explainer
- Check out your timeline
- Click the gear icon
- Delete Location History
- Confirm that you understand
- Click Delete Location History
- Click OK
- Return to your activity page
Step
1Open your Google Activity page
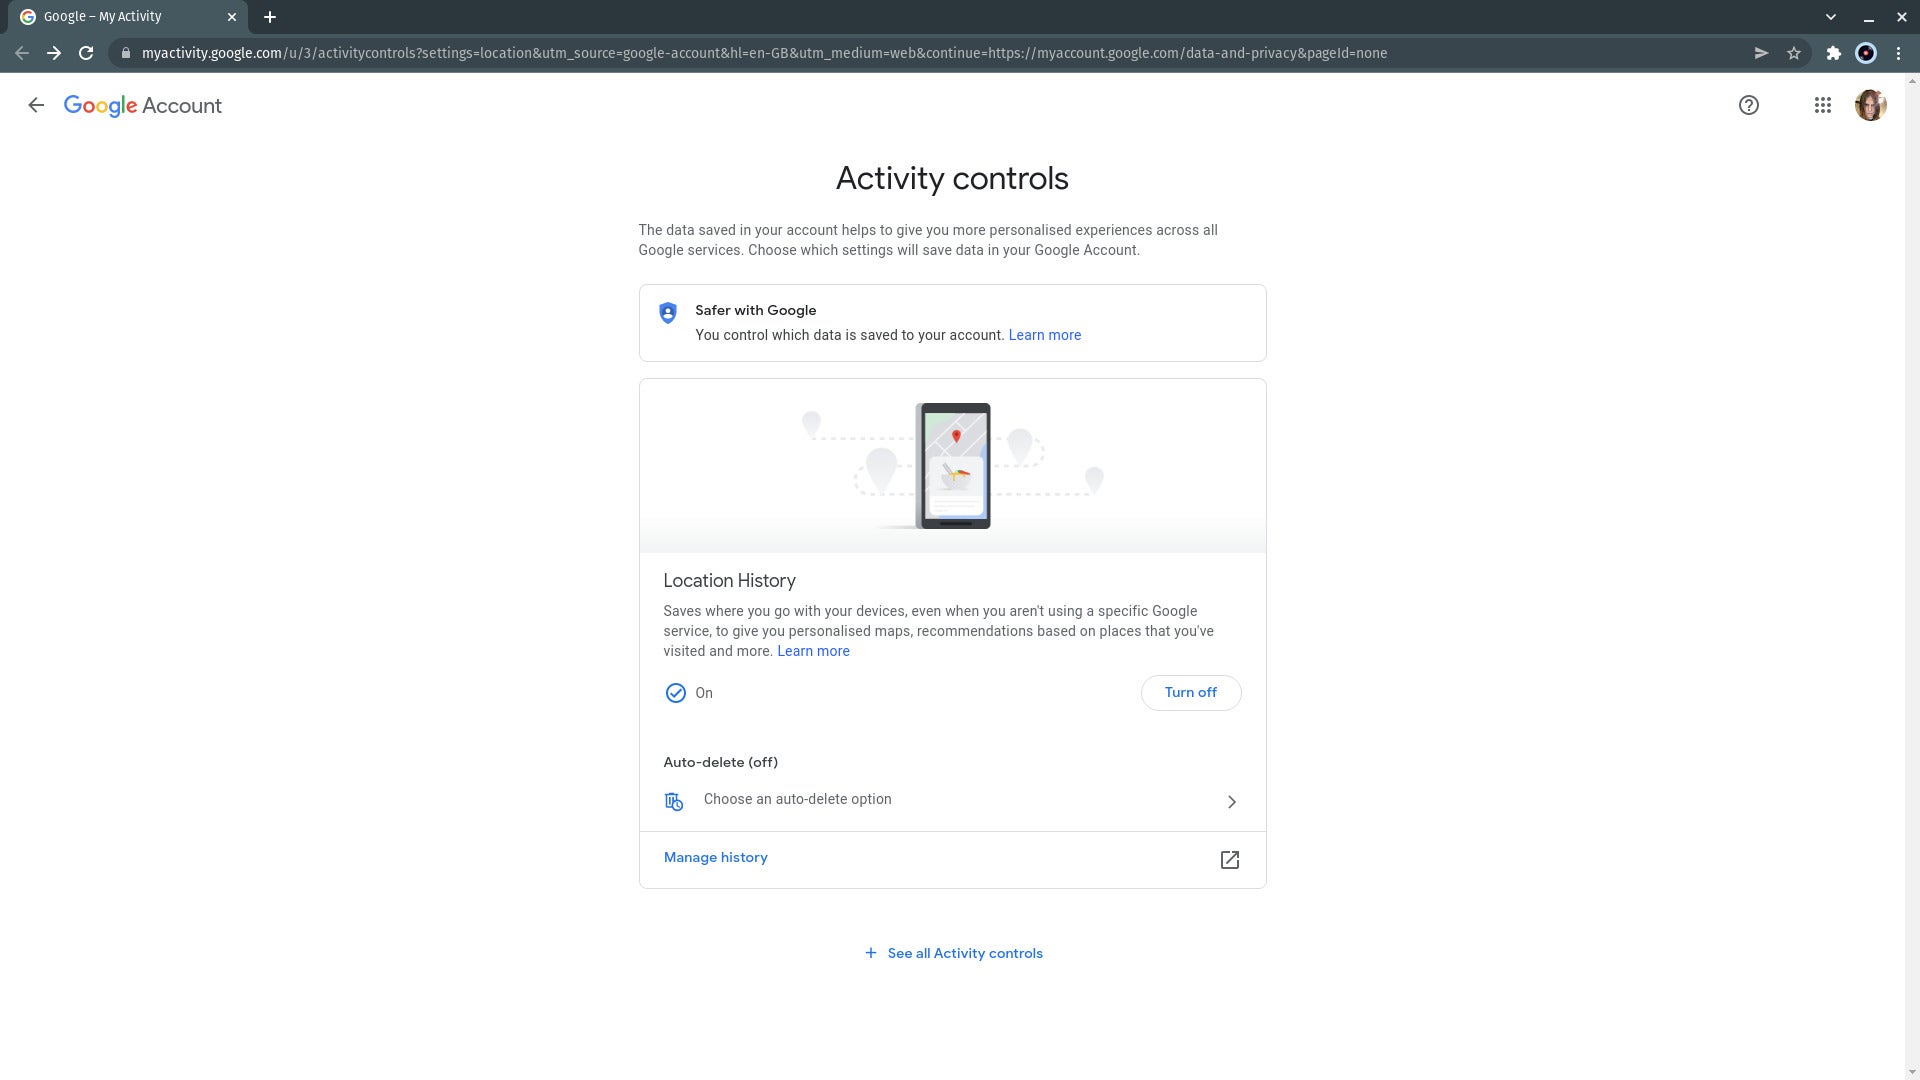
Go to https://myactivity.google.com/ in your web browser. You may have to log in using the account whose location history you wish to check. Most users will find that their Location History is marked as either “off” or “paused”, but my account here has it activated.
Step
2To disable Location History, click Turn off
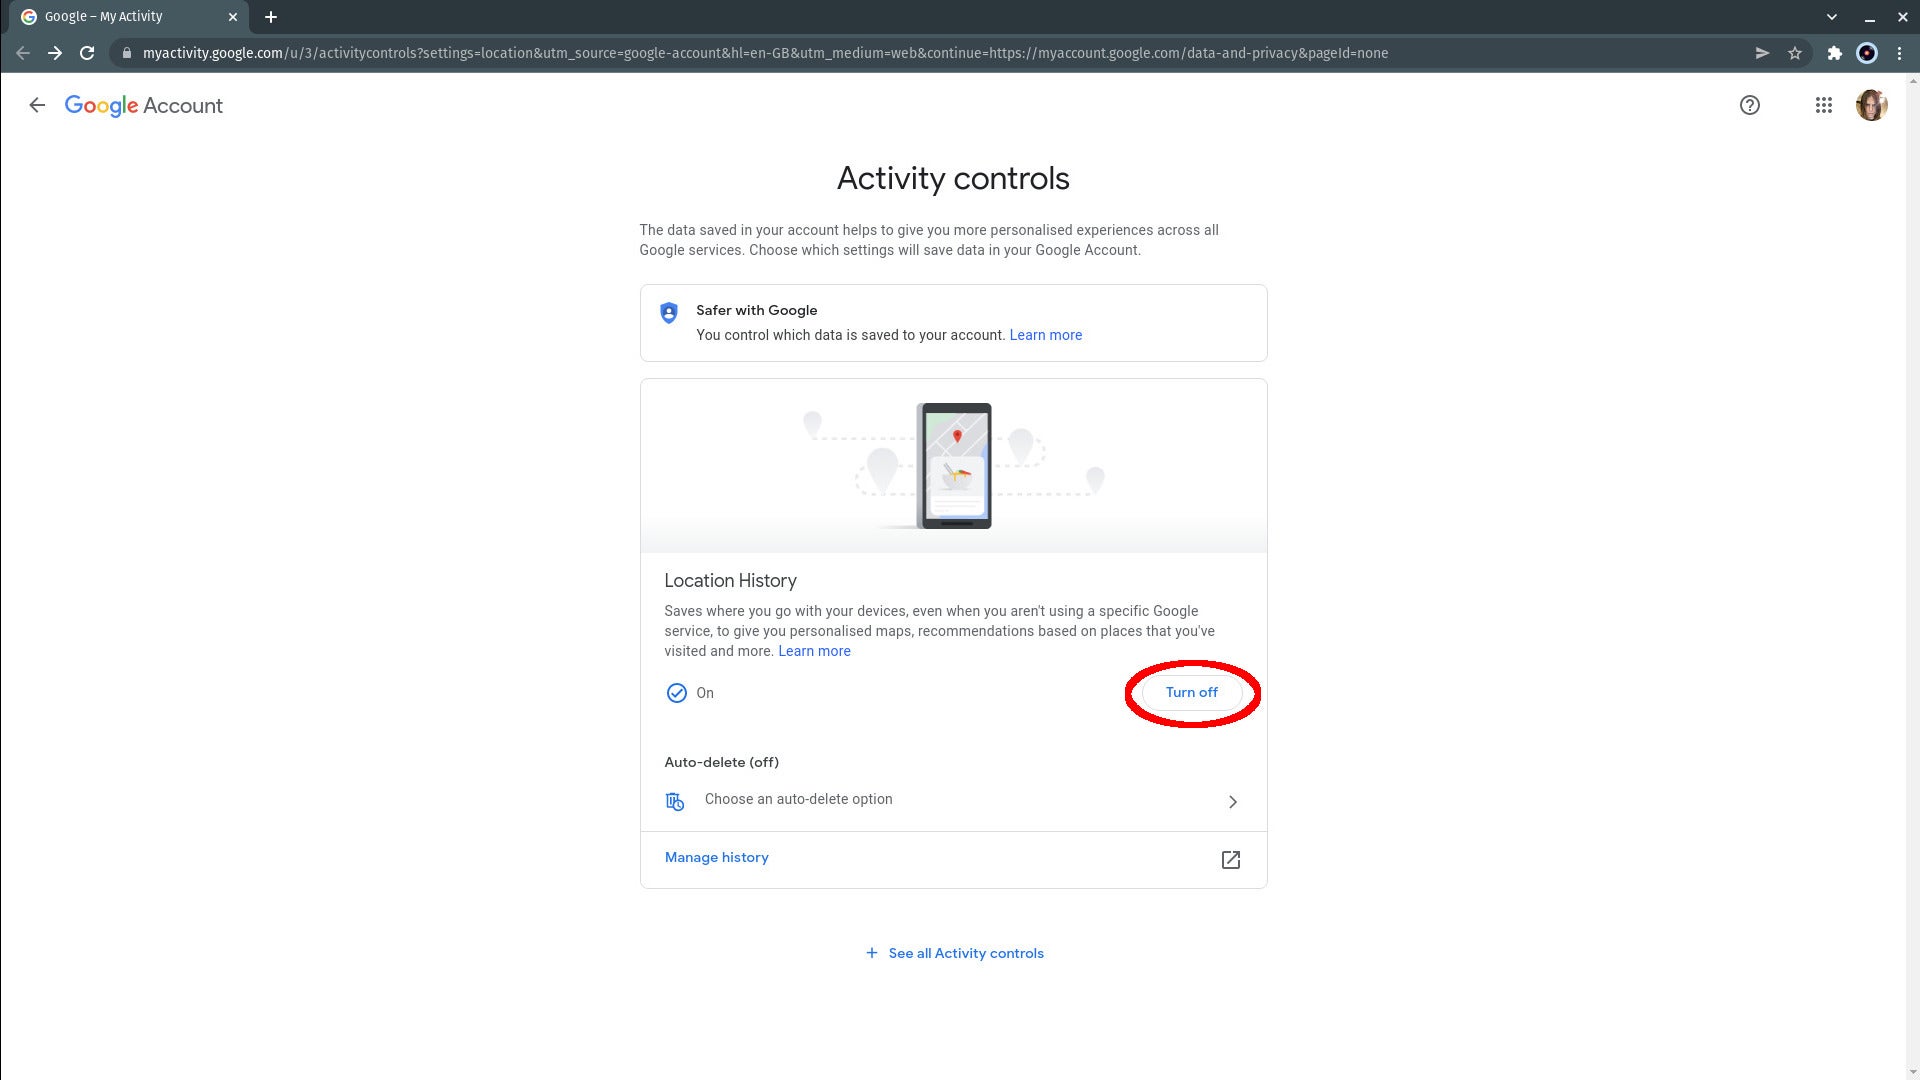
If you immediately want to stop new location data from being gathered by any of your devices, click the button marked “Turn off”.
Step
3Click Pause
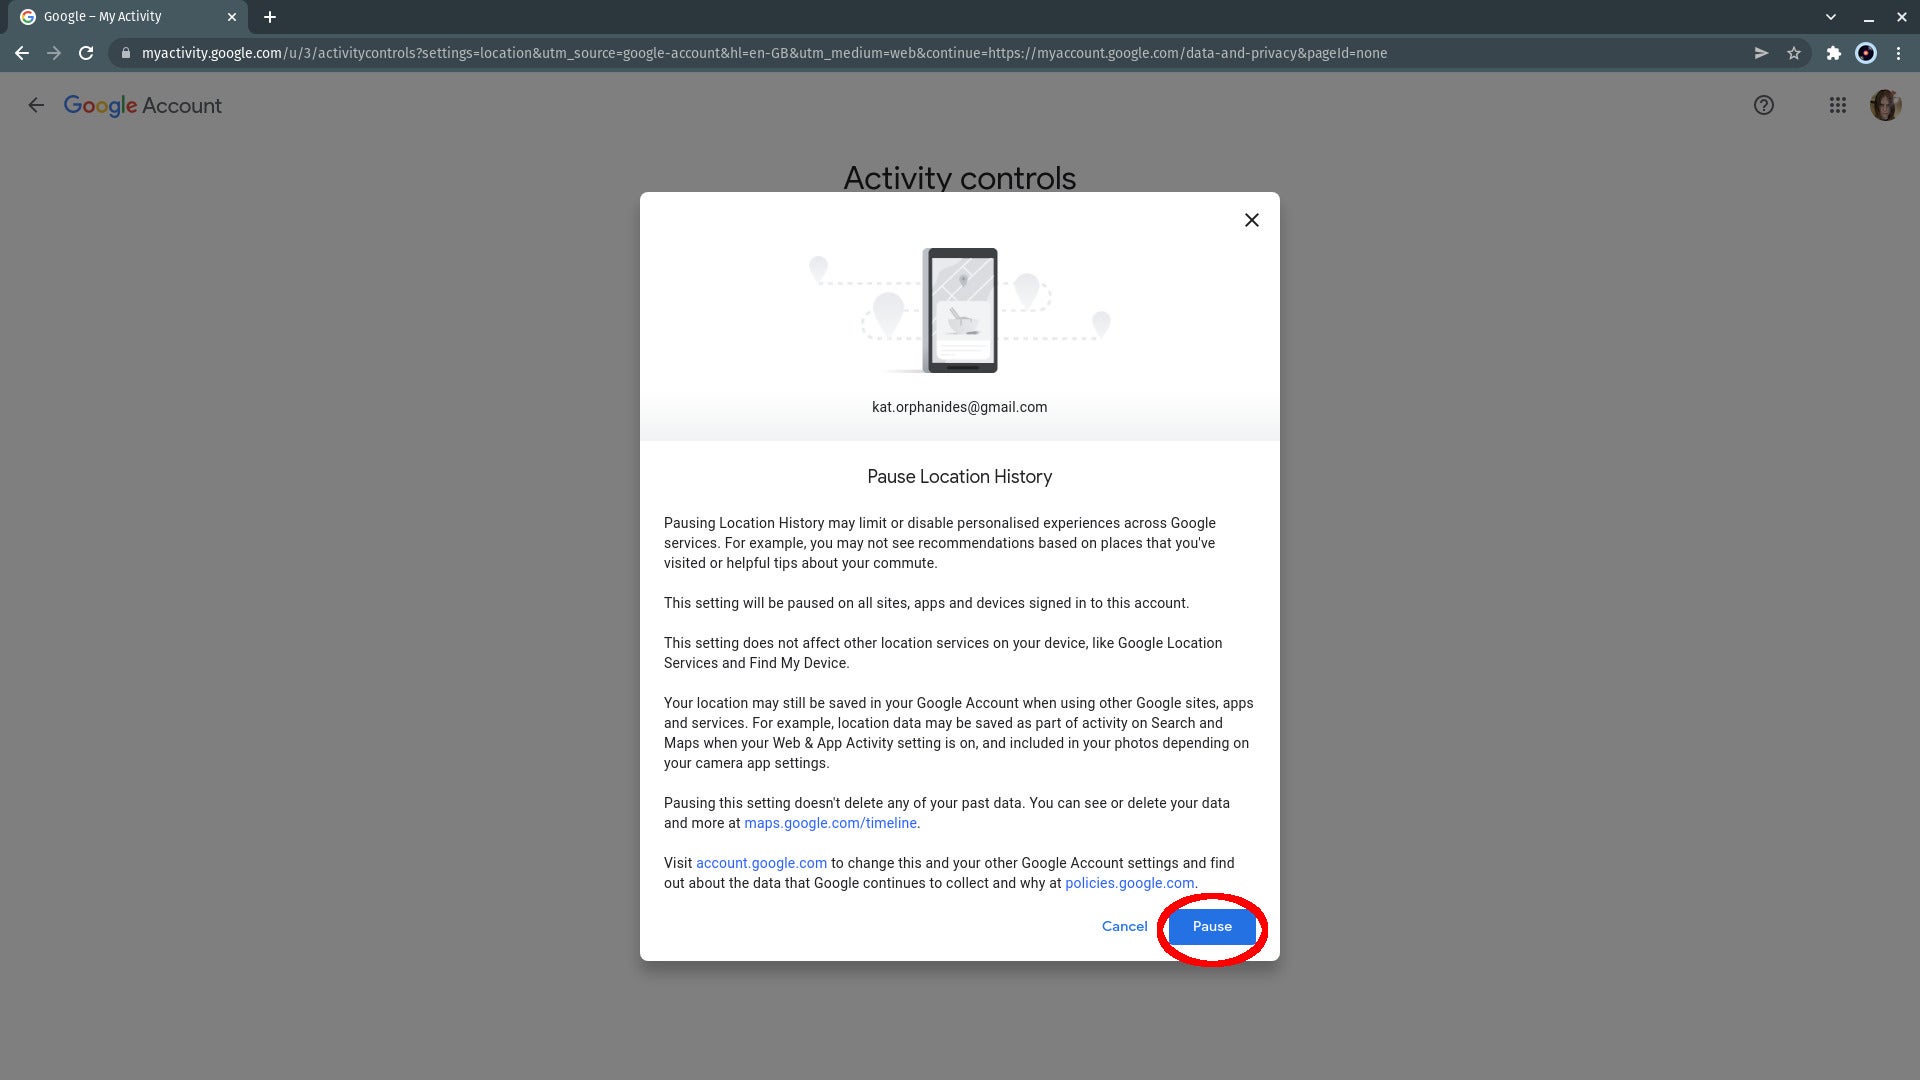
A pop-up will come up warning you pausing location history will disable personalised experiences but will not impact your ability to use features such as Google Location Services and Find My Device. Read it and click Pause. You can always turn the service back on later.
Step
4Click OK

A confirmation pop-up will appear. You can delete your history from here: You’ll be taken directly to the Mange History map if you click “Delete old activity” but we’re going to return to the main activity screen first. Click the OK button.
Step
5See where you’ve been
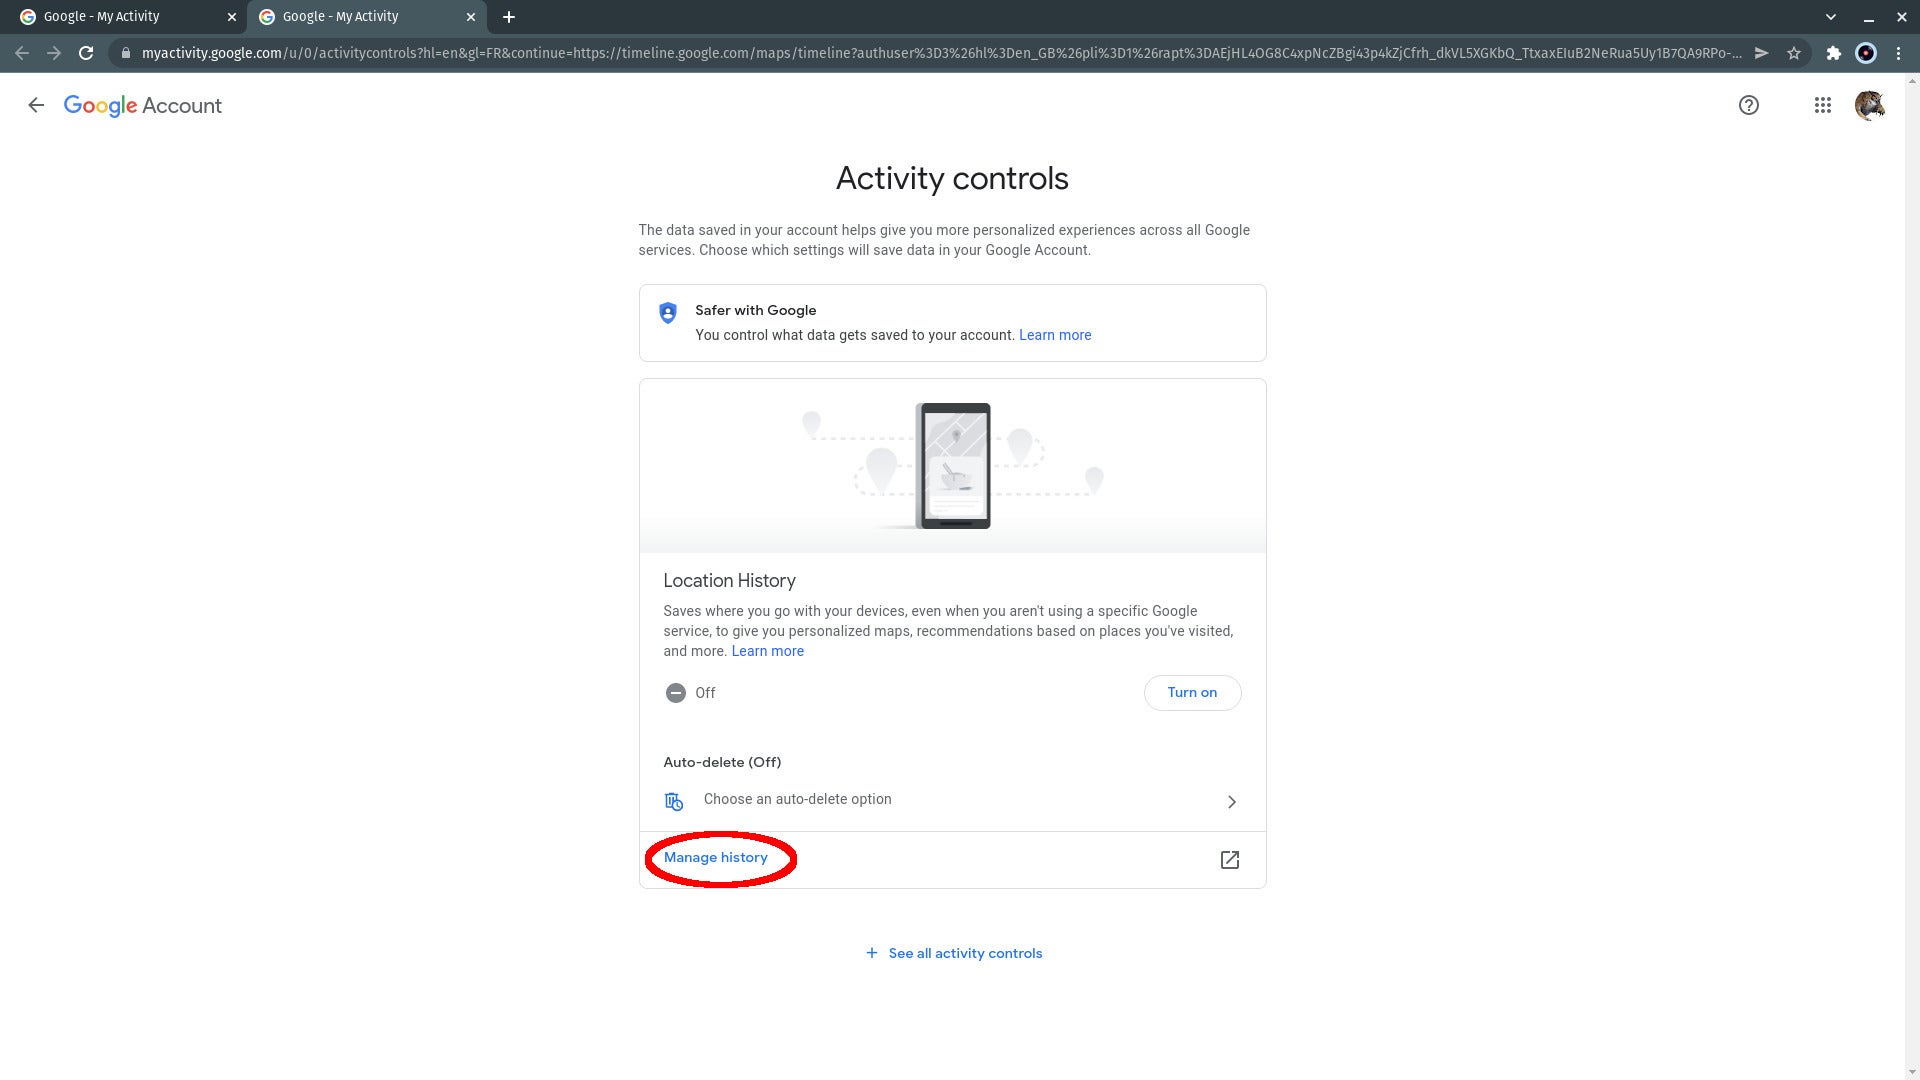
Before we delete anything, let’s see what Google knows about our travels. Click Manage history.
Step
6Read or skip the explainer
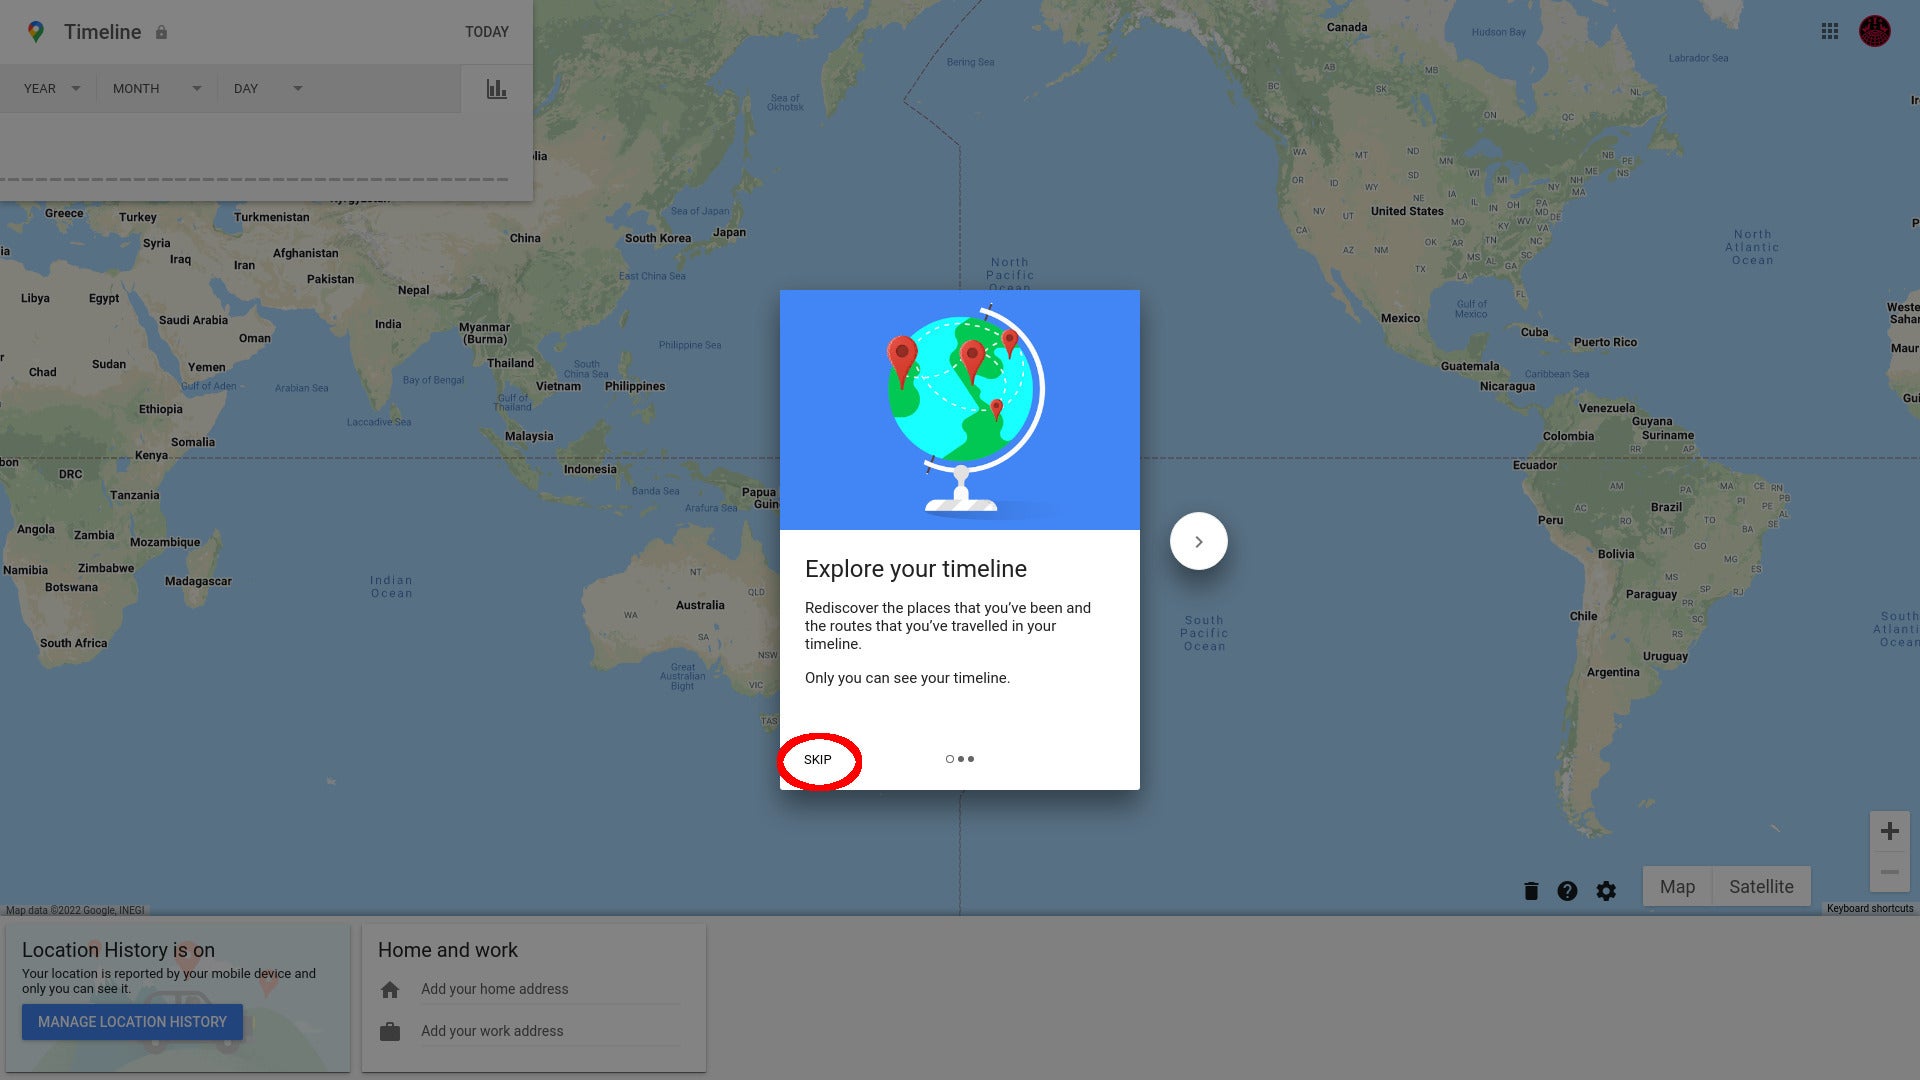
You’ll be taken to https://timeline.google.com/. If it’s the first time you’ve been here, an explainer pop-up titled Explore your timeline will appear. You can read through three short explanations of the features available, or you can just click Skip straight away.
Step
7Check out your timeline
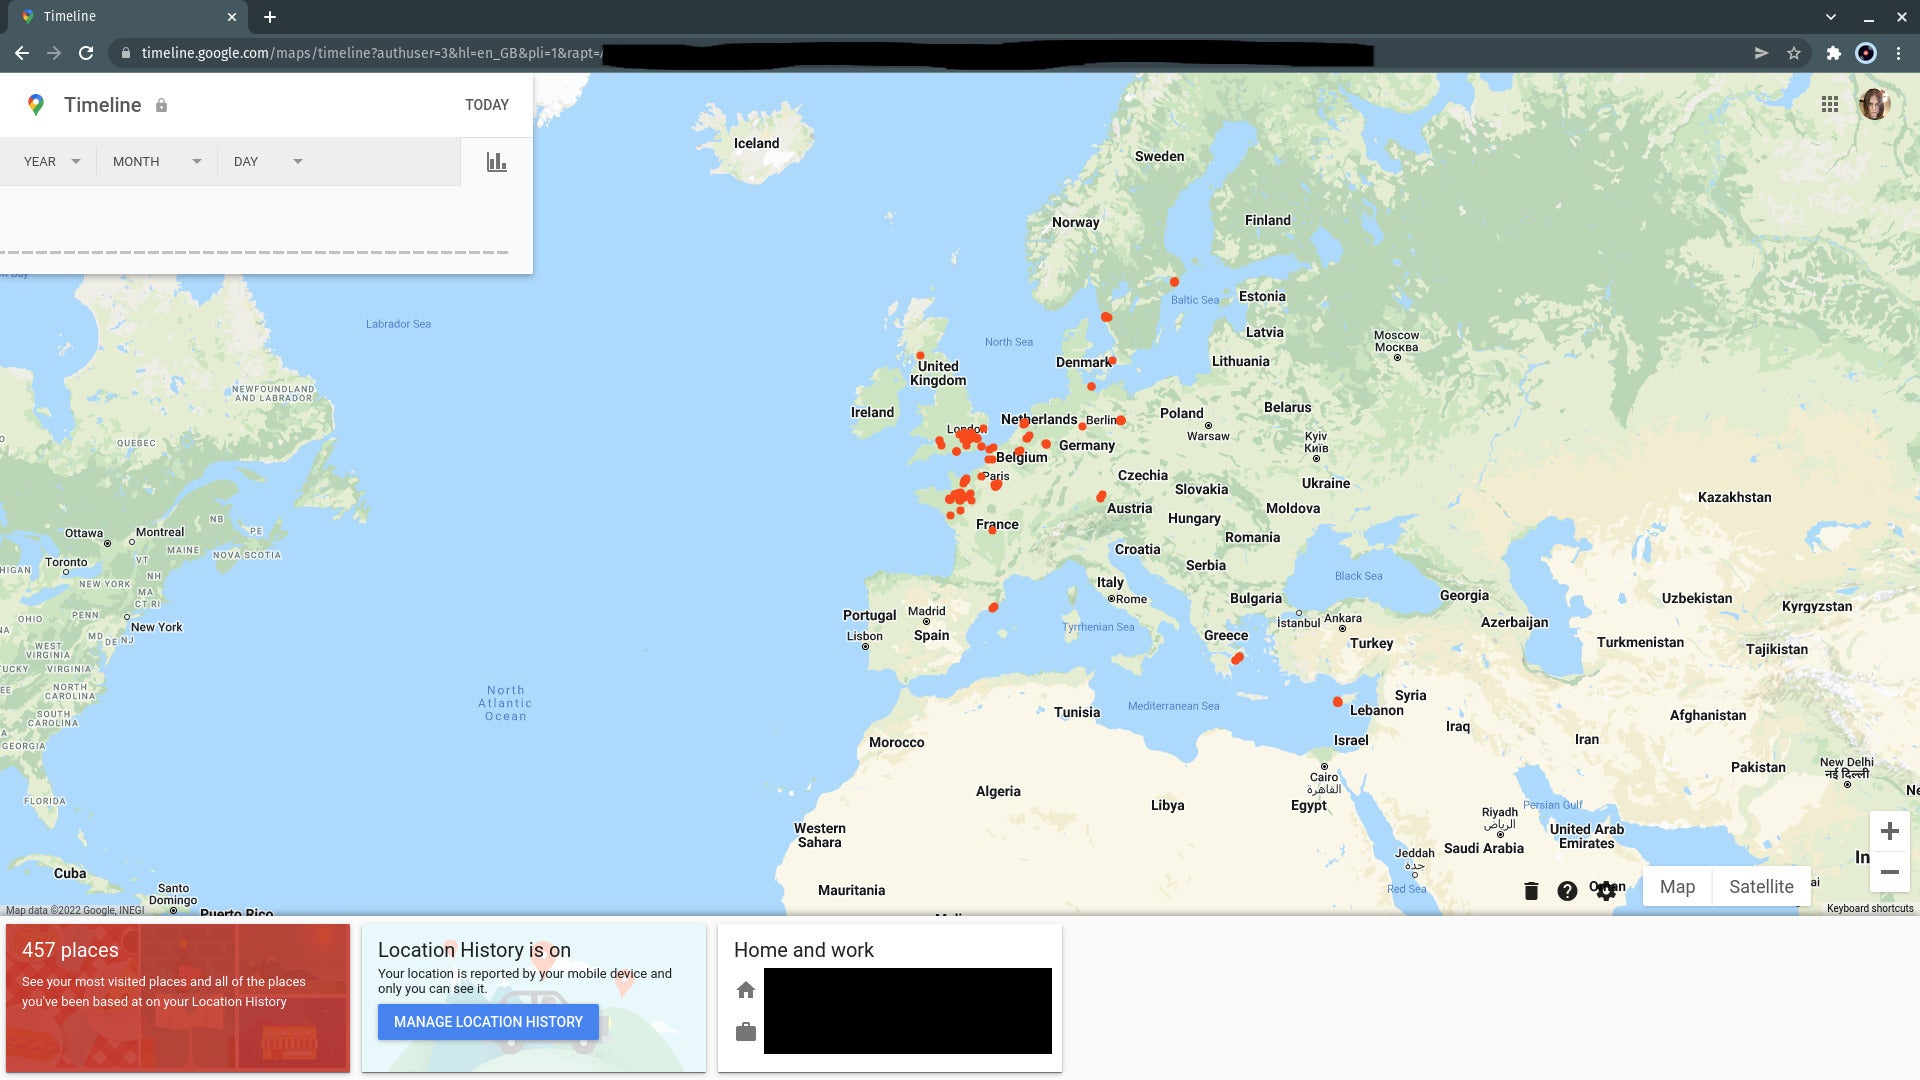
Everywhere you’ve been is shown on a map. You can scroll around and zoom in to check out individual locations, use the timeline box to see where you were on a given date, click the red box at the left to see a list of the places you’ve been and with what frequency, and check to see if your home and work addresses are correct.
Step
8Click the gear icon
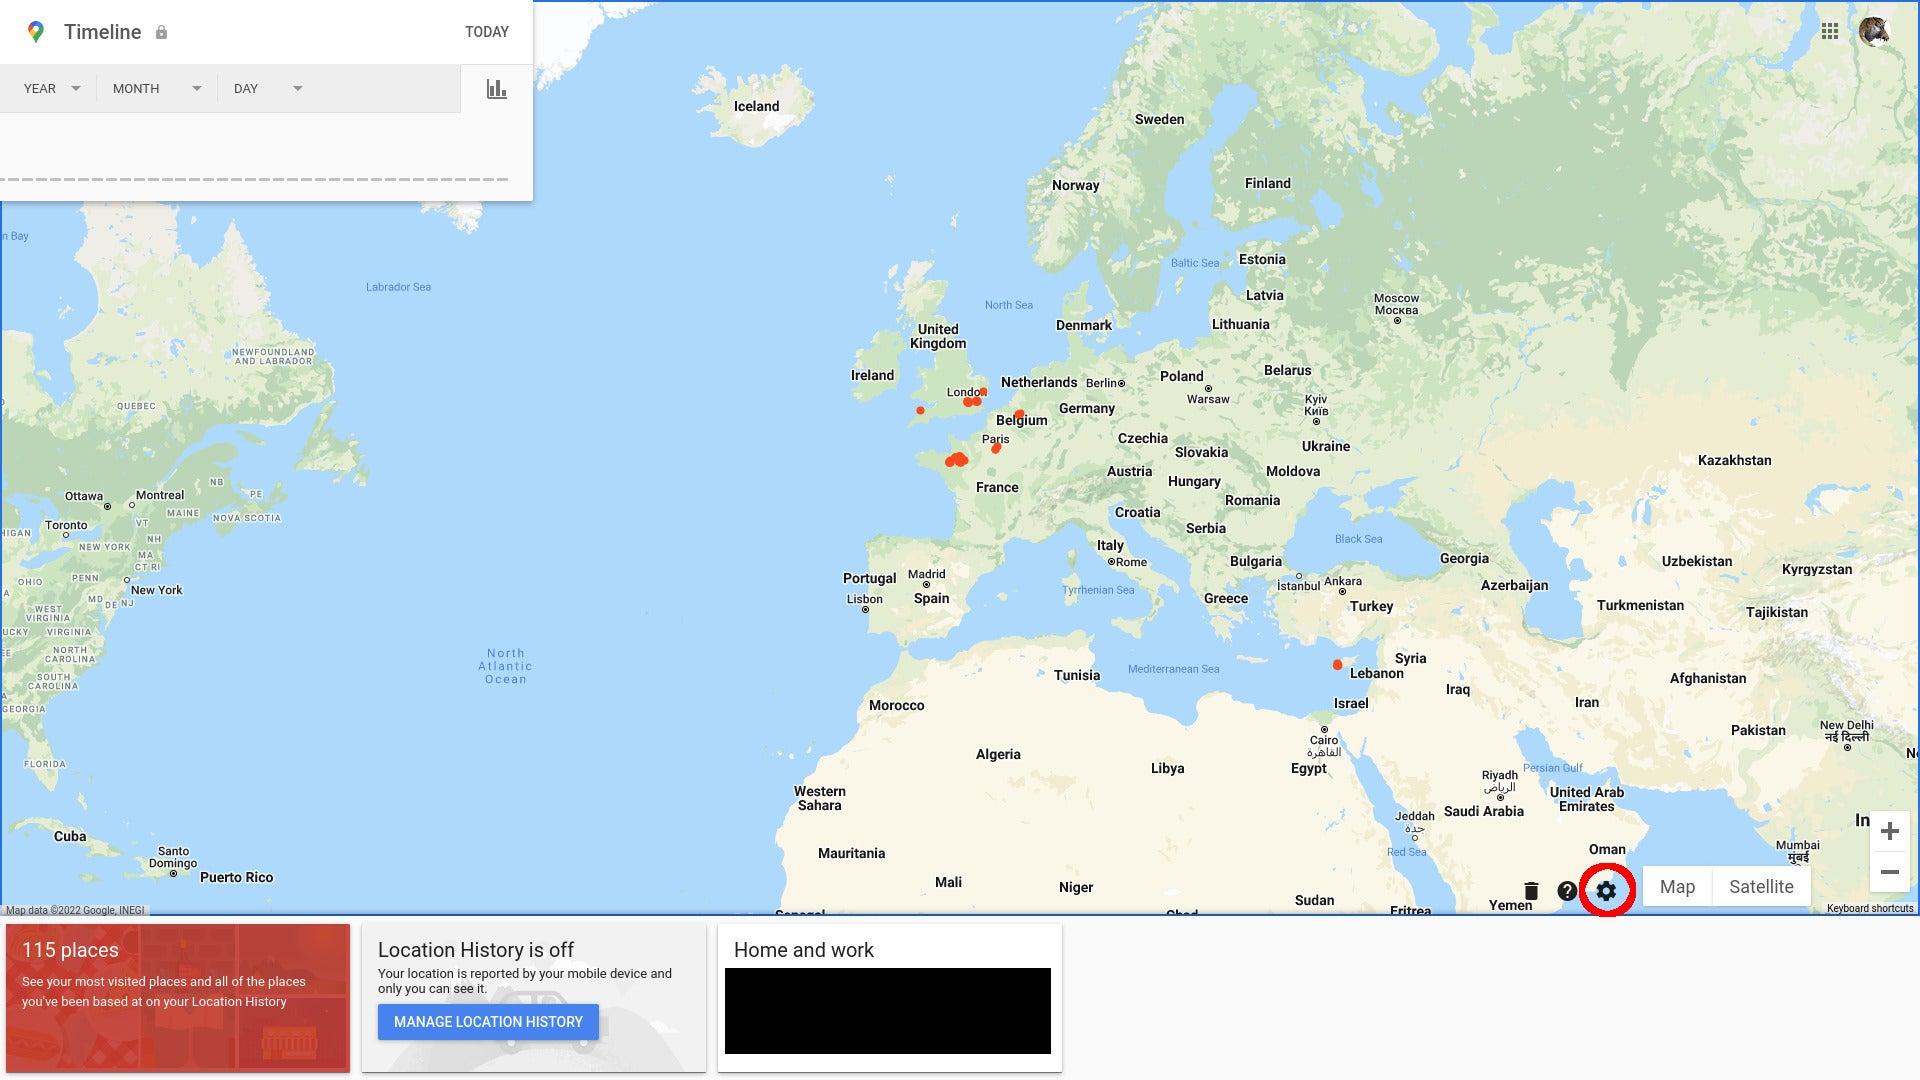
Click on the surprisingly inconspicuous gear icon at the bottom of the map to access deletion, export and download options.
Step
9Delete Location History
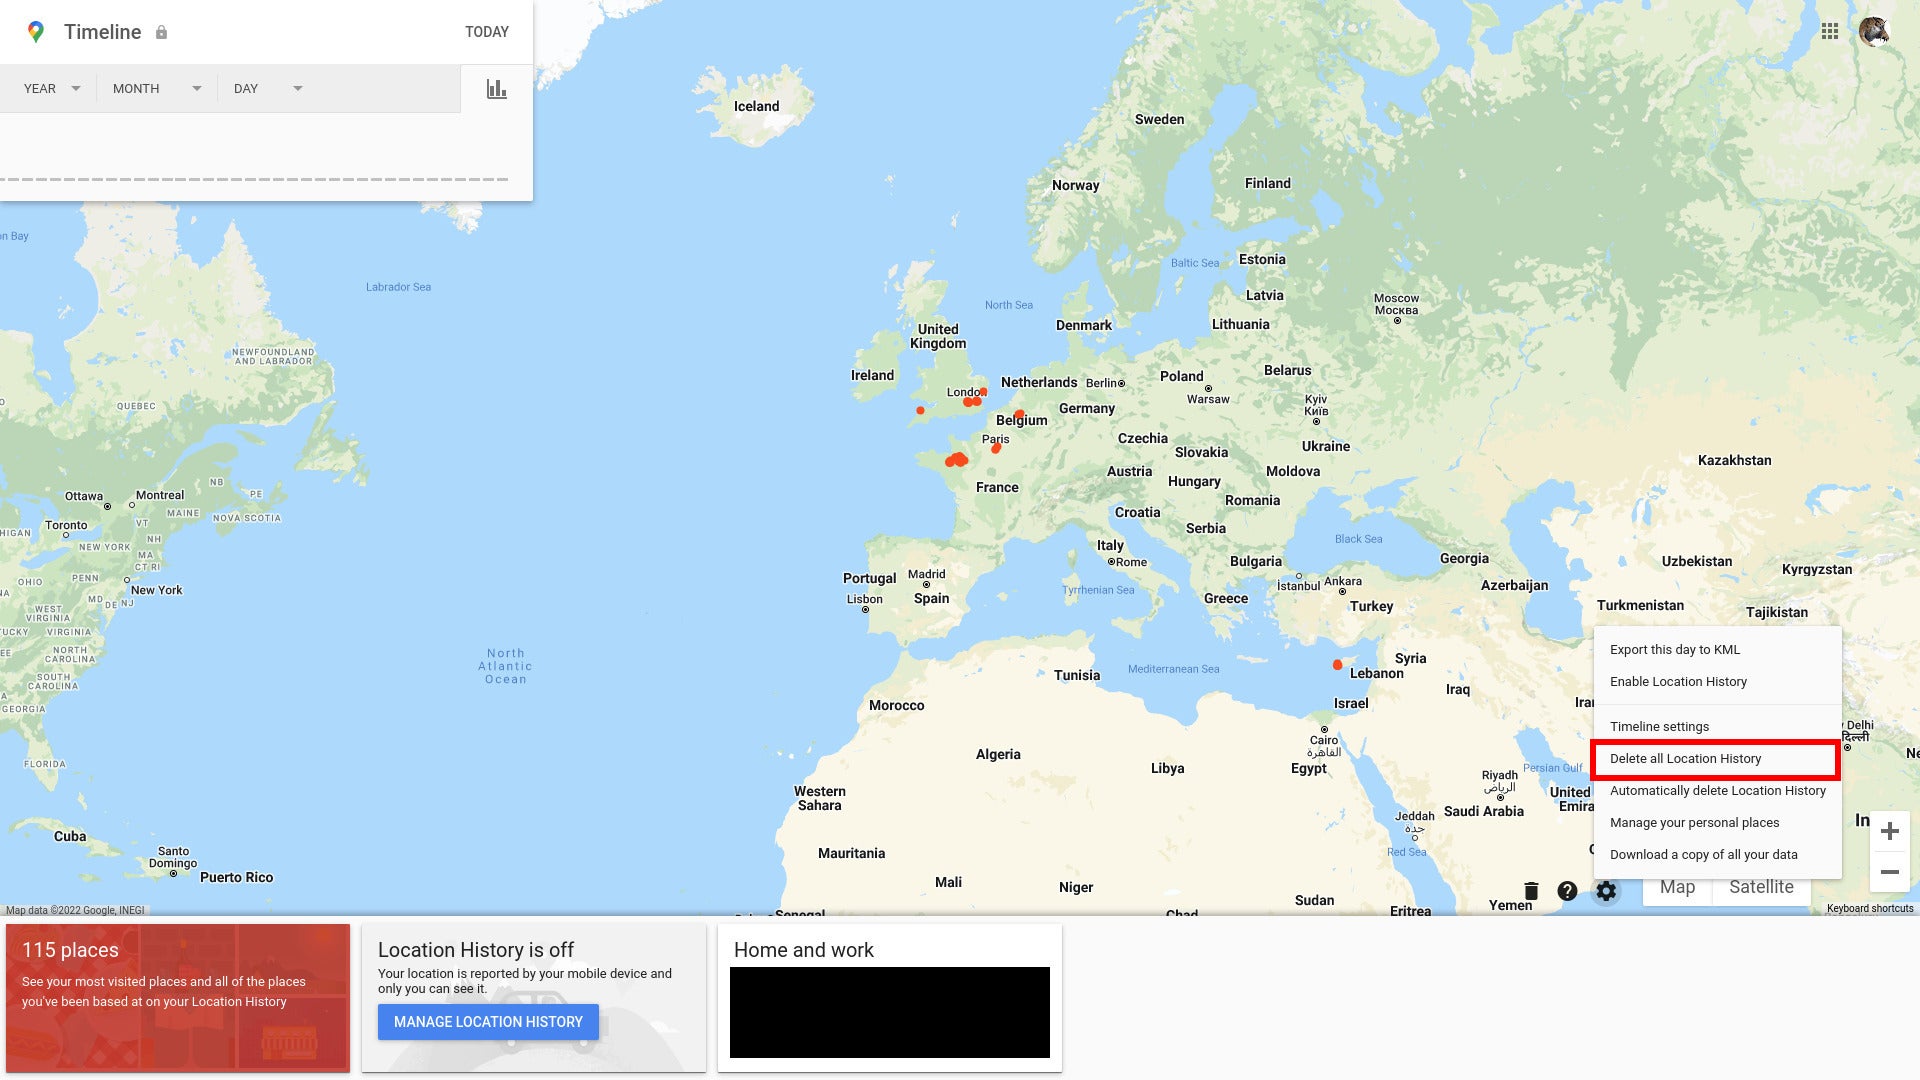
Click Delete all Location History in the menu that opens.
Step
10Confirm that you understand
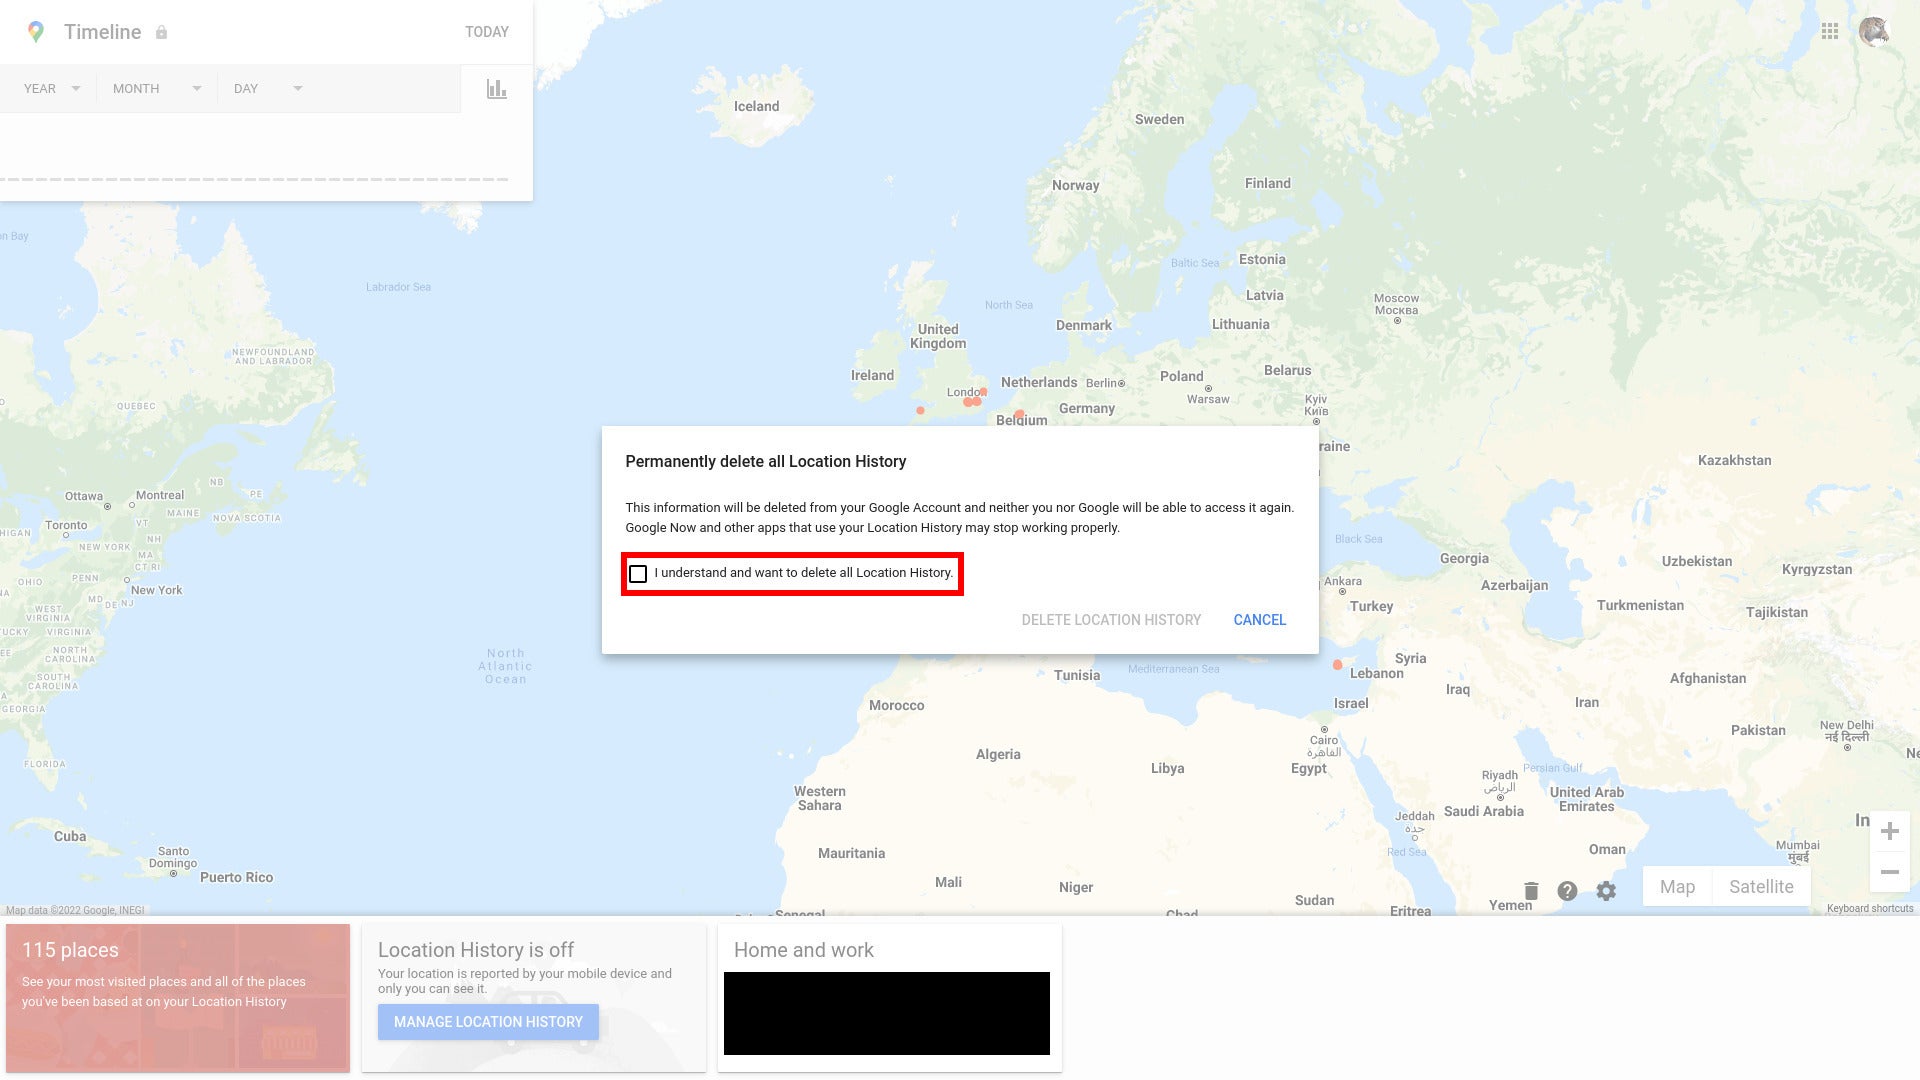
Read the pop-up warning you that neither you nor Google will ever have access to your history again and tick the box marked “I understand and want to delete all location history”.
Step
11Click Delete Location History
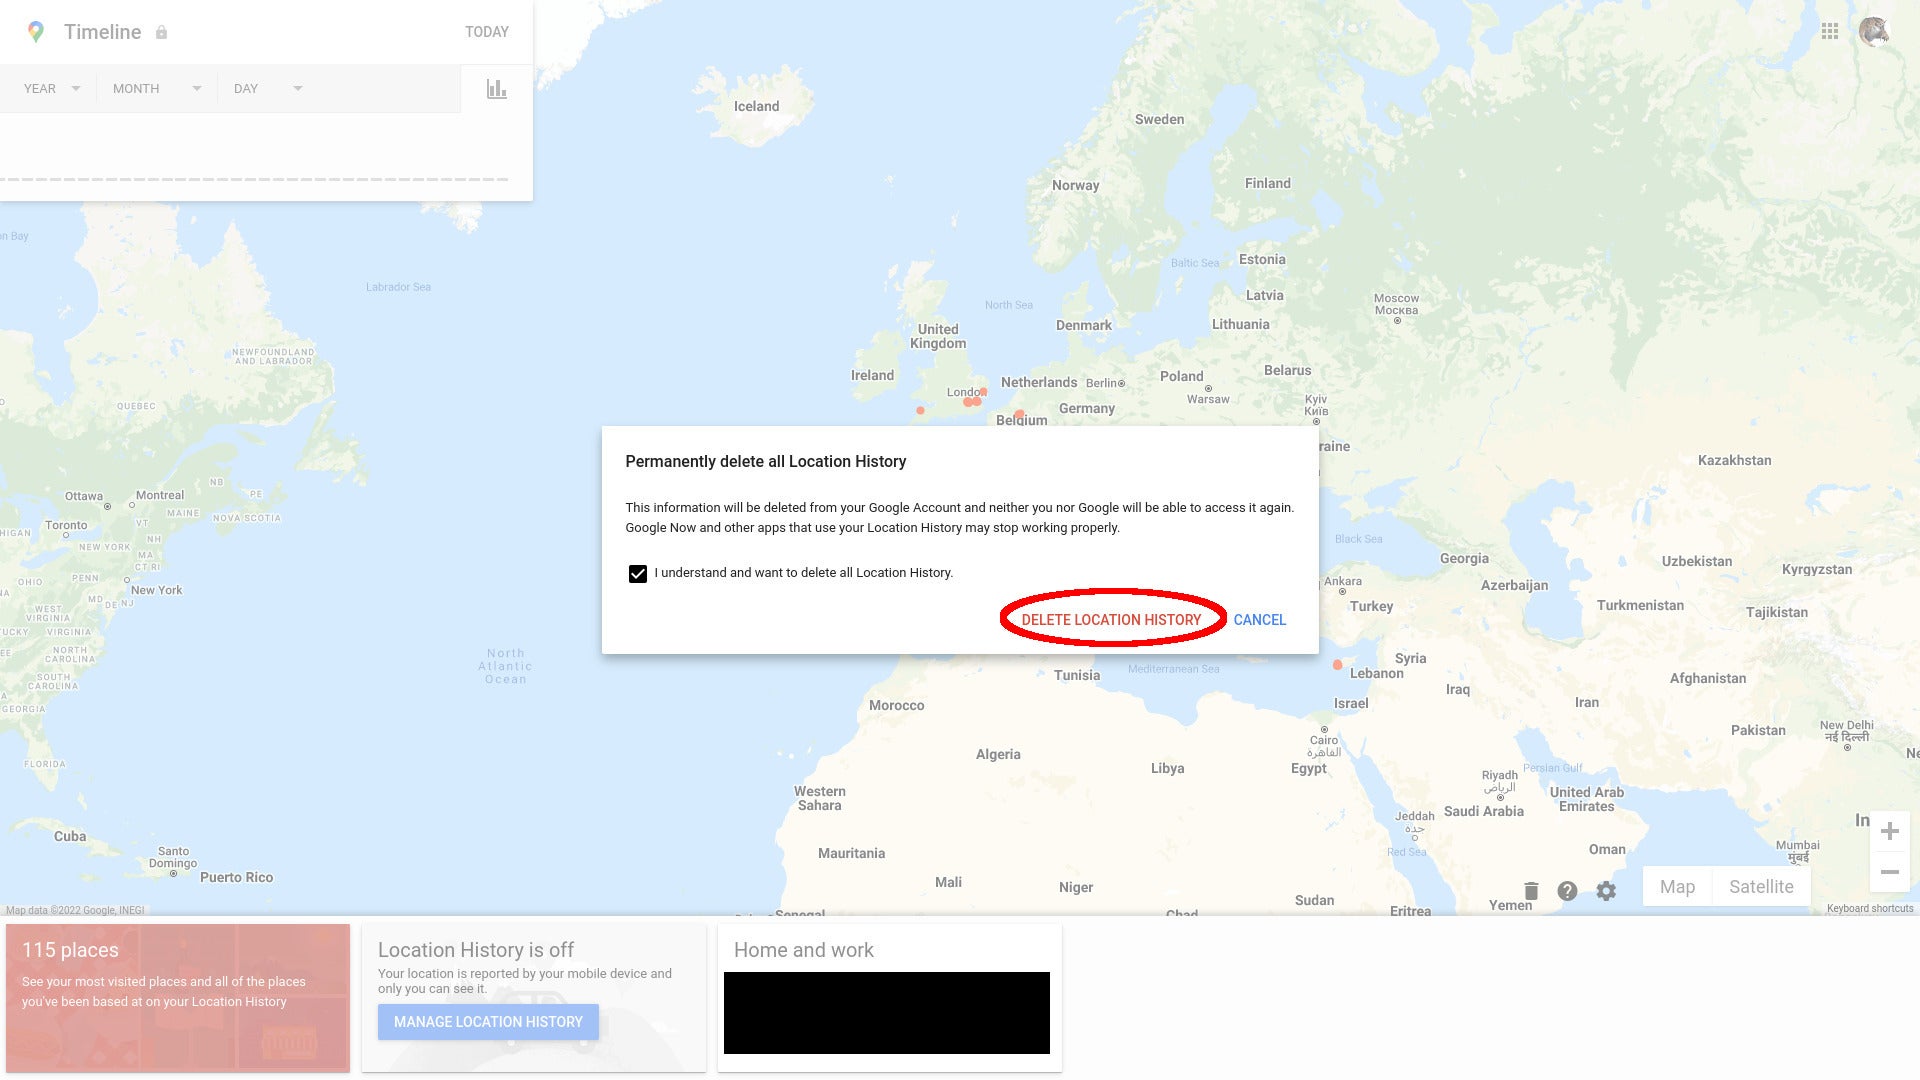
Click the red Delete Location History button.
Step
12Click OK
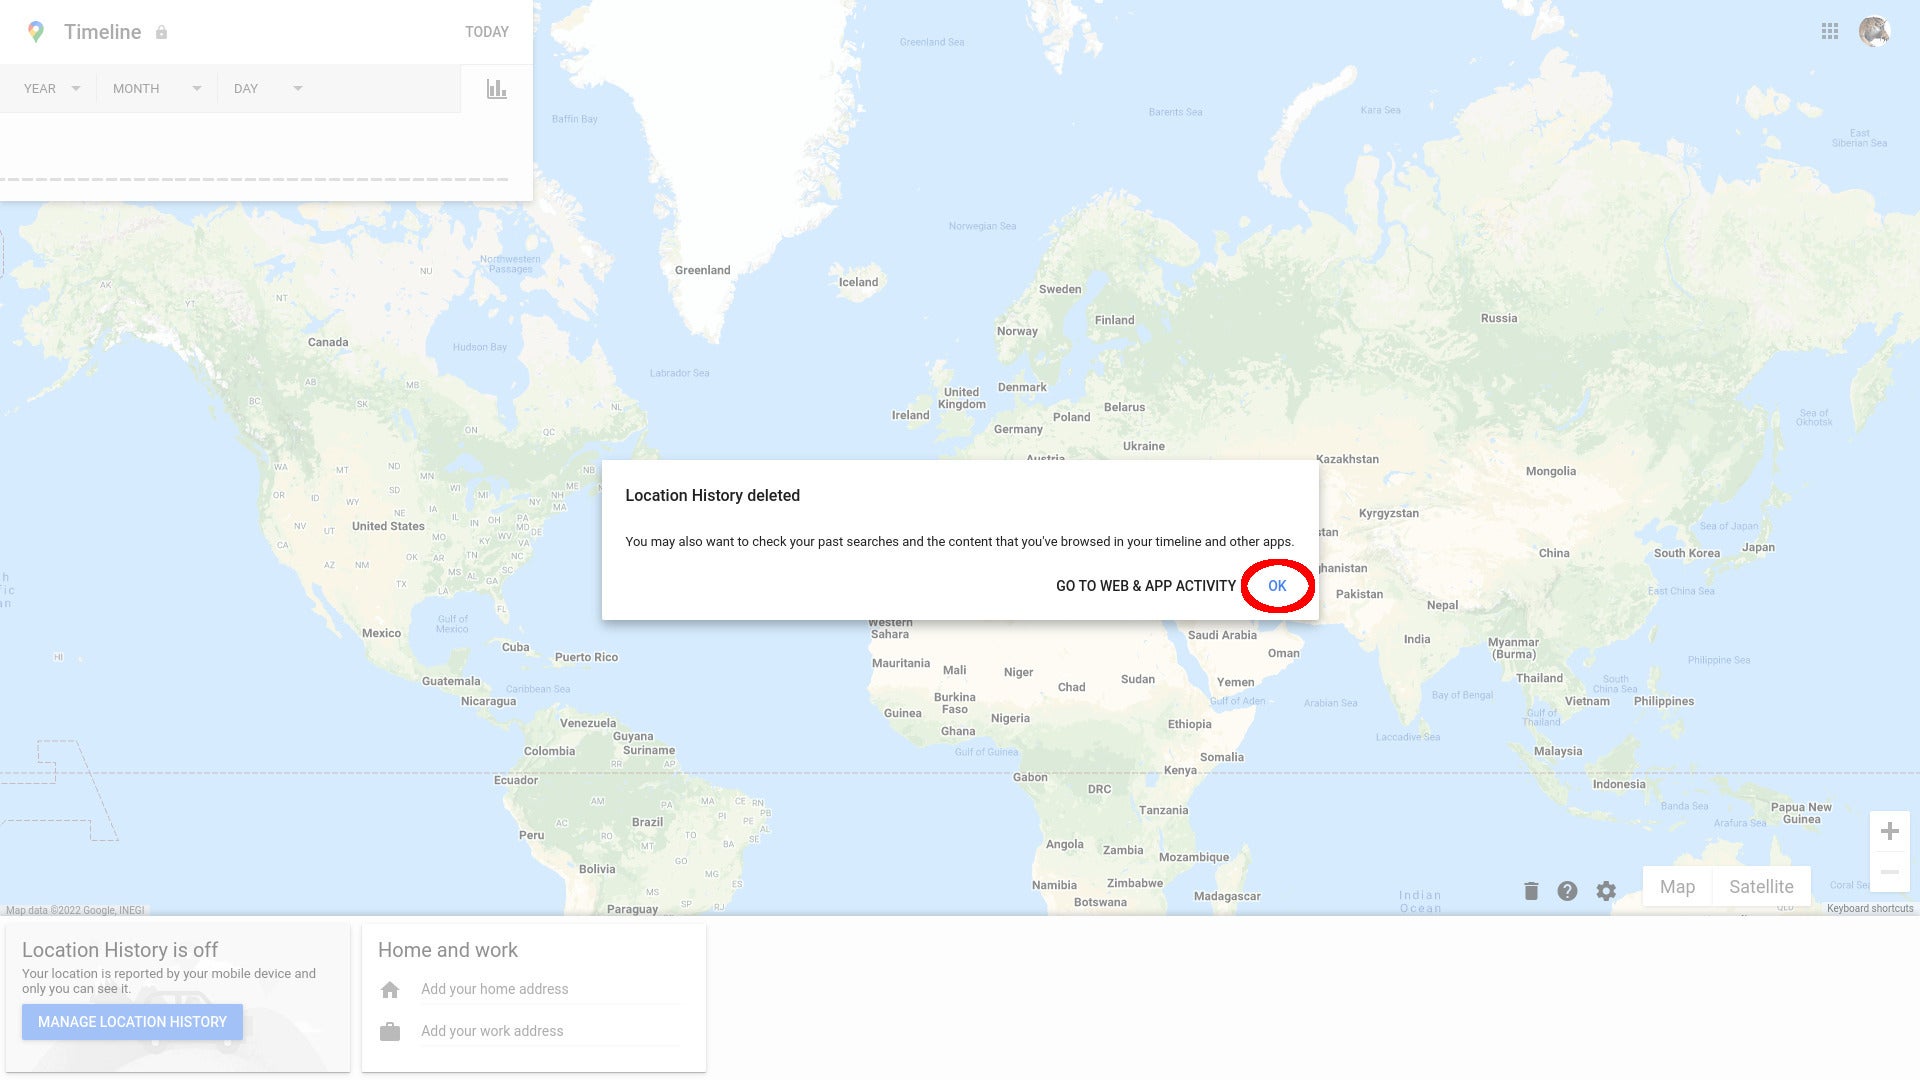
Click OK on the next pop-up to return to the map – you can go on to deleting your historic web and app activity from here, but that’s beyond the scope of this particular tutorial.
Step
13Return to your activity page
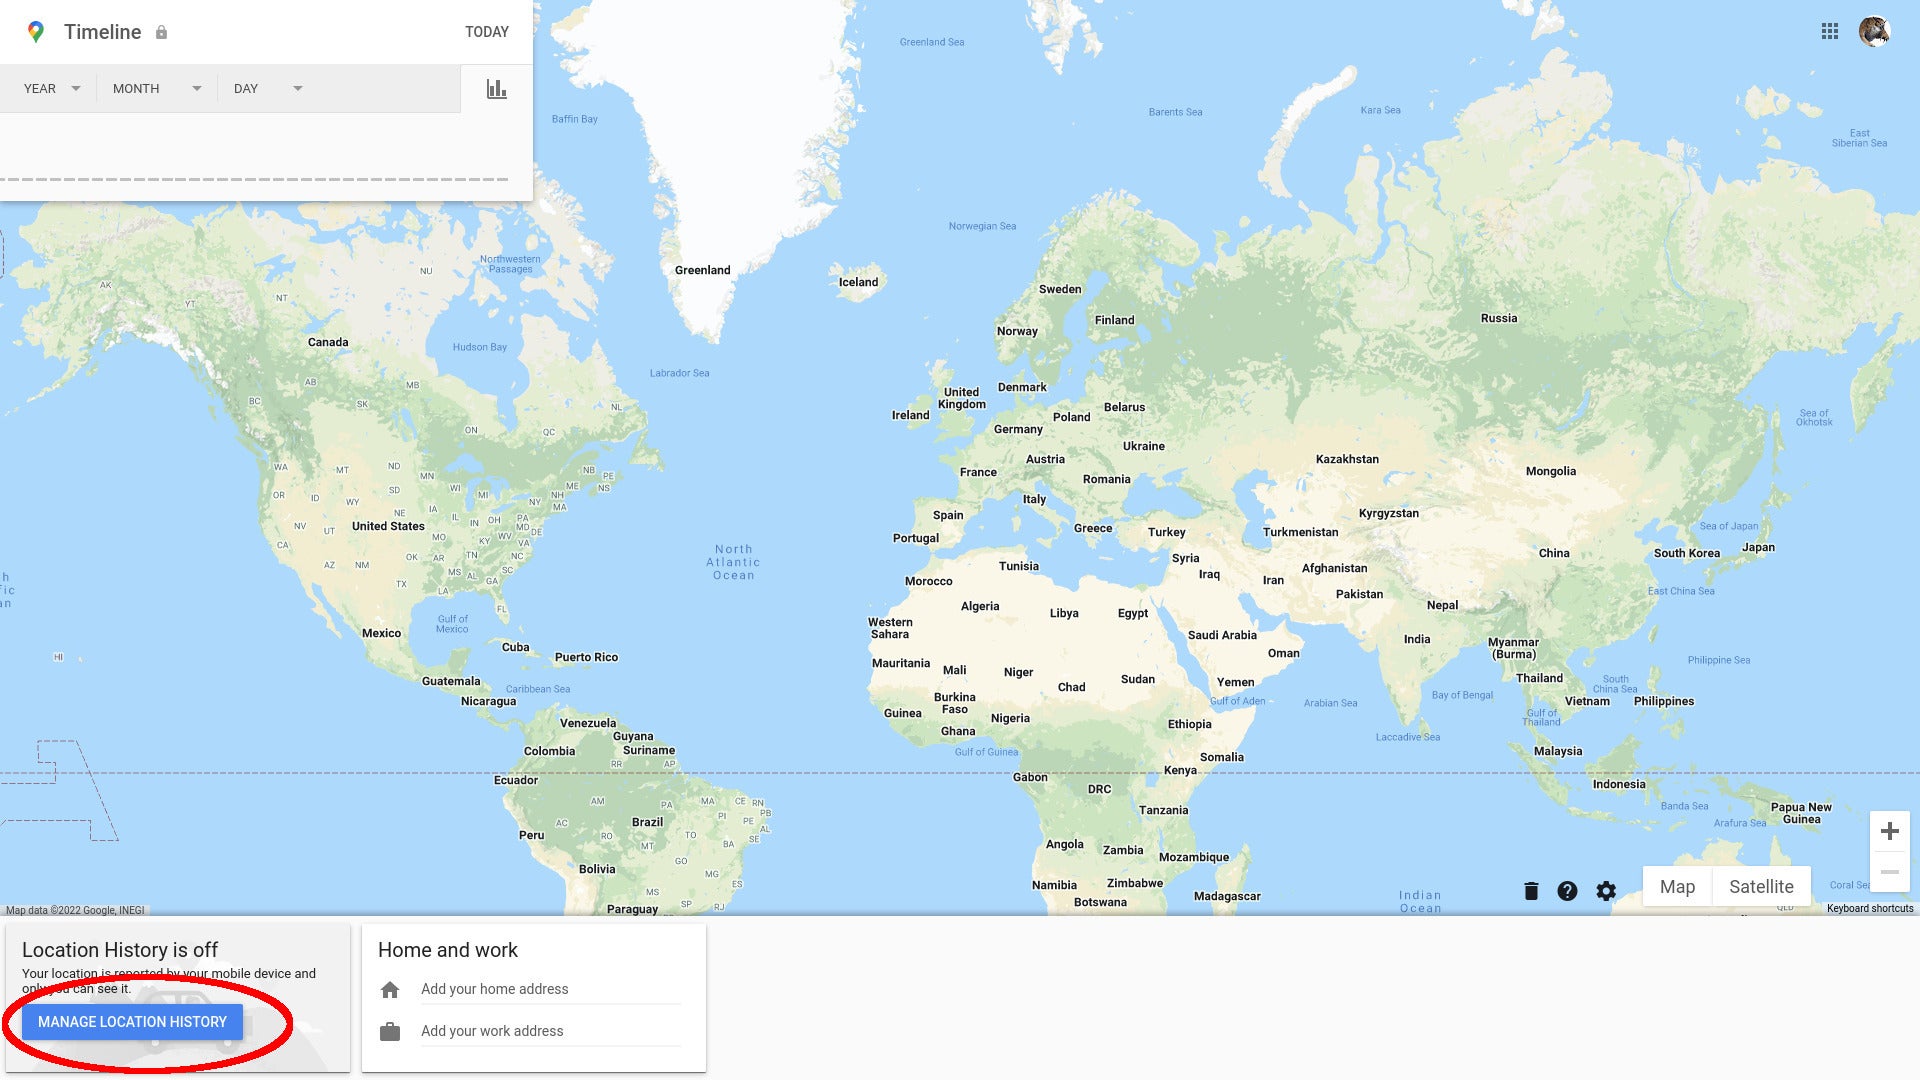
You’ll notice that all your map markers, as well as your address details, have now been removed from the map. Click the Manage Location History button to return to your activity page.
You’ve now successfully disabled Google’s Location History tracking and – if you chose to – deleted all past records of it. You can now close your browser window or continue exploring Google’s settings.
Save 81% on a VPN with SurfShark
Surfshark has dropped the price of its VPN to £1.94 a month. Head over to Surfshark now to pay a one time price of £46.44 for 24 months of Surfshark and save 81%.
- Surfshark
- 81% off
- £1.94 a month
FAQs
Select Download a copy of all your data from the gear icon menu on the location timeline map or go directly to https://takeout.google.com/ – remember to deselect everything else, or you’ll be looking at a very large download!
If you want Google to keep a record of where you’ve been, go to https://myactivity.google.com/ and click the “Turn on” button under Location History.
Newer Google accounts are configured to auto-delete location history older than 18 months by default – this may not be the case if you’ve previously manually configured it or have an older account to which different settings were applied. At https://myactivity.google.com/, you’ll see a section marked “Auto-delete”. Click the > arrow next to “Choose an auto-delete option”. On the following pop-up, click the radio button labelled “Auto-delete activity older than”. The default is 18 months. Click the pull-down to see and select other options. Click next and then confirm that you want any data older than your specified timeframe to be deleted.
You might like…


Editorial independence
Editorial independence means being able to give an unbiased verdict about a product or company, with the avoidance of conflicts of interest. To ensure this is possible, every member of the editorial staff follows a clear code of conduct.
Professional conduct
We also expect our journalists to follow clear ethical standards in their work. Our staff members must strive for honesty and accuracy in everything they do. We follow the IPSO Editors’ code of practice to underpin these standards.