

Knowing how to delete a user on a Mac can be a very handy skill, especially if you want to reset the machine or get rid of an old account.
Like a lot of other tasks on macOS, the process for deleting (and of course adding) a user is pretty easy, and if you ever need to do it, you can refer to our handy guide. Here’s how you do it.
Hardware Used
- 2020 13-inch MacBook Pro
- macOS Big Sur
The Short Version
- Open System Preferences
- Click Users & Groups
- Click the Lock to make changes
- Select the user & press the minus button
- Press ‘Delete User’
Step
1Open System Preferences
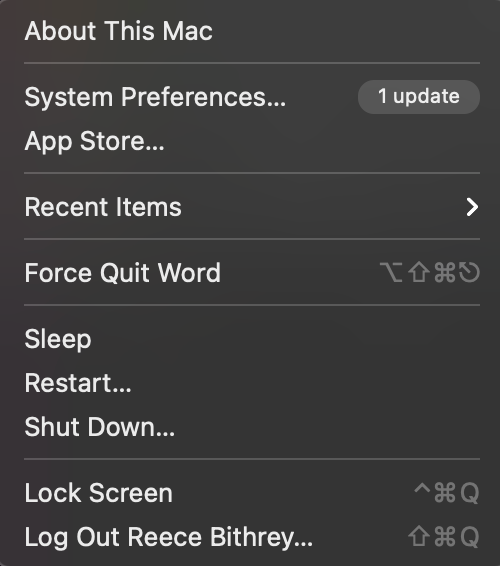
You can either head up to the Apple logo in the top-left of the menu bar and click it, which will bring up a drop-down menu. From there, click ‘System Preferences’.
Or, you can just click on the gear icon in the Dock.Step
2Click Users and Groups
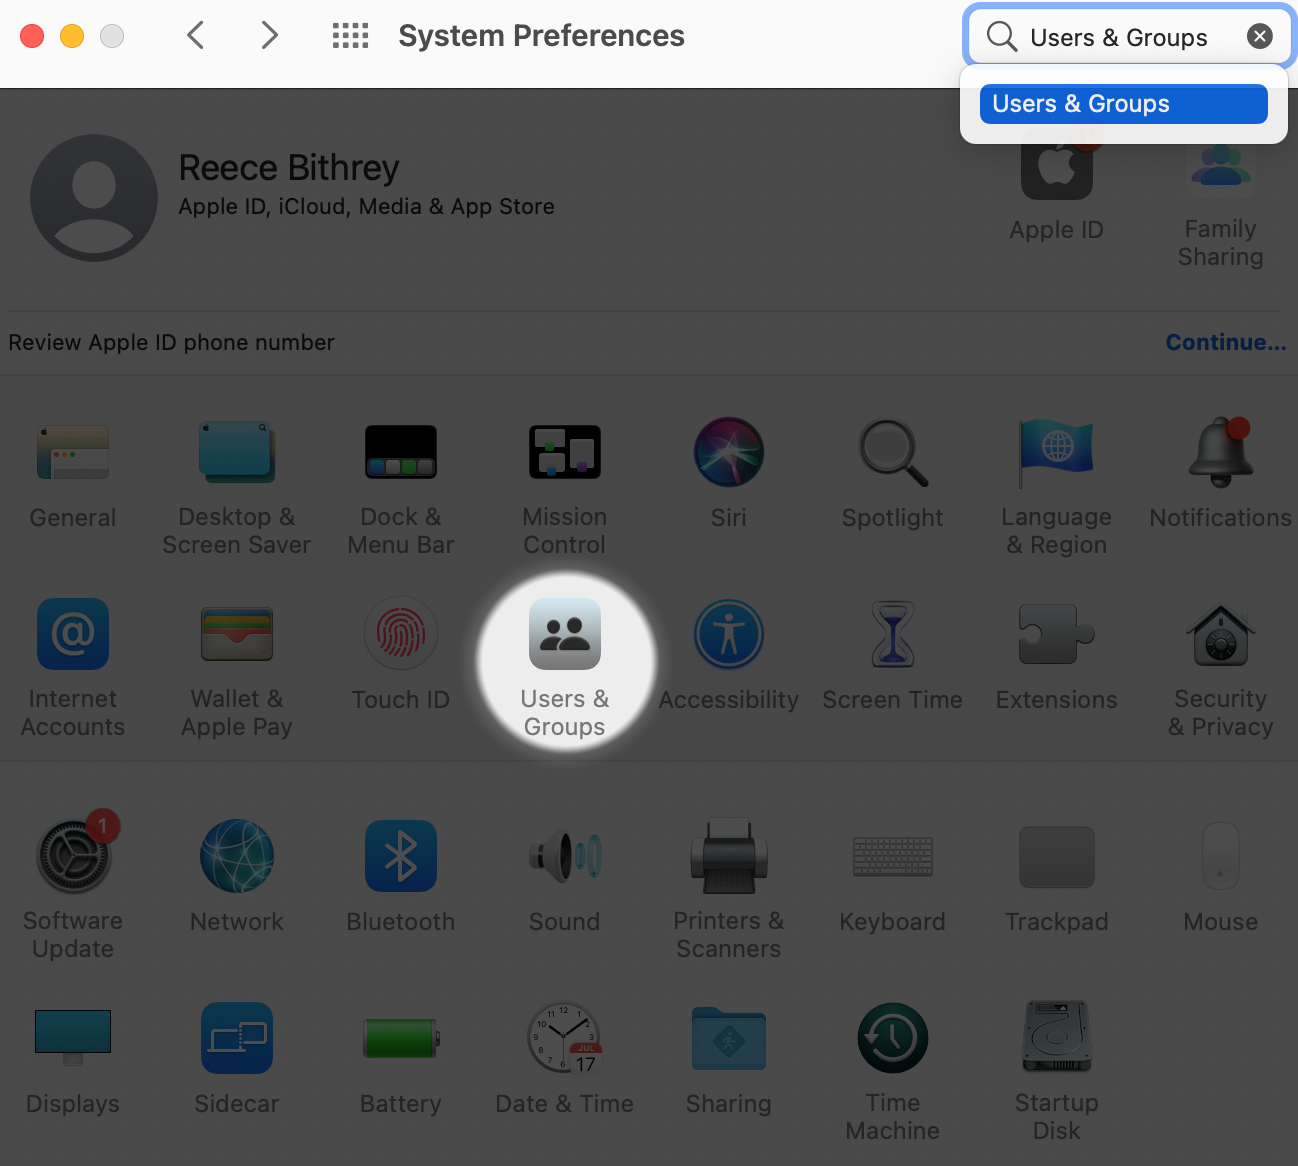
The next step is to open the Users & Groups folder which can be achieved either by searching for it in the bar in the top-right of System Preferences or by clicking it within the menu.
If you’re having trouble finding it, Users & Groups can be found on the second row of the top half of processes, usually in-between Touch ID & Accessibility.Step
3Click the Lock to make changes

Once inside, you’ll need to click the lock to make changes at a system level. Input your password and press ‘Unlock’.
Step
4Select the user, press the minus button and hit Delete User

Once inside, click on the user you want to delete and select the small minus button in the bottom-left corner. A small box will appear, which provides you with three options.
The first will archive any saved documents and information so they can be restored at a later point if needed. The second option keeps the home folder in the Users folder. The third simply deletes the folder and any used-up storage space is freed.
Once you’ve selected an option out of the three, press ‘Delete User’. The process should now be completed.
FAQs
If only one administrator account exists, then you won’t be able to delete the user account. You’ll either have to create another administrator account first, or upgrade another existing account to have administrator privileges.
You might like…


Editorial independence
Editorial independence means being able to give an unbiased verdict about a product or company, with the avoidance of conflicts of interest. To ensure this is possible, every member of the editorial staff follows a clear code of conduct.
Professional conduct
We also expect our journalists to follow clear ethical standards in their work. Our staff members must strive for honesty and accuracy in everything they do. We follow the IPSO Editors’ code of practice to underpin these standards.