

Apple Home, which uses the HomeKit underlying tech, has become one of the best centralised tools for managing smart home devices from multiple manufacturers. As well as giving you manual control, I’ll show you how to create and use Apple Home Automations, making your smart home react automatically.
I’ve used screenshots from the MacOS version, as it’s a bit easier to see what’s going on, but the same steps apply to the iOS version of the app on your iPhone or iPad. Before we start, it’s worth pointing out that if you want to run Automations when you’re not at home, you need to have a HomeKit Bridge, which can be a HomePod or HomePod Mini, iPad or Apple TV.
1. Create a new Automation
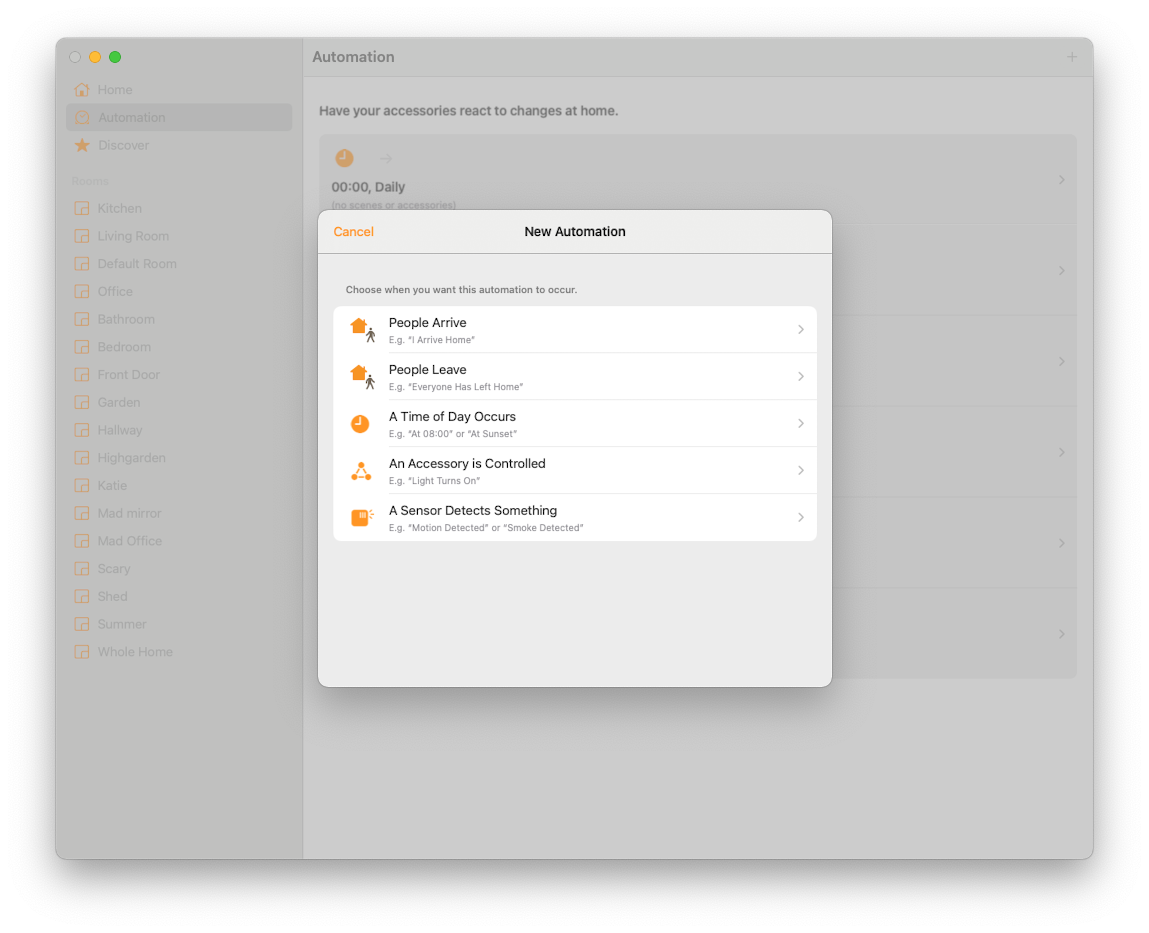
Select Automation from the app (in the left-hand bar on Mac and at the bottom in iOS). This gives you a list of all Automations that you currently have. To create a new one, tap the ‘+’ icon. You’ll see a list of potential Automations, based on the type of trigger.
They are when People Arrive or when People Leave, which will use your iPhone’s location to trigger rules when either one person arrives or leaves or when everyone leaves. These kinds of rules can be used to, say, turn off your heating and lights when everyone goes out, but have them turn on when the first person returns. You can also use when A Time of Day Occurs, which is your basic timed scheduling.
The last two options trigger routines based on smart devices: the first one, is when An Accessory is Controlled, such as turning on a switch or unlocking a door; the later is for when a Sensor Detects Something, such as when a motion sensor detects movement.
All Automations are built in the same way once you’ve picked a trigger, so I’ll choose An Accessory is Controlled for this example.
2. Create your Trigger
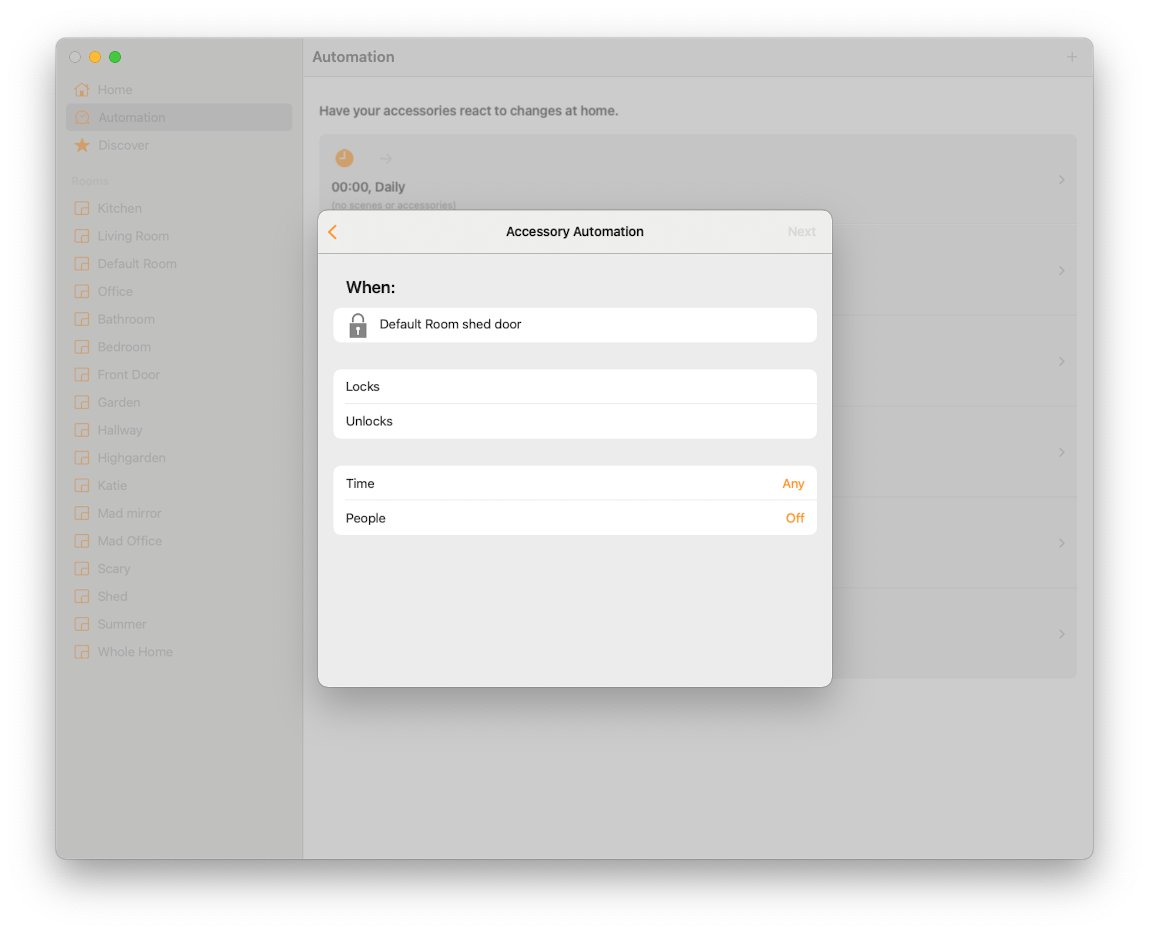
Next, you have to set up your trigger, which could be picking a time or day or selecting who’s arriving/leaving. As I picked the rule based on a device being triggered, I now need to pick this from the list. I’m going to pick my Shed door smart lock.
Select the device and click Next. Now, you can pick the information that will trigger the Automation. The choices are dependant on device. For my lock, I can pick ‘Locks’ or ‘Unlocks’; if you chose a light, you’d get the options ‘Turns on’ or ‘Turns off’. Select the rule that you want: here, I’ll choose Unlocks.
You can then fine-tune the rule, selecting the times that the rule is valid, and you can select who has to be home (or away) for the rule to run. The latter can be very useful. For example, I’m going to show you how to turn off an alarm when the Shed door is unlocked, which is useful when I’m at home, but if I’m away, I may not want this rule to run, as only a thief could be trying to get into the shed: perhaps they’ve broken into the main house and have taken the keyfob that unlocks the door.
3. Create your actions
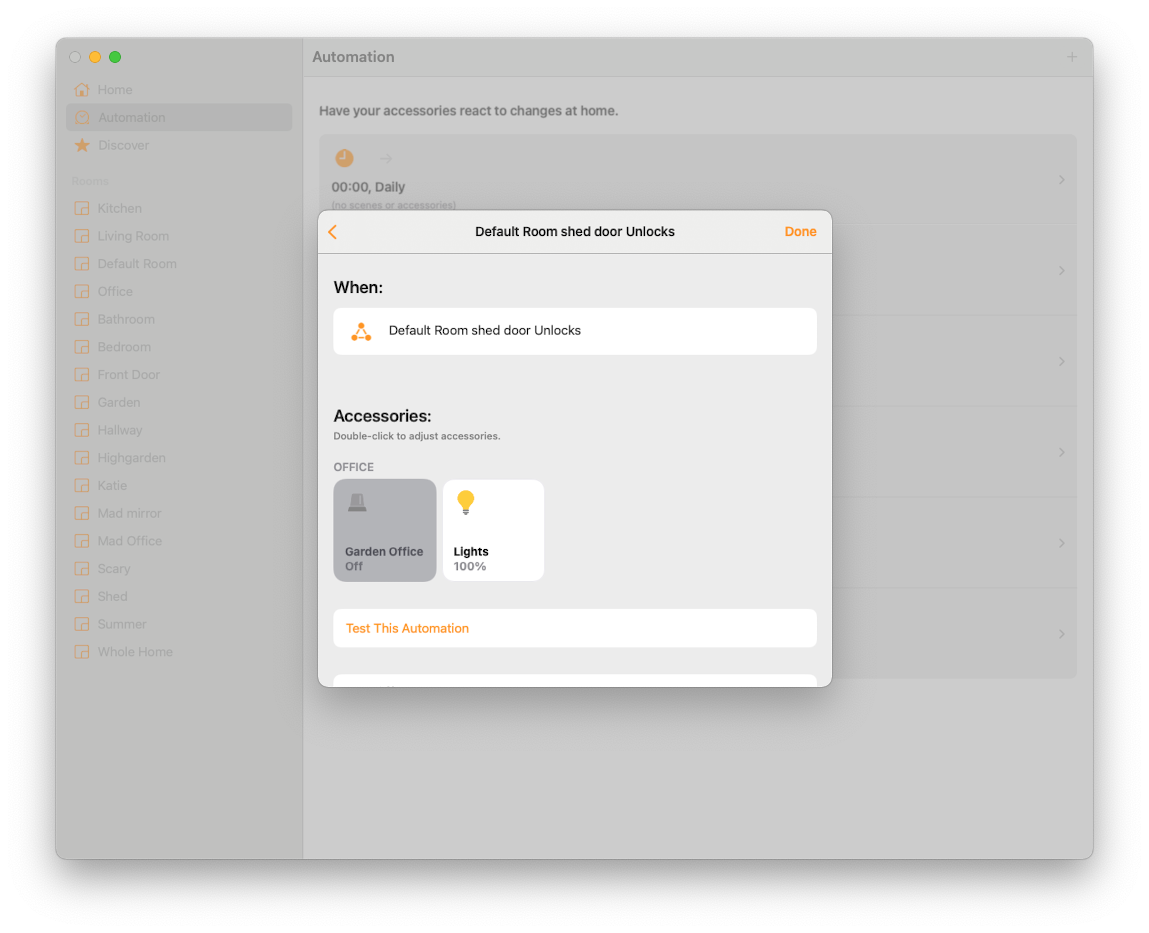
Next, you can choose what happens when the Automation is triggered. On this screen, you can choose to run Scenes, or you can select multiple devices. Tap Next, when you’ve selected your devices.
You can now set the devices that you’ve chosen to your preferred settings. Just use the standard Home controls. I’ve set my lights to come on to 100% and have set the Alarm to turn off; I could set the lights to 50% if I wanted.
At the bottom of the page, you can choose a timer for the Turn off setting. This effectively reverses the actions that you’ve made after a set time. For example, if you have lights trigger from a motion sensor, you could set the Turn Off time to five minutes, so that the lights turn off when there’s no motion for five minutes.
Tap Done when you’ve finished. Your first Automation will now run based on the triggers and actions that you have set.
4. Edit your Automation
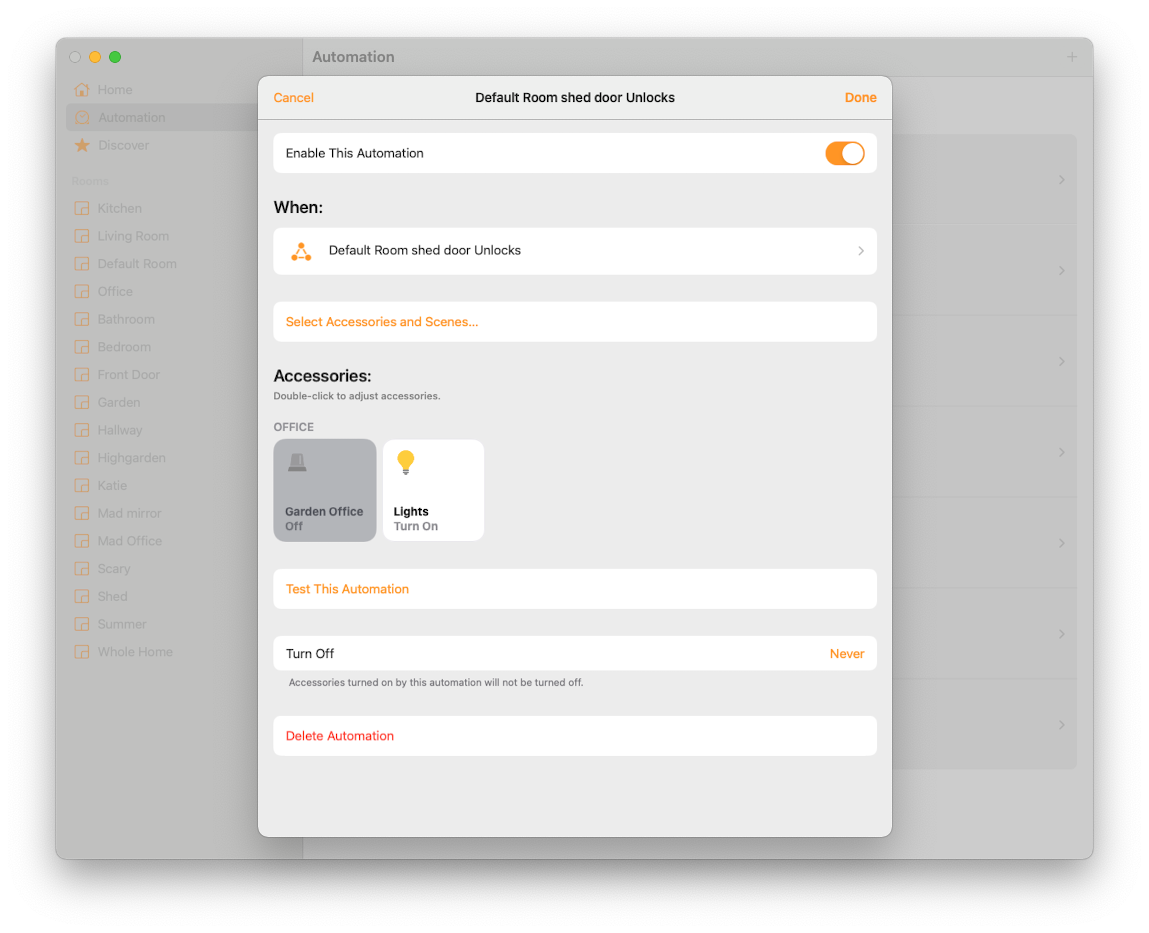
Your new Automation appears in the list. Tap it to edit it. You get a basic screen with the list of devices that you’re controlling, and you can change their behaviour. For example, I could change the lights from coming on at 100% to 50% instead. If you want to remove devices or add new ones, tap Select Accessories and Scenes.
You can edit the trigger by tapping the ‘When’ section, and you can adjust the Turn off time. If you don’t want the Automation you can use the Enable toggle to turn it off temporarily or use the Delete option to permanently remove it.
Try experimenting with a few different triggers and actions and you’ll soon see how much more powerful your smart home can be.
Editorial independence
Editorial independence means being able to give an unbiased verdict about a product or company, with the avoidance of conflicts of interest. To ensure this is possible, every member of the editorial staff follows a clear code of conduct.
Professional conduct
We also expect our journalists to follow clear ethical standards in their work. Our staff members must strive for honesty and accuracy in everything they do. We follow the IPSO Editors’ code of practice to underpin these standards.