Microsoft Family Safety provides comprehensive parental controls for Windows PCs, Xbox consoles and smartphones. In this guide, I’ll cover the basics of putting in place sensible restrictions for Windows and Xbox.
If you’ve not already created Family Safety accounts for your and the child you’re responsible for, or if you’ve not yet added your child’s account to Windows, first go to my step-by-step setup guide on how to do that first.

Save 81% on a VPN with SurfShark
Surfshark has dropped the price of its VPN to £1.94 a month. Head over to Surfshark now to pay a one time price of £46.44 for 24 months of Surfshark and save 81%.
- Surfshark
- 81% off
- £1.94 a month
You will need:
- An internet connection
- A Microsoft Family Safety organiser account for yourself
- A Microsoft Family Safety member account for the child
The Short Version
- Open Family Safety
- Select your child’s profile
- Check the overview
- Scroll down
- Click Screen time on the left
- Check their screen time
- Enable a single schedule
- View and click on the schedule
- Select Every day
- Change the schedule
- Select another time
- Click Done
- Click Content filters
- Check your content filters
- Open App and games settings
- Check app restrictions
- Check spending settings
Step
1Open Family Safety
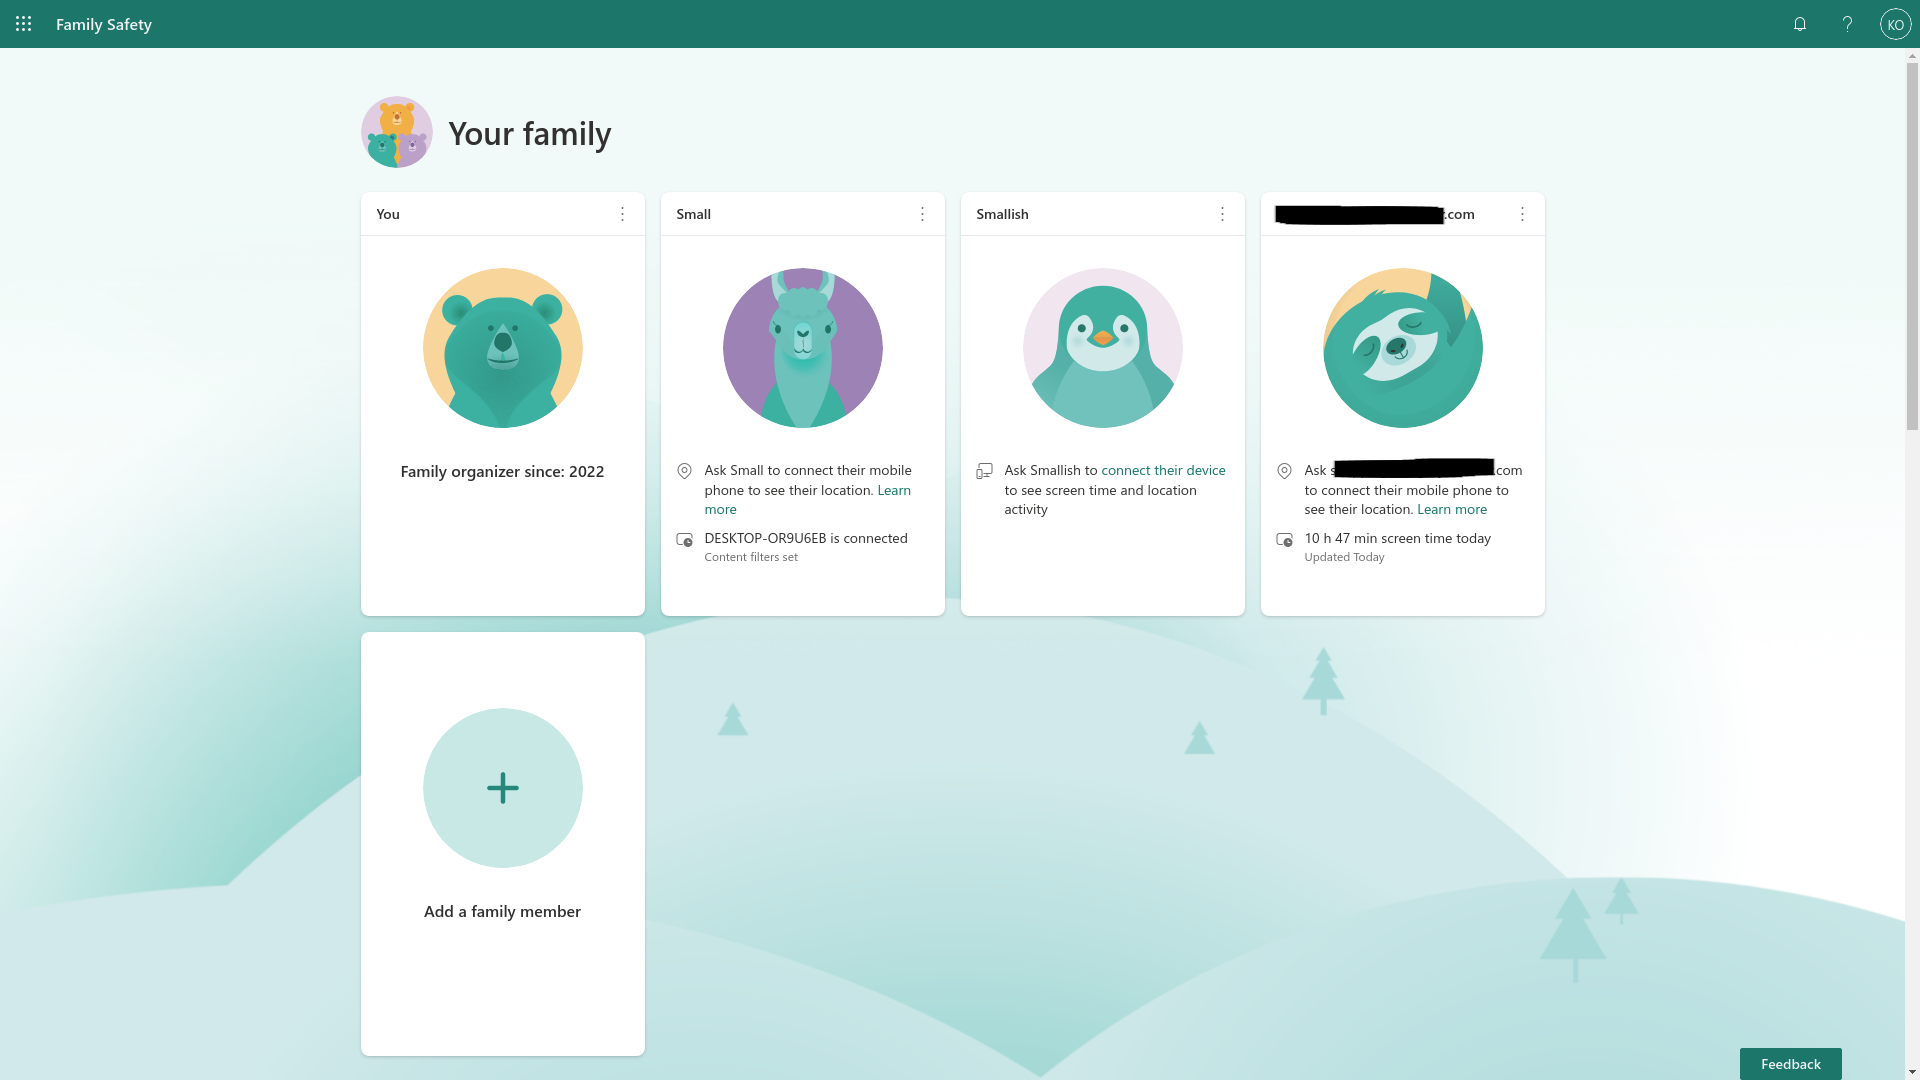
Open your web browser and go to https://account.microsoft.com/family/home
Step
2Select your child’s profile
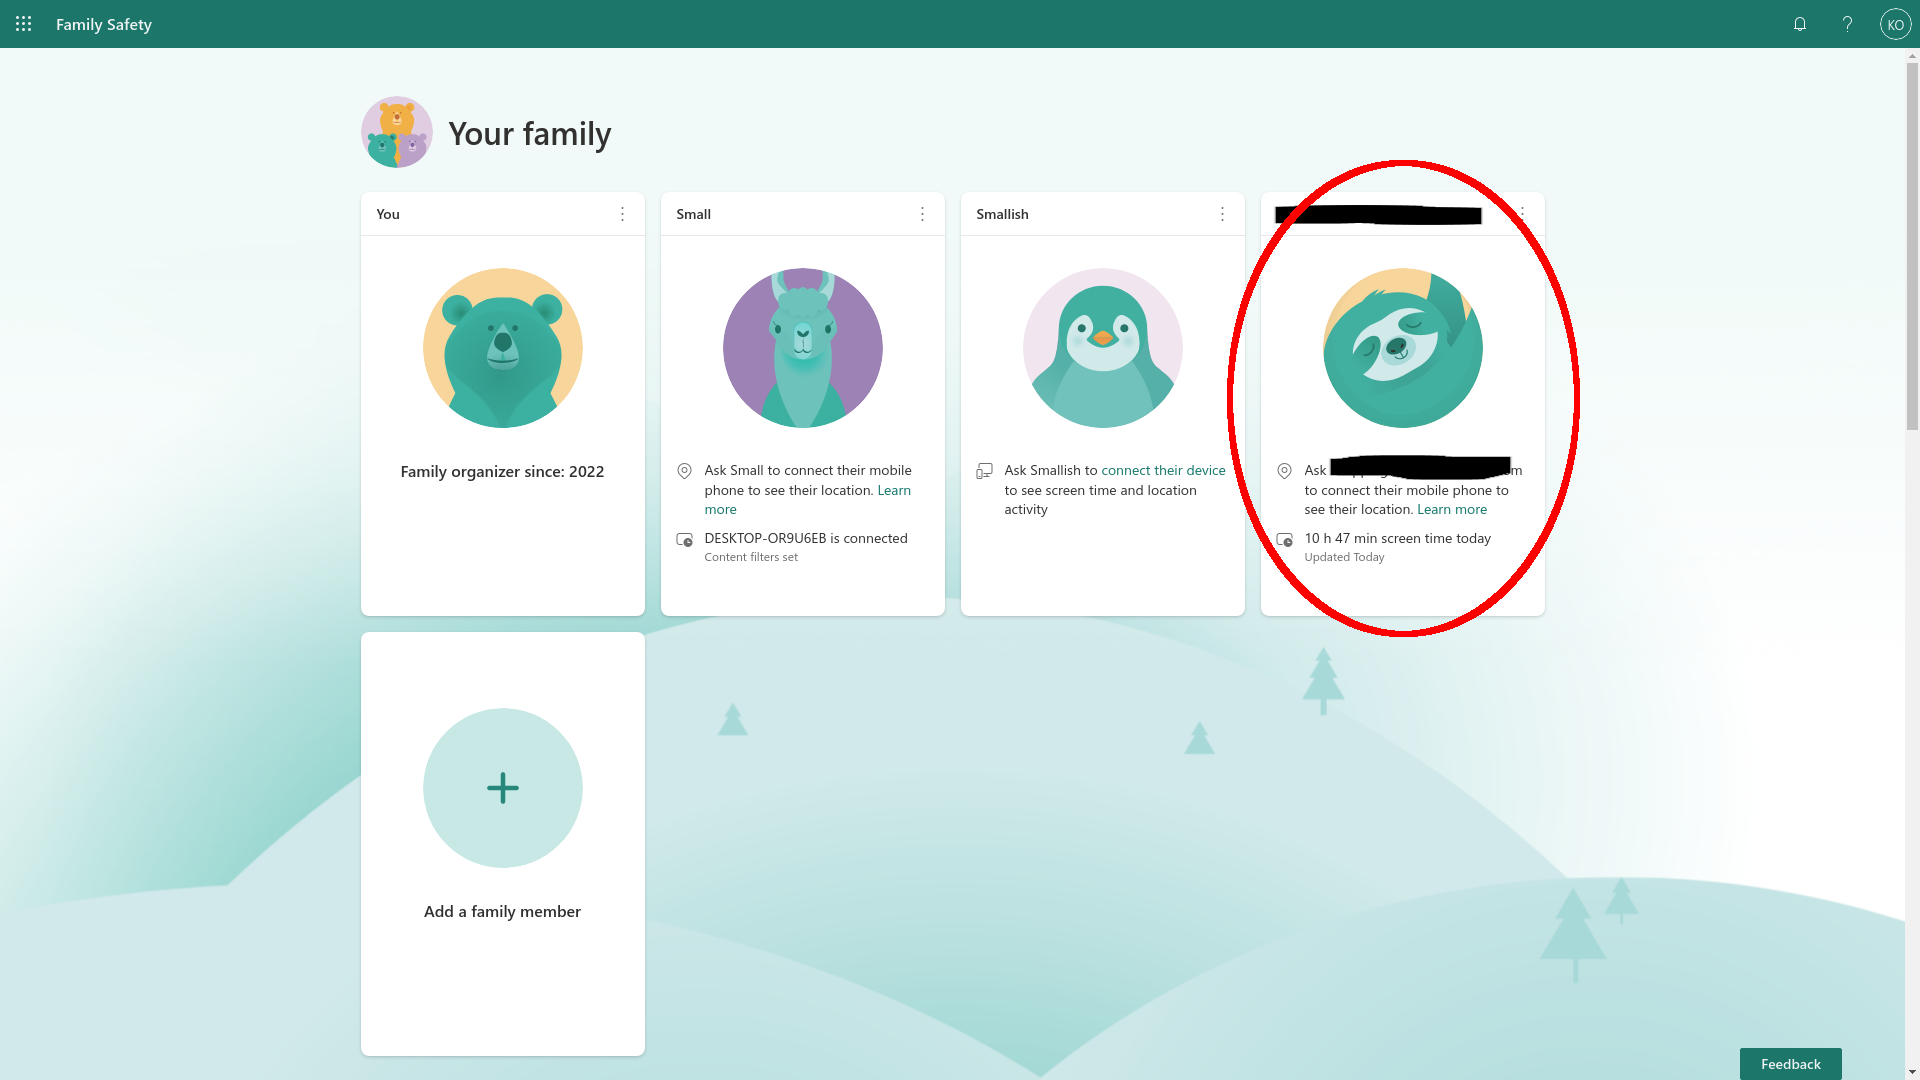
Click on your kid’s profile image – this will be a pastel-coloured animal labelled with either the name you gave them when you created their account or, if you didn’t enter a name or nickname, their email address.
Step
3Check the overview
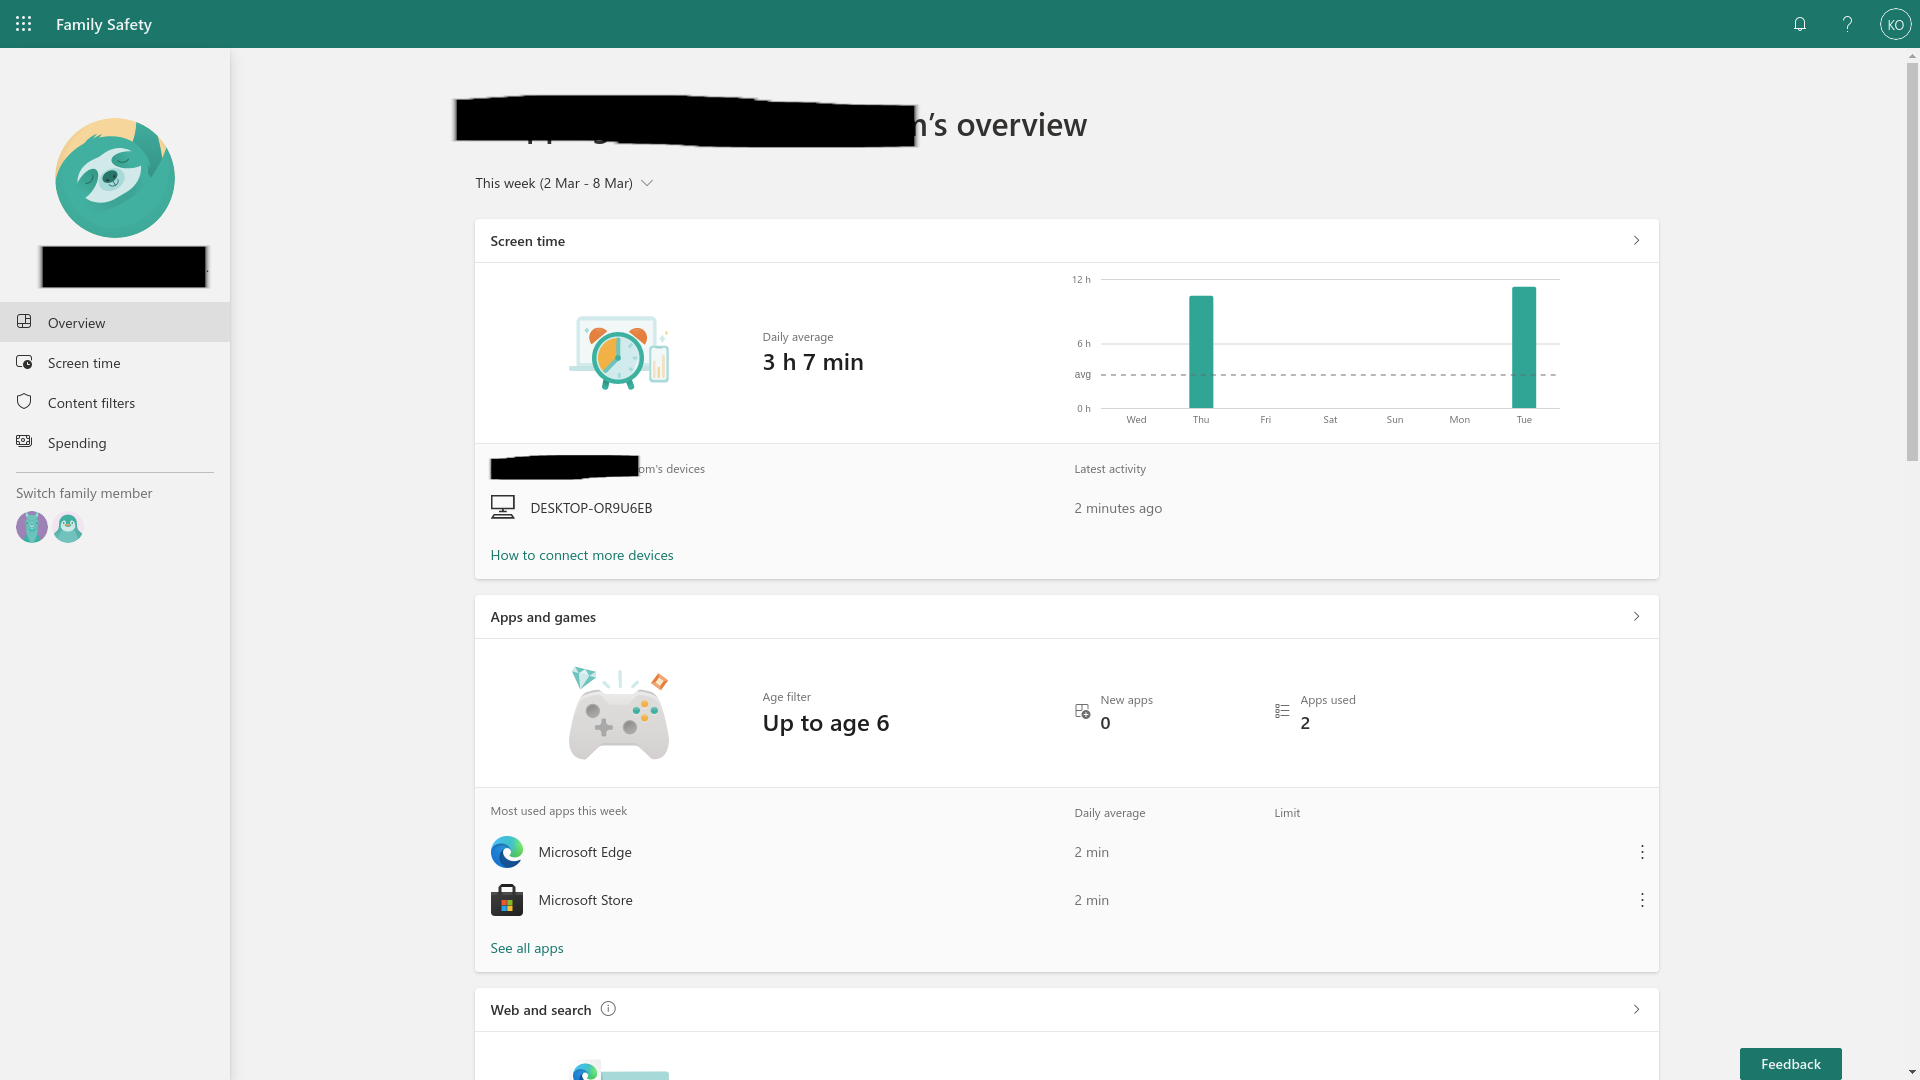
You’ll open on an Overview page showing their activity. At the top are sections displaying screen time, the current age filter configuration, and installed and used applications. I’m using a dummy account here because you should never share a child’s real online activity data with the general public.
Step
4Scroll down
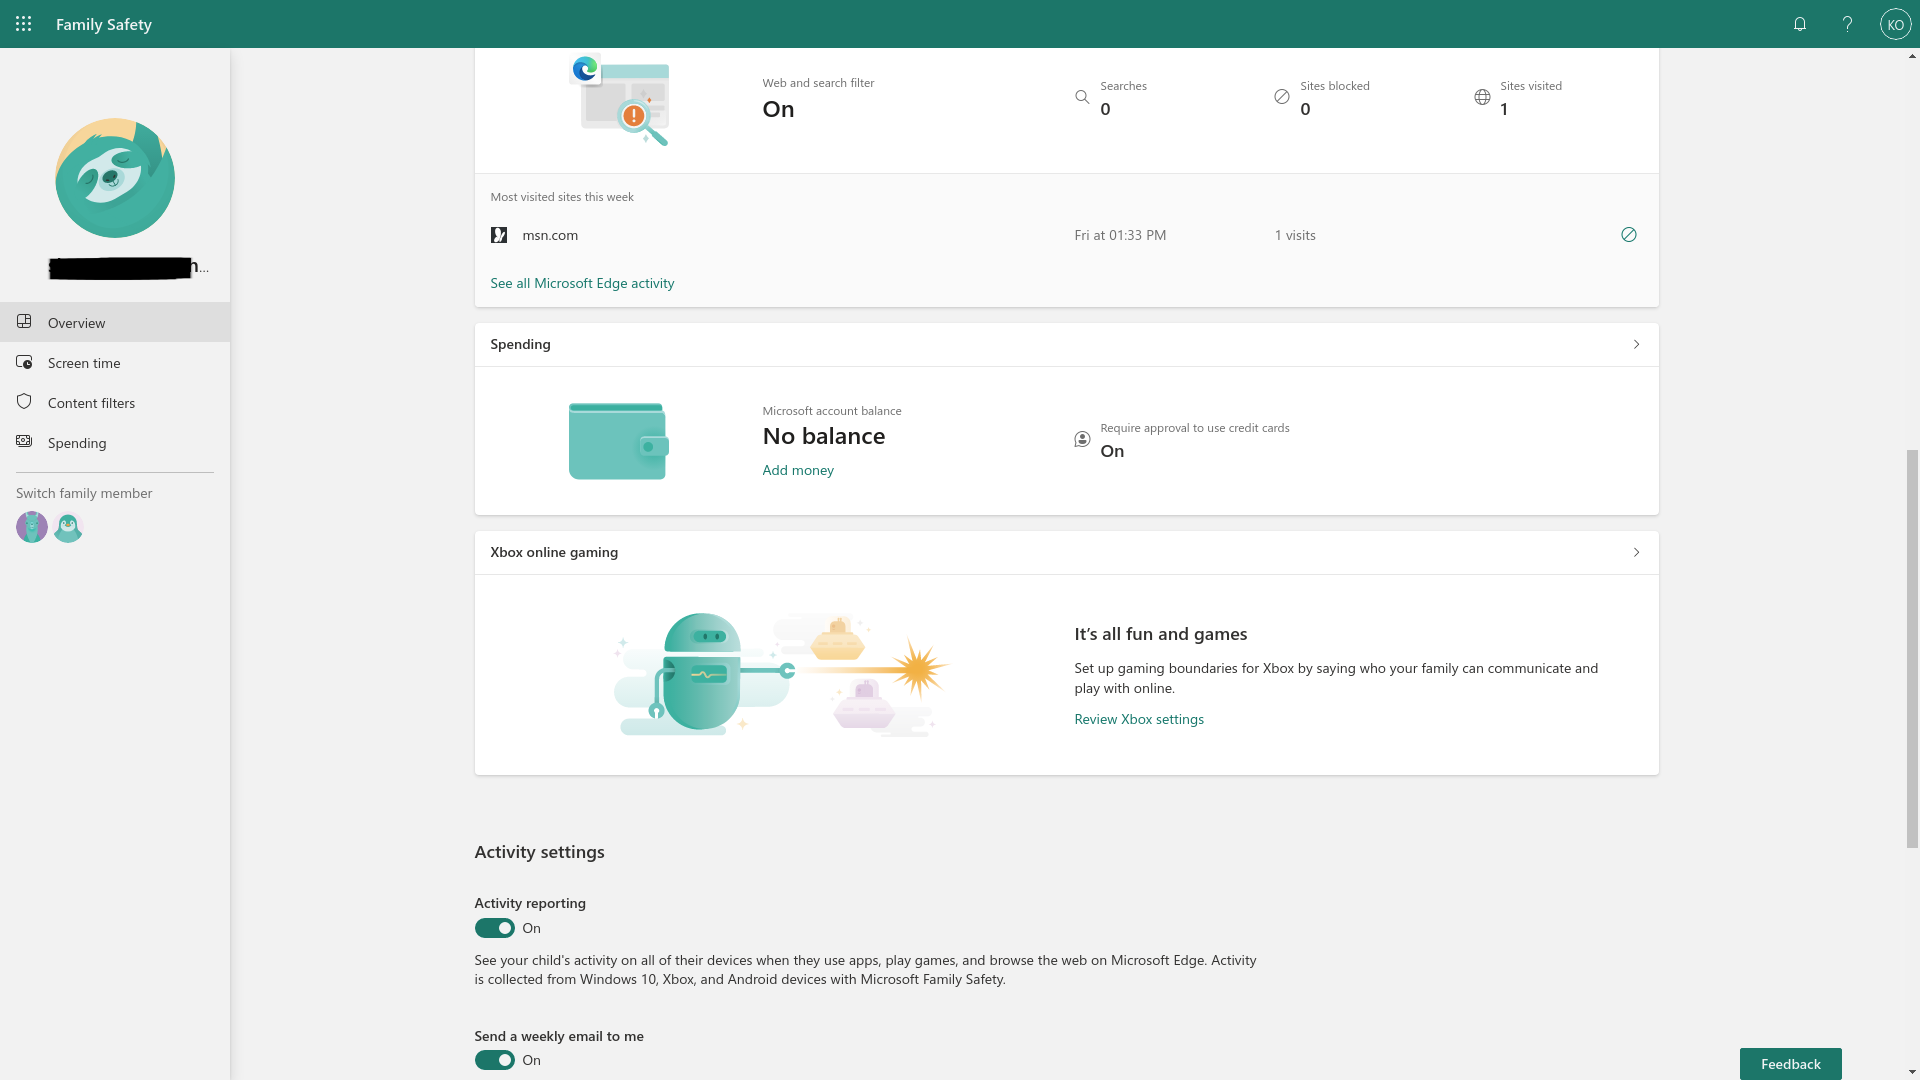
If you scroll down, you’ll see your child’s web history on Microsoft Edge, spending balance on Microsoft’s storefronts, settings for Xbox online and Activity reporting options, as well as links at the bottom to help you configure and troubleshoot your settings.
Step
5Click Screen time on the left
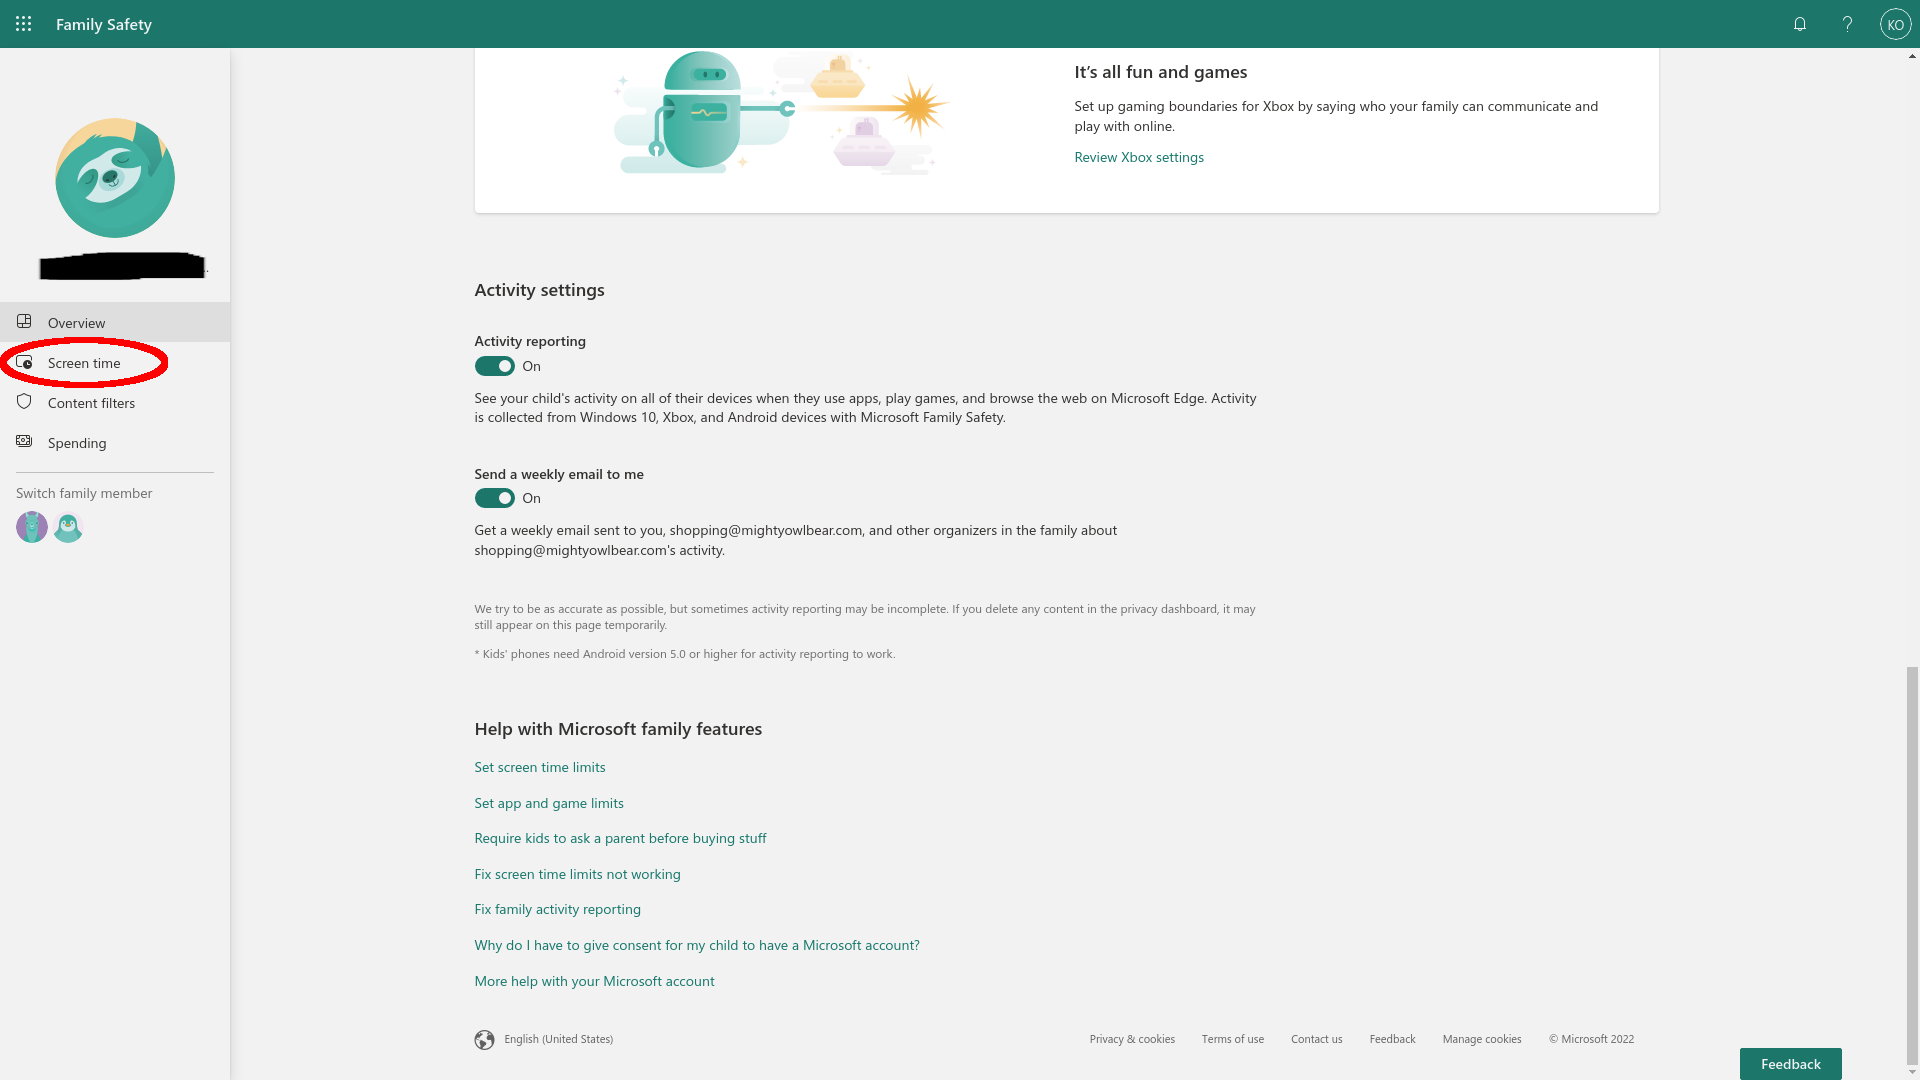
At the left-hand side of the page, there’s a navigation bar with a number of tabs. This allow you to view and configure key settings. You can also access these settings by clicking on their display widgets in the main pane. Click Screen time on left.
Step
6Check their screen time
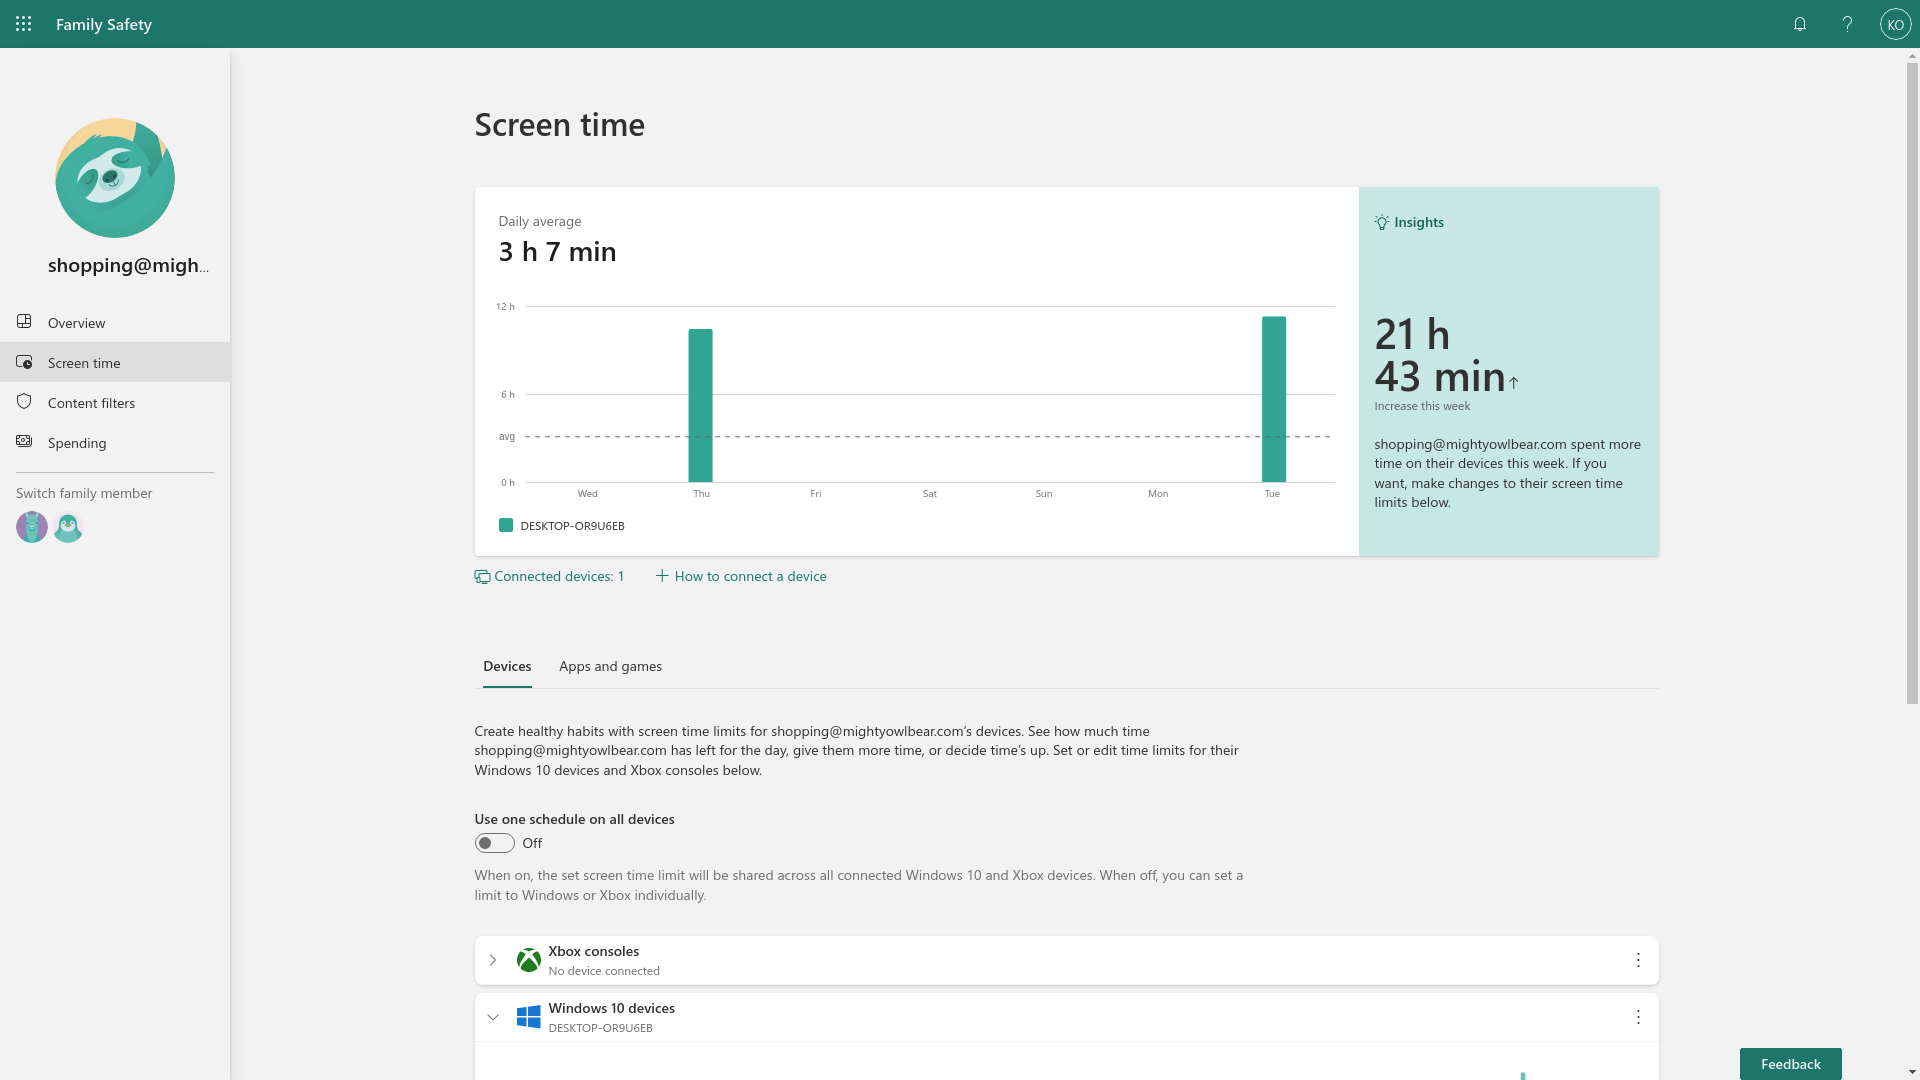
You’ll see a bigger version of the chart from the Overview page, and a summary of hours the user has spend on their PC. My demo system clocked a lot of hours because I left the virtual machine logged in and active.
Step
7Enable a single schedule
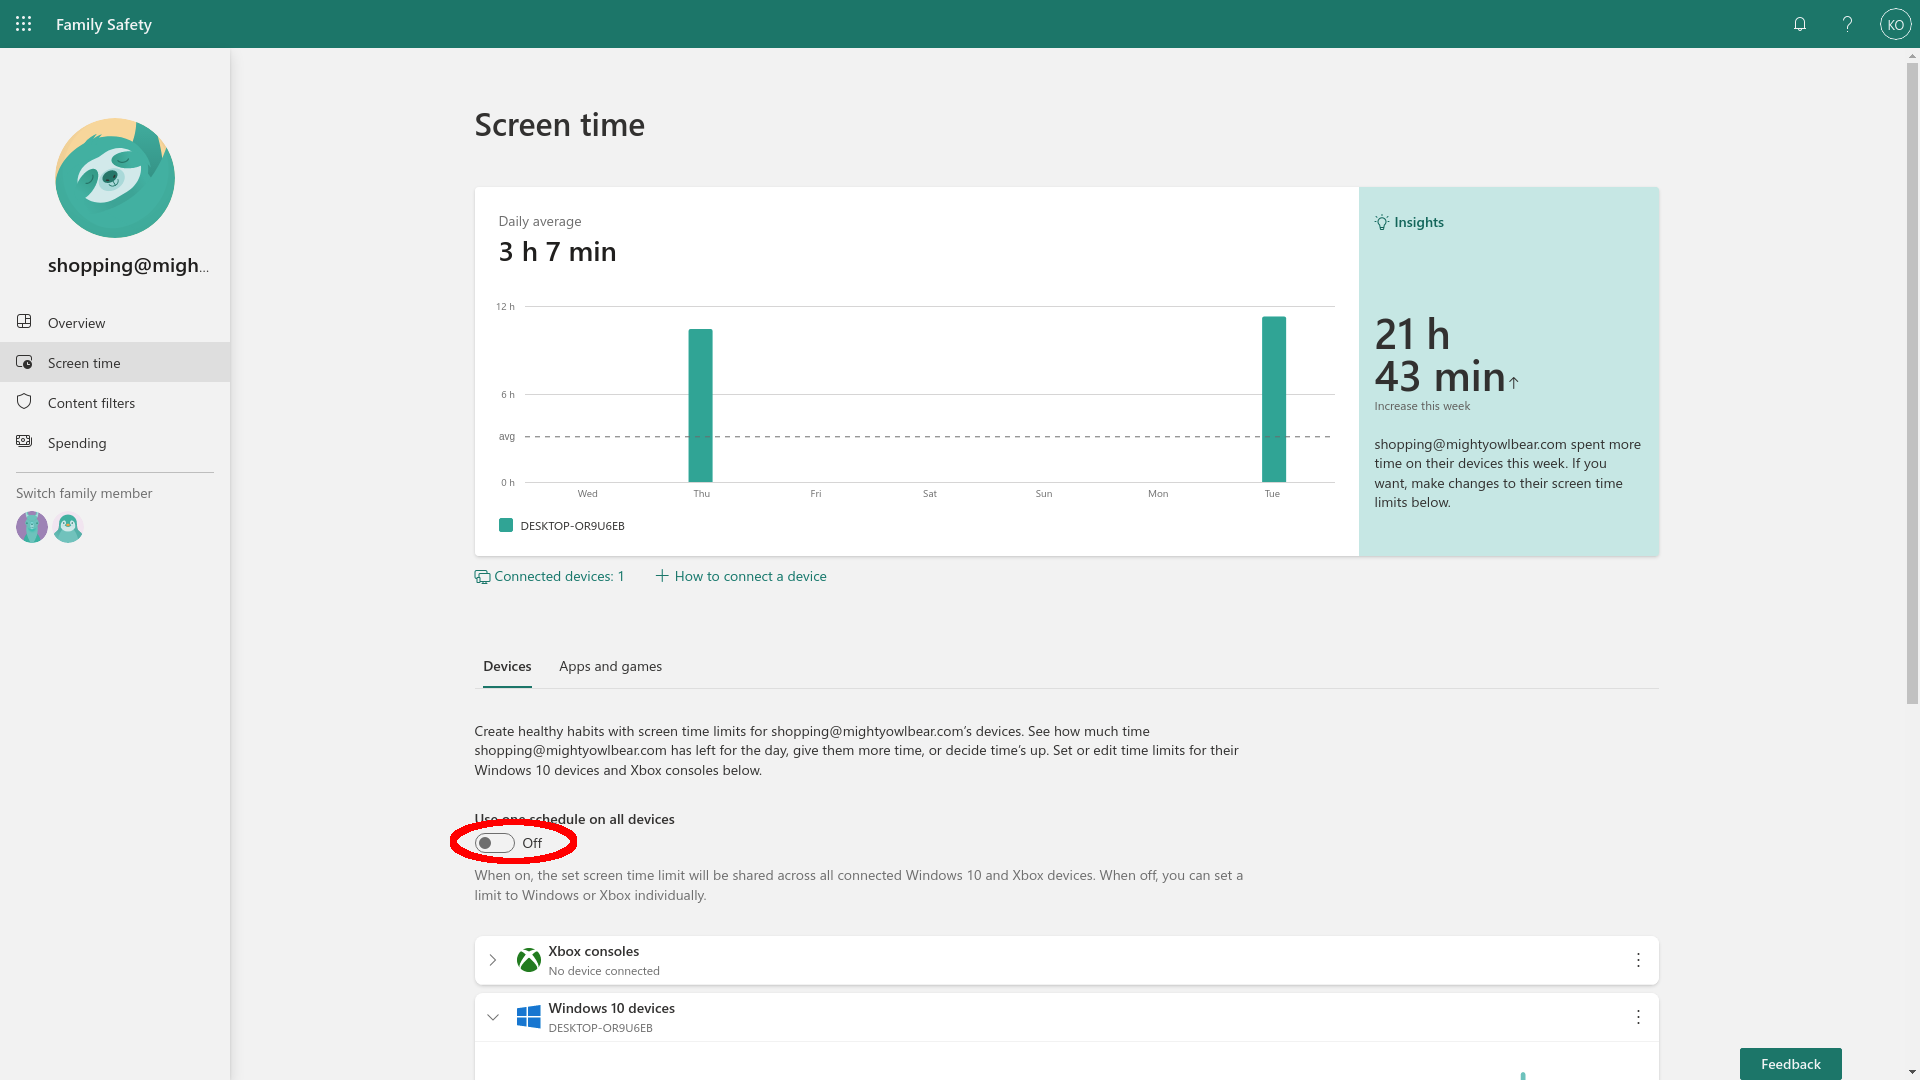
By default, screen time is managed per-device, but there’s a button here to apply the same settings to all Windows and Xbox systems. Click the Use one schedule on all devices button.
Step
8View and click on the schedule
Schedule controls for each day will now appear – you can bring them up in future by clicking anywhere on the schedule in the main page. By default, there’s 15-hour-per-day time limit from 7am to 10pm. This is definitely not appropriate for my hypothetical six-year-old! Click on a day to edit the schedule.
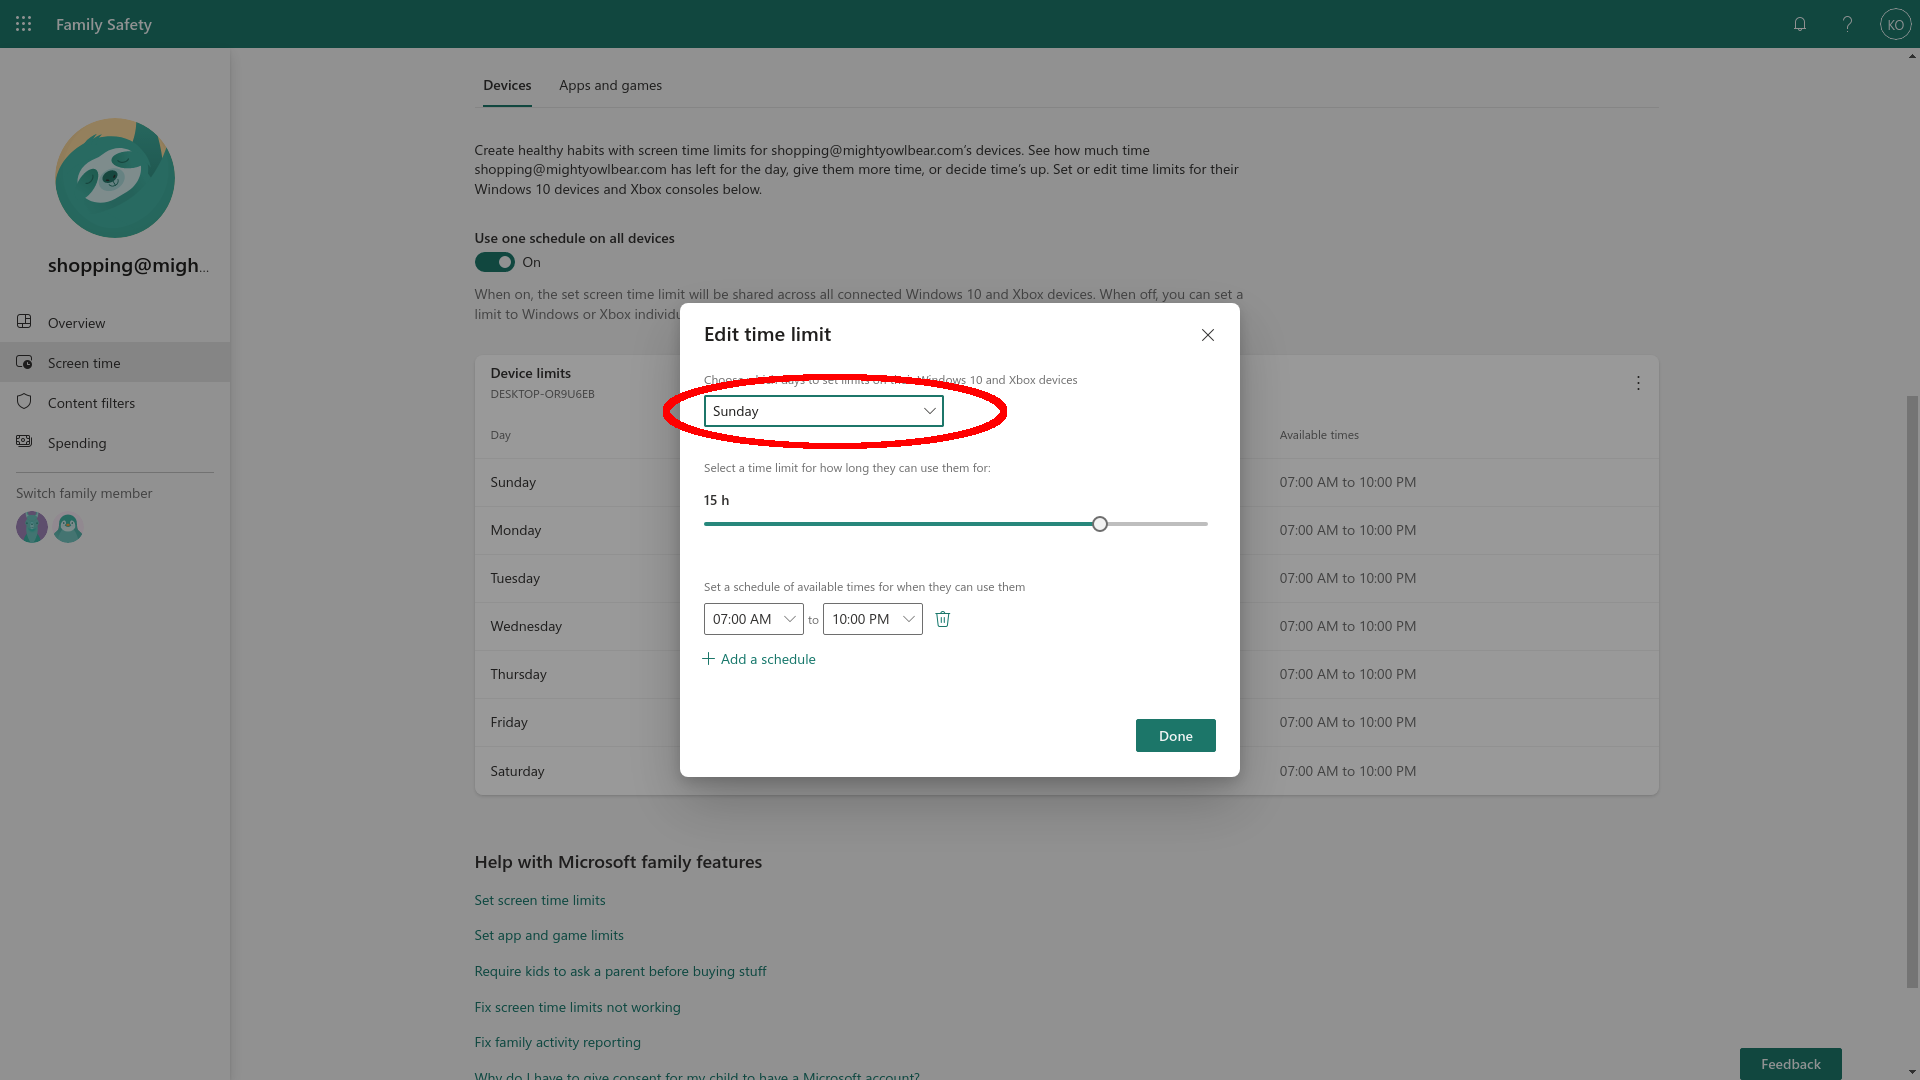
Step
9Select Every day
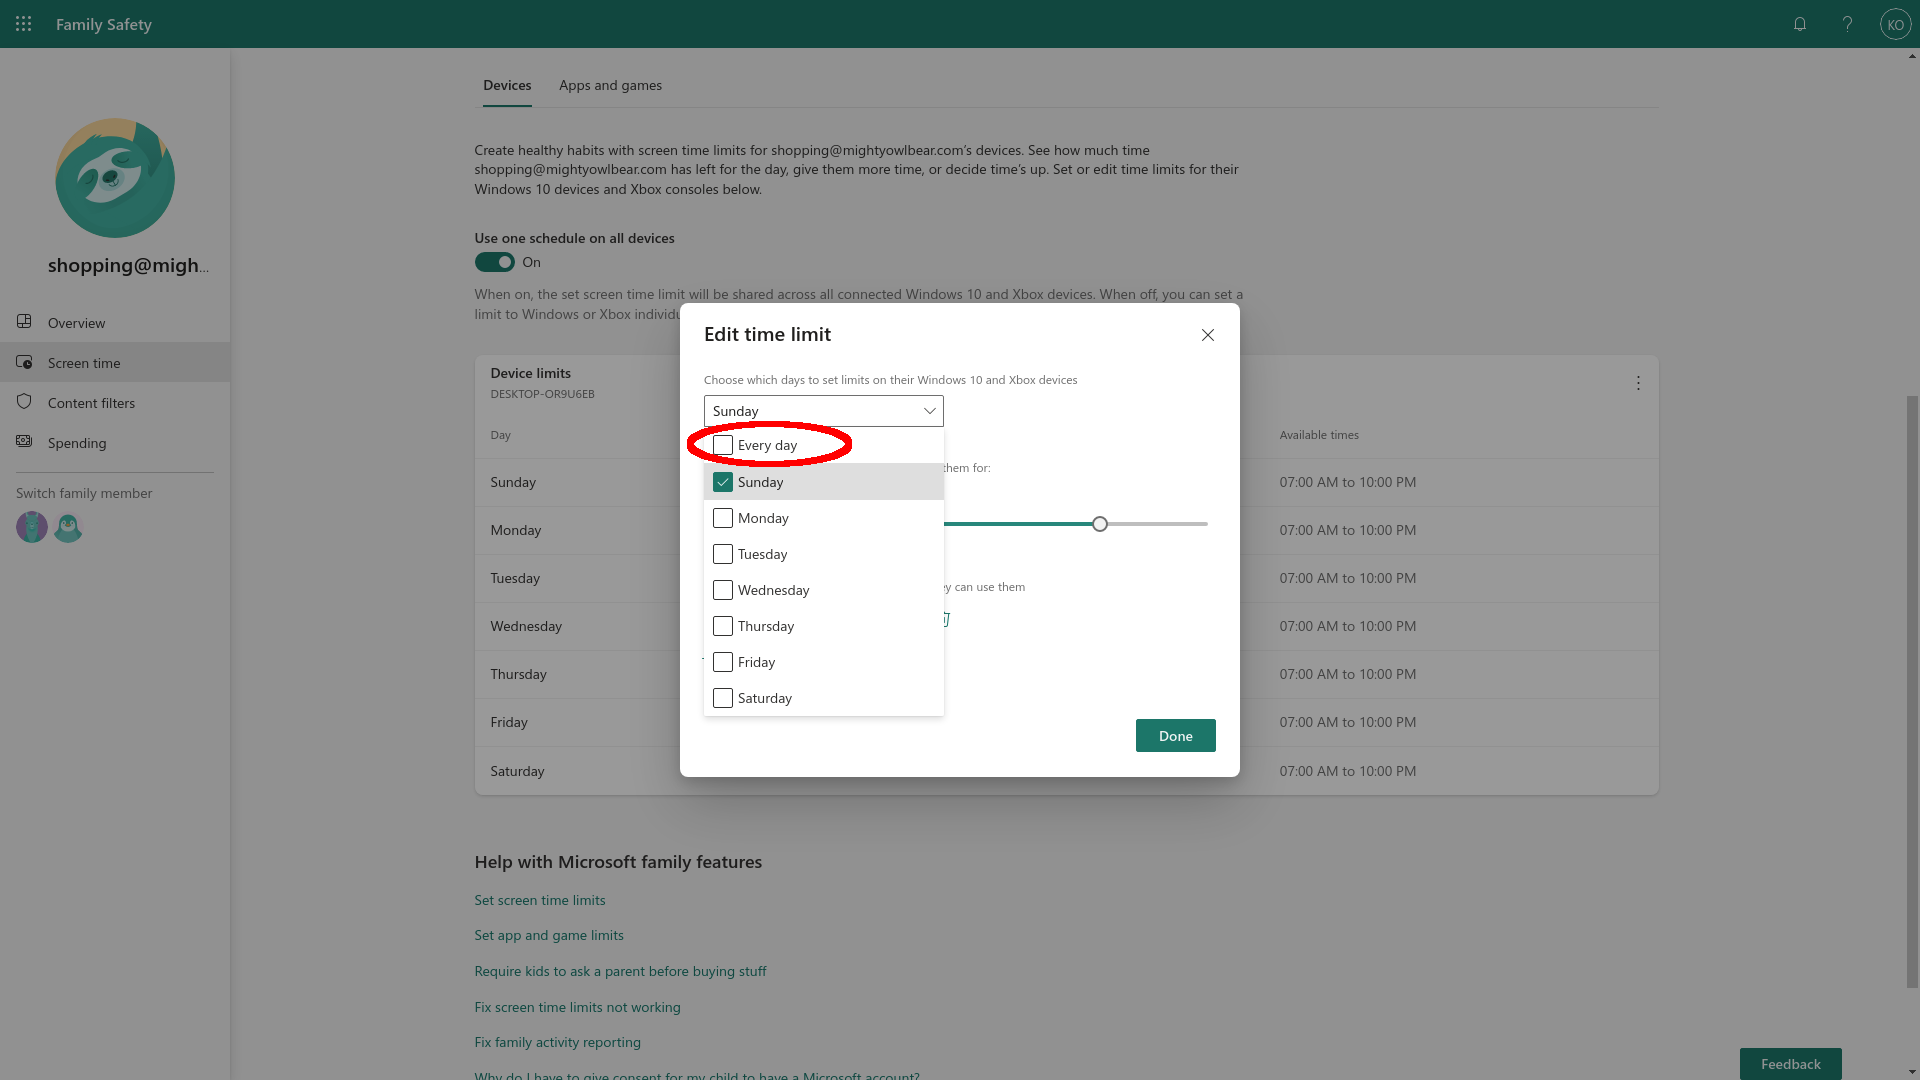
In the Edit time limit block click the pull-down showing the day you selected. Tick the box marked Every day.
Step
10Change the schedule
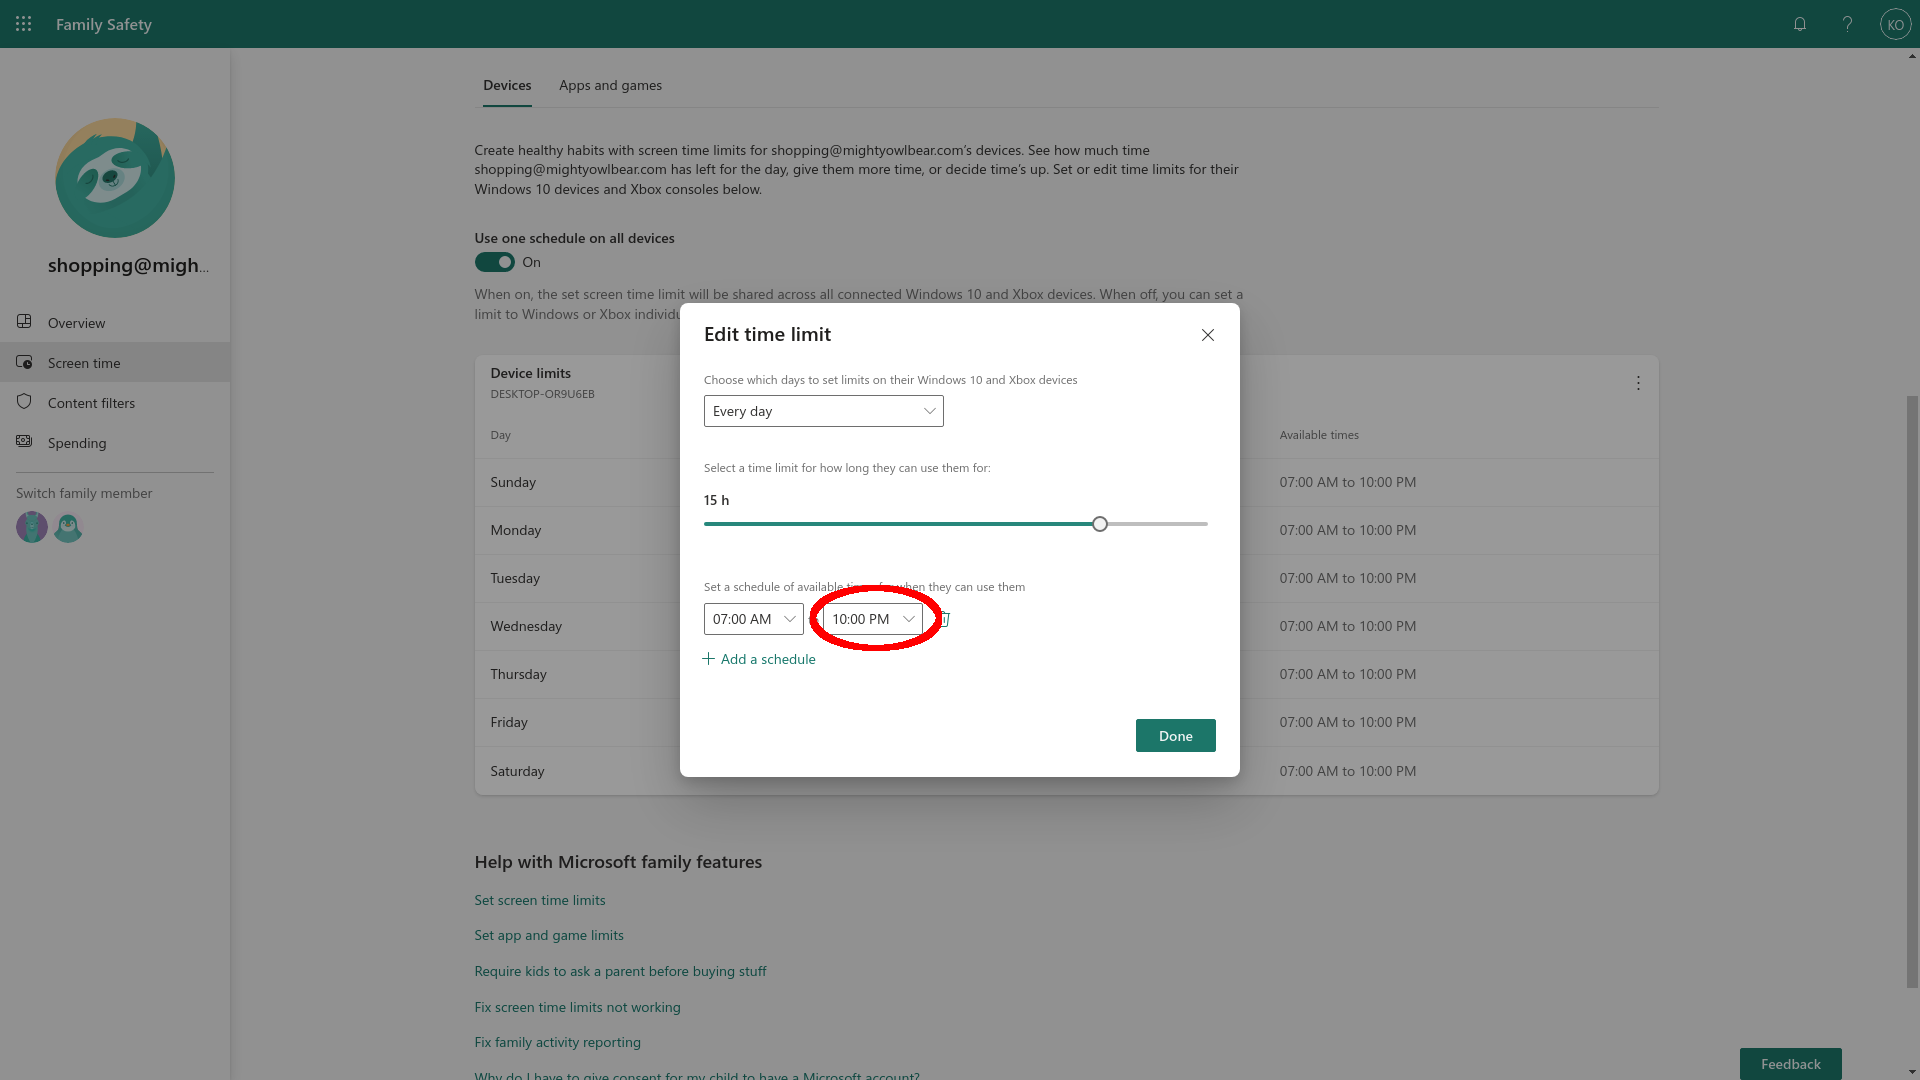
At the bottom of the box, there’s a 7am to 10pm schedule on display. Click into the 10:00pm finish time.
Step
11Select another time
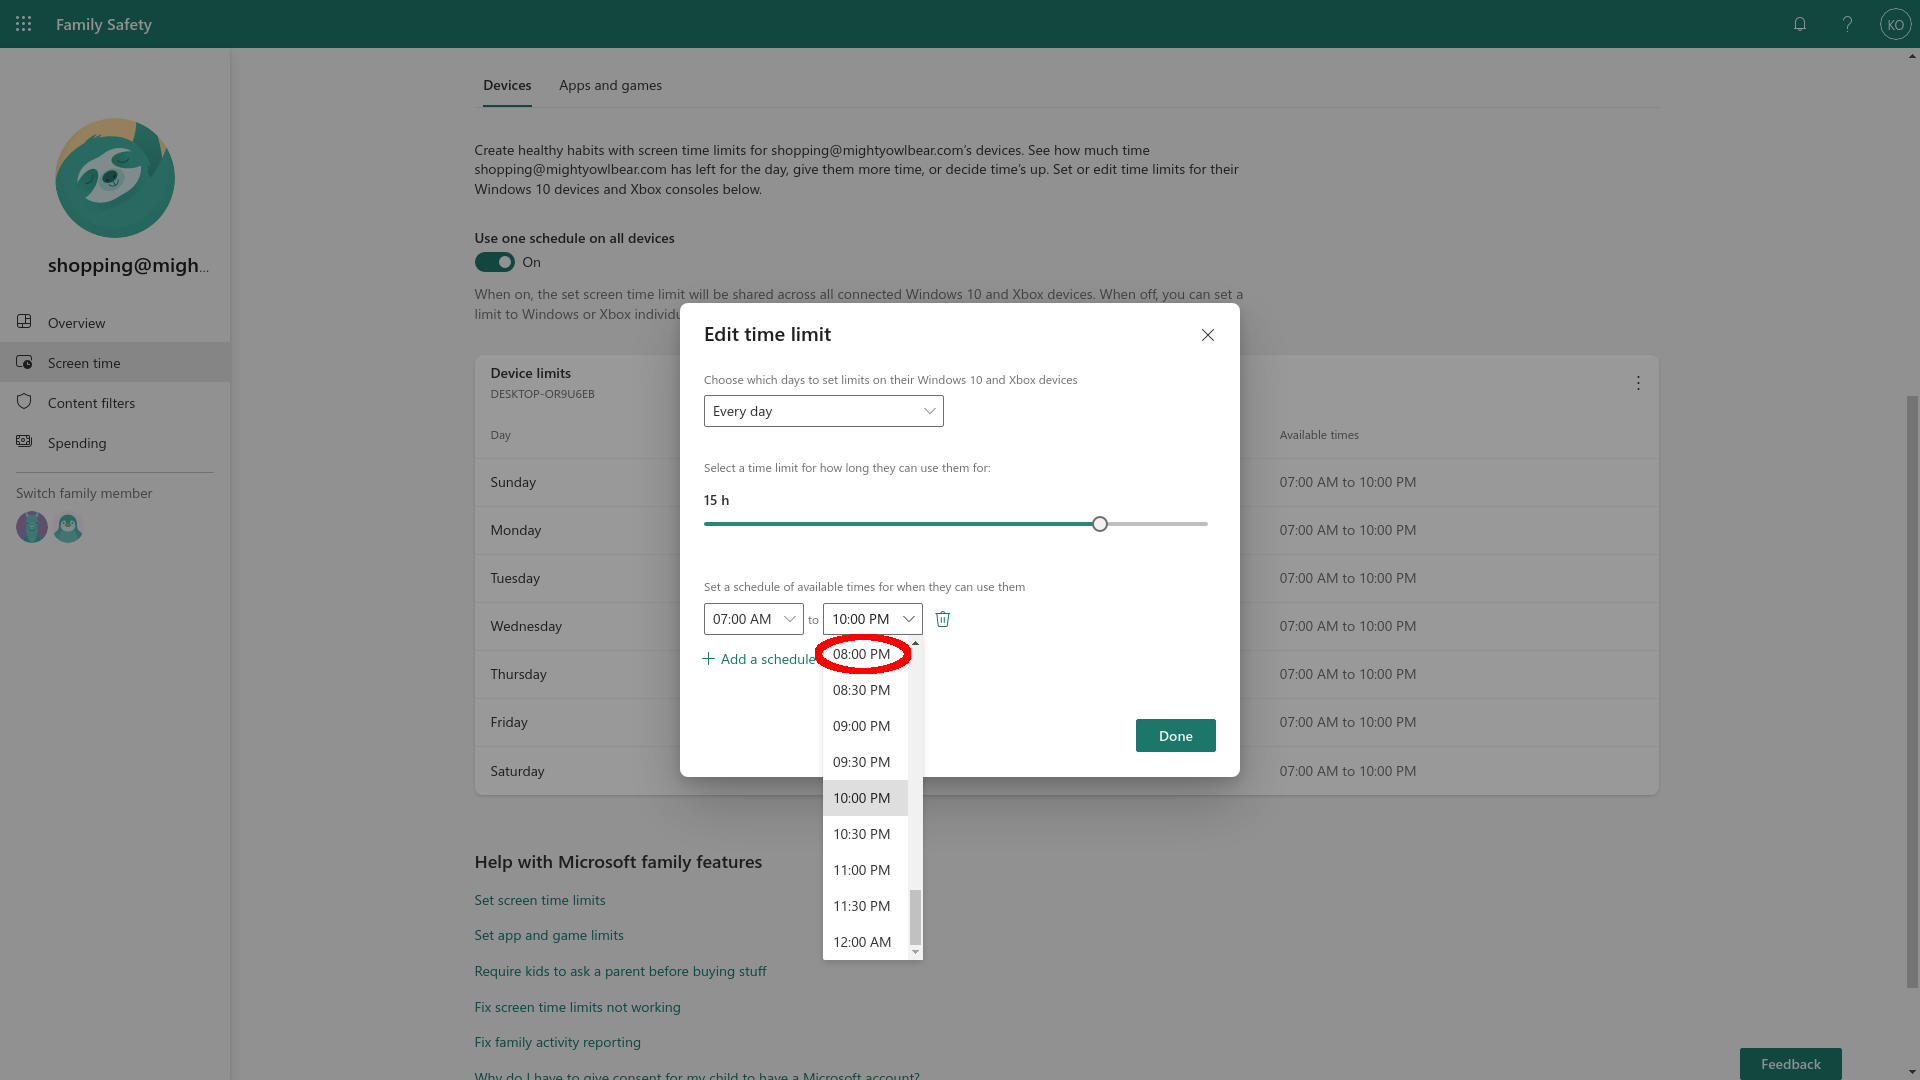
To set this to 8pm, choose 8:00 PM from the pull-down.
Step
12Click Done
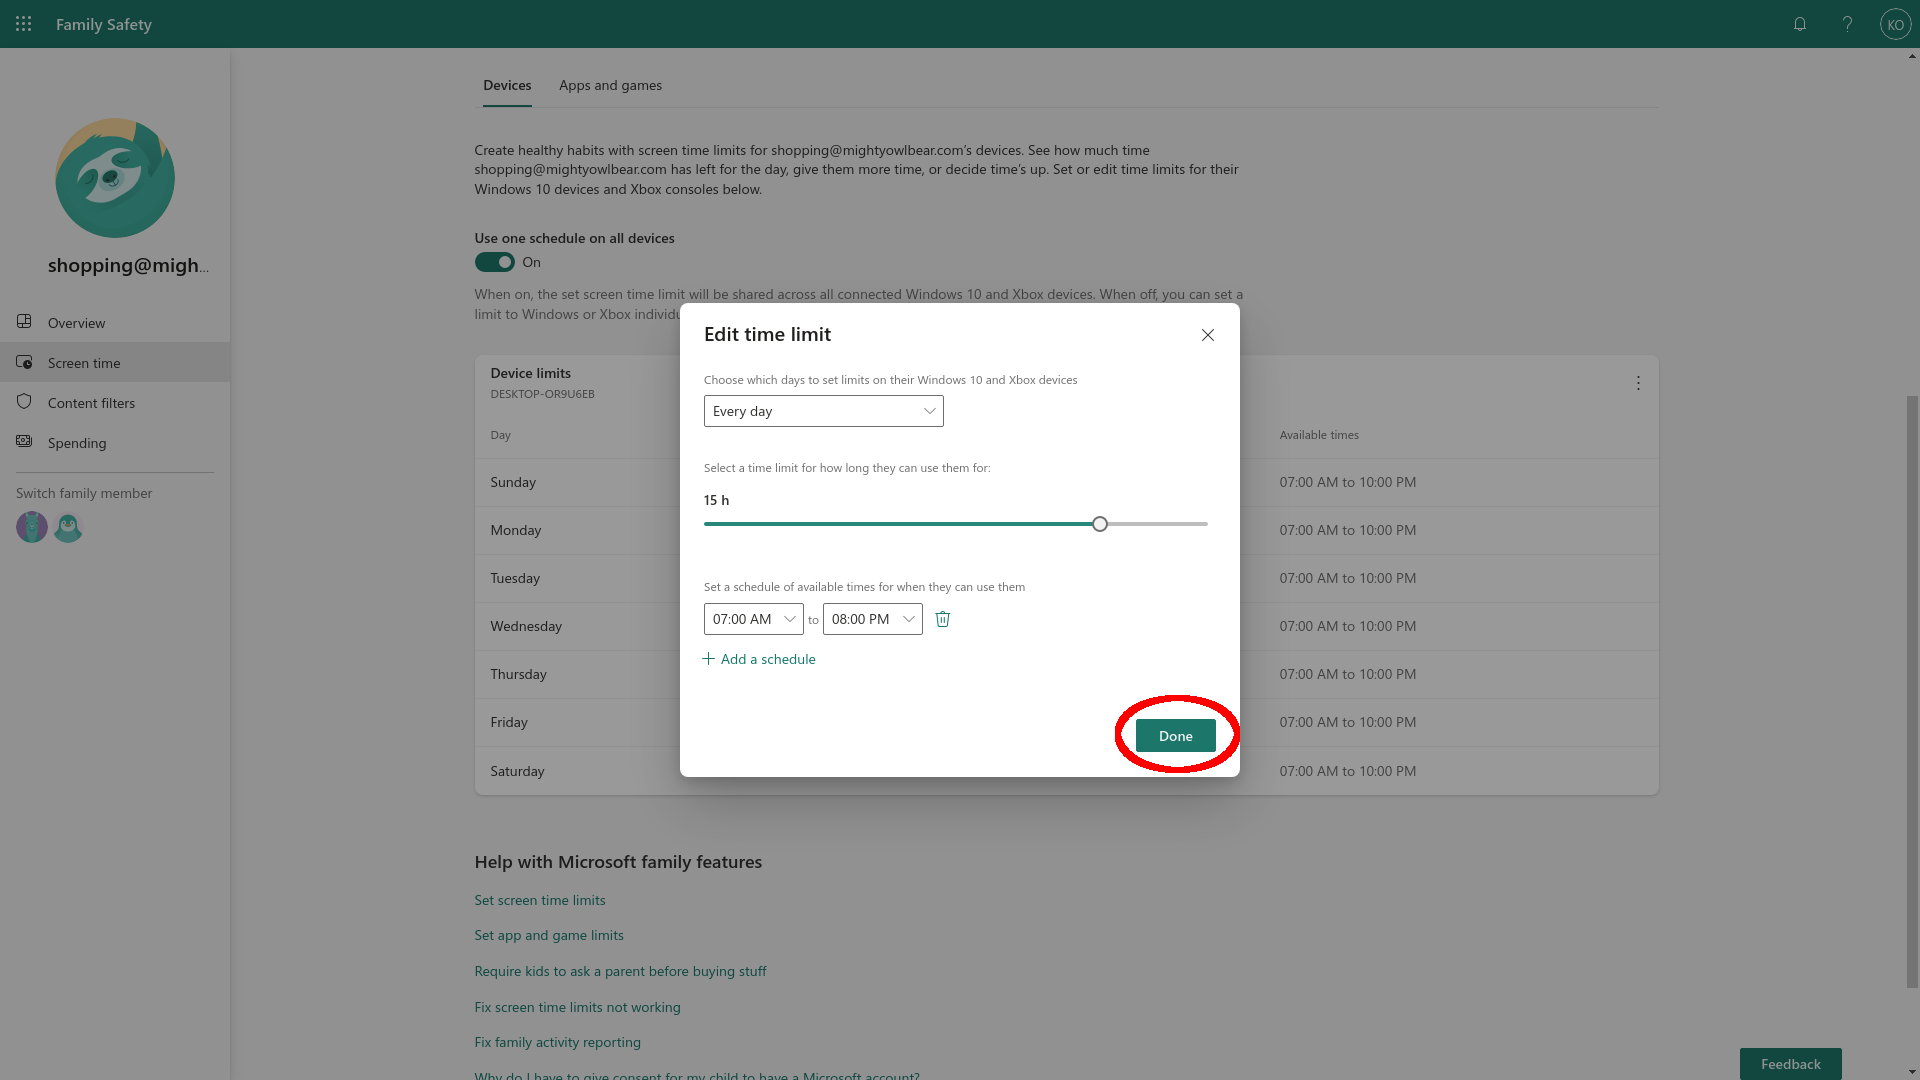
Click Done to save your settings. You’ll be returned to the main Screen time page.
Step
13Click Content filters
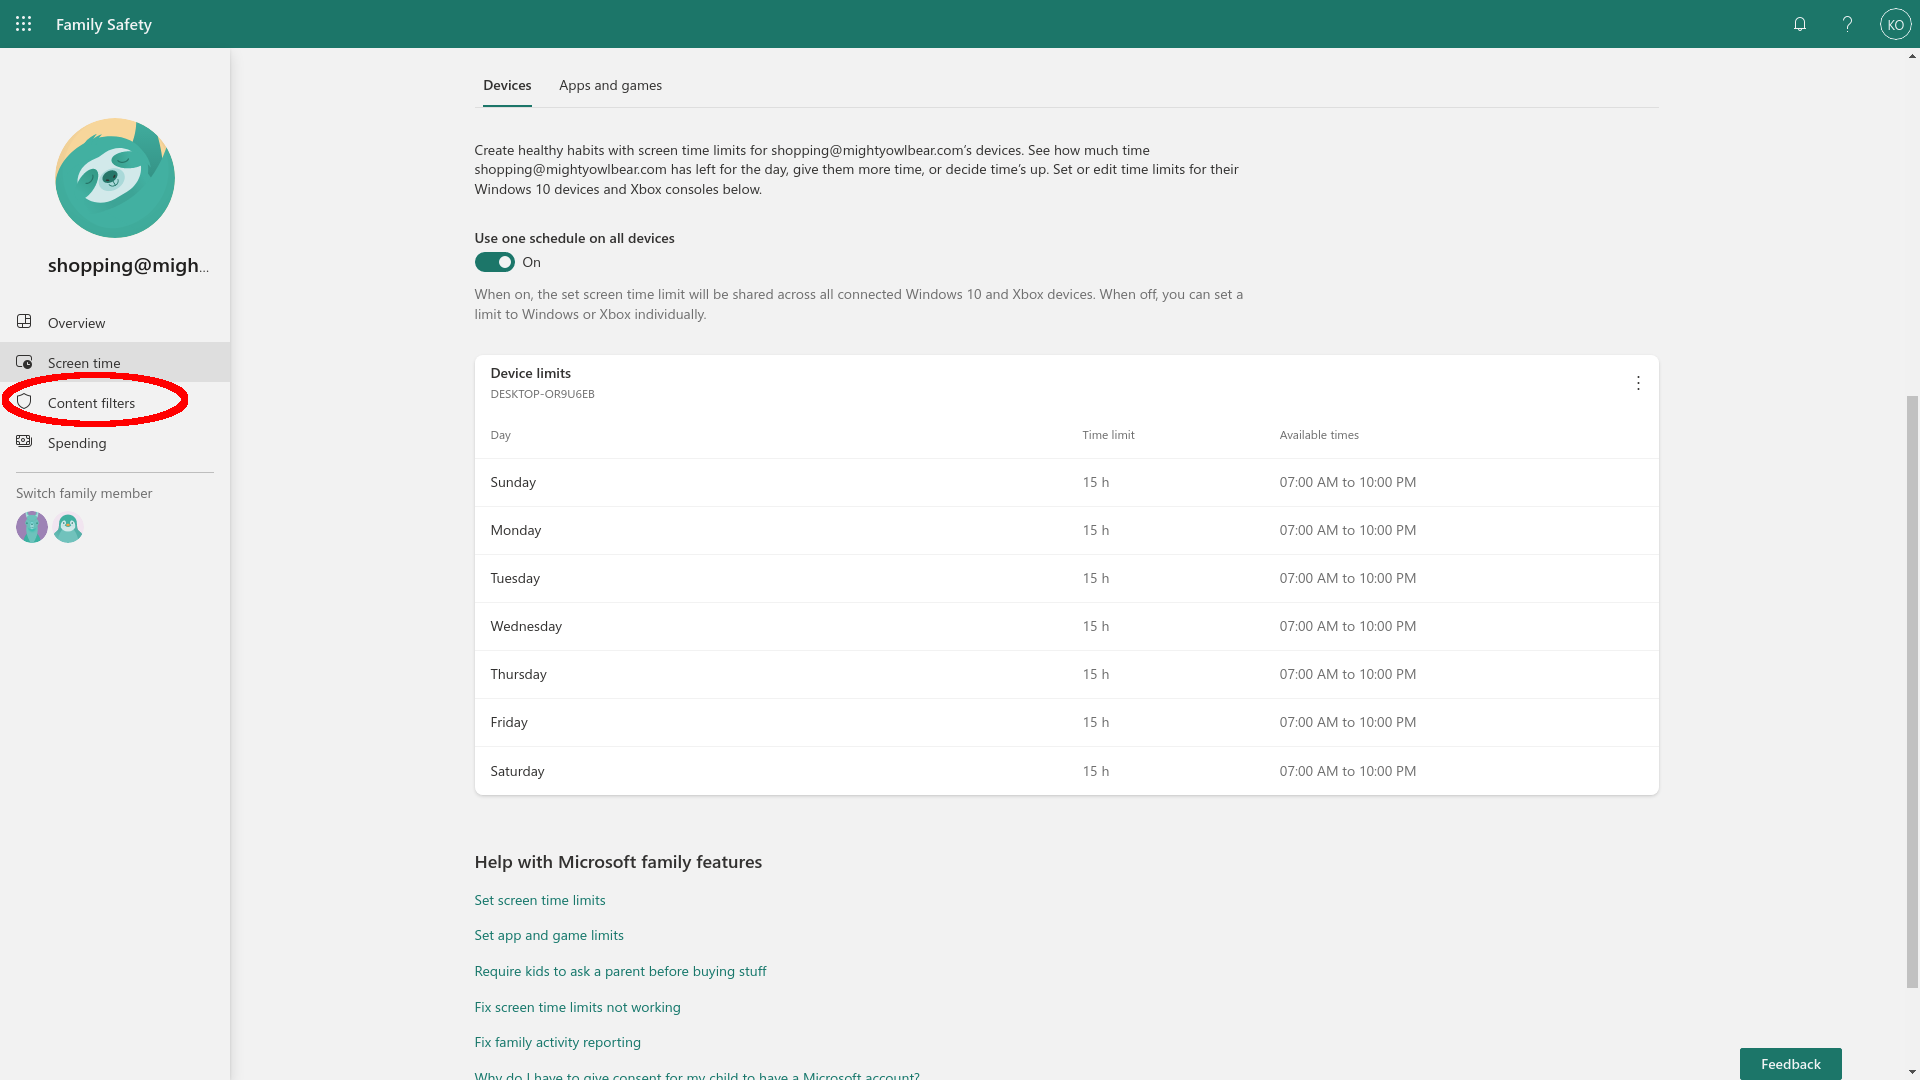
In the left-hand pane, click on the Content filters tab.
Step
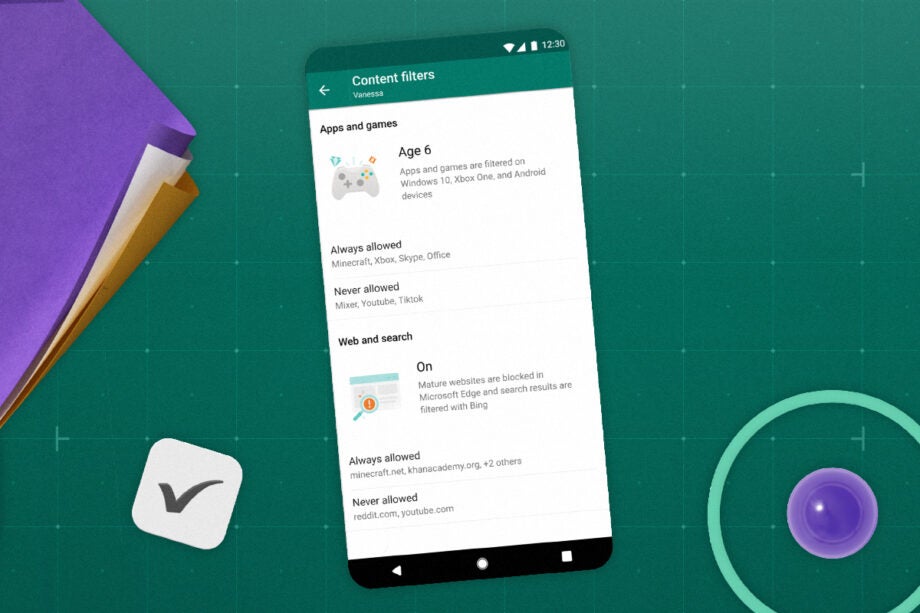
14Check your content filters
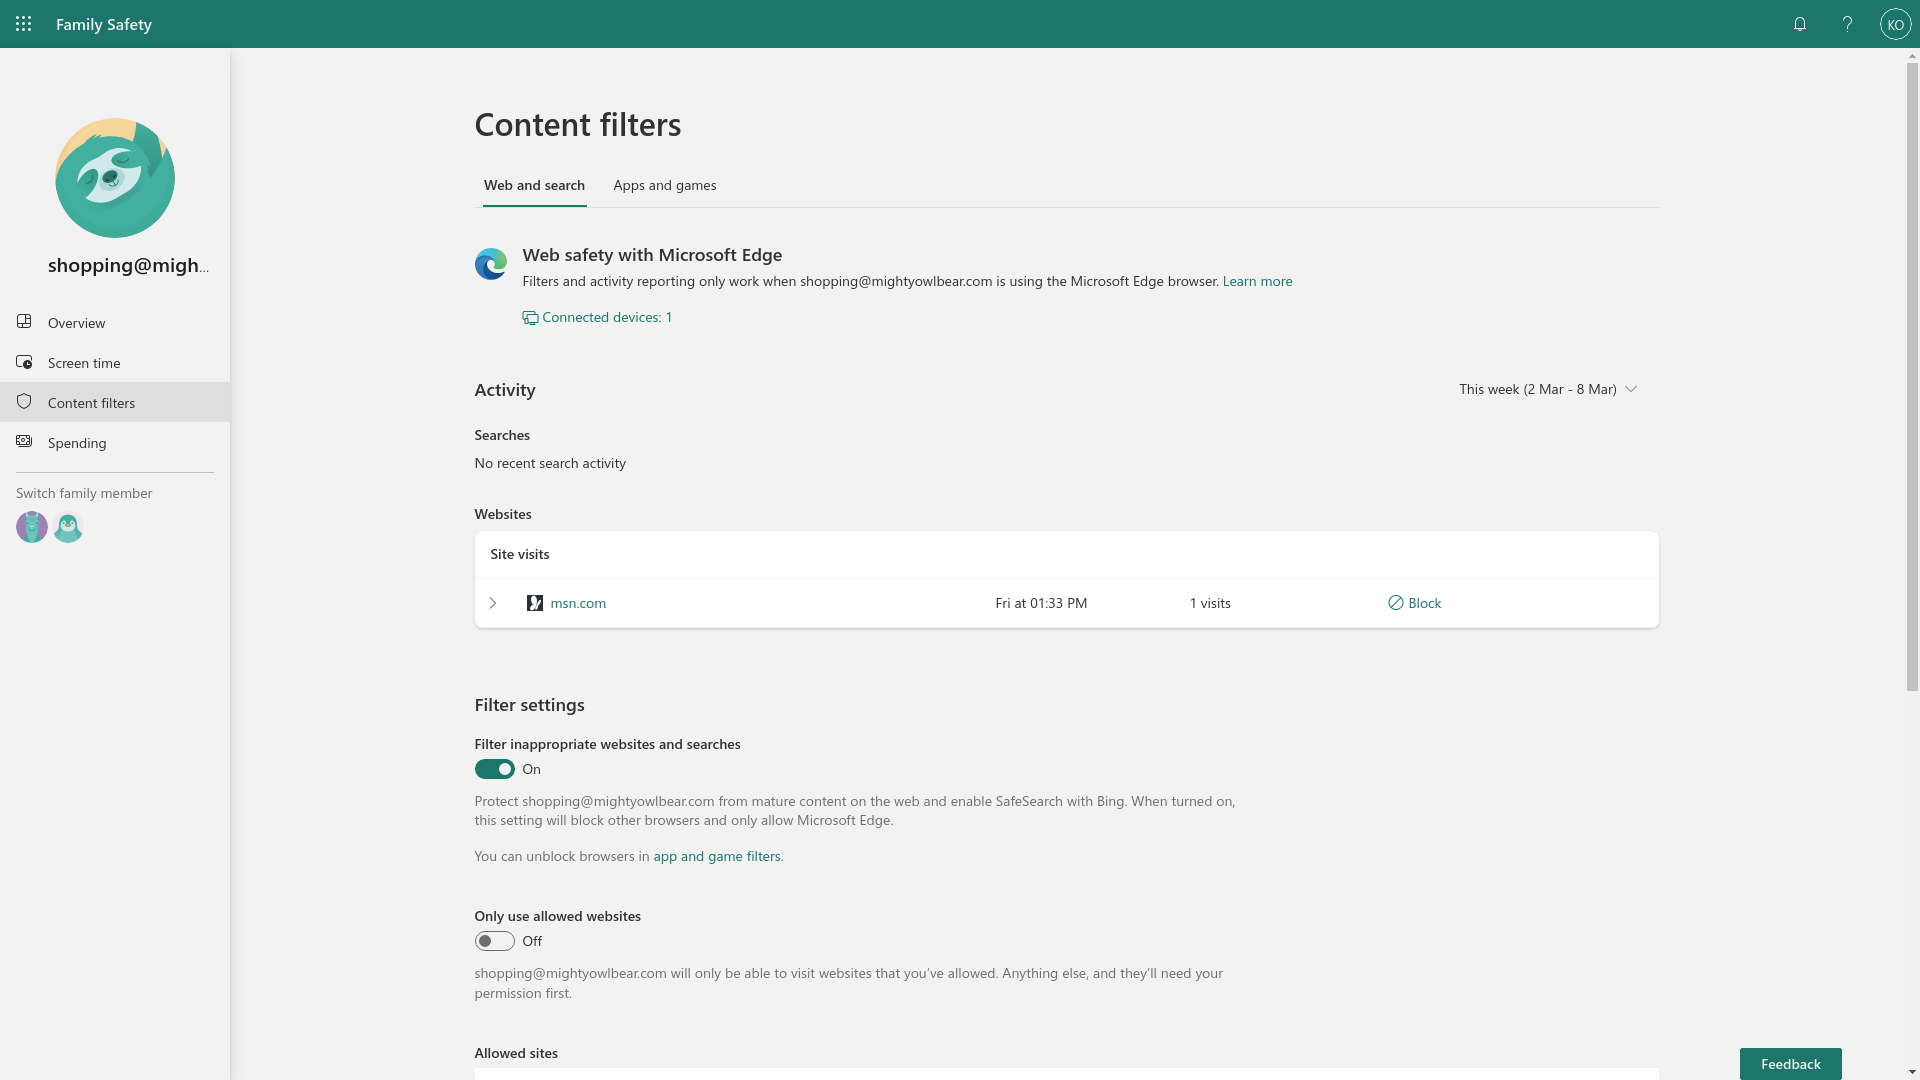
The settings here are usually fine: Filter inappropriate websites and searches. The degree to which content is filtered depends on the age setting you’ve set for the account. This is also where you can blacklist (block) and whitelist (allow) specific sites, as well as lock down content restrictions to only allow sites you’ve specifically whitelisted. This is a high-maintenance approach that is generally overkill for most families.
Step
15Open App and games settings

Scroll back to the top of the Content filters page and click on the Apps and games tab just below the title at the very top.
Step
16Check app restrictions
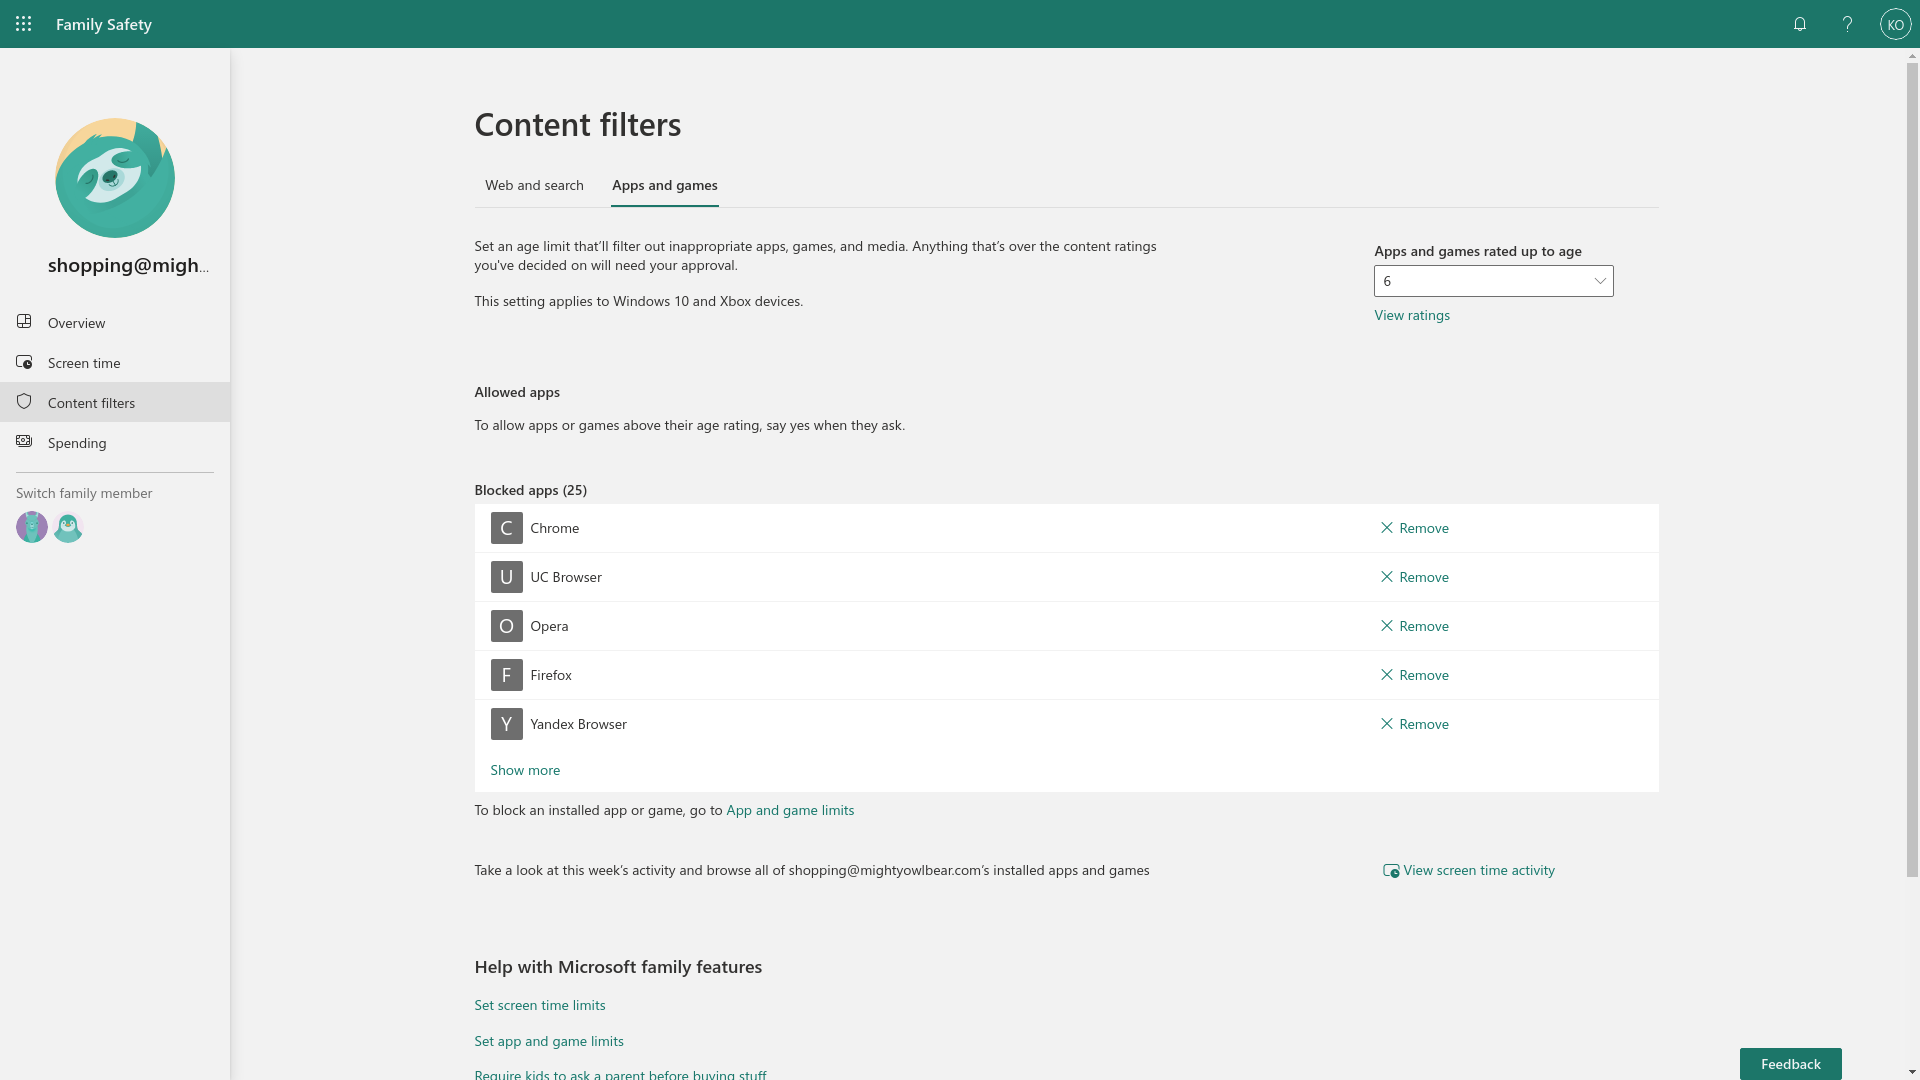
App and game restrictions only apply to Windows 10 and Xbox devices. Your child’s age rating is at the right, in a pull-down menu, which also allows you to change their age rating. Your child can request access to apps above this age rating – if granted, these will appear in the Allowed apps section. I’ve not allowed any. Below this you’ll see a list of Blocked apps. By default, these include most web browsers, so your child is obliged to access the web via Edge and your content filters.
Step
17Click spending
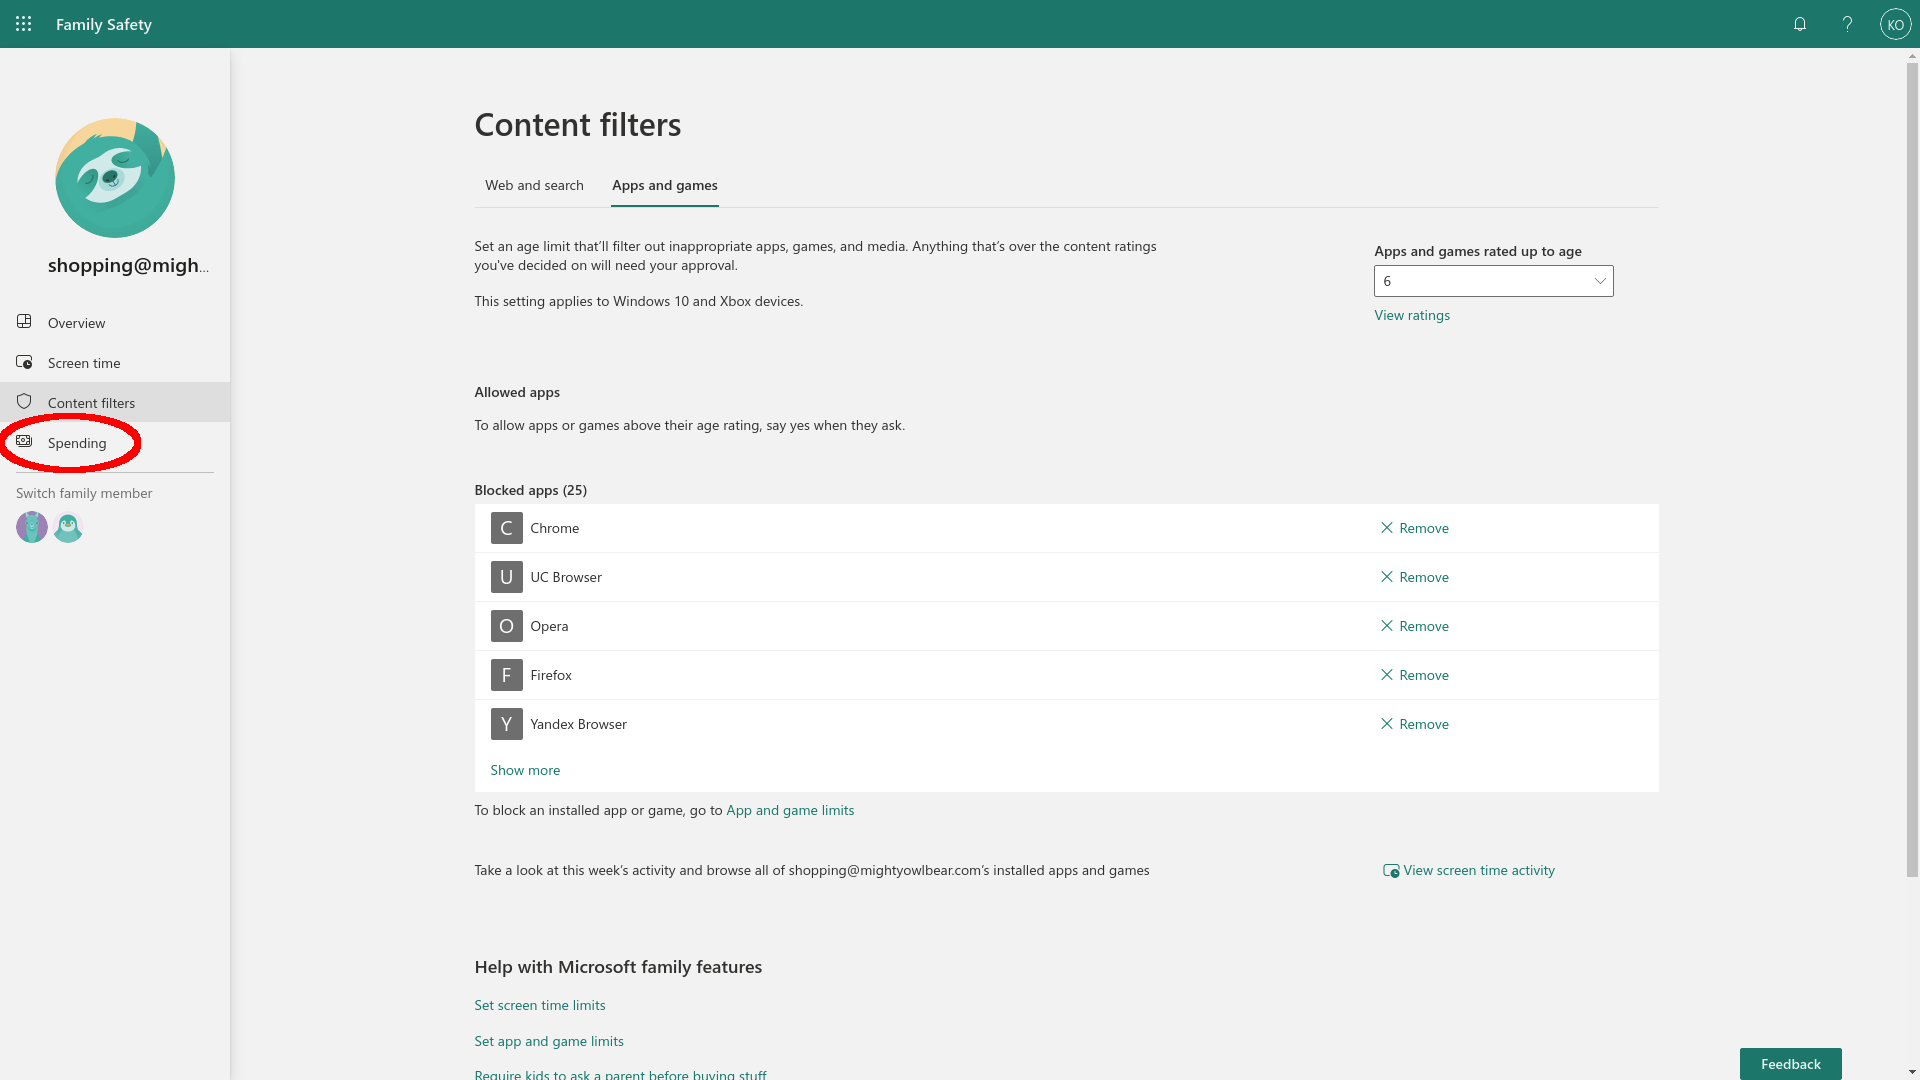
In the left-hand pane, Click Spending.
Step
18Check spending settings
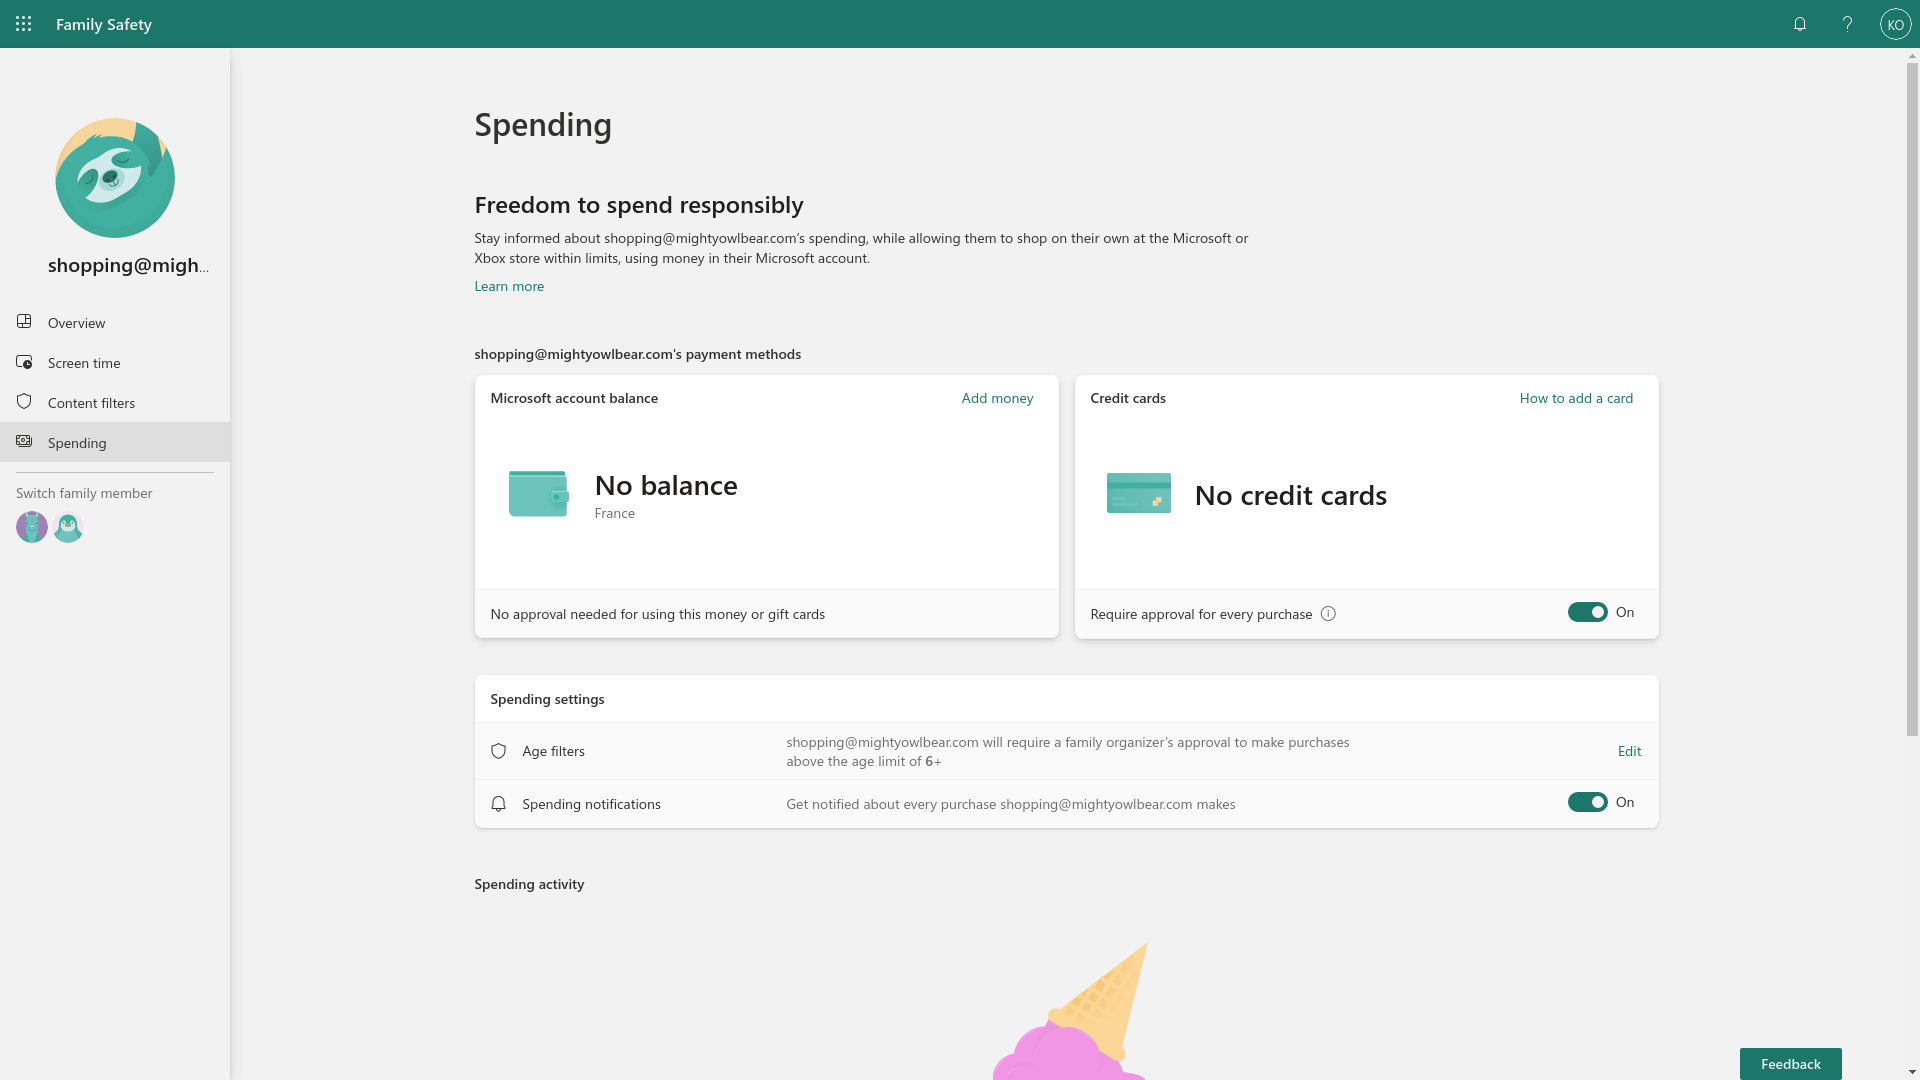
The last stop on our tour of Family Safety’s main features are Spending settings. I have no balance or cards set up for my hypothetical six-year-old, but if you click Add money here, you’ll be able to use a card to give them a bit of spending money for the Microsoft and Xbox stores (within their allowed age ratings).
Look down the page and you’ll see Age filters – my six-year-old requires my approval to buy anything even after I’ve given them money: click Edit to change this. Below that are Spending notifications, which will inform you every time your child spends anything in Microsoft’s online stores.
Save 81% on a VPN with SurfShark
Surfshark has dropped the price of its VPN to £1.94 a month. Head over to Surfshark now to pay a one time price of £46.44 for 24 months of Surfshark and save 81%.
- Surfshark
- 81% off
- £1.94 a month
FAQs
Make sure that both your device and that of your child are connected to the internet.
Go to Content filters and paste its URL or IP address into the Blocked site field, the click the + icon at the end of the field.
Go to Content filters and paste its URL or IP address into the Allowed site field, the click the + icon at the end of the field.
All the sites you’ve blocked or allowed will appear in a list below their respective text entry fields. At the end of each site’s list entry you’ll see a Remove link. Click it to take the site out of your block or allow list.
You might like…


Editorial independence
Editorial independence means being able to give an unbiased verdict about a product or company, with the avoidance of conflicts of interest. To ensure this is possible, every member of the editorial staff follows a clear code of conduct.
Professional conduct
We also expect our journalists to follow clear ethical standards in their work. Our staff members must strive for honesty and accuracy in everything they do. We follow the IPSO Editors’ code of practice to underpin these standards.