Looking to create a GIF in Photoshop? Here’s how to do it in under five minutes using any photo, video or illustration.
The acronym GIF stands for Graphics Interchange Format. The file type is commonly used to upload moving graphics to websites and create silent looping clips to be shared across social media and instant messaging apps.
While GIFs aren’t the most high-quality files around (the 8-bit format is limited to just 256 colours) they are small and easy to share amongst others. This has made them a popular choice for creating memes and animated reactions to post on Facebook and Twitter.
We’ve put together this guide to teach you how to create your own GIFs in Photoshop.
What you’ll need:
- Adobe Photoshop
- A Creative Cloud subscription
The Short Version
- Open the frames of your GIF as separate layers in Photoshop
- Open the timeline panel
- Click Create Frame Animation
- Select Make Frames From Layers
- Export your GIF
How to create a GIF in Photoshop
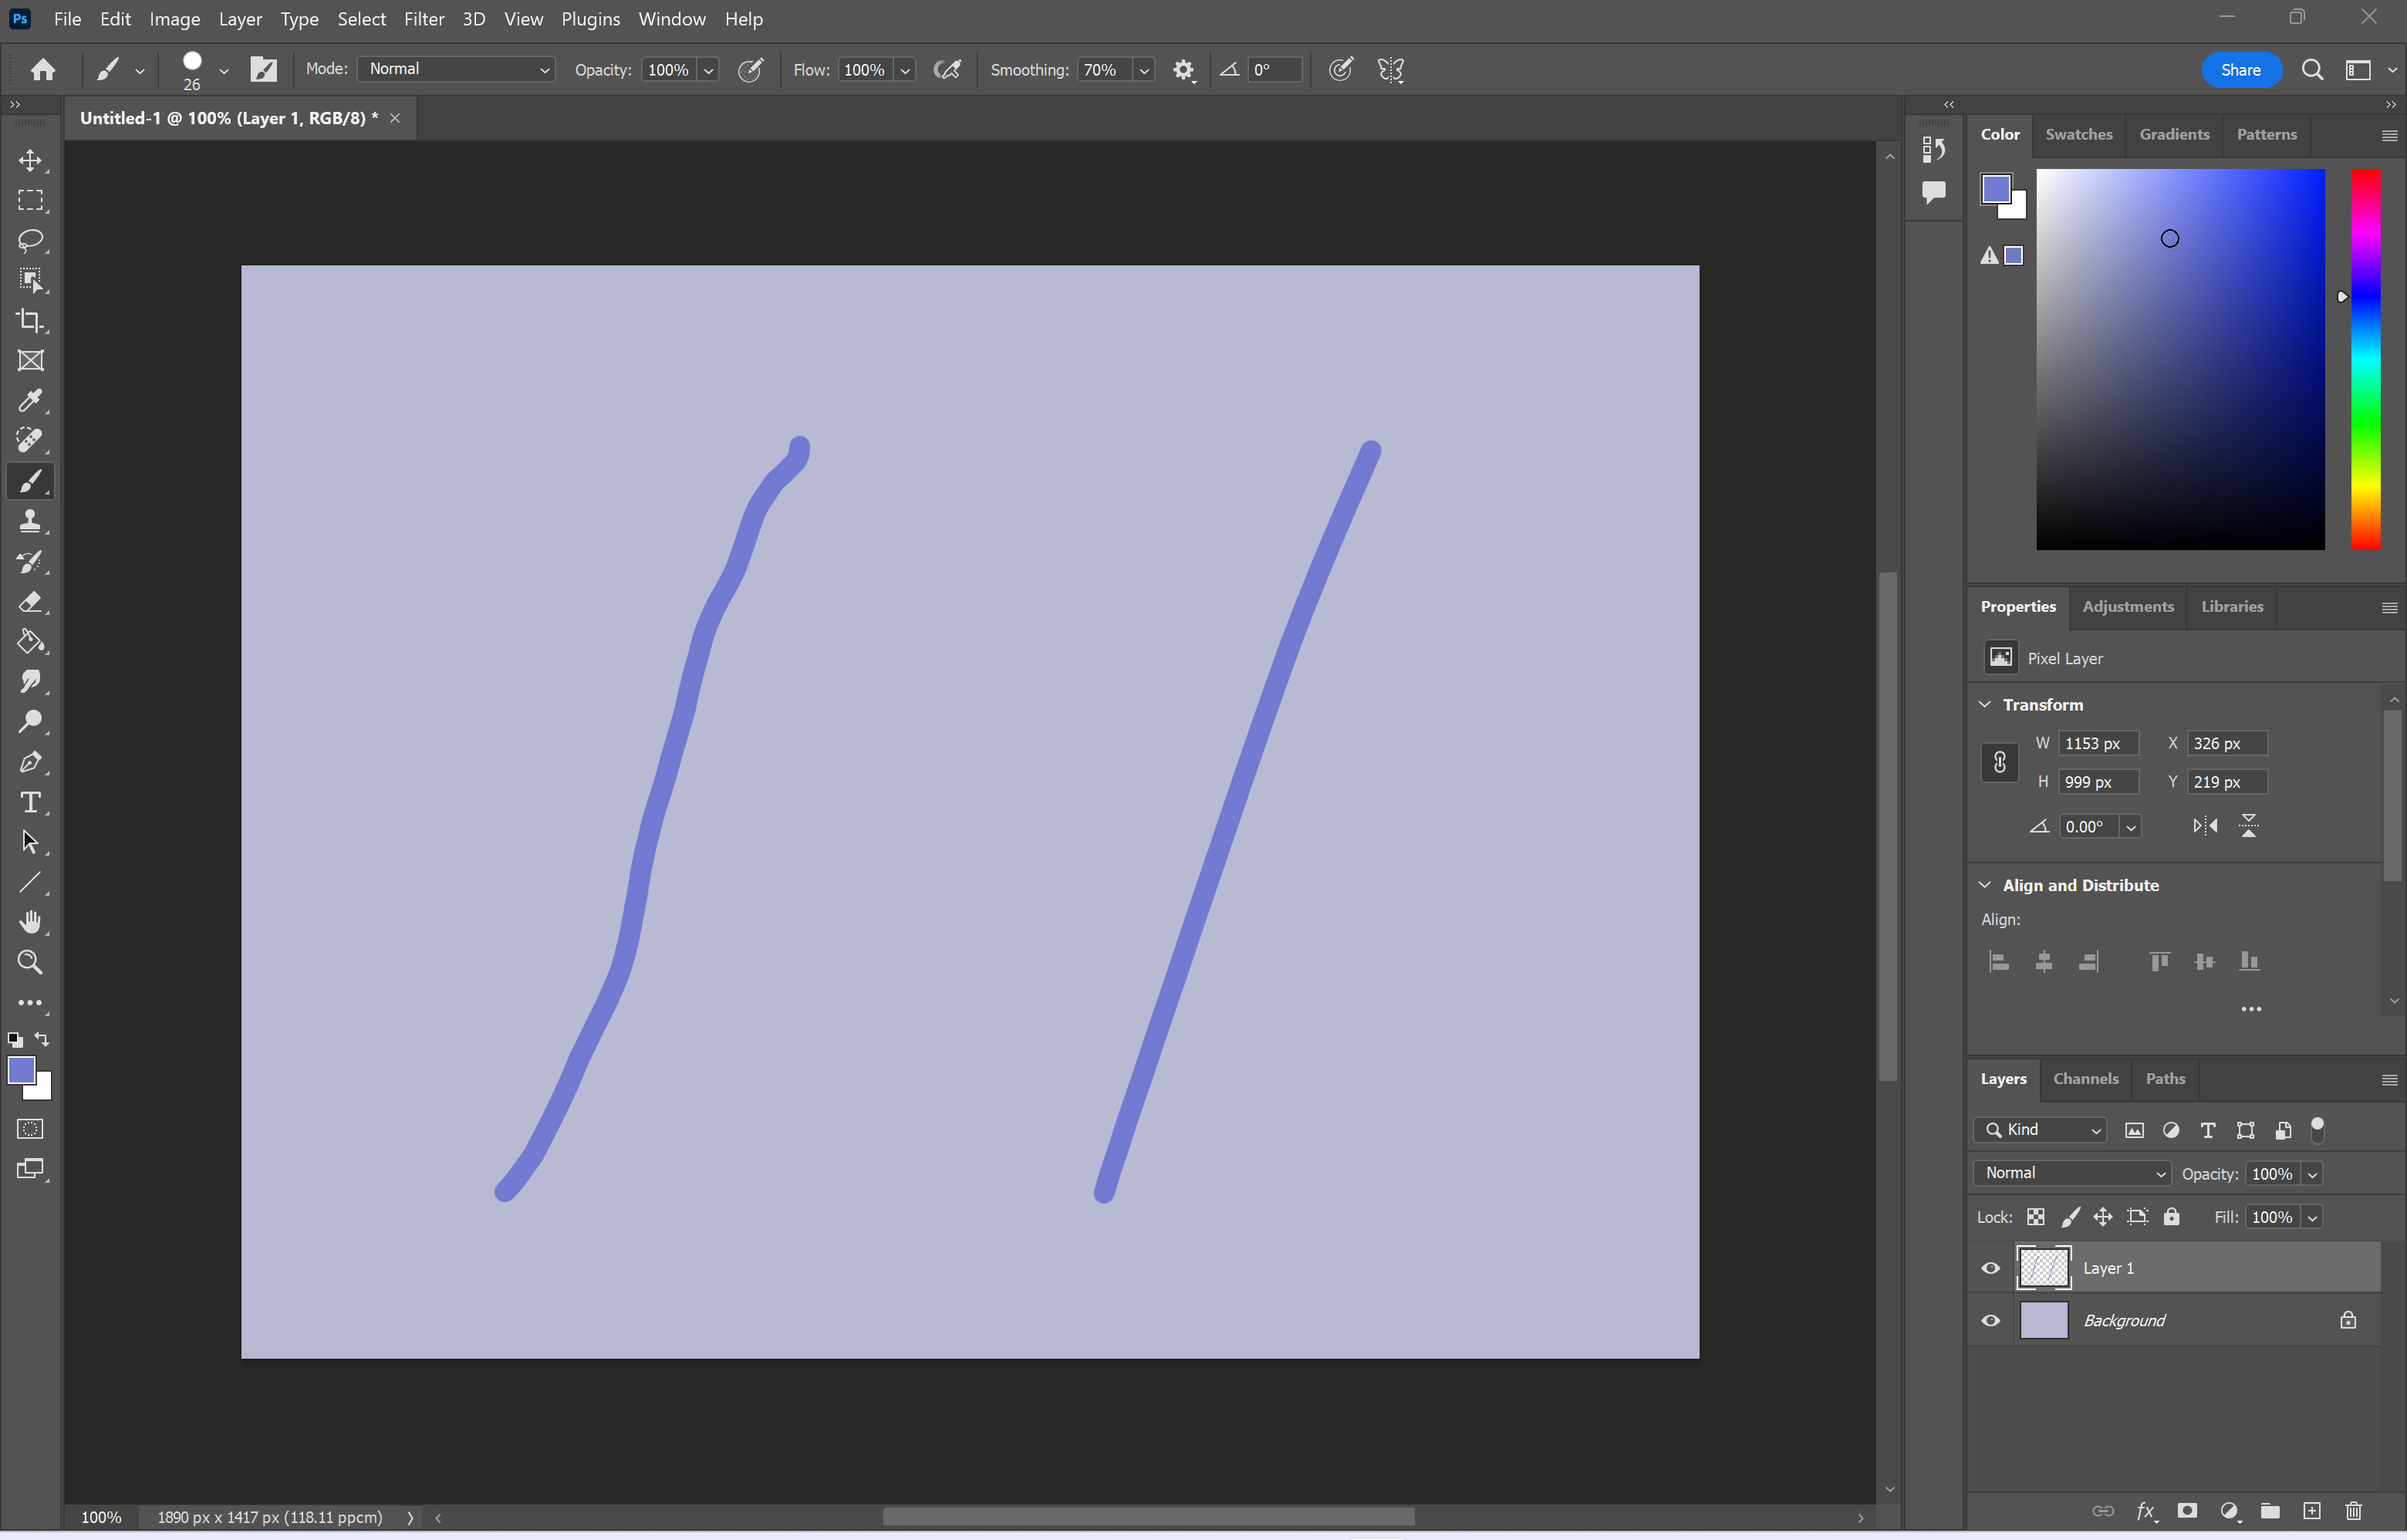
Step
1Open your frames as separate layers in Photoshop

You can use photos, illustrations or individual frames from a video to make your GIF.
Step
2Click Window

You can find this menu at the top of Photoshop.
Step
3Select Timeline
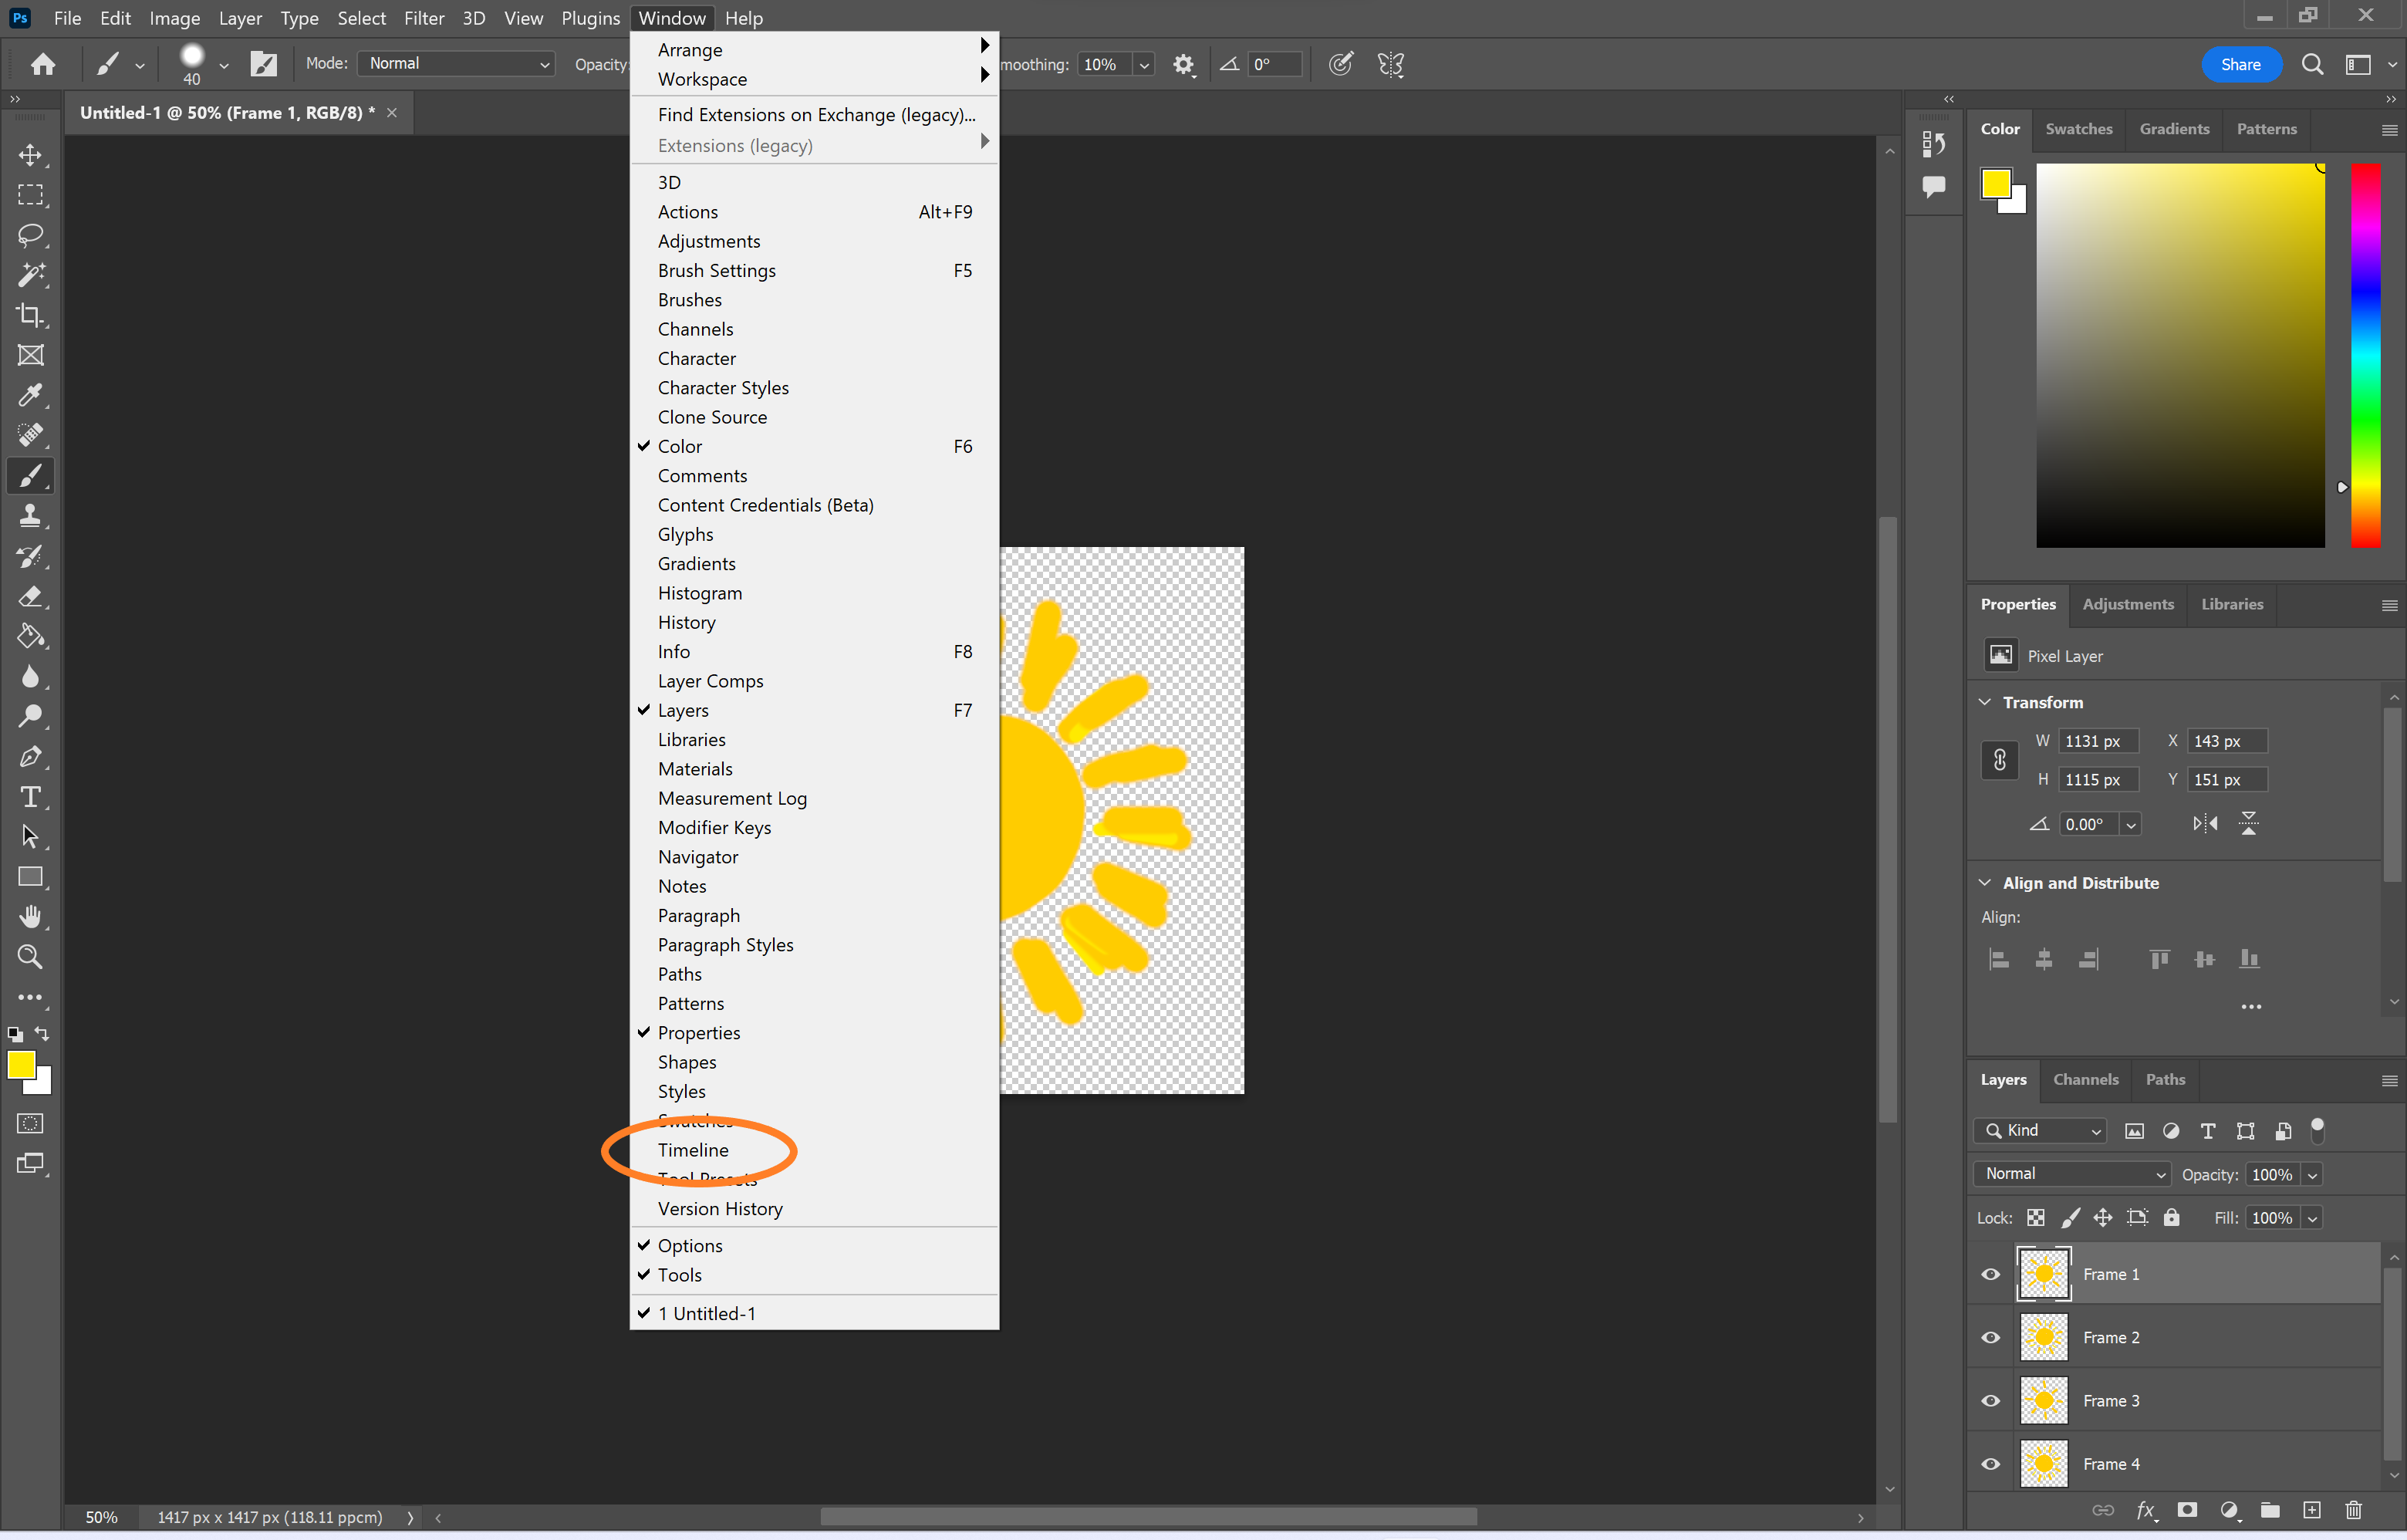
This will open the timeline panel.
Step
4Click Create Frame Animation
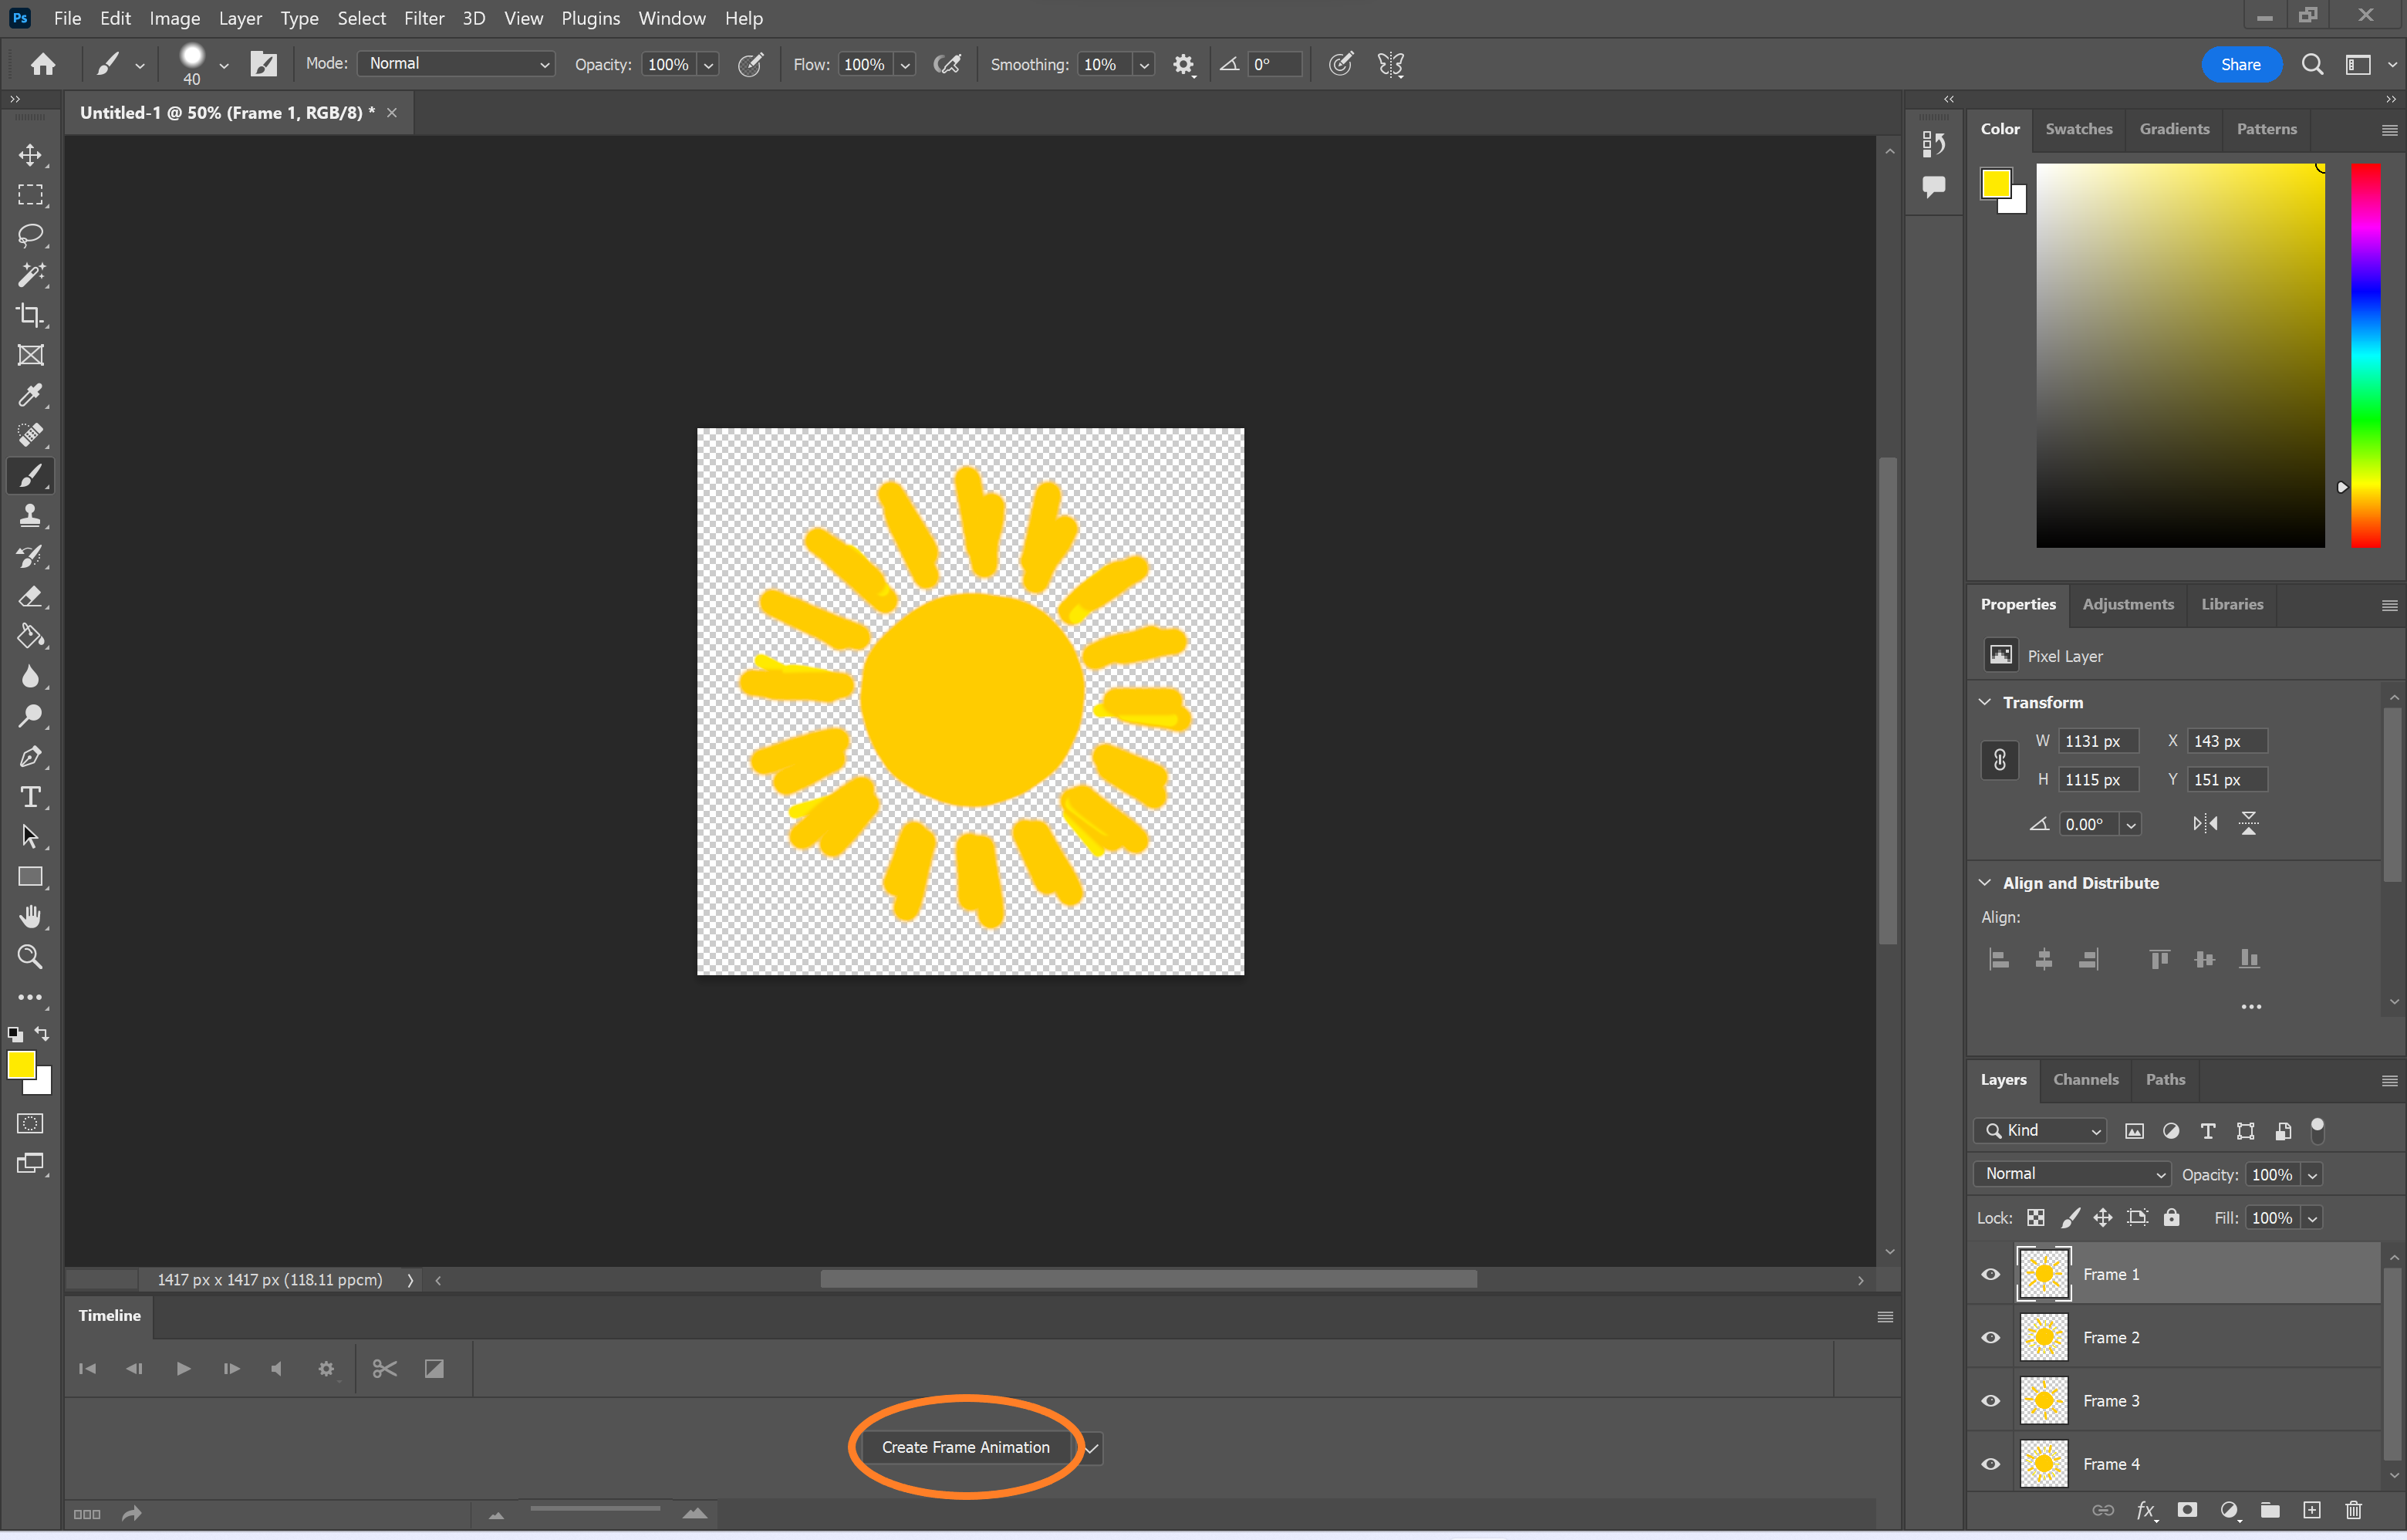
You might need to click the small arrow to find this option.
Step
5Click the four-line icon on the right
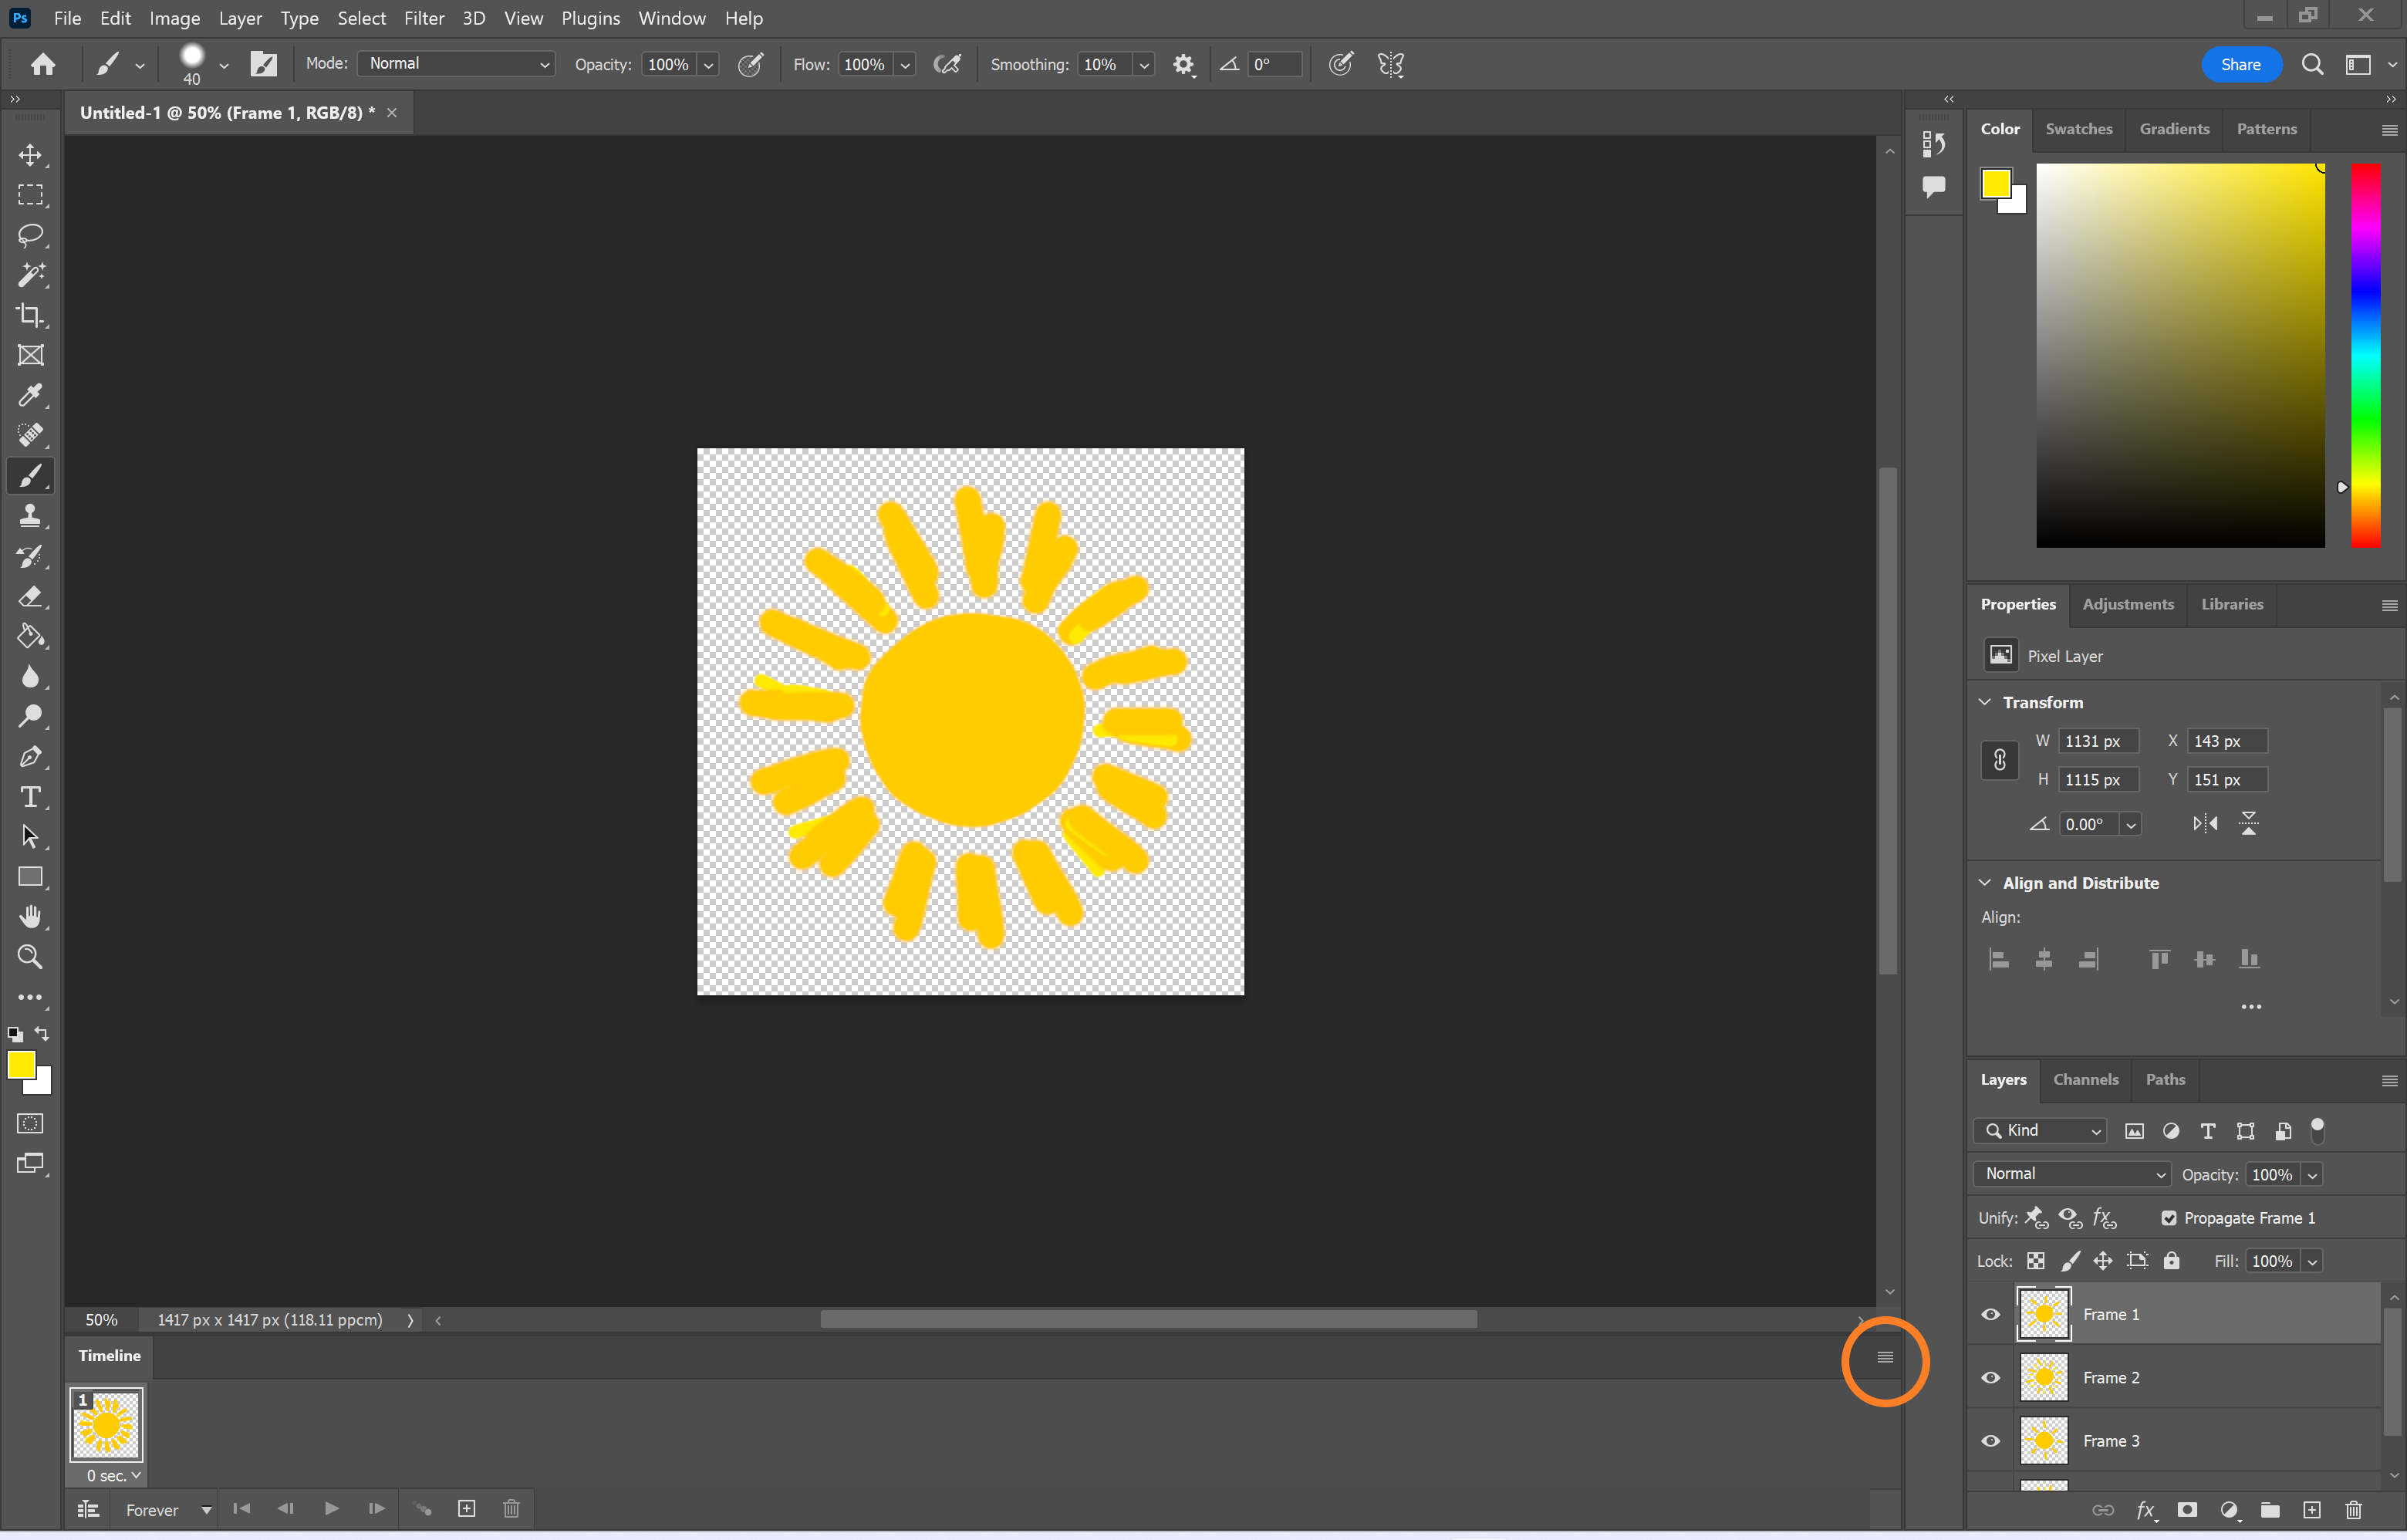
This will open up the timeline menu.
Step
6Select Make Frames From Layers
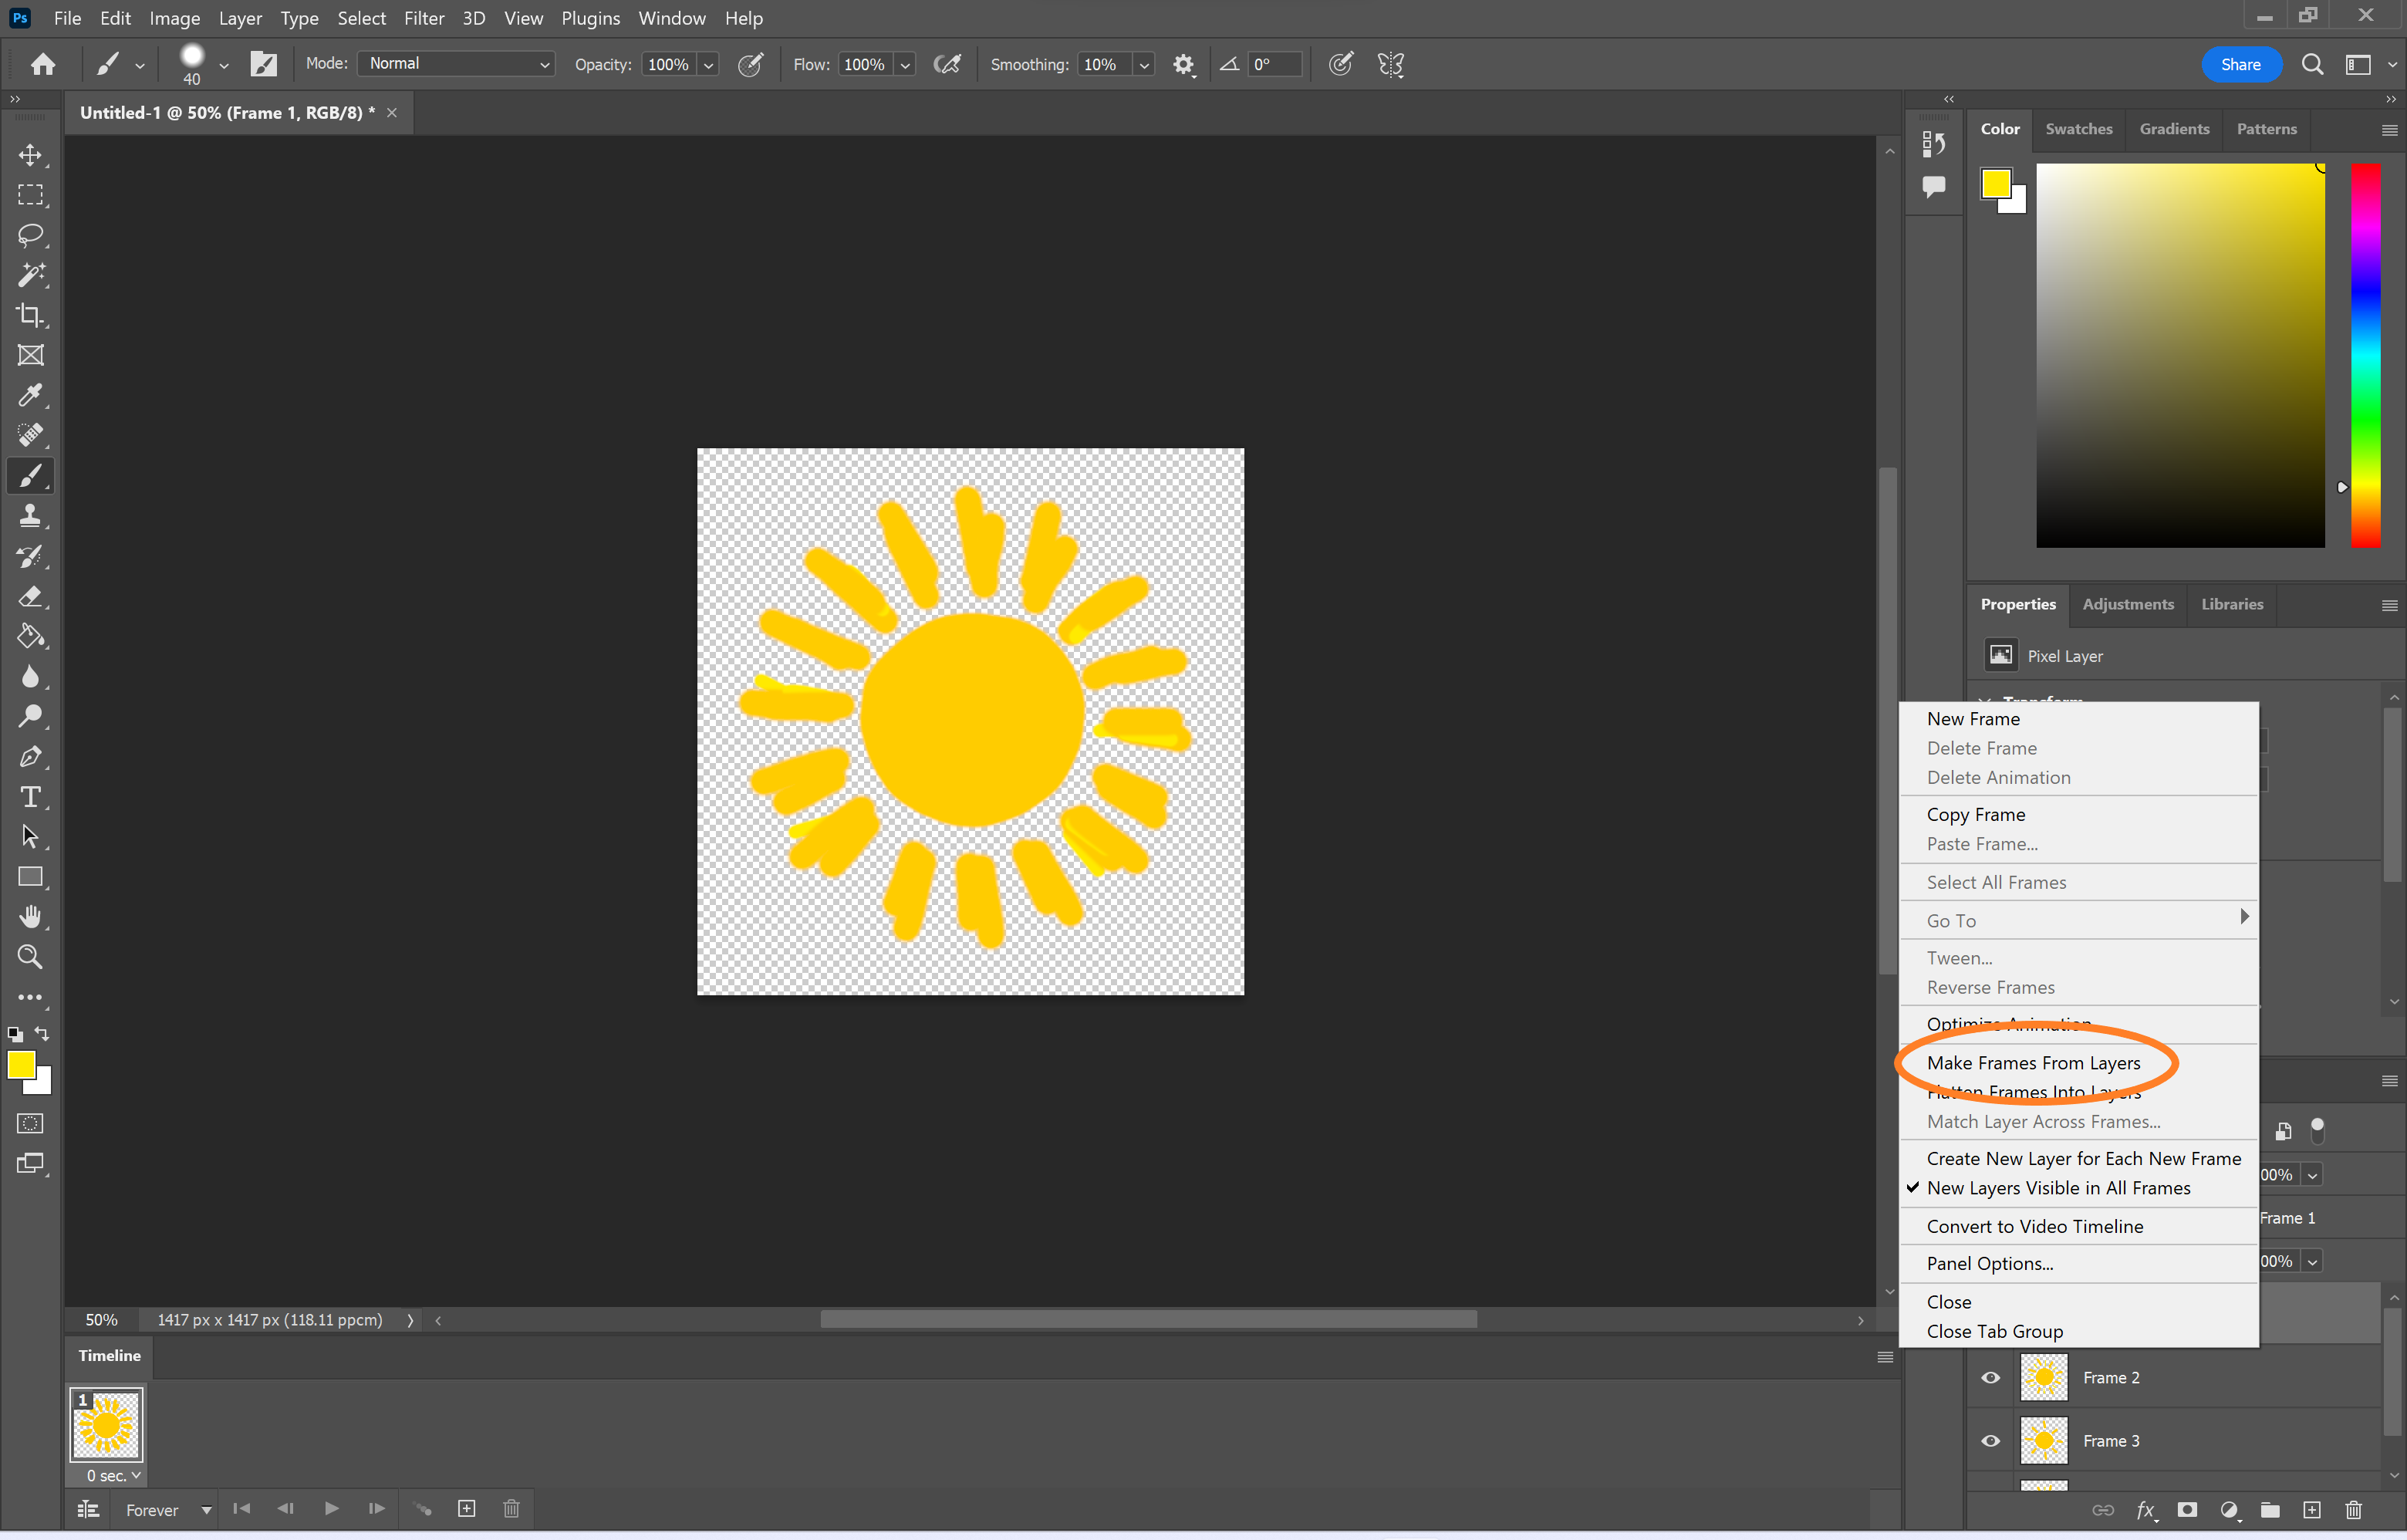
This will create a frame from each Photoshop layer.
Step
7Use the timeline panel to make any changes to your GIF
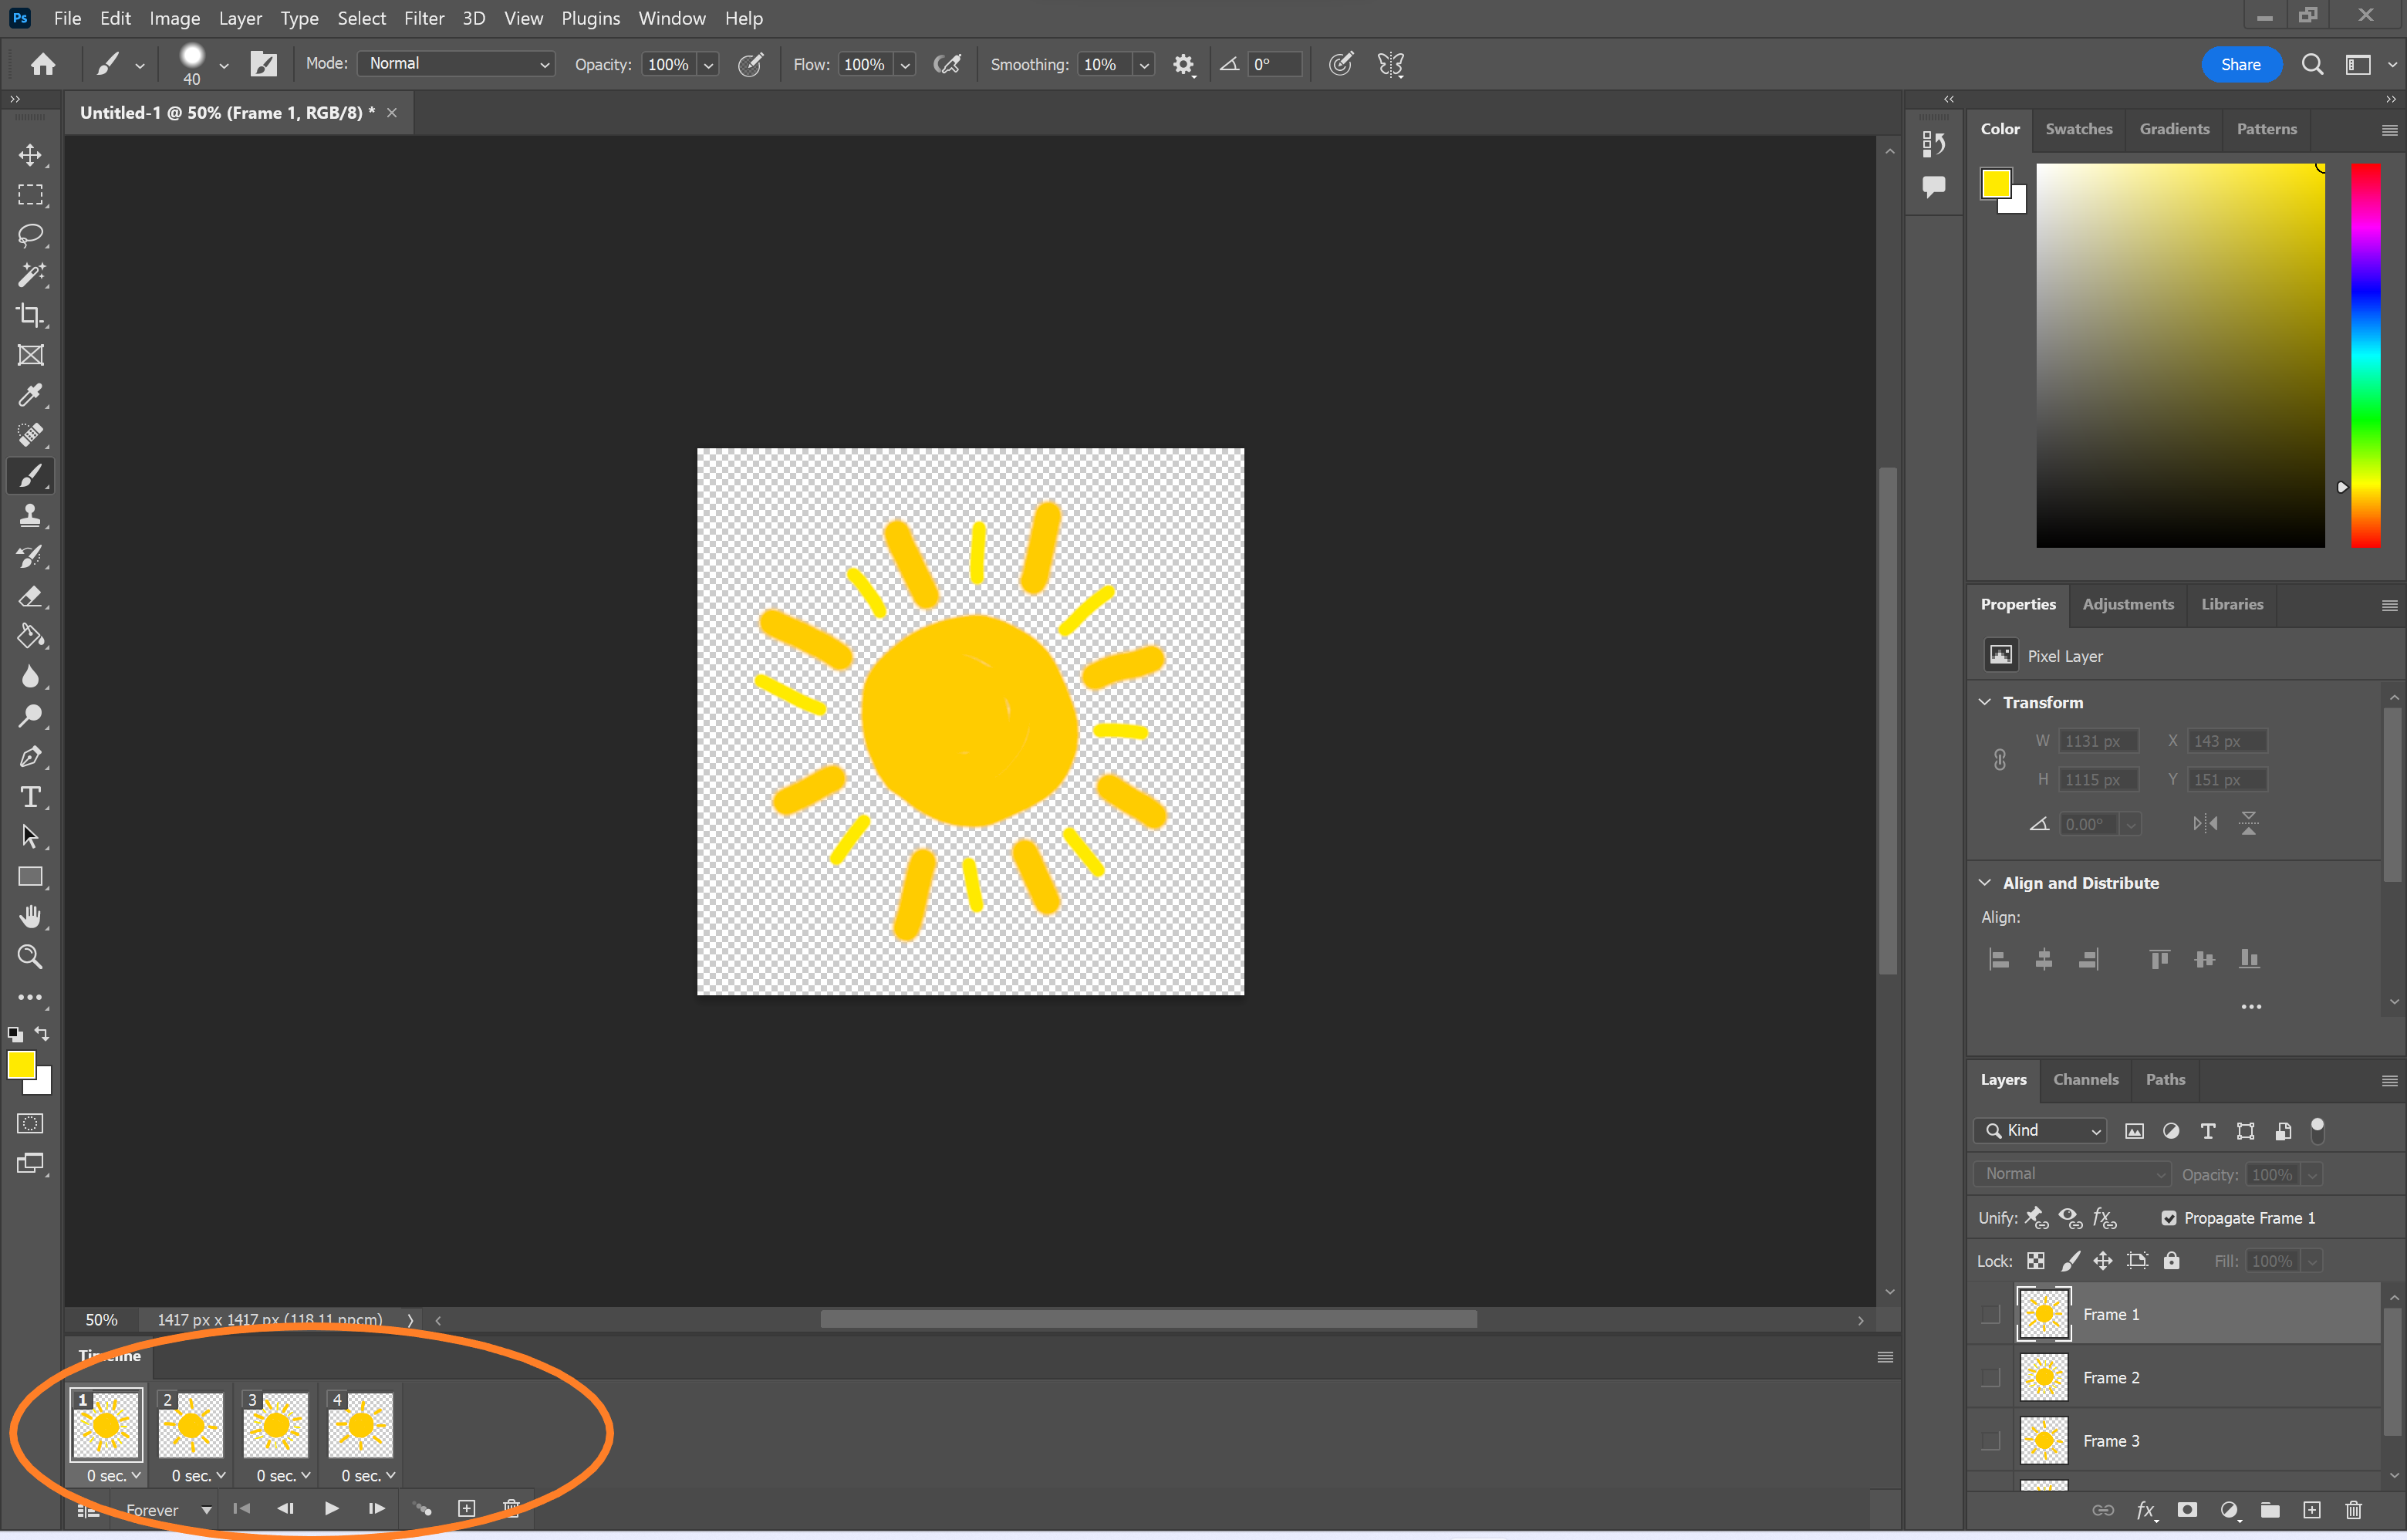
You can choose how long each frame lasts, how many times it’ll loop and preview your GIF from here.
Step
8Once you’re happy with your GIF, click File
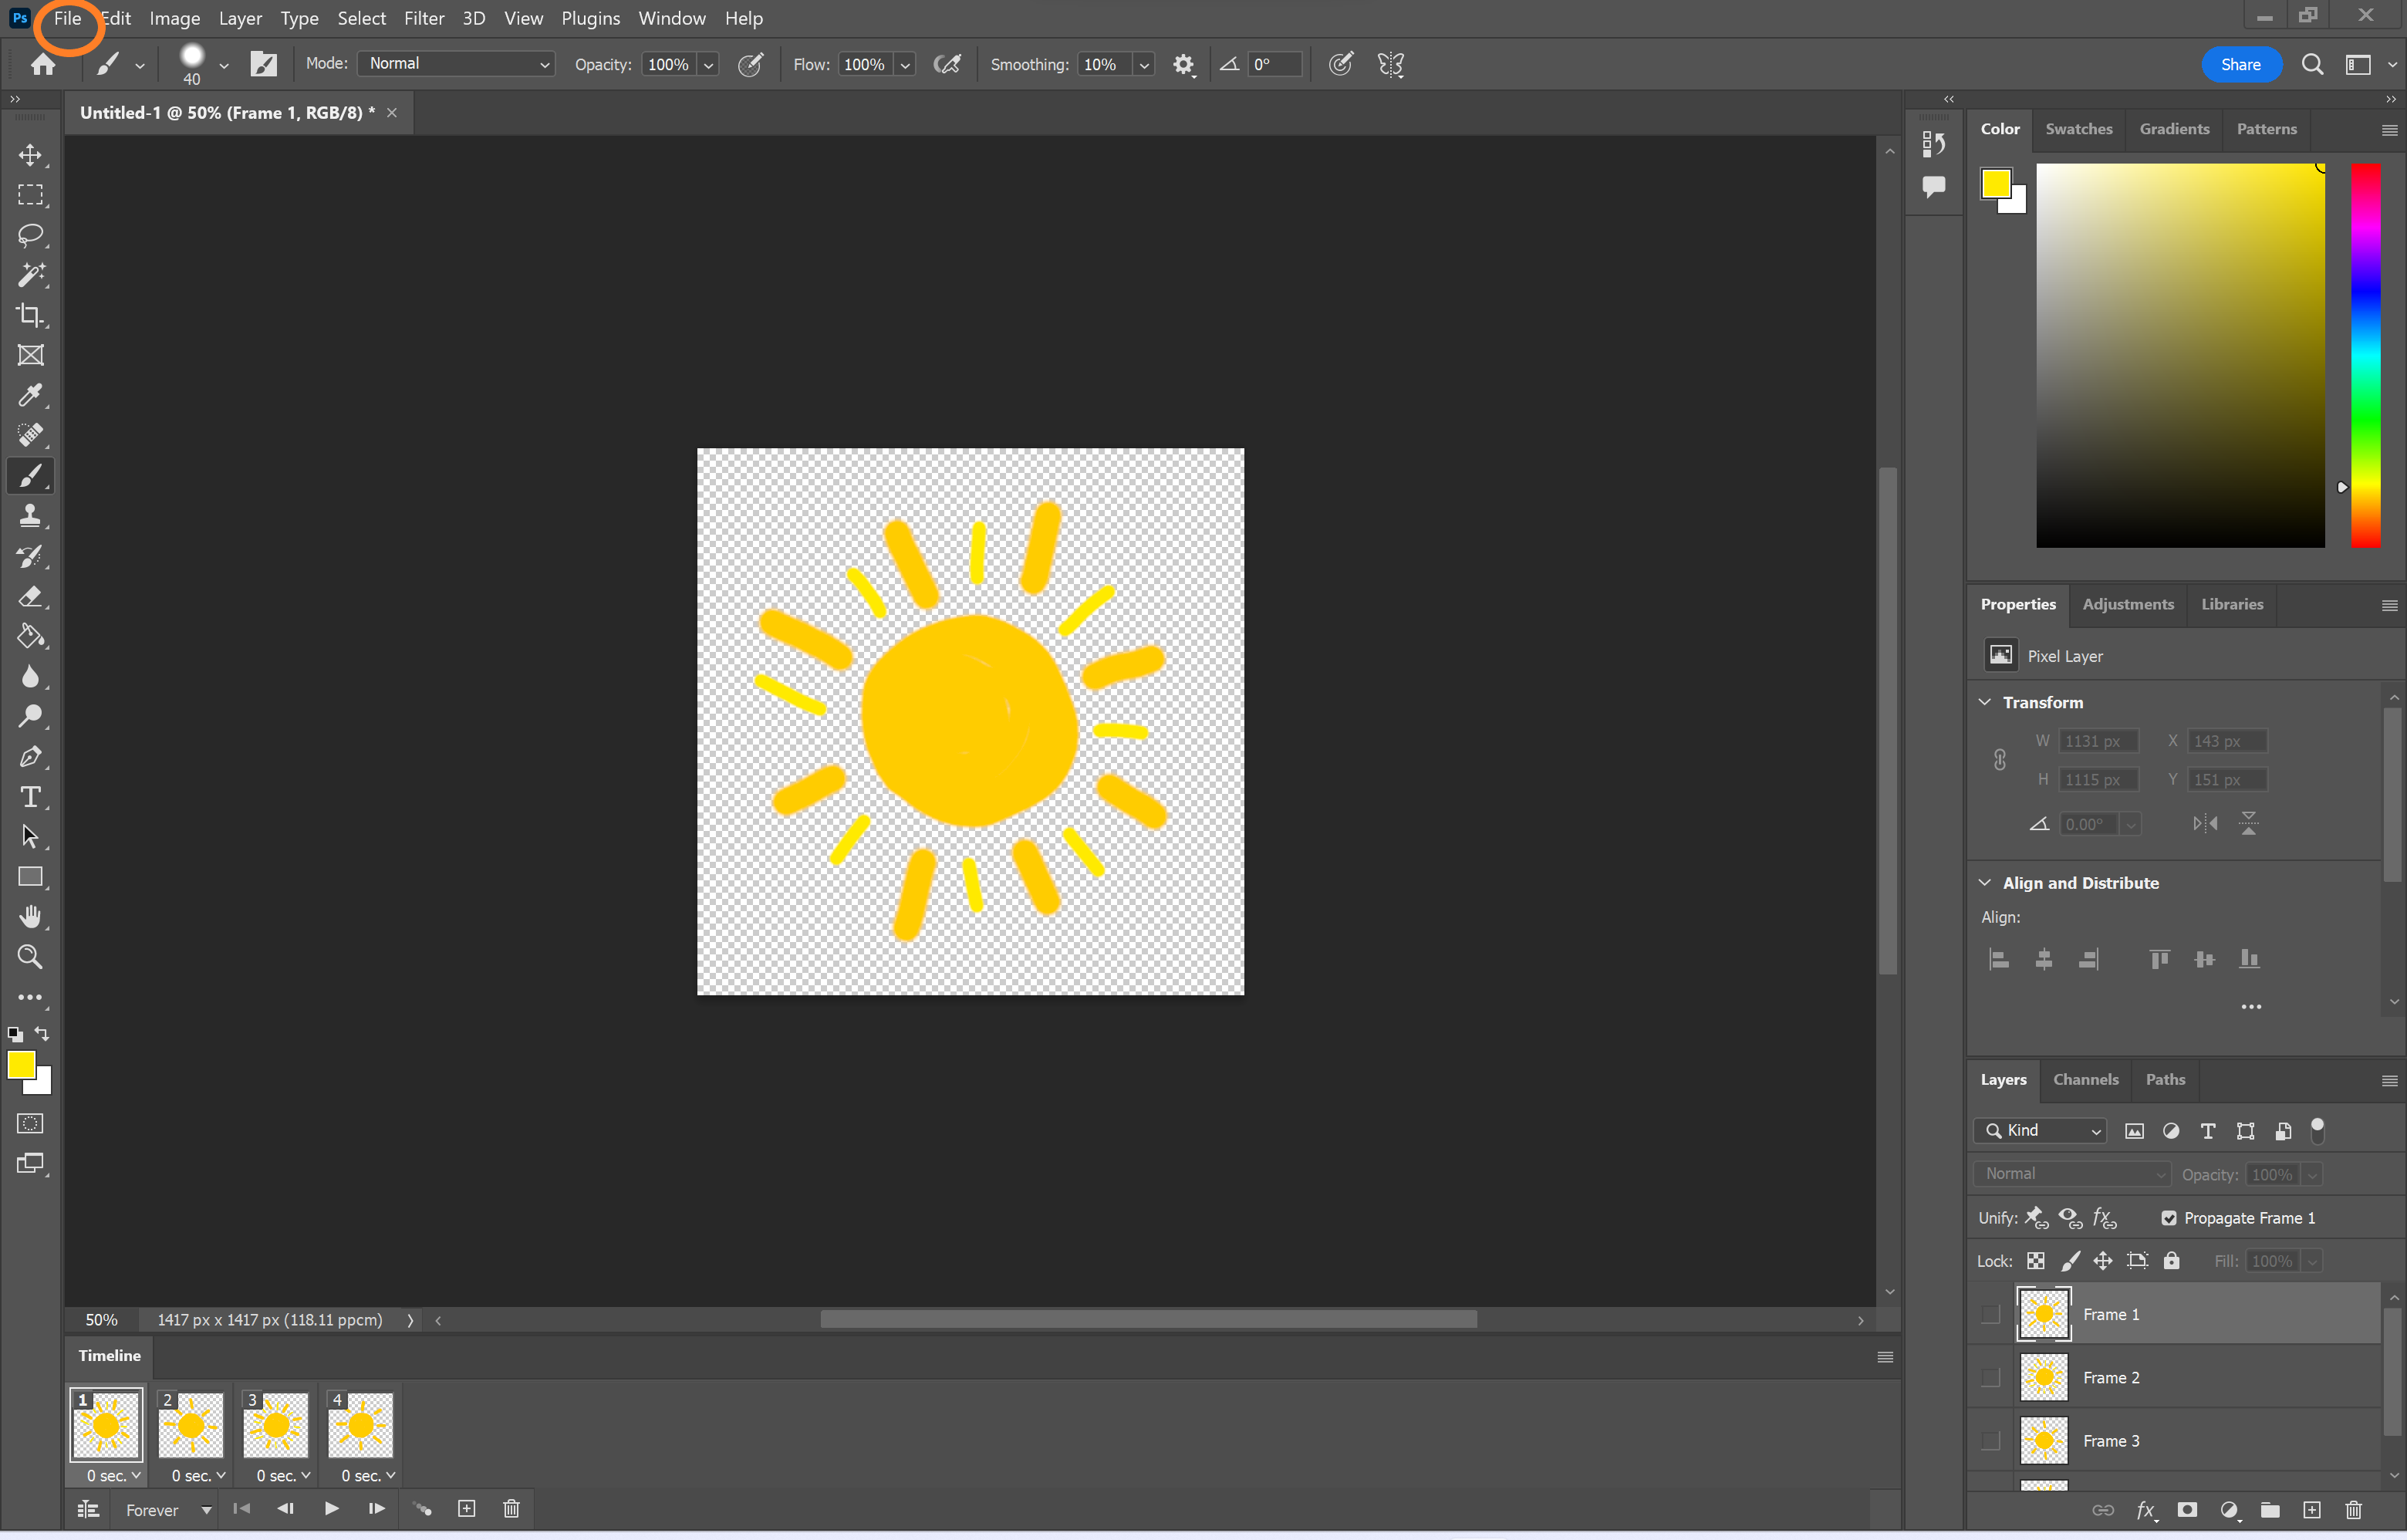
Now we’re going to save the GIF.
Step
9Select Export
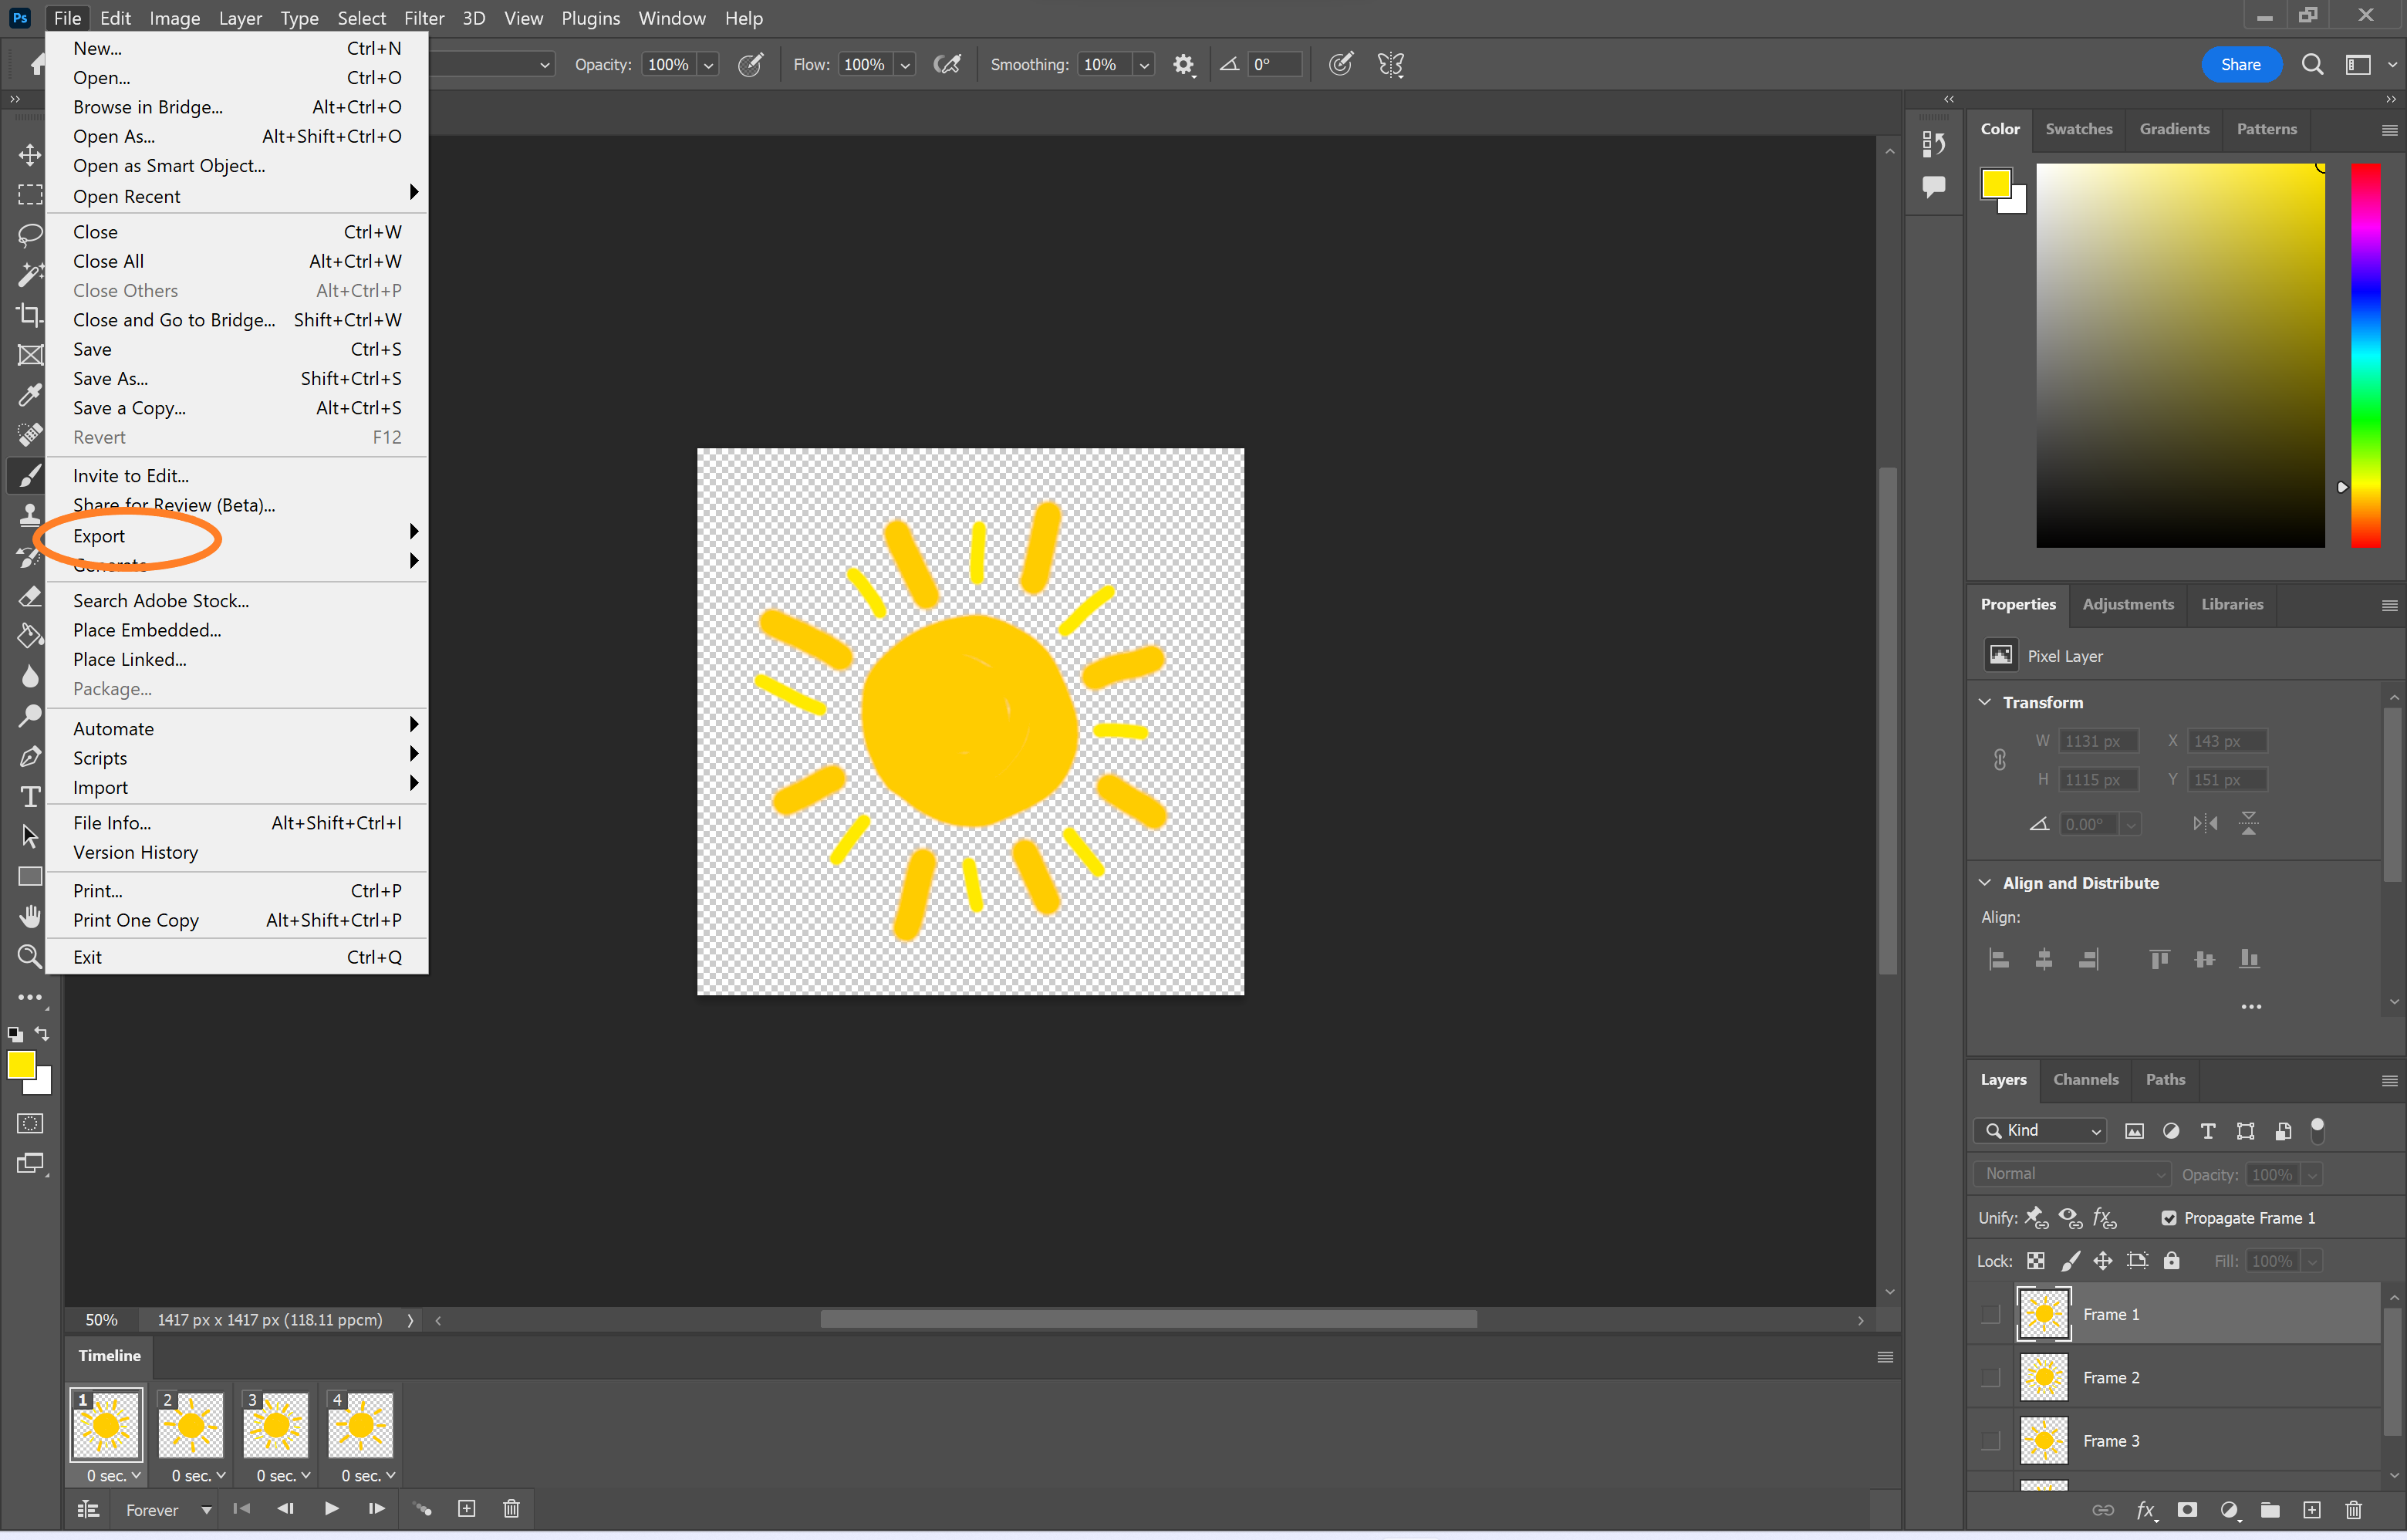
This will be under File.
Step
10Choose Save For Web (Legacy)
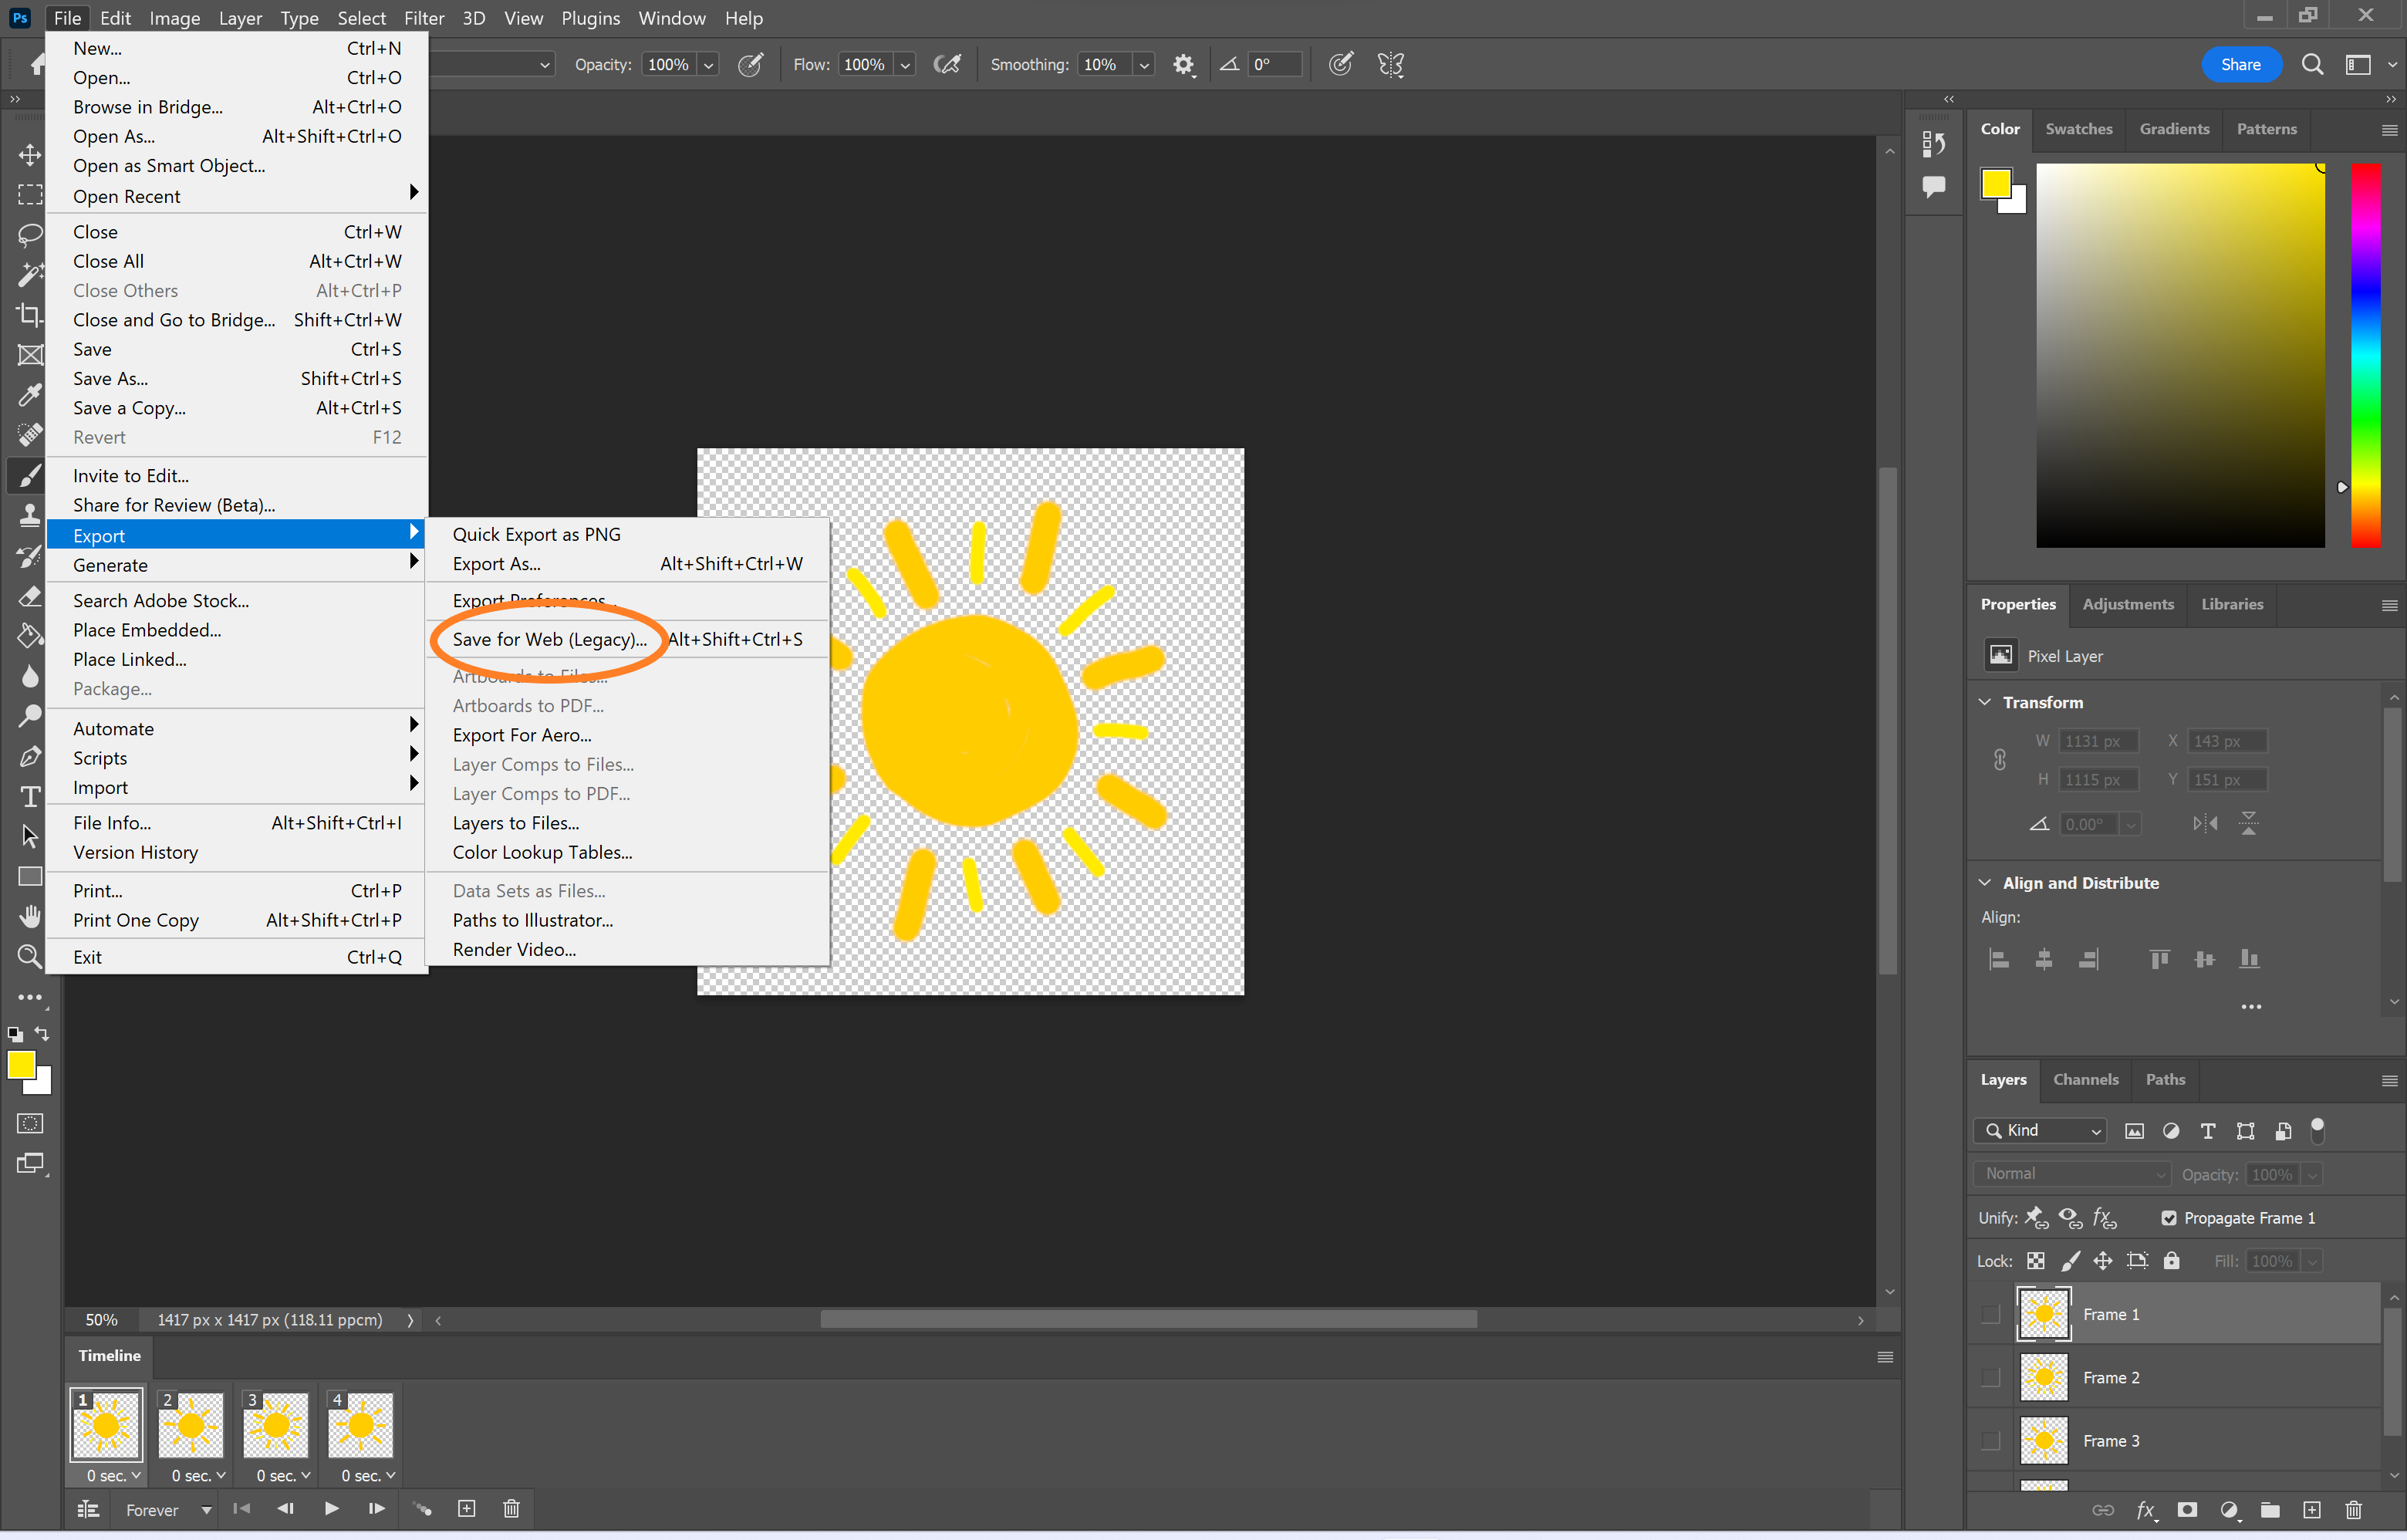
You can also skip steps 8 to 10 using the shortcut Alt+Shift+Ctrl+S.
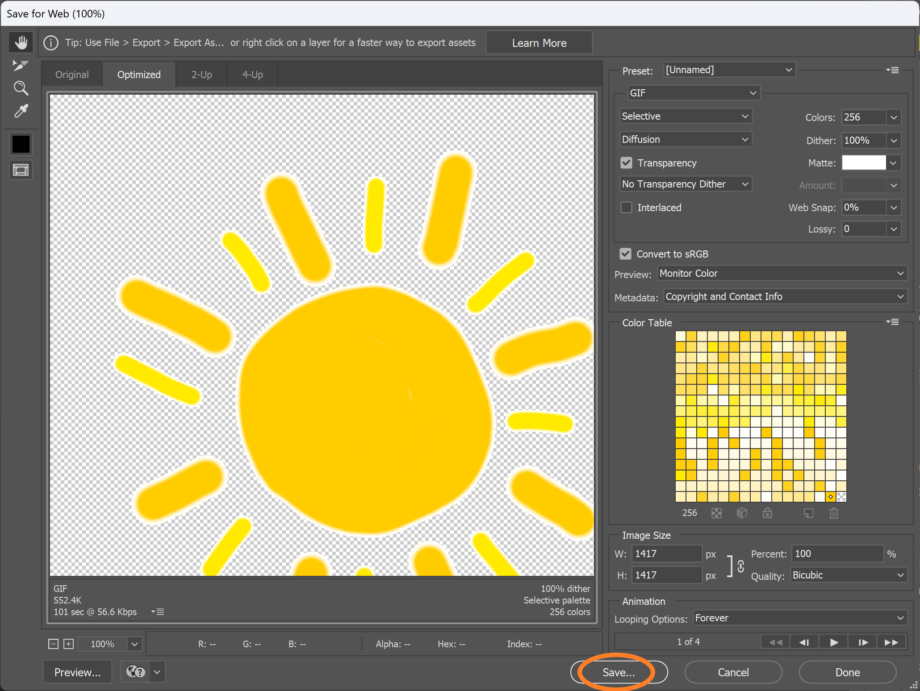
Step
11Hit Save
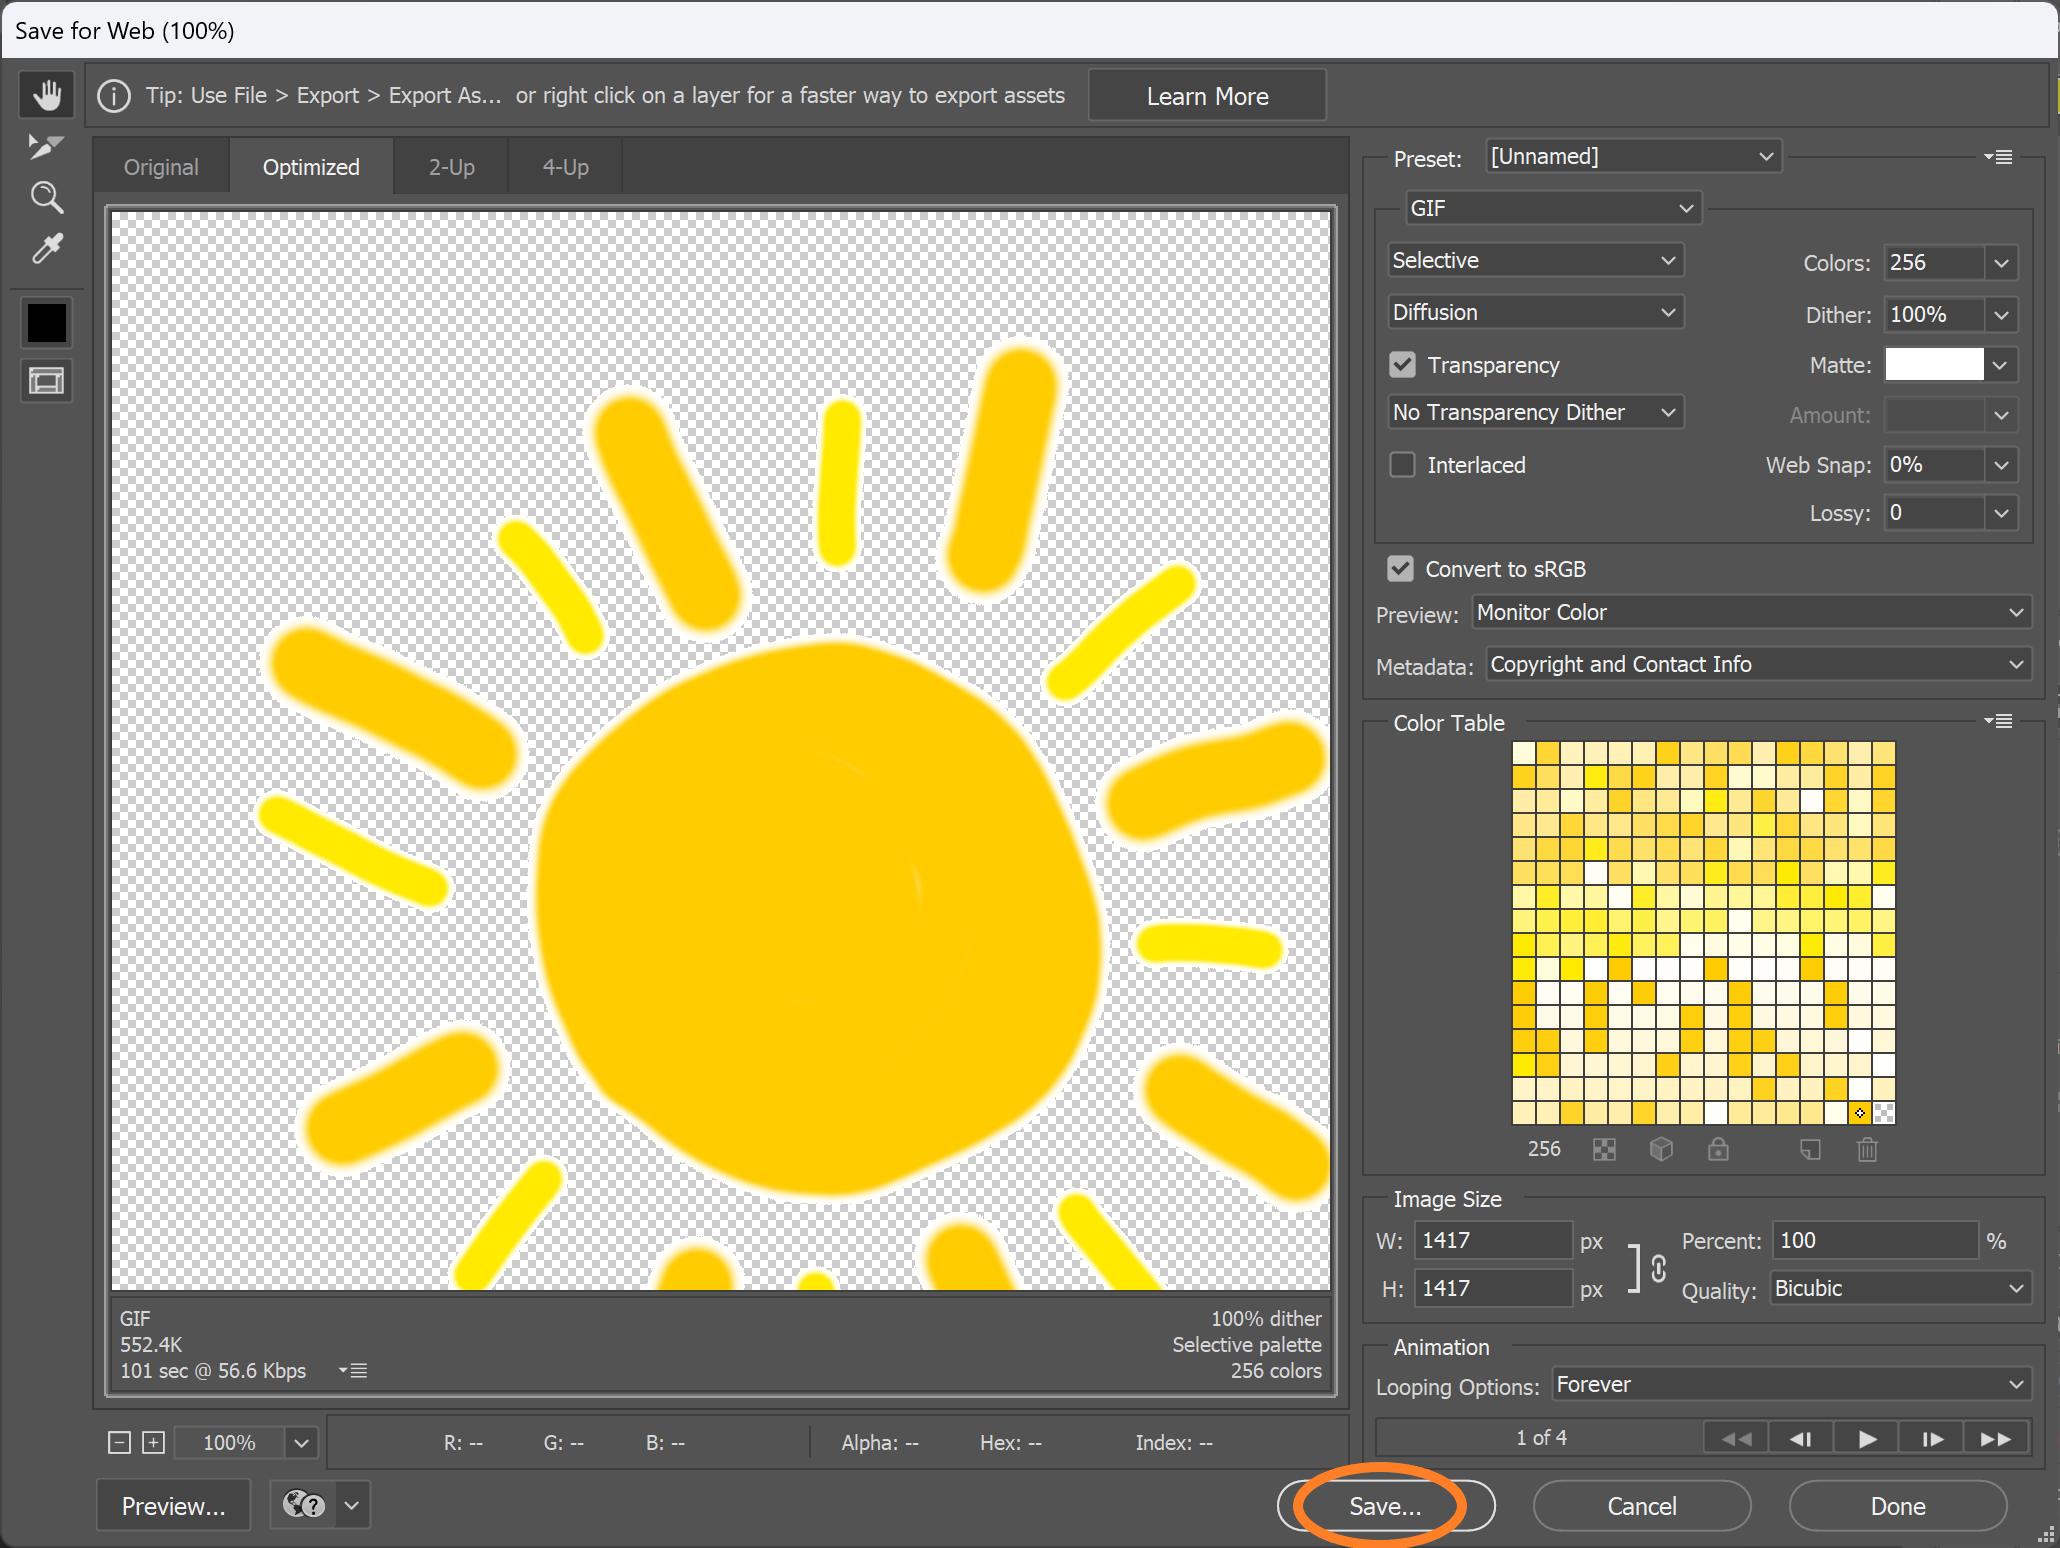
Then just choose a location to save your GIF.
Troubleshooting
To make a GIF from a video, you’ll first need to open your video in Photoshop by clicking File, Import and Video Frames To Layers. Choose your video and select the frames you want to use. Then follow the steps above to edit your frames using the timeline panel and export your GIF.
Yes, you can create a GIF with a transparent background.
You might like…


Editorial independence
Editorial independence means being able to give an unbiased verdict about a product or company, with the avoidance of conflicts of interest. To ensure this is possible, every member of the editorial staff follows a clear code of conduct.
Professional conduct
We also expect our journalists to follow clear ethical standards in their work. Our staff members must strive for honesty and accuracy in everything they do. We follow the IPSO Editors’ code of practice to underpin these standards.