
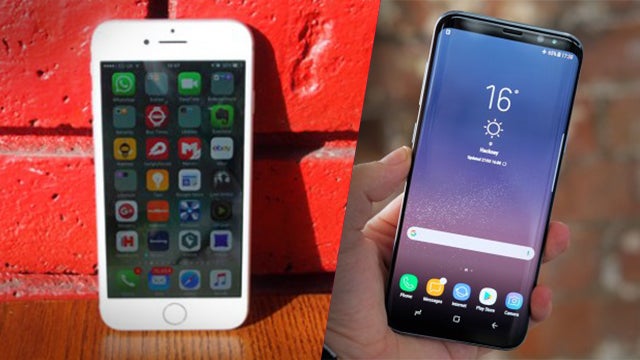
Making the jump from iPhone to Android a little easier
Has the latest batch of Android phones convinced you to put down your iPhone?
Maybe you’re convinced by the premium sheen and great camera of the Google Pixel. Or perhaps the One Plus 3T‘s fantastic value has been too difficult to resist.
Has Samsung’s beautiful, HDR-compatible infinity display on the Samsung Galaxy S8 turned your head? Or is the prospect of Android Nougat prompting you to make the shift?
Whatever the reason, you’re likely to find plenty to like over on ‘the other side.’
Many long-term iPhone owners will be anxious over making the switch, but they needn’t be. You’d be surprised how easy it is to get all of your photos, music, contacts, and apps over to Android.
Set up a Google account
The very first thing you should do with your Android phone is set up your Google account.
If you don’t have a Google account and you’re switching to Android, well, you really need to get one. This is a Google-driven phone, and if you don’t have a Google account you’re not going to get a lot of the best stuff that Android has to offer, and there isn’t really much point in owning your new phone.
The Google Play Store needs a Google account for you to download and install apps. All of the preinstalled Google apps like Google Maps and Gmail need a Google account, too.
Related: Nexus 6P vs Nexus 5X

Also, by signing up for a Google account you’ll make the process of bringing all your contacts, photos, and videos across infinitely easier.
It’s easy to set up a Google account. You’ll be offered the chance during the set-up procedure, but even if you skipped this phase, just go into your phone’s settings menu (look for the little cog icon in the notification menu), go to the Accounts section, and opt to add a Google account. Follow the instructions, and you’re away.
Once set up, any Google app you have installed, or that you install from the Google Play Store, will be able to tap into this account without fuss. That’s just how things roll in Googletown.
Importing contacts
Different Android devices have different ways of transferring contacts, so we’ll start with the universally applicable – if somewhat long-winded – way of adding your Apple iCloud contacts to your Google account.
This is nonetheless a good way of ensuring your Google account, which is at the source of the Android experience in many ways, has all of the right information from the outset.
Still, there should be a quicker and simpler way to transfer your contacts via Bluetooth, and we’ll run through that at the end.
Importing contacts the sure-fire Google way
If you’ve been using Google and Gmail for your contacts on your iPhone, then you’ll have brought your contacts across when you logged into your Google account at the outset. Easy peasy!
Of course, many people coming from an iPhone won’t have this luxury. There’s a good chance you have these contacts stored in Apple’s own iCloud. So how do you bring these contacts across?
We hope you still have your iPhone to hand. If so, go to Settings>Mail, Contacts, Calendars>iCloud and ensure the toggle for Contacts is flipped to the on position.
If you have to flip it on, you’ll be asked if you want to merge your device’s contacts with iCloud – say yes.
Now, go to iCloud.com on a desktop web browser and log in with your Apple ID. Select Contacts, then click on the little cog in the bottom left hand corner. Now select all, click on the cog again, and select Export vCard.

Stay in your desktop browser, but head to Gmail.com and log in using your Google account. Click on Gmail in the top left hand corner and select Contacts. If you haven’t been using Gmail, this will probably be a little sparse right now. Let’s fill it up.
Click on More just above those contacts, followed by Import. Note: if you’re using the new Google Contacts tool, import won’t be available, but you’ll be given the ability to revert to the old tool. Now select Choose File and navigate to that saved vCard file you just exported from iCloud.
Select that and all of your iCloud contacts will be added to your Google account – and hence your new Android phone.
If, like many people, this process brings together contacts from both accounts, there’s a good chance you’ll find yourself with a number of duplicate entries.
To help deal with that, click on More in Gmail again and select Find & merge duplicates.
Importing contacts the easy Bluetooth way
Of course, there’s probably a much quicker and easier way to do this. Go into your Android phone’s Contacts app, and you should find an option to import contacts.
Check this and there could well be a Bluetooth option. Select this and ensure that Bluetooth on your iPhone is turned on, then select your newly visible iPhone from your Android phone. You should find all of your iPhone’s contacts being pulled in, nice and easy.
Bringing your photos and videos across
There are loads of ways to bring your photos and videos across from your iPhone to your Android phone, but the best way is to make use of the cloud.
You can use Dropbox, OneDrive, Box, or any other cloud storage service for that matter, but perhaps the easiest for most new Android users will be Google’s own Google Photos service. Here’s another instance where signing up for that Google account at the outset reveals itself to be a good idea.
Google Photos comes with every Android phone these days, and offers unlimited online photo storage (for 16-megapixel photos and under) for free.
The easiest way to get your iPhone photos onto your Android phone whilst integrating with the Android ecosystem is to download the Google Photos app onto your iPhone. Sign into this app using your Google account details.
Next, select the menu icon from the top left hand corner of the app, followed by Settings. Now select Backup & sync and ensure the Backup option is flicked on.
SEE ALSO: Google Drive vs iCloud Drive vs Dropbox vs OneDrive
All the photos and videos stored on your iPhone will be uploaded to Google’s cloud storage solution.
Now, go into the Photos app on your Android phone and, once signed in, you’ll find all of your iPhone photos and videos, there to share, edit, and download as you will.
Transfer your iTunes music
Though music subscription services are all the rage now, most former iPhone users will have amassed a large number of MP3 music tracks through iTunes. This can be a big reason for sticking with Apple.
You might be surprised to learn how easy it is to bring those tracks with you to Android. In fact, with Google Play Music, you can send those tracks to the cloud so you’ll have access to them from virtually any connected device. This won’t cost you a penny either.
Make sure that all of your music is synced to iTunes on your computer. Now, install the Google Play Music Manager on your computer, run it, and follow the instructions to upload up to 50,000 of your music tracks to Google’s servers.
Note that you’ll need to set up a Google Wallet account, which involves putting the details for a cash or credit card in, even though you won’t be paying for anything.
Once your music is uploaded, you’ll be able to find it through the Play Music app on your new Android phone. From here you can either stream it or download it to your phone.
NOTE: Direct media uploading
With all of these media types – photos, music, and videos – you can just as easily upload them onto your Android phone with a USB cable.
Simply plug your phone into your computer’s USB port using such a cable (which should have come bundled with your phone), and you’ll be able to drag and drop files onto it as if its were an external hard drive or a simple USB drive.
With Windows, you can just plug in and go – just choose Media device (MTP) on the Android phone if prompted. On Mac, it works the same, but you’ll need to download and install the Android File Transfer application before hand.

That done, your files should appear in the appropriate media apps on your Android phone.
This method is a little old fashioned, and it’s a little clunky, but if you want to transfer large numbers of media files simultaneously, and to store them locally on your phone, it’s still a good method to use.
If your Android phone comes with a microSD slot, you can transfer files the same way, but you’ll need to buy an SD adaptor first.
Apps
It used to be that the big disparity between Android and iOS was apps. Just a few short years ago, Google’s app store was a virtual wasteland compared to Apple’s, which had all the best and latest apps.
If you have any lingering worries over this, put them out of your head. Android has pretty much all of the major apps that you could want, and a fair few of the cool and quirky little ones too.
Here are some of the top apps that you may have been used to using on your iPhone, and links to the Android versions.
Social networking
Facebook
Twitter
Instagram
Tumblr
Path
Pinterest
Communication and VoIP
Snapchat
WhatsApp
Facebook Messenger
Mailbox
Viber
Skype
Outlook
News & Productivity
Pocket
Wunderlist
Flipboard
Evernote
IFTTT
Dropbox
MS Office Mobile
Oh, and you can even get Apple Music on the Google Play Store now.

If games are more your thing, then rest assured that the Google Play Store is very well stacked indeed for games. No, it’s not quite up there on a par with iOS in terms of range or quality just yet, but it’s not too far behind, and there are already far more top notch games available than you’ll have time to play.
Here are just a few examples of blockbuster iOS games that are also available for Android:
Fallout Shelter
Lara Croft GO
Monument Valley
TwoDots
Clash of Clans
Prune
Ridiculous Fishing
Kingdom Rush Frontiers
Rayman Adventures
So there you have it. Making the jump from iPhone to an Android phone is easier that it has ever been. If you have any questions about switching things up on the smartphone front, let us know in the comments section below.
Editorial independence
Editorial independence means being able to give an unbiased verdict about a product or company, with the avoidance of conflicts of interest. To ensure this is possible, every member of the editorial staff follows a clear code of conduct.
Professional conduct
We also expect our journalists to follow clear ethical standards in their work. Our staff members must strive for honesty and accuracy in everything they do. We follow the IPSO Editors’ code of practice to underpin these standards.