Pokémon Go: How to find, hunt, and catch rare Pokémon

How to catch rare Pokémon: A guide to finding, hunting, and catching Pokémon, with tips on basic capture techniques and how to track down rare creatures.
Pokémon Go. It’s a phenomenon like no other, with millions of Android and iOS users around the world joining the hunt to catch ’em all.
But what if you don’t want to catch ’em all as much as you want to catch the good ones – or to follow what seems to be proper Pokéslogan parlance, catch the good’uns.
However you’re looking to catch ’em, you’re probably doing it wrong. Or at least, you could be doing it better. Luckily we’ve got a few tips for you. Sorry, for ya.
Here’s all you need to know.
Related: 7 clever Pokémon Go hacks
How to find Pikachu in Pokémon Go
Before we get start explaining how the hunting and capture system works, you might be interested to know this easy tip. When the game first starts, you’ll be asked to choose between three starting Pokémon: Squirtle, Bulbasaur, and Charmander. What you may not be aware of is that you’re not limited to these choices.
If you fancy nabbing Pikachu as your starting Pokémon, all you have to do is walk away from the three creatures you’ve been offered. Keep walking until your phone vibrates and they reappear. Repeat this about five or six times and Pikachu should pop up alongside the other Pokémon. Tap on him to start the capture screen and he should be yours. Simple.
Watch: Pokémon Go tips and tricks
Although Pikachu won’t come with any particular power advantage, the little beast is an electric-type Pokémon, which seem to be quite rare in the game. As they can be effective against water-type creatures, it’s worth trying to capture Pikachu if you can.
That said, you may well run across him in your travels throughout the rest of the game, although he seems to be quite rare.
Related: iPhone 7 news, rumours and release
Finding Pokémon – The Basics
So, you’ve signed up and you’re ready to start catching Pokémon. By now, you should be aware that the game uses real-world maps, so finding the little beasts is a matter of actually walking around your local area.
Pokémon will crop up as you walk around and the ones closest to you will be represented by small rustling grass symbols. Walk towards these symbols and, providing the seemingly constant server issues don’t prevent it, the creature should appear on the map. Once it’s visible, simply tap it to start the capture screen (more on this in the next section).
Related: How to battle in Pokémon Go
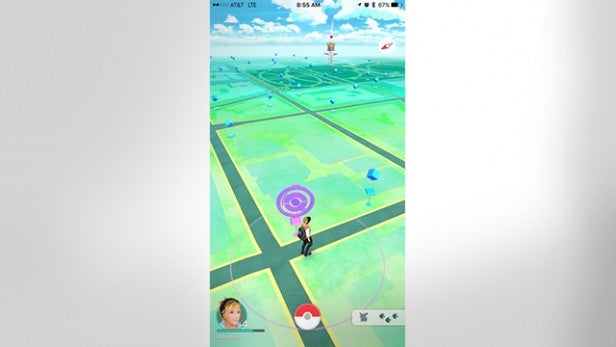
The type of Pokémon that appear depend on the environment you’re in. Parks are more likely to yield grass-type beasts, while going to the beach, or anywhere near water, should ensure you get a good helping of water types.
If you want to start finding the rarer ones, you’ll have to up your player’s level. We’ll go into that more in a later section.
There are certain things you can do to draw Pokémon to you as well. If you find yourself in possession of Incense (see our Pokémon Go beginner’s guide for more information), you can use it to attract creatures to your location for 30 minutes.
Alternatively, if you’ve got a Lure Module in your backpack, you can drop it at a Pokéstop to bring Pokémon to that location. Again, see the beginner’s guide for an explanation of these terms.
Of course, looking for Pokèmon can be somewhat taxing on your phone’s battery. If you’re looking to keep your phone going long enough to ensure a decent hunting session, check out some of our favourite battery packs:
Buy Now: Pokemon Go Plus at Amazon.co.uk (£68) | Amazon.com ($45)
Finding Pokémon the easy way
For those less concerned with following the rules, you’ll be pleased to know that the indefatigable ingenuity (read: unrelenting desire to cheat) of the internet has made finding Pokémon a whole lot easier. There’s a tonne of maps and guides strewn across the web, dedicated to showing you exactly where to find the little beasts.
Related: Pokémon Go Problems: How to fix the most common Pokémon Go issues
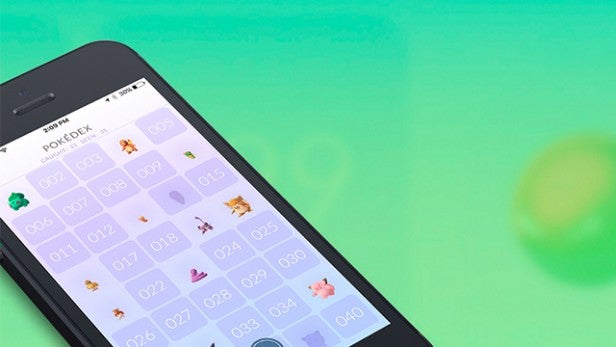
For a long time, Pokévision was the most popular of these. It used the Pokémon Go API to provide up to date information on Poké locations, and generally meant you had to exert a lot less effort in the pursuit of Blastoise.
But it seems Niantic is none to pleased with recent efforts to game its system, as it’s been shutting down these third-party apps left and right. But there’s still a fair few online, and we just happen to have a full guide to the best ones in our Pokevision Alternatives article. You’re welcome.
Catching Pokémon
Once you’ve found a Pokémon, whether through your own efforts or by using a third-party app, you’ll have to capture it in order to add it to your line-up of creatures. Although the capture system is fairly straightforward, there are a few tricks you can use to make things easier.
Related: Pokémon Go: Tips and tricks to become a Pokémaster

The basic mechanic involves you swiping upwards on your screen to launch Pokéballs at the Pokémon. Using your index finger rather than your thumb should improve accuracy. If you manage to hit it, the ball will open up and the Pokémon will be encased.
Mostly, you should find that’s the end of it, but sometimes the creature will break out. In which case there are some things you can do to try and up your capture game.
Capture circles
First of all, you’ll notice when you tap and hold the Pokéball, before you swipe to throw, a circle appears around the Pokémon itself, with a coloured circle within it. This coloured circle gets progressively smaller and will be either green, orange or red depending on how difficult the Pokémon itself is to capture.
Wait until the circle is as small as possible, then try and throw the Pokéball so it hits the creature right in the circle itself. The smaller the circle was when you threw the ball, the more chance you have of ensuring a capture – as long as the ball lands within the circle.
Related: The secret history of Pokémon Go
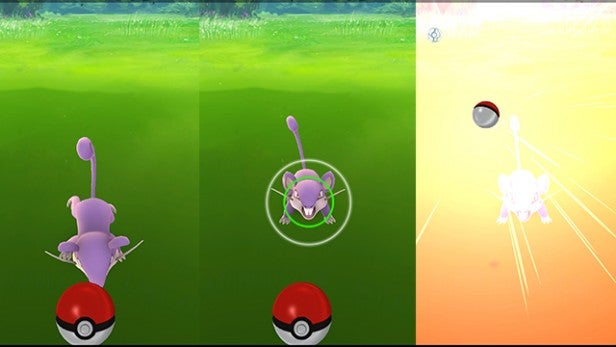
For lower-level Pokémon, it doesn’t really matter whether you hit the coloured circle or not – a direct hit on the Pokémon should end in a positive result. But for the higher-level creatures, you’re going to want to try and hit the the circle at its smallest. You’ll know if you’ve been successful in doing this, as a ‘Nice’ or ‘Great’ message should appear on-screen. What’s more, you’ll gain extra XP for performing these moves correctly.
Buy Now: Pokemon Go Plus at Amazon.co.uk (£68) | Amazon.com ($45)
Curveballs
Trying to catch one of the more belligerent Pokémon? Some of the creatures have taken to batting Pokéballs away or dodging throws, so you might run into some trouble every now and then. If you find yourself in this situation, you can try throwing a curveball to make things easier.
Just use your finger to spin the Pokéball before you throw it. Doing so will add a curve to its trajectory, making it harder for the Pokémon to dodge. It takes some getting used to, but can make the difference between nabbing a rare creature and walking away empty-handed.
Better Pokéballs
When you first start the game, you’ll be using the normal Pokéballs, but as you progress through the levels, you will start getting more powerful versions. Other than the standard type, you’ll also start to get Great and Ultimate balls from Pokéstops as you move up the levels.
We started noticing Great Pokéballs at around level 11, and are yet to encounter any Ultimate balls – which, from the sound of it, is a good thing. Once you start picking up these upgraded Pokéballs, you’ll want to save them for the rarer Pokémon.
Related: Pokémon Go Teams explained
 This Pokémaster has his priorities in order
Throw from the top
Some Reddit users are claiming that throwing the ball from the top of the screen improves your chances of hitting the shrinking coloured circle. We haven’t tried it yet, but by all means, give it a go and see what you think.
Switch off AR
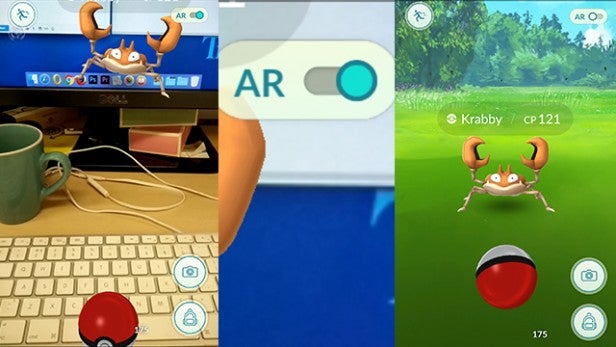
A simple way to make throwing Pokéballs easier is simply to switch AR mode off by tapping the slider in the top-right of the capture screen. This will centre the Pokémon, making them easier to chuck Pokéballs at.
Related: Pokemon Go Eevee Evolution explained
Razzberries
You should find yourself picking up a few Razzberries from Pokéstops as you travel around. During a capture scenario, tap the backpack icon in the bottom-right and select the fruit from the list. Now just tap the screen to throw it at the Pokémon. This should endear the little creature to you, making them easier to capture.
Using the Nearby tracker
When it comes to hunting down rarer Pokémon, the first tool at your disposal is the Nearby, or Sightings, tracker, which can be opened by tapping the icon in the bottom-right of the screen
The whole Nearby tracking feature and how it’s developed has been nothing short of a debacle, with Niantic removing the feature, then tweaking it, then putting it back, and generally confusing everyone. For now it exists in the form of the Sightings menu, which still shows you nearby Pokémon, with the nearest in the top right and the furthest away in the bottom left (at least that’s how some people think it works – others say the order doesn’t matter).
Related: Best Pokévision Alternatives – Best Pokémon Go maps and trackers
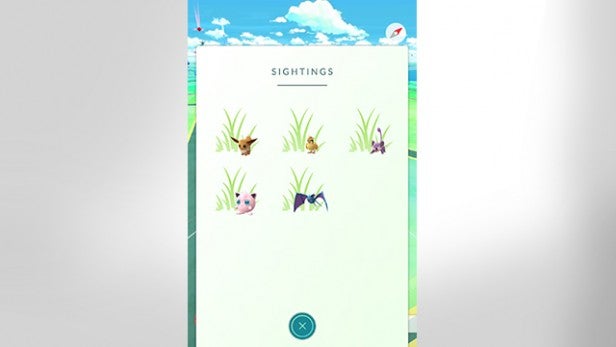
While some lucky players in San Francisco are currently testing out a new Nearby tracking menu, which gives you a top-down view of the map and uses Pokéstops to guide you to specific creatures, the rest of us are stuck with Sightings for now.
Which isn’t all that bad really – especially when compared to the previous Nearby menu, which many complained about not being responsive enough. Now, the Sightings menu will refresh much quicker, to keep you informed about what creatures are nearby (within an area of about 200 metres).
If you walk around and the creature drops of the list, you’re going the wrong way, or the creature has disappeared from the map. Turn around, and try again, until you happen upon your desired beast. A bit laborious, we’re sure you’ll agree, but it’s only a temporary measure until Niantic rolls out the full new Nearby tracking to everyone.
Related: Pokémon Go bots explained
So how the hell do I get some rare Pokémon?
There are two types of rare Pokémon: Rare and Legendary. Obviously, the Legendary beasts will be more elusive than the Rare ones, but both are difficult to come across. It seems that rare creatures in one area could be quite common in another, so the best advice for capturing these Pokémon is to travel around as much as possible.
The other way to ensure you start seeing rarer Pokémon is to move up the levels. The higher you are, the more likely you are to see rarer and higher-level beasts appear. Of course, once you’ve moved up the levels enough, you could always use one of the third-party maps to go straight to where the rare creatures are – if you don’t mind being accused of cheating.
And finally, the guys over at Poké Assistant have compiled a list, based on user feedback from thousands of players, of what they say are 20 rare Pokémon:
Charizard
Ditto
Omastar
Charmeleon
Dragonair
Muk
Vaporeon
Machamp
Ivysaur
Venusaur
Blastoise
Nidoqueen
Nidoking
Vileplume
Poliwrath
Alakazam
Weepinbell
Victreebel
Slowbro
Marowak
If you fancy catching one of the above, you can find out where nests (spawn points where multiple creatures appear on the map) are located near you. If you happen to live in London, we’ve a got a little guide you should check out (click the link below), otherwise, the internet is full of maps showing the location of specific nests and which Pokémon will spawn there.
And that’s all there is for now. We’ll be updating with more tips as we discover them, so check back over the coming weeks for new ways to become a Pokémaster.
Related: Pokémon Go London Nests
Watch: What is Pokémon Go?
Got any other capture tips? Having trouble finding the rarest Pokémon? Sound off in the comments below.

