The Euro 2016 tournament is upon us and, unless you have a ticket, chances are you’ll be watching on your TV at home. That would be fine if only TVs didn’t tend to do such a rubbish job of making football look good.
Colours can look messy and drab, for instance. You can struggle to make out who’s who on the pitch due to noise and softness in the picture. Motion settings can lead to you seeing multiple balls on the pitch at once, or no balls at all. And so on and so forth.
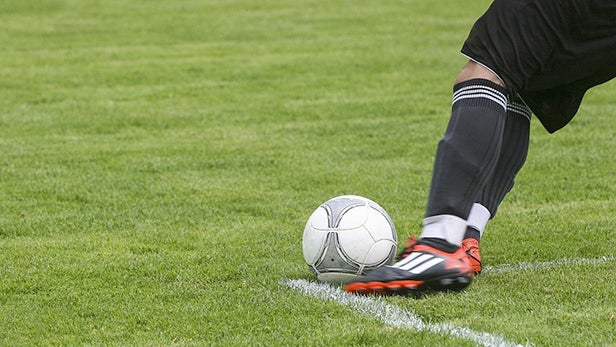
So here’s our step-by-step guide to making your TV look – and sound – so good with football that you’ll swear your living room has become the Stade de France.
Step 1: Check if your TV has a Football mode
Some TVs – especially models bought in years of World Cup or Euro football tournaments – have Football or Sports modes built into them. These aren’t perfect, but they’re a good starting point if you’re looking to minimise the time you spend tinkering with your TV’s settings.
Note that while some TVs simply include Football or Sports modes as options in their regular picture preset lists, other sets – including, most notably, those from Samsung – tuck their Football/Sports presets in less obvious places, such as ‘System’ menus. So make sure you have a good look through all of your TV’s settings before deciding that it definitely does not have a sports-friendly picture preset.
Video: Trusted Explains… All you need to know about TVs
Step 2: Boost the backlight
While films generally look best with a fairly subdued backlight setting on most LCD TVs, football looks better when there’s more light behind it. So, if your TV has a backlight or OLED brightness setting, push this up from the level you’re probably using for day-to-day TV viewing. In fact, in many cases I’d say you can push the backlight right to its maximum level given the usually consistently bright look of football coverage.
Please note, though, that I’m talking here about Backlight or ‘OLED brightness’ adjustments specifically – I’m not talking about TVs’ basic brightness settings, which are generally best left close to their default positions.
Step 3: Boost the contrast
While I generally advise people to tone down contrast settings from their usually too high default levels, it’s worth pushing contrast back up again for football. Doing so can enhance the sense of definition, dynamism and depth in pictures which, where football coverage is concerned, generally only bother with the upper half of the brightness spectrum. Higher contrast can also help to make predominantly bright pictures feel more lifelike while we’re still waiting for football to start being broadcast in HDR.
Don’t necessarily just shove your TV’s contrast setting set to maximum and forget about it, though. If you push contrast too high for your particular TV’s capablities, any even slightly dark parts of the picture can start to look hollow, and you may see source noise become more exaggerated. My advice would be to start with the contrast on maximum with some football showing, and reduce it one step at a time until you feel you’ve got the best overall effect.
As a side point here, if your TV has a dynamic contrast and/or local dimming systems, it’s worth turning these up to. This can greatly enhance the punch of the image, and because football coverage is usually so uniformly bright you won’t have to worry about typical unwanted side effects such as light blooming or exaggerated jumps in the image’s overall brightness level.

Step 4: Boost the colour
Again, for normal video viewing and especially movie viewing, I’d usually suggest you actually tone your TV’s colour settings down a little from their default positions. With football, though, the relatively stark, bright and necessarily colour-rich nature of the content means it looks more engrossing and frankly just more fun if you ramp up your TV’s colour setting.
Do not under take this to mean you should push colour to its maximum, though. For most TVs I’d suggest picking a point somewhere between 60 and 70% of the maximum colour setting available – versus the 40-45 level generally best selected for typical video playback.
The exact best value will differ from TV to TV, but the best way to try and get the right value for you is to pause a shot of the pitch on the screen and push the colour up until either the green starts to take on a ‘radioactive’, glowing tone, or the details and slight colour differences in the grass stripes start to blur out or suffer with noticeable noise.
Once you hit this point nudge the colour back down until things settle down.
Step 5: Turn off, or turn right down, noise reduction
For some reason TV manufacturers still think noise reduction (NR) processing is a good idea, despite most of us now being able to watch HD content for most of the time. In fact, NR processing is usually a picture quality disaster.
While it can reduce the impact of grain and the sort of compression blocking and ‘mosquito noise’ you can get with digital broadcasts, the pay off is almost always a considerable reduction in the image’s overall sharpness, along with a tendency for fast motion to look blurry or laggy. And if there’s one thing that defines football coverage, it’s fast motion.
If you have an HD source, I’d say make sure all your TV’s NR options are turned off completely for football viewing. If you’re having to watch standard definition for some reason, maybe set the NR to its low setting. But don’t go any higher.
Step 6: Push up the sharpness
Because football coverage is relatively simplistic by video standards, but also features many shots containing relatively small-looking objects filmed from quite distant cameras, it usually benefits football viewing to push your TV’s sharpness a bit higher than normal.
The exact value to choose will depend on your individual TV, as there are actually more factors involved with boosting sharpness than you might imagine. That said, around two thirds of maximum is generally a good starting point.
What you’re looking for is a setting that really defines players against the pitch as well as the colours/details of their shirts without introducing issues like exaggerated source noise or, especially, glowing edges around sharply contrasted objects.
Just make sure you only do this after sorting your noise reduction out, though.
Step 7: Experiment with your TV’s motion settings
This is arguably the most important area of all when it comes to optimising picture quality for football, yet it’s the area where mistakes are most likely to be made.
Many TVs now have motion-processing options that are meant to make things look smoother. You’d imagine turning these up for football would work fine, but you’d be wrong. In fact, doing so can actually make things look worse.
Some TVs simply aren’t good enough to keep up, resulting in distracting side effects like shimmering halos around the players or ball, or ghostly echoes.
On cheaper TVs, you might find turning these systems off entirely actually makes the picture better. On pricier models, try setting the motion processing to its low or medium levels – if possible – and see which looks best.
A good way to test this is to record a bit of football and look for a shot that combines a camera pan with rapid ball and player movement, as this will put a TV’s motion processors under the biggest strain.

Step 8: Make sure you watch the HD option
This sounds obvious, but the number of times I’ve been round to friends’ houses and they’ve been watching sport on a standard definition channel despite it also being available in HD is terrifying.
Just as terrifying is the picture quality of standard definition football in the digital age, which often makes it almost impossible to recognise players or even which team has got the ball thanks to the horrendous amount of compression artefacts in the picture.
So please: if you have an HD TV and an HD football broadcast option is available, make sure you choose it!
Step 9: Widen your sound stage
If you’re lucky, your TV will have some sort of Sport or Stadium audio option. If it does, use it. While these modes generally sound horrendous for any other sort of content, the way they add more width and depth to a half decent TV’s sound stage while also upping the extent to which crowd noise stands out in the mix can really help boost the sense that you’re ‘there’ in the stadium where the match is taking place.
If your TV doesn’t have a sports-based audio mode, look for any setting that adds both more dynamic range to the sound and expands the sounds physical range. Virtual Surround settings are usually a good start, while other TVs have ‘wide’ sound options to explore.
Failing that, Movie options can, surprisingly, sometimes be helpful, as they tend to try and create a more expansive and detailed mix.

Editorial independence
Editorial independence means being able to give an unbiased verdict about a product or company, with the avoidance of conflicts of interest. To ensure this is possible, every member of the editorial staff follows a clear code of conduct.
Professional conduct
We also expect our journalists to follow clear ethical standards in their work. Our staff members must strive for honesty and accuracy in everything they do. We follow the IPSO Editors’ code of practice to underpin these standards.