Battlefield 1 Multiplayer Guide

Battlefield 1 is out now, and you might be discovering how broad a shooter it really is. Developer DICE has always excelled in creating big, chaotic war zones that thrive with dozens of players, but Battlefield 1’s transposition to the muddy trenches, scorching deserts and flak-full skies of World War I brings with it a whole host of new things to get used to.
These changes stretch beyond purely the cosmetic, making for a much fresher and more inventive game. It relies heavily on the series’ tried and tested template, but don’t expect to play the same as you have before. Here are a few of the game’s key basics to keep you alive and killin’.
Buy Now: Battlefield 1 at Amazon.com from $53
Check out our Battlefield 1 video review:
Battlefield 1 guide – Modes
Battlefield 1 guide – Modes – Conquest
Battlefield 1’s go-to mode is Conquest, a huge war zone with up to 64-players, all battling it out across enormous maps fit for vehicular combat and massive environmental destruction. It’s where the game shines, and matches have a wonderful tug of war as players do their best to capture key points on the map before holding them for as long as possible.
This makes Conquest a great mode –– one that’s not all about your kill/death ratio and is instead more about just playing as a team. Rather than concentrating on the killstreaks, you should be coordinating together with your squad to overtake objectives. If you’re the leader of that squad, you should be giving the objectives by spotting targets –– this will raise your team’s score far quicker, and eventually, hopefully result in a victory. In terms of moment to moment actions, we’ll go through this in the classes.
Battlefield 1 guide – Modes – Rush
Rush is a game of attackers and defenders. The attackers have a finite number of tickets, which represent lives. As the attacking team uses up these lives by spawning, the number of these tickets reduces. If the defending team manages to hold off attacks on its telegraph posts as the timer winds down –– or until the attackers run out of their precious tickets –– you win.
Related: Call of Duty: Infinite Warfare review
It’s big, loud and really exciting, especially when matches reach the late stages of a game when tickets are low and telegraph posts are hotly contested. The finite number of tickets makes dying far more important if you’re playing the attacking team –– the key to victory is, again, coordination, as taking multiple points in succession adds to your score quicker.
Battlefield 1 guide – Modes – Team Deathmatch
Team Deathmatch is the most basic of modes. In Battlefield it works exactly the same as in every other game –– two teams compete against each other to rack up the most number of kills. Battlefield 1 uses smaller, tighter variants of its main maps, and this results in a much greater sense of pace compared to its larger game modes, which can go on for quite a long time. If you want a quick game –– and one where kills matter more than anything else –– hop into TDM.
Battlefield 1 guide – Modes – Domination
Domination is Conquest, but smaller. That makes it faster paced on smaller maps, and it doesn’t have quite the spectacle of the latter because of the removal of vehicles. As with Conquest, it pays to invest your time into chasing objectives rather than sitting on a hilltop and headshotting your foes as they run past.
Battlefield 1 guide – Modes – War Pigeons
War Pigeons is ridiculous and takes one of the most comedic/poignant (depending on your viewpoint) moments from the campaign and turns it into its own unique multiplayer mode. Essentially, it’s a game of Capture the Flag –– the pigeon operates as the flag, but it’s a moving target that you have to catch. Once you do so, you then have to write a note, attach it to the pigeon and send it off to a target.
Related: PS4 Pro vs PS4
All of this is more exciting than it sounds, as writing that note has to be done while stationary or moving very slowly, which means you’re likely to get killed. Your progress is halted as soon as you drop the pigeon, so the best way to play is to operate in smaller squads, capable of defending the person who has the pigeon and is writing the note. Just be careful not to stick too closely together, or a stray grenade will finish you all off in one and give the enemy a real advantage.
Battlefield 1 guide – Modes – Operations
Operations is an all-new mode in Battlefield 1 and one of its best. It cleverly adds a narrative hook to extended tactical battles, focusing on events from The Great War, but its fundamental rules are pretty confusing for anyone new to Battlefield –– it’s even a little vague to the well initiated.
As a hybrid of Rush and Conquest, Operations has an attacking team assaulting several points on a map over the course of several different stages. Attackers have limited tickets (or lives) and are responsible for pushing forward towards each objective, and the Defenders are free to die as much as they please –– they just have to keep the attackers from taking key objectives throughout multiple stages. The amount of stages depends on the Operation itself, but some span across three maps.
These matches are huge and frequently throw up some incredible moments –– I had a desperate late-game charge as dozens of my teammates and I sprinted across the hill on the Ballroom Blitz map, all of our soldiers screaming as they did so. The key to victory is, again, coordination, as you have to hold all three points in a sector to force the Defenders into a retreat.
Related: Nintendo Switch news
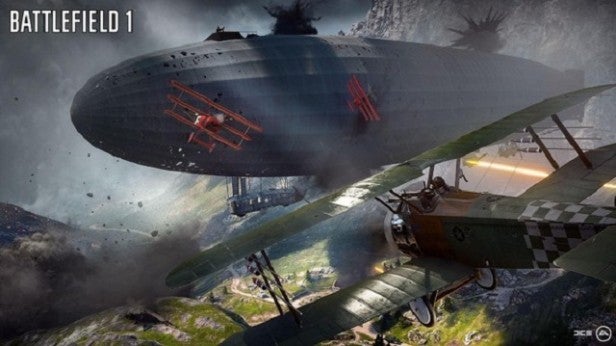
As a Defender, you’ve got to focus on taking down as many enemies as possible while also destroying the Attackers behemoths –– it’s super tough, but a varied squad of different classes will be able to operate far better. Plus, make sure you’re practicing your piloting skills so that you can utilise bombers and fighters to attack the zeppelins, armoured trains and dreadnought ships that attack throughout the course of an Operation.
Buy Now: Battlefield 1 at Amazon.com from $53
Battlefield 1 guide – Classes
Battlefield 1 guide – Classes – Assault
The Assault class is your go-to all-rounder, with a light rapid fire submachine gun that makes sprinting around the battlefield taking on enemies at close range the best bet for you to rake in the kills. It’s also a great shout for anyone that’s up for taking down vehicles, offering up several ballistic options like heavy grenades and anti-tank rounds.
Oh, and try not to aim from iron sights –– get in close enough and firing from the hip is the best way to play. In terms of submachine guns, grab a variation of the Auomatico m1918. In terms of shotguns, the Model 10 is the one to go for. It’s an especially great class for Team Deathmatch, where the maps and smaller, and there’s some great damage you can do on a tight map like Argonnes Forest.
Battlefield 1 guide – Classes – Medic
Medic is self explanatory –– a medic heals other soldiers on the battlefield. It’s a key role in any given squad, but you’ll find that not many people play as the Medic because, well, they’re too arrogant to bother. Should you play as one –– and play as one well –– you’ll be a very valuable member of the team.
Related: Best Xbox One Games
They carry around syringes to revive downed teammates, and a bandage pouch that offers healing over a longer period of time. Don’t forget to heal yourself by tossing the same pouch at your own feet. Medics carry rifles (the Mondragon is pretty good) great for medium range, and they have the potential for longer range combat as well once you start to customise your guns with the odd scope. Play as a Medic well and you’ll find a surprisingly well rounded fighter –– it’s a great option on Suez or the Sinai Desert, as well as Ballroom Blitz on Conquest where it ranges between close quarters combat and open spaces.
Battlefield 1 guide – Classes – Support
Support is the heavy option in Battlefield 1, carrying a fantastically grunty Lewis Gun as its default –– it’s so good that it’ll comfortably see you through the majority of your time online. It also has access to perhaps the coolest and most inventive set of tools, including mortars and limpet charges –– there’s also the ability to repair weapons, making it the optimal class should you want to be a reliable driver.
Because of their ability to drop ammo pouches to restock the magazines of your squad mates, you’ll also find that the Support class has a lot more legs than the others, without the risk of running out of ammo and having to scramble the battlefield for more, or another weapon entirely. In maps like Amiens or Argonnes Forest it’s a great option, especially in Team Deathmatch.
Battlefield 1 guide – Classes – Scout
Scout is my personal favourite class in Battlefield 1. For all intents and purposes it’s a sniper, perfect for mid to long range, but it lacks the movement and dexterity of the other classes –– get flanked and you’re going to struggle to last for long.
It’s arguably the toughest class to learn, with several settings on the rifle to adjust for bullet drop. This can be fiddly at first, but after a few games you’ll fall into a rhythm and be able to switch between the different modes without much thought. Its best weapon is, in my opinion, the Russian 1895, which packs a hefty punch. The default SMLE is also amazing considering you start with it.
Once you’ve learned how to properly use each rifle, you can start exploring the maps to find excellent positions with a variety of angles –– just remember to set up tripwire bombs to cover any entrances that might let enemies come up behind you. A particularly fantastic map for sniping is Fao Fortress, where you can use a couple of points on the map to get an incredible view of the action playing out below you.

