Retro Game Consoles: 12 of the best mods and hacks to try today
The world of ‘new’ offers a continual stream of devices and gaming machines to check out, like the recently launched Nintendo Switch, but there remains a special place in our hearts for the consoles of old.
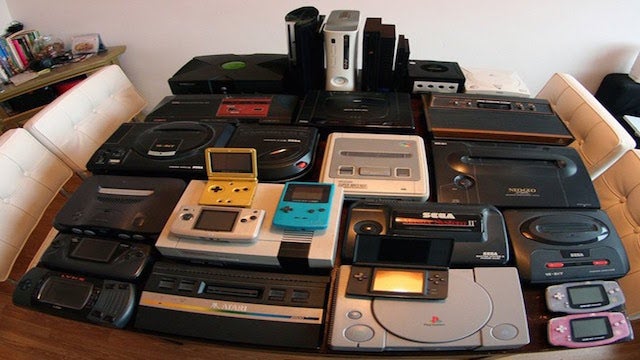
Why not dig out those dusty abandoned boxes, and breathe new life into them with a few simple (or not so simple) retro gaming console mods?
Before we go any further, however, it’s worth pointing out that some of these projects should be left to those who are comfortable using the tools required, and are well versed in the modding and hacking scene, to avoid any damage to themselves – or their treasured old-school systems.
Note, too, that if you’re using a RetroPie-powered device and don’t own a copy of the cartridge (ROM) you’re installing, then it’s probably illegal. Owning a copy of the cartridge would strengthen your defence, although there’s no legal precedent that’s been set specifically with game ROMs. Sharing them is definitely illegal, however.
With those caveats out of the way, let’s check out some of the best DIY retro console projects you could take on today.
Related: Best Raspberry Pi projects
1) Wii U RetroPie

If you’ve fallen out of love with the Wii U, or just have an old controller sitting around not doing much, you can construct yourself an all-new handheld gaming system that runs titles from various different emulators – provided you have the patience and skill.
To get started, you’ll need a Wii U shell and a few other components (a full list of required parts can be found here) and to install the script from GitHub.
Once complete, though, you’ll have a handheld gaming machine that can play a whole range of classic games across an expansive 6.5-inch HDMI display with switchable toggle controls (to swap between keyboard and joystick input). This will make it possible to play games from the Atari emulator.
2) Nin10do Zelda Edition

The Nin10do is another Pi-based DIY gaming system that will knock you sideways if you can manage to pull off the build correctly.
Its creator, TheDanielSpies, designed the first version back in 2015, and has since then been iterating on the original design to refine it. In this case, he’s built a 4K-capable Nin10do Zelda Edition model with a gold mirror finish. To give it the Zelda look, it even features laser-engraved artwork.
On the rear, there’s a composite/audio-out, HDMI port and a Micro USB socket for providing power, while on the side there’s a microSD card slot for storing games, and on the front there’s a four-port powered USB hub.
Throw in some multi-colour LEDs and a remote control to switch them on and off, and you have yourself a custom Zelda games emulator that can play titles from more than 50 different consoles of the past.
You could buy yourself a pre-made custom console from the Nin10do shop, but if you want to make the slightly less special “Nin10do Lite” yourself, follow the instructions here. The code for the original Nin10do is on GitHub too.
Related: Legend of Zelda: Breath of the Wild review
3) Atari 5200 custom controller

The Atari 5200 was huge fun, and still offers retro appeal for gamers. The problem, however, is that its controllers were notoriously awful, requiring frequent maintenance to keep them working correctly. ThunderSqueak’s solution was to build a custom controller to her own requirements.
On drawing up a schematic, it became clear that an arcade controller was the answer – in this case, two heavily modified Generation NEX units.
After acquiring and drilling holes in an outlet cover, the 3 x 4 matrix keypad was complete. With the potentiometers wired and the rest of the build finished, the end result is a digital controller that converts its input to analogue resistance interpreted by the 5200.
For most games, ThunderSqueak says it works A-OK.
4) Wall-E GameCube


If you have an unloved GameCube lying around in a drawer, and are proficient with acrylics, then this is a relatively simple alteration.
To provide the ability to move, modder TheChoozen put it together using a child’s toy and Plexiglas. The custom Wall-E appearance comes from a layer of acrylic that was then airbrushed, and the arms and hands are made from Plexiglass tubes and rods – both have the ability to move.
The eyes are probably the trickiest part of the mod, requiring multiple layers of acrylic to be bent together into the correct shape and mounted on a metal plate attached to the GameCube.
Related: Best PC games
5) TMNT Party Wagon NES

This could be one of the most detailed mods on this list, delivering a full NES gaming experience in a Teenage Mutant Ninja Turtles party bus shell, complete with working lights, windows, movable guns and two turtles.
Creator PlatinumFungi says that the modded NES took “countless” hours of cutting, sanding, wiring and gluing – and the best part of a month. That’s not including any of the R&D that went into the project before the building phase, either.
The result is a truly remarkable NES with custom-painted controllers to match the party wagon. Michelangelo is, typically, just sitting around eating pizza.
6) N64 handheld

The Nintendo 64 is probably the console that’s most frequently transformed into a handheld device, but while some people focus on making it look snazzy, this build focuses on making it work better.
It isn’t the easiest, though.
You’ll need 2 lithium-polymer batteries, a 7-inch LCD, some speakers (taken from an old iPod speaker in this case) and the original input controllers from an N64 controller. Don’t be tempted to skip the D-pad, since this is needed for lots of games. You’ll also need the N64 board from the console too, and the cartridge slot to re-seat.
The end result is a handheld gaming machine that can last for two or three hours, depending on the batteries you put in. It may not be the nicest-looking N64 mod, but it’s a highly practical one.
Check out Travis Breen’s build on YouTube, too.
Related: Upcoming Nintendo Switch games
7) N64 Tron edition

Another N64 mod, this time from modder Zoki64, who built it specifically for a customer who doesn’t intend to play on it – this is the reason it uses a non-GameCube analogue stick. The console itself is largely standard, with a custom paint job and decals.
The lighting effect isn’t achieved with LEDs, however. Instead it’s by using a glow-in-the-dark paint to achieve a consistent illumination effect. It ‘charges’ via sunlight or UV light and then glows on its own. It also avoids the heat and power drain that comes with using lights.
You’ll need to be a dab hand at custom paintwork to pull this one off, or you could ask Zoki64 to make you one perhaps.
8) PiCart

This is one of the cheapest and easiest mods to attempt, requiring only a few parts. It’ll take only a couple of hours, according to the directions on HowChoo’s YouTube channel.
You’ll need a Raspberry Pi Zero or Pi Zero W as the basis (along with the RetroPie software for emulation), an old NES cartridge and a USB hub. Aside from that, it’s just a few adapters to avoid the need to solder.
The result is a portable NES ‘console’ that will easily fit in your pocket. If you don’t want to play multiplayer games with a friend then you could even do without the USB hub – or you could include a Bluetooth module for wireless gaming.
Related: How to build a Raspberry Pi retro gaming centre
9) NES Classic Mini Raspberry Pi retro

If you’re one of the few people who’s managed to get their hands on a Nintendo Classic Mini, and feel the need to rip it apart and put a Raspberry Pi running RetroPie in its place, then this is for you.
In essence, it takes a NES Classic Mini, swaps the front ports to USB, adds a Mausberry auto-shutdown circuit, Raspberry Pi and some controller mods to swap them over to USB.
If you’re particularly handy, and have the requisite skill set, there’s a video overview to get you started. For anyone else, you’ll have to provide all the required parts (and console) and pay More Moddnstine $125 to make the changes for you.
10) Nintendo TV

The Nintendo TV is the creation of Jon at Hackaday and uses the familiar RetroPie emulator as its gaming heart.
It started out life as a Dora the Explorer TV set but has ultimately found a much better use as an all-in-one retro gaming machine, complete with integrated gamepad storage on the rear. After removing the DVD tray and making an internal mounting for the Pi in its place, Jon has added USB ports for the controllers on the front.
An HDMI panel mount extension provides the ability to play games on an external (higher-resolution) TV, as well as on the integtrated CRT monitor.
Related: Best RPGs
11) Steampunk NES

This mod is a whole lot of work, and one that you’ll need to do it mostly unaided, aside from a few pictures to show you the process. However, the end result is a glorious Steampunk NES – which presumably becomes pretty warm to the touch.
Starting with a top-loading NES for the internals and overall shape, Andrew5875 made a template for the metal skin from cardboard, then set about cutting it out to form the basis of the console’s chassis. It’s all mounted on a steel sub-frame.
Layering a copper sheet on the metal skin sets it on the road to giving it that Steampunk look.
You might want to pause before diving into this customisation, however: top-loading NES consoles fetch a decent price (£100-£300) on eBay if in good condition. They’re terrible for playing games, but are fast becoming collectors’ items.
12) XBook One S

OK, admittedly, this isn’t a retro console, and you’re almost certainly not going to make it at home. However, if you wanted to spend around £1500 on an Xbox One S that looks just like a laptop and has an integrated screen, there’s pretty much only one place to look.
It’s made almost entirely from strong acrylic and re-seats the original Xbox One S components in a compact, laptop-style package that you can theoretically take anywhere you like.
Note that there are no integrated batteries, though, so you’ll always need a power supply to use it. But it does have a 4K-compatible output for playing on a larger, higher-definition screen than the built-in one.
The custom case has dual front-facing speakers, a remote control for the integrated display, and has been modded to include an HDMI splitter (and an extra port) to allow a picture to be viewed on the display or an external TV. All in all, it’s a pretty neat piece of kit for anyone who has money to burn on an Xbox One S.
What are you favourite retro console mods? Let us know in the comments below.
Editorial independence
Editorial independence means being able to give an unbiased verdict about a product or company, with the avoidance of conflicts of interest. To ensure this is possible, every member of the editorial staff follows a clear code of conduct.
Professional conduct
We also expect our journalists to follow clear ethical standards in their work. Our staff members must strive for honesty and accuracy in everything they do. We follow the IPSO Editors’ code of practice to underpin these standards.