How to upgrade your PS4, PS4 Slim and PS4 Pro hard drive
Having a PS4 for over ten minutes means your hard drive will most likely be filled with games, screenshots and more. If you don’t fancy using an external hard drive via USB then it’s easy to upgrade your existing one.
The PS4 can be as troublesome as a PSOne memory card when it comes to managing memory. Luckily, Sony’s PS4 Slim can now be purchased with a hefty 1TB hard drive, which itself is super easy to upgrade. The PS4 Pro comes with a 1TB hard drive as standard, making the upgrade a little more enticing.
However, if you’re still stuck with an older model, we’ve included an easy peasy walkthrough below to help you out.
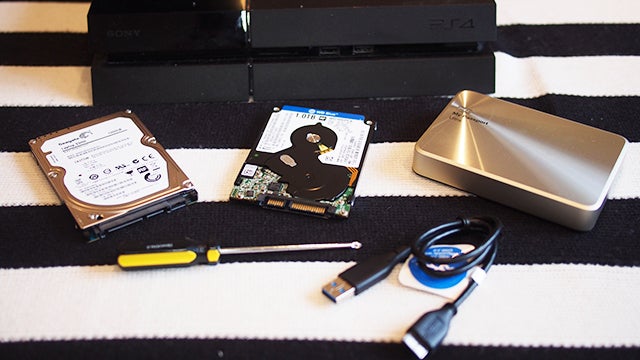
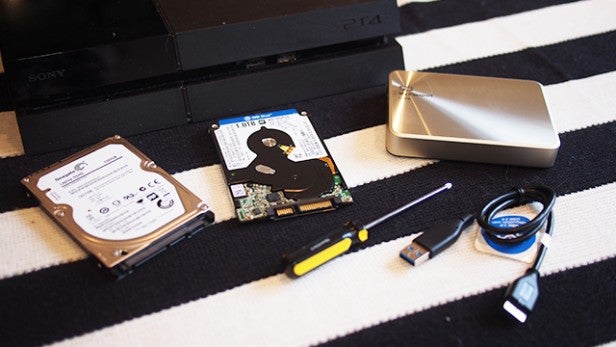
All you need is a compatible HDD, a Phillips-head screwdriver, a laptop, a USB drive with around 5GB of free space, and some patience.
Oh, and our handy step-by-step guide on how to upgrade your PS4 HDD.
Related: PS4 Pro vs PS4 – should you upgrade?
Step 1 – Choose your HDD
The PS4 isn’t difficult to upgrade, but you will need to take the console apart a bit and set aside a chunk of time to follow the necessary steps.
The first of those steps is to choose your HDD.
The PS4 has a 500GB 2.5-inch SATA HDD, the likes of which are usually found in a laptop. Your choice of replacement hard drive must be no thicker than 9.5mm, otherwise it won’t fit in the hard drive enclosure within the PS4.
That does limit your options somewhat, especially if you’re looking for a 2TB hard drive.
Buy Now: Samsung M9T 2TB at Amazon.co.uk (£98) | Amazon.com ($106)
If you look at the 1TB alternatives, there are plenty that fit the specifications required for the PS4.
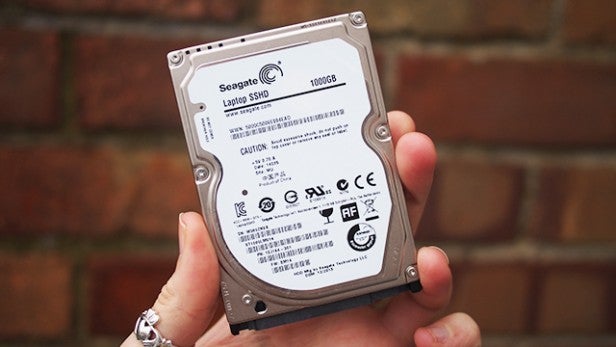
We chose two to test. The 1TB Seagate Laptop Thin SSHD is a hybrid 5400RPM SSD/HDD drive and 9mm thick. You can pick it up for around £75, making it a great affordable option.
Buy Now: Seagate 1TB SSHD at Amazon.co.uk (£84) | Amazon.com ($94)
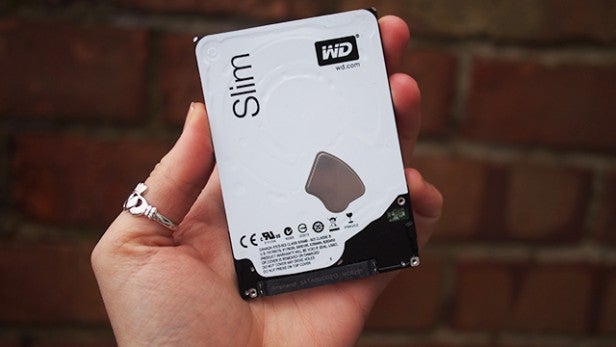
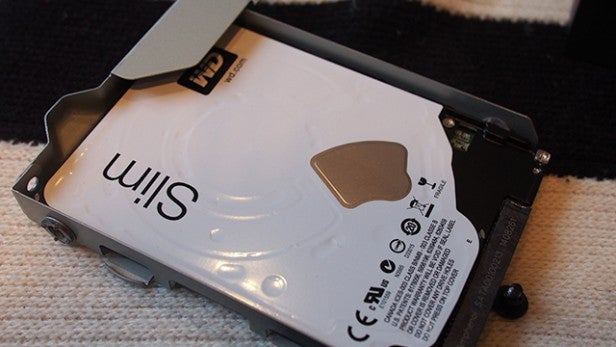
We also picked out the WD Blue WD10SPCX, another 1TB 5400RPM hard drive, but this one is just 7mm thick. This WD drive is now around the £50 mark, making it the more affordable alternative for the Seagate.
Buy Now: WD Blue WD10SPCX 1TB at Amazon.co.uk (£64) | Amazon.com ($86)
You can use SSD drives as well, but for anything above a PS4-matching 500GB you’re looking at spending some serious dollah.
See also: PS4 vs Xbox One
Step 2 – Prepare your PS4 for the update
Choosing the drive is the relatively straightforward part of the upgrade process. Next, comes actually preparing your PS4 for its little op.
You’ll need to back up your saved game files before you start tinkering with the internal hard drive. That’s because once you install the new drive, you’ll need to start from scratch.
There are two ways of backing up your save files, along with any other content you want to keep, such as video clips and screenshots.

The easiest option might be one you’ve already chosen. PlayStation Plus members can upload save files to the cloud, meaning you can download them right away when you boot up your upgraded hard drive.
Some of you will have this set up to happen automatically when your PS4 is in rest mode, meaning you can skip this step altogether.
You can check that by heading to Settings > Application Saved Data Management > Saved Data in System Storage > Upload to Online Storage. If any of your games listed in this section as a PlayStation Plus user say “Off”, their respective save games won’t have been uploaded to the cloud.
To fix that go to Settings > Power Saving Settings > Set Functions Available in Rest Mode. In this menu, make sure the Stay Connected to the Internet option is ticked to perform background uploads in Rest Mode.
If you’re not a PlayStation Plus member, or just want to make doubly sure your saves are safe, you can back them up on a USB drive. It has to be formatted to FAT, FAT32 or exFAT to store the saves on, but as long as it is, just plug it into the front USB ports of your PS4.
Then, head to Settings > Application Saved Data Management > Saved Data in System Storage > Copy to USB Storage Device. Within this menu, you’ll find a list of all your game saves.

You’ll have to go through each one individually, check Select All and then press Copy to USB. There’s no way to copy the whole lot in one batch, but despite being a slightly laborious process, it doesn’t take long to do once you get cracking.

If you’ve got any gameplay videos or screenshots you want to keep, you’ll want to move them to your USB drive, too. Just go to the Capture Gallery within the System Storage Management and select Copy to USB Storage Device within the options presented.
See also: PS4 vs PS3

Step 3 – Remove the existing HDD
Once you’ve saved all the necessary saves and gameplay clips and screenshots, it’s time to start tackling the HDD business.
Turn off your PS4 completely – don’t just put it into Rest Mode – and unplug your console from the wall, removing any wires from the back of your PS4, too.
Move your PS4 to a flat surface such as a table, where you’ve got enough room for all your necessary tools.
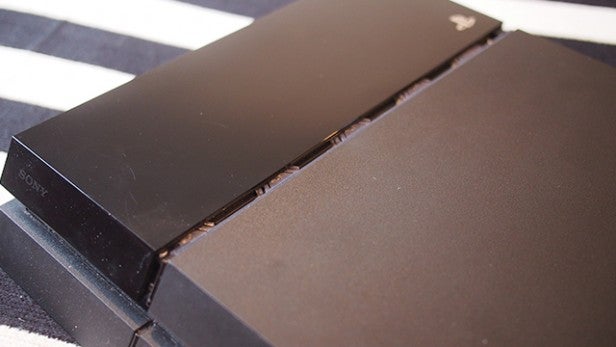
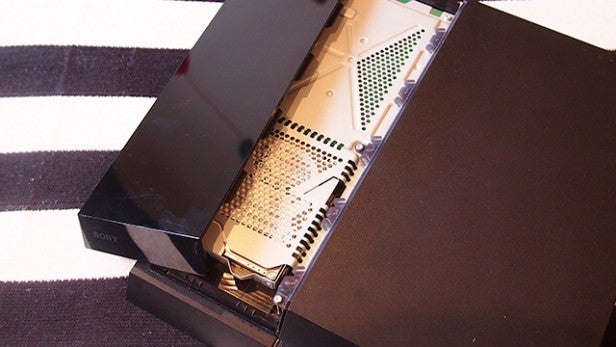
Slide off the shiny part of your PS4’s casing. It’s pretty easy to do, especially when you place a thumb at either end and push away from the matte section. It might feel like it’s sticking in parts, but just apply a little force.

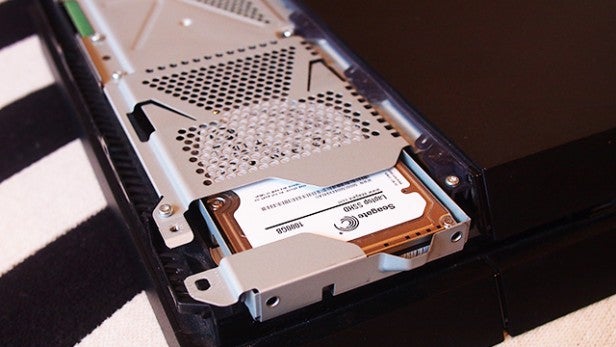
Once this section is completely removed, you’ll be able to see the metal HDD enclosure below. This enclosure is fixed down by a large screw, which is easily spotted thanks to the fact that it has the PlayStation button symbols engraved on it.
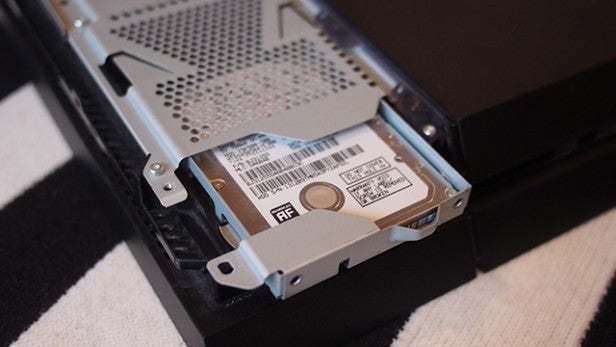
Grab your trusty Phillips screwdriver and tackle that PlayStation screw. Once you’ve removed it, you’ll be able to slide out the existing PS4 HDD in its little metal surround – the tray of which is highlighted by a little handle. PlayStation has made it as easy as it possibly could to replace.
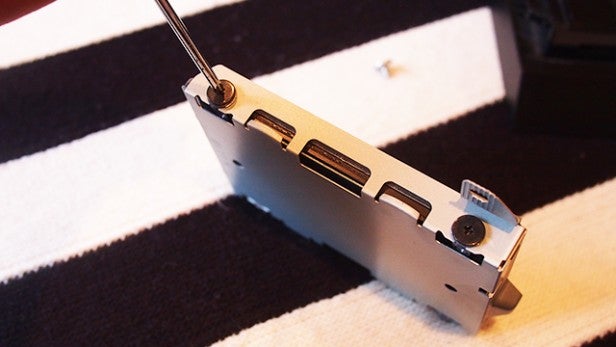
You’ll then need to remove the four black screws at the corners of the hard drive tray, leaving the rubber bungs behind. The standard HGST drive will slide right out once they’re removed.
See also: Xbox One HDD Upgrade – How to upgrade your Xbox One hard drive
Step 4 – Install the new HDD
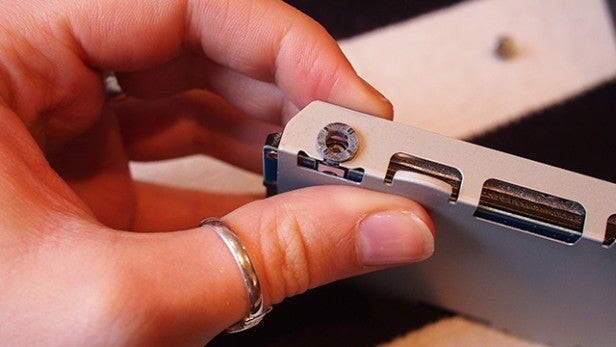
Put the new drive into the tray, making sure that the flat side is at the handle end of the tray and the exposed components are flat side down at the open end of the tray. Sometimes it’s useful to take a picture of the previous tray so you remember which way in the new one is supposed to go.
Then fit the black screws back into place. If you’ve opted for a slightly slimmer drive, you might need to manoeuvre it into place a bit.
This wasn’t an issue with the Seagate drive, but the WD Blue was a little more fiddly to get into place because of its slim 7mm profile.
Once your new drive is secured with the black screws, slide the tray back into the console until you feel it’s attached to the PS4 properly.
All that’s left to do is lock it into place with the PlayStation screw and clip the PS4 lid back on the top of your console.
See also: Best PS4 Games 2017
Step 5 – Reinstall the PS4 system software
The next step will need your computer and a USB drive with at least 1GB of free space, formatted to exFAT, FAT32 or FAT – you can use the one with your saved games on it.
Because your PS4 now has a brand-new drive in, you’re going to have to reinstall the system software manually.
On your drive, create a folder named “PS4”. If you’re using the USB drive with your save files on, there will already be one with that name. Within that folder, create another folder called “UPDATE”.
When you’ve done that, head here to find the latest version of the PS4 system software. At the time we did it, the file was around 900MB in size, and it took around 10 minutes to download. Make sure you only get the software from the above link, because there are several other sites out there with incorrect software.
Once it’s downloaded, drag your file into the UPDATE folder on your hard drive.
You’ll next need to plug all your various wires back into your PS4, plug in the USB drive with the install file on it, and attach your DualShock 4 via USB cable.
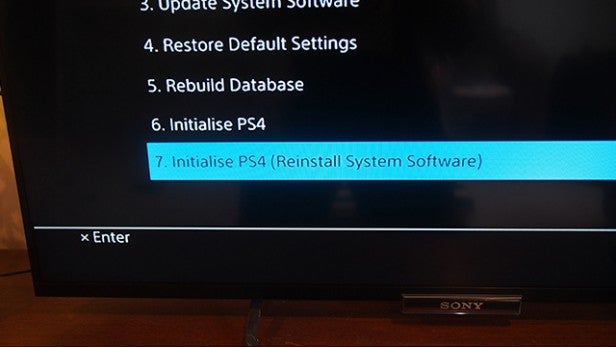
Next, boot up your PS4 in Safe Mode. You do this by holding the power button on your PS4 down for seven seconds or longer – it’ll beep to let you know it’s booting up in Safe Mode.
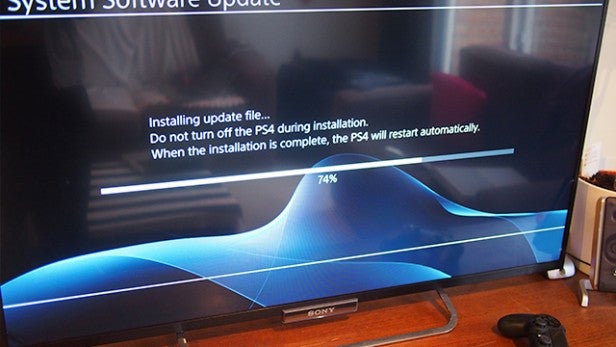
When you’re presented with a selection of options, go down to number 7 – Initialise PS4 (Reinstall System Software).
The PS4 will then grab the update file from the USB drive and install it on your new hard drive. It only takes a couple of minutes and then you’ll be guided through the initial setup for your PS4, just like you went through when you first got your PS4 out of the box.
Once you’ve been through that, you’ll have to add your PSN account and sign in properly to be able to download all your games and apps.
Don’t panic if you have to go through the setup process again when booting up for the first time after installing your HDD. We had to do it, and after that everything was working properly, regardless of whether we put the PS4 into Rest Mode or turned it off entirely.
See also: Upcoming PS4 Games 2017
Step 6 – Reinstall everything else
Handily, all your previously downloaded stuff is located in your Library at the end of the Recently Used bar of your PS4.
You can go in there and download all your games and apps just by selecting the appropriate icon. We found it a good way to streamline our PS4 a bit, by not re-downloading any games we’d completed or weren’t interested in playing any more.

The only downside to the HDD installation process is that reinstalling all your games – especially digital download versions of AAA beasts – takes an age. You’ll definitely want to download them in order of playing priority.
When reinstalling your game saves from a USB drive, you won’t be able to install any for games you’ve not yet downloaded. It’ll take you quite a while to download all your titles, so you can’t be anxious to move all your save games immediately.
See also: PlayStation VR Review

Step 7 – Reap the benefits
It might take ages to get your PS4 back up and running with all your titles, but you’ll now have a lot more space with which to play.
Using our 1TB drives, we doubled the available storage space on our PS4, with 861.4GB available for installing games and other content, once the system had taken up some for software installation.
In terms of performance, because we chose two 5400RPM drives which match specs of the original PS4 internal hard drive, we didn’t notice much of a difference.
You’d have to pay up for a 7200RPM drive if you’re wanting to see some serious performance enhancements.
What we will say is that, thanks to its SSHD hybrid structure, the Seagate Laptop Thin HDD booted up games faster and installed games from disc slightly faster too, in comparison to the WD Blue.
If we had to recommend one, the Seagate has the slight edge in terms of performance. Thanks to it being around the same size as the original HDD, it’s easier to install, too.
PS4 External Hard Drive Support
After over three years of waiting Sony has finally made external HDD support available on PS4. The feature was introduced in a recent firmware update that also brought with it custom image backgrounds and improved notifications across the console.
See also: Nintendo Switch Review
If you’d rather avoid the fuss of opening up your console, an external hard drive can be attached via USB 3.0 to install games, store saves and more. Drives of up to 8TB in size will be supported, so you shouldn’t be running low on space anytime soon.

Editorial independence
Editorial independence means being able to give an unbiased verdict about a product or company, with the avoidance of conflicts of interest. To ensure this is possible, every member of the editorial staff follows a clear code of conduct.
Professional conduct
We also expect our journalists to follow clear ethical standards in their work. Our staff members must strive for honesty and accuracy in everything they do. We follow the IPSO Editors’ code of practice to underpin these standards.