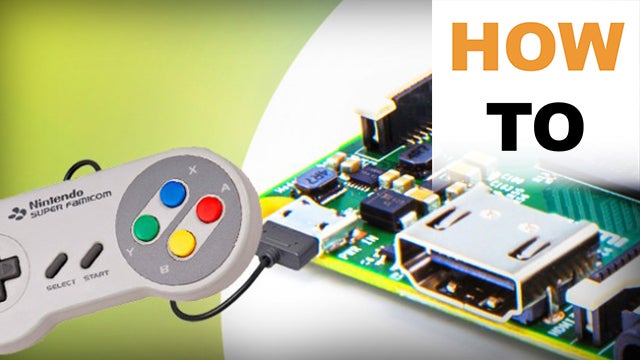
We guide you through the process of turning your Raspberry Pi into a retro gaming centre.
To celebrate the release of the new Raspberry Pi we thought we’d have a look at creating something that’s very close to our hearts, and something that embraces the original concept of the Raspberry Pi foundation itself: retro gaming.
Those of us who are old enough to remember getting our first home computer – mine was a ZX Spectrum 48k, back in 1983 – will no doubt have fond memories of loading the games up from a tape and playing them until we either completed them or we stretched the tape to the point where it was unreadable.
Video: Raspberry Pi 3 vs Pi 2: What’s the difference?
We didn’t have the luxury back then of playing something over the weekend before discarding it and paying for another game. Even with the budget Spectrum titles costing £1.99, pocket money had to be stretched to cover the other items we needed – usually sweets. So for those bleak months of no new games we had to make our own.
The 80s were the golden age of the bedroom coder, where a young teen could experiment late at night with an overworked Spectrum to create their own unique game. As well we know, many of these games went on to become legendary with the likes of Manic Miner and so on.
It’s this getting your hands dirty with code approach that launched the Raspberry Pi; to get this new generation interested not just in technology, but also how it all comes together behind the scenes.
Related: Raspberry Pi 3 vs Pi 2

For many of us though, it was the gaming of the 80s that brings a nostalgic tear to the eye. Regardless of whether your particular brand of gaming was Chuckie Egg on the BBC Micro, 3D Starstrike on the Spectrum, Last Ninja on the C64, Rampage on the Sega Master System, or Operation Wolf at your local arcade, you have to admit those early games were pretty awesome.
Therefore, we’re going to look at getting a collection of retro consoles and home computers, as well as arcade classics working on the Raspberry Pi, to see if we’re just looking at this through some rose-tinted retro spectacles, or whether gaming was as good as we remember it.
What you’ll need

Obviously, you’ll need a Raspberry Pi – or at a push you might be able to get away with the QEMU emulated image found here, but we can’t comment on that method as we haven’t tried it – and you’ll need to make sure you’re either running the latest Noobs or Raspbian image, or you’ve updated and upgraded your current RPi OS via the Terminal with:
sudo apt-get update && sudo apt-get upgrade
We’ll have a little look at gaming hardware at the end of this How To, for now though it’s on to some retro gaming.
ZX Spectrum
We’ll start with the home computer that’ll put a smile on every 40-something year old’s face: the humble Speccy.
With just 48Kb of memory and a 3.5MHz processor at its core, this amazing little piece of British history has reached legendary status. Regardless of the ‘dead flesh’ rubber keyboard, and the fact that it could take ten minutes to load a game from a tape, the Spectrum brought untold joy to millions.
Fuse is regarded as one of the better Spectrum emulators available for the Raspberry Pi, although there are others. To install Fuse on the Raspberry Pi, open up the Terminal by clicking on the Menu button in the bottom left corner, moving the mouse over the Accessories menu, and clicking on the LXTerminal program.
Related: 6 of the coolest Raspberry Pi projects ever

With the Terminal open, type in the following, pressing Enter when you’re done:
sudo apt-get install fuse-emulator-common spectrum-roms fuse-emulator-utils
Press ‘Y’ to accept any changes.
When the installation is complete, the Fuse Spectrum Emulator should appear in the Games menu from the main menu. You can click the program to launch, which should bring up the familiar Spectrum. From there you can load up any TAP files you have – or have downloaded legally from the likes of World of Spectrum – by clicking on the Media option along the Fuse top menu, followed by Tape > Open and using the file explorer to point to the game image.
Related: What is Raspberry Pi Zero

All you need to do then is enter into the Spectrum:
Load “” – by pressing J followed by CTRL and P twice.
Commodore 64
The C64 was the global 8-bit home computer success, and chief rival to the Spectrum. Many a playground battle was fought over which was better, C64 or Spectrum.

VICE is the emulator of choice for C64 fans, and it can be installed by entering the following into the Terminal:
wget http://sourceforge.net/projects/vice-emu/files/releases/vice-2.4.tar.gz

Once downloaded, unpack the compressed file with:
tar xvfz vice-2.4.tar.gz

This will create a vice-2.4 folder within the Home Folder, so you’ll need to make sure you’re in that folder before you begin to build the program. To do that simply enter:
cd vice-2.4/
You’ll notice the current folder location, in blue at the start of the Terminal command line, change from ~ $ to ~/vice-2.4 $.
Next, enter the following into the Terminal:
sudo apt-get install libsdl1.2-dev
If you’ve updated your system the chances are you’ll already have the latest version of libsdl1.2-dev, but just in case it’s worth running the command.

If all is well, then proceed to build VICE by entering:
./configure –enable-sdlui
Notice the double hyphen before enable, in case the command returns an error. This will prep the files ready for building – in layman’s terms.

It may take a little time, but when it’s done enter:
make
Again, this will take some time. But once it’s complete, enter into the Terminal:
sudo make install

Finally, when the Make Install command has finished running, enter:
x64 –sdlbitdepth 8
This will launch the C64 emulator, and from there you can press F12 to access the menu to load up any C64 game images you own.
RetroPie
Although those two examples are great, and will no doubt bring many happy memories flooding back, there is however another way to play and emulate all your favourite games and platforms.

RetroPie is a project that aims to turn the Raspberry Pi into a dedicated retro gaming console. It runs directly off its own SD card, and can emulate the following systems:
• 3do (lr-4do)
• Adventure Game Studio (AGS)
• Amiga (UAE4ALL2), (UAE4ARM)
• Amstrad CPC (CapriceRPI), (lr-cap32)
• Apple II (Linapple)
• Atari 2600 (Stella), (lr-stella)
• Atari 5200, and Atari 8 bit series: 400, 800, 1200XL, 600XL, 800XL, 130XE, XEGS (Atari800)
• Atari 7800 (lr-prosystem)
• Atari Jaguar (lr-virtualjaguar)
• Atari Lynx (lr-handy)
• Atari ST/STE/TT/Falcon (Hatari)
• CoCo (XRoar)
• Colecovision
• Commodore 64 (Vice)
• Daphne (Daphne)
• Dragon 32 (XRoar)
• Dreamcast (Reicast)
• FinalBurn Alpha (PiFBA), (lr-fba), (lr-fba-next)
• Genesis/Megadrive (DGEN), (lr-Genesis-Plus-GX), (lr-picodrive)
• Game & Watch (lr-gw)
• Game Gear (Osmose), (lr-Genesis-Plus-GX)
• Game Boy (lr-gambatte)
• Game Boy Color (lr-gambatte)
• Game Boy Advance (gpSP), (lr-gpSP), (lr-vba-next), (lr-mgba)
• Intellivision (jzIntv)
• Macintosh (BasiliskII)
• MAME (AdvanceMAME), (MAME4ALL-Pi), (lr-imame4all), (lr-mame2003), (lr-mame2010)
• MasterSystem (lr-Genesis-Plus-GX), (lr-picodrive), (Osmose)
• MSX (lr-fmsx), (lr-bluemsx)
• Neo Geo (GnGeo-Pi), (PiFBA), (lr-fba), (lr-fba-next)
• Neo Geo Pocket (lr-mednafen-ngp)
• Neo Geo Pocket Color (lr-mednafen-ngp)
• Nintendo 64 (Mupen64plus), (lr-mupen64plus)
• Nintendo DS (lr-desmume)
• Nintendo Entertainment System (lr-fceumm), (lr-nestopia)
• PC (DOSBox), (rpix86)
• PC Engine/TurboGrafx-16 (lr-mednafen-pce-fast) (lr-beetle-supergrafx)
• PlayStation 1 (lr-pcsx-rearmed), (pcsx-rearmed)
• PSP (lr-ppsspp), (ppsspp)
• ScummVM
• Sega 32X (lr-picodrive)
• Sega CD (lr-picodrive)
• Sega Saturn (lr-yabause)
• Sega SG-1000 (lr-Genesis-Plus-GX)
• Super Nintendo Entertainment System (PiSNES), (snes9x-rpi), (lr-armsnes), (lr-catsfc), (lr-pocketsnes), (lr-snes9x-next)
• Vectrex (lr-vecx)
• Videopac or Odyssey2 (lr-o2em)
• Virtual Boy (lr-beetle-vb)
• WonderSwan (lr-mednafen-wswan)
• WonderSwan Color (lr-mednafen-wswan)
• Zmachine (Frotz)
• ZX Spectrum (FBZX), (Fuse), (lr-fuse)
To enjoy all these emulators though you’ll first need to download the latest image and transfer it to a spare 4GB minimum SD card.

The RetroPie images for both the RPi 1 and Zero can be found here, while the images for the RPi 2 and 3 are here. Once you have the correct image for the version of the Raspberry you own, unzip the IMG from the compressed file and transfer it to a 4GB SD card using either Win32DiskImager for Windows, Apple Pi Baker for Mac or the dd command under Linux.

With the image transferred to the SD card, insert the card into the Raspberry Pi and power it up. The RetroPie OS will run through a first boot sequence before rebooting itself. After that you’ll be presented with a Welcome screen where you can configure your controller to mimic any of the usual retro controllers.
After following the on-screen instructions to setup your controller, you’ll finally boot into the EmulationStation front end where you can access the aforementioned emulated platforms and any game ROMs you’ve copied over.

For a full list of how to transfer ROMs, including locations for legally obtaining game ROMs that don’t conflict with any copyright law, visit the petRockBlog, and follow the links for the RetroPie Project.
A taste of nostalgia

The above should cover you with pretty much every popular retro system going, however we’re sure there are plenty more out there that aren’t in the collective RetroPie universe. In that case, and if you have a console or home computer you used to love, why not get involved with the project and come up with an emulator yourself.
Just follow the RetroPie links to donate and get involved.
(apester:56d7129136e5105a3a3cbeb7)
If there are any other retro Raspberry Pi emulators you have, then please let us know in the comments section below.
Editorial independence
Editorial independence means being able to give an unbiased verdict about a product or company, with the avoidance of conflicts of interest. To ensure this is possible, every member of the editorial staff follows a clear code of conduct.
Professional conduct
We also expect our journalists to follow clear ethical standards in their work. Our staff members must strive for honesty and accuracy in everything they do. We follow the IPSO Editors’ code of practice to underpin these standards.