How to use OneDrive
Microsoft may have been a little late to the cloud storage phenomenon, but its OneDrive service certainly has to offer.
OneDrive, formally known as SkyDrive, was actually launched around eight years ago. When it first launched it was called Windows Live Folders – using SkyDrive as the codename. Back then users only had 5GB of free storage available to them, however that was soon increased to 15GB when the service was finally renamed and rebranded to OneDrive.
There are various plans available beyond the free 15GB option. Office 365 users get 1TB of storage for each household member (up to five individual users), or you could opt for 50GB of storage for a mere £1.99 per month.
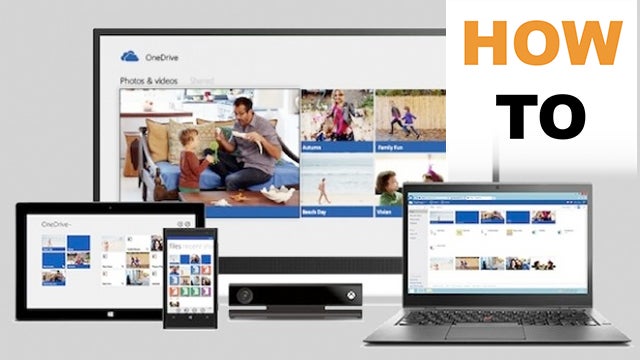
OneDrive isn’t solely for use on Windows systems either, there are iOS and Android apps available too. It’s also not just an online file dump either, as you can access any OneDrive registered and logged in PC under your user account, and you can edit any of the Microsoft Office program files such as Word, Excel and so on.
Related: How to remove TouchWiz from your Samsung Galaxy
Using OneDrive
OneDrive is available with Windows 8.1, 10, and the latest Microsoft Office releases from Office 2013 and beyond; it’s even available for the Xbox.
If you have any of these products then you’ve already got the OneDrive app, you’ll just need to log into Windows or Office with your Microsoft account and activate OneDrive and associate it with your account and computer.
OneDrive on the Windows desktop will sit in the System Tray, that section in the bottom right of the screen where the date is. Its icon is that of a little cloud, and by right-clicking it you can access the various settings or sign into your linked Microsoft account.
Once you’ve signed in to your Windows/Microsoft/OneDrive account, you’ll be greeted with a setup wizard that will take you through the initial stages of setting up your OneDrive synchronised folders on the PC you’re currently using.
After clicking on the Next button, the next step is browse through the various folders from your user account on the PC you’re using, and click to tick the box next to the folder to allow it to be a part of the OneDrive sync and available through the service.
When you’re ready, you can click Next and the final option will allow you to click on the ‘Open my OneDrive folder’ button, which will open up the OneDrive area on your local PC that acts as an upload area to the online OneDrive account.
Any files or folders you want to upload to your OneDrive account, just drag and drop them into this area within Windows Explorer – located from the Quick Access sidebar in Explorer. You can also right-click the OneDrive link in the sidebar to choose other folders to sync.
Providing you’ve got a decent connection to the internet, and you don’t have too many files, the initial OneDrive synchronisation shouldn’t take too long.
Related: How to set-up an iPhone
OneDrive online
Working with OneDrive on your Pc via Explorer is all well and good, but what if you wanted to access the extended features of Microsoft’s cloud service?
By browsing to onedrive.com, you’ll be forwarded to the online dashboard of the files and folders you’ve chosen to synchronise from your PC. There’s a handy video on there, courtesy of Microsoft, that’ll detail some of the features and how to get started. It’s worth watching, at least, to familiarise yourself with what’s going on.
Below that you’ll see the folders you’ve synchronised, this is where things begin to more interesting. You can left-click any folder to access it and view the contents; if they’re pictures then you’ll see a large thumbnail preview of each image, with various controls along the top of the screen to further edit, copy, or share with another.
If they’re documents, such as a Word or Excel file, then you can similarly click on them only this time you’ll open up the Office online version of the file type, where you can edit, print, share or add any comments.
The sharing side of OneDrive online is an interesting concept, although not a new one by any stretch. By left-clicking on a file followed by clicking on the Share option at the top of the screen, you’ll be presented with a window where you can invite others via their email addresses. When you’ve included the people you want to share the file or folder with, click on the Share button and an email will be sent detailing to the recipient how to gain access to the item(s) you’ve just shared.
All of these option are also available if you right-click any of the files or folders within your OneDrive area. The right-click menu will enable you to share, create a new folder or file, download if you’re on another PC other than your usual, or create a photo album if the content contains images.

Mobile OneDrive
If you’ve installed OneDrive on your mobile device then you’ll be able to include so much more into your OneDrive account.
For example, you’ll be able to automatically upload any photos or video you’ve taken, edit any existing files through the online versions of the Office apps, as well as the tasks we’ve already looked at such as sharing, deleting, searching and so on.
The mobile version of OneDrive is pretty simple to use, all you need to do is sign in with your linked Microsoft ID account, and it’ll automatically setup the common areas where photos are stored within your device. You’ll also be able to choose other folders too, just as you could from the desktop version of the OneDrive client.

Final thoughts
Microsoft gets a lot of stick from the press and users alike, and while the company doesn’t always get technology right there are some elements that make it shine.
OneDrive is one such service that Microsoft has managed to pitch at the right note. It’s quick, easy to use, has a decent number of features, and allows you to keep your data and personal information always at hand and safe too.
If you have any other OneDrive tips you’d like to share, then please mention them in the comments section below.
Editorial independence
Editorial independence means being able to give an unbiased verdict about a product or company, with the avoidance of conflicts of interest. To ensure this is possible, every member of the editorial staff follows a clear code of conduct.
Professional conduct
We also expect our journalists to follow clear ethical standards in their work. Our staff members must strive for honesty and accuracy in everything they do. We follow the IPSO Editors’ code of practice to underpin these standards.