Verdict
Last month we reviewed the Abit AX78, which is based on the AMD 770 chipset. At the time we coupled this with a B2 stepping Phenom 9600 processor – the one with the TLB Erratum – and we were left thoroughly underwhelmed by the whole experience. The integrated graphics in AMD 780G are very good indeed but the other chipsets in the 700 family have been let down by the poor performance of Phenom. So, when Sapphire sent us its new PC2-AM2RX780, which also uses the 770 chipset, it felt like the perfect opportunity to use the new B3 Phenom – the one without the TLB erratum-not-error – and give 770 a second chance.
Before we get into the testing, though, let’s take a look around this Sapphire board. It’s a passively cooled board with small coolers on the AMD 770 Northbridge and SB600 Southbridge. There are two PCI Express slots for CrossFire with a controller chip made by ICS located between the two slots. The 770 chipset supplies a total of 16 lanes of PCI Express 2.0 for graphics duties which Sapphire has divided evenly between the two slots. If you use a single graphics card and want the full 16 lanes to go the primary slot you can plug a switch card that is included in the package into the second slot. 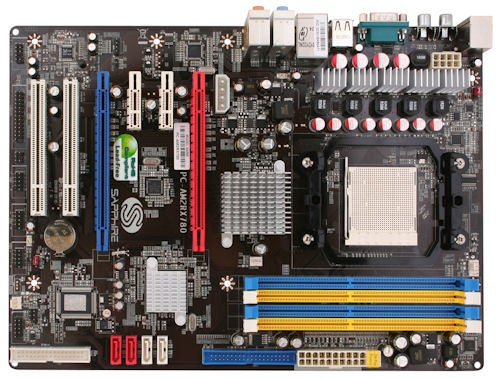
Other than that the layout is quite conventional. There are two PCI Express x1 slots between the graphics slots so at least one will be available even if you use double slot cards. There are two PCI slots below the second graphics slot so you can be sure there will be at least one available for your sound/RAID/PhysX card.
The four DDR2 slots are located close to the CPU socket and there was only the tiniest gap between the CPU cooler and the two modules of Corsair that we used in testing. The cooler in question was a mid-sized unit from Asus so you may well find that a hefty cooler will block the nearest memory slot.
The single IDE connector is next to the main power block with the four SATA connectors in a line down the edge of the board and the floppy connector down in the corner. Life might be just a little easier if the connectors were laid down but we have no real complaints in this department. The eight-pin ATX 12V connector is located between the I/O panel and the tall passive coolers on the power regulation hardware where it is reasonably accessible. It looks as though there is space to have placed it on the top edge of the board which would have been better, though.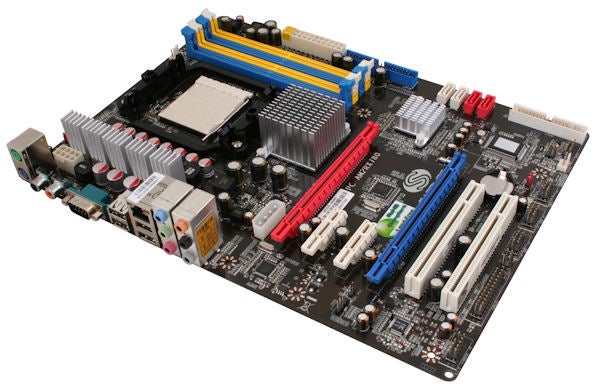
Other minor gripes include the headers across the foot of the boards as they are all uncoloured and unlabelled. It’s not strictly necessary to label USB headers, although it helps when you’re connecting up case-mounted ports that use individual connectors, but it’s definitely a pain in the parts when front panel headers are anonymous. This Sapphire doesn’t have micro buttons for Power and Reset and there are no LEDs to give any indication about onboard activity so this may be one board to avoid if you plan on overclocking.
Running the Sapphire gave us a series of small but annoying problems. For starters there was the Sapphire power supply issue that has cropped up a few times in the past. For motherboard testing we use either an Enermax Galaxy 850Wor CoolerMaster 850W power supply as they have plenty of connectors to feed modern graphics cards. Small Sapphire motherboards are incompatible with these PSUs as, apparently, the PSUs are divided up internally in a way that confuses the motherboard with the result that the board appears to be dead. For Sapphire testing we have to resort to an old Antec Neo 480W with an adapter to supply the six-pin graphics.
Then we had to get to grips with the BIOS on the PC2-AM2RX780 which is quite familiar yet it behaves in a slightly odd fashion. When you make a change it is unlikely to take effect instantly as the board often fails to restart. You make a change, save and restart, cross your fingers and hope that Windows comes to life. If it doesn’t start you have to hit the power switch and then start the system from cold. If Windows starts this time then all is well but if not you have to disconnect the power connectors and clear the CMOS. It’s a pain in the neck and took us round in circles a number of times until we found settings that worked successfully.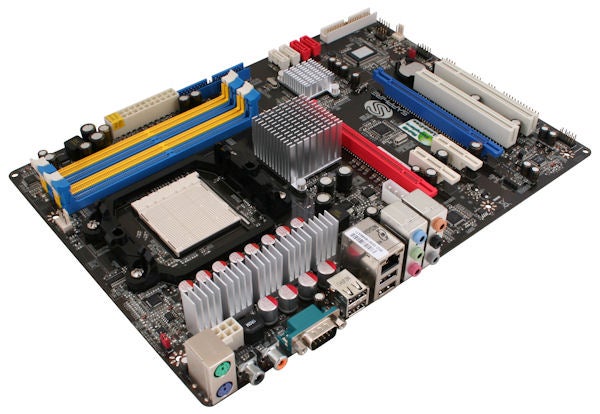
Also, we were using 64-bit Windows Vista which refused to run the installer on the Sapphire driver CD as the software wasn’t digitally signed.
The default CPU voltage when Cool ‘n’ Quiet is disabled is 1.34V and as we found that supplying as much as 1.475V made no difference to the overclocking of this particular CPU we set the voltage manually to 1.35V to avoid any uncertainty.
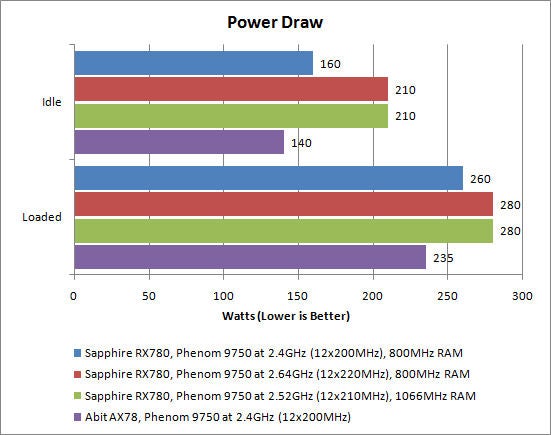
Overclocking our Phenom X4 9750 gave a relatively small improvement in performance but once the processor speed was raised from 2.4GHz to 2.64GHz the graphics performance took a hit.
There’s something a bit odd about the memory support on the PC2-AM2RX780 as the packaging refers to DDR2 800MHz support yet the manual refers to support for 1,066MHz memory. There’s a setting in the BIOS to increase the default speed of 800MHz to 1,066MHz and Phenom supports this faster speed so it would seem that there is a simple misprint on the packaging. 
In practice we found the answer was a little more subtle than that. Once the RAM voltage was increased in the BIOS to 2.1V, to give our Corsair memory enough power to run at 1,066MHz, the system refused to play ball. We had been able to increase the 200MHz clock speed to 220MHz with the memory running at 800MHz but when the memory speed was increased to 1,066MHz the system locked solid. After a couple of resets we dropped the clock to 210MHz and the faster memory speed worked properly. Eventually we came to the conclusion you can either have a more overclocked Phenom with 800MHz memory or you can sacrifice a bit of CPU speed to run your memory a bit faster as well.
The upshot was that the Phenom ran stably at a slightly overclocked speed but the amount of messing around was far too much like hard work. Although our experiences with the B3 Phenom were more successful than the original B2 it is still far from perfect. In fact, the only one of the Phenom X4 range we can wholeheartedly recommend you try is the multiplier unlocked 9850 Black Edition as this gives you a guaranteed good overclock and costs little more than the alternatives.
As for the Sapphire PC2-AM2RX780, it is a perfectly mediocre board that uses a chipset we have little reasons to enthuse about. By all means go for a 780G motherboard but a 770 with CrossFire holds little appeal.
”’Verdict”’
There’s little to make the Sapphire AM2RX780 stand out from the crowd and with an iffy BIOS as well it’s even less of an attractive proposition. Combined with the limited appeal of siding with AMD and its Phenom range anyway, this is probably one to avoid.

DMark Vantage performance graph for Sapphire PC-AM2RX780.” width=”300″ height=”193″ class=”align size-medium wp-image-186535″ srcset=”https://www.trustedreviews.com/wp-content/uploads/sites/54/2008/05/7480-3dMarkVan-1.jpg 551w, https://www.trustedreviews.com/wp-content/uploads/sites/54/2008/05/7480-3dMarkVan-1-300×193.jpg 300w, https://www.trustedreviews.com/wp-content/uploads/sites/54/2008/05/7480-3dMarkVan-1-320×206.jpg 320w” sizes=”(max-width: 300px) 100vw, 300px” />
Trusted Score
Score in detail
-
Value 6
-
Features 6
-
Performance 6
Editorial independence
Editorial independence means being able to give an unbiased verdict about a product or company, with the avoidance of conflicts of interest. To ensure this is possible, every member of the editorial staff follows a clear code of conduct.
Professional conduct
We also expect our journalists to follow clear ethical standards in their work. Our staff members must strive for honesty and accuracy in everything they do. We follow the IPSO Editors’ code of practice to underpin these standards.